


 本文介绍了如何在Windows子系统Linux(WSL2)上安装Rust,并提供了调试Rust代码的方法,旨在帮助开发者在Linux环境中流畅地进行Rust开发。
wsl 安装 rust
If you are developing using Rust on Windows with a WSL2, adding support for debugging is very easy. If you haven’t started using WSL2(Windows subsystem for Linux 2) yet, you can follow my previous post on how to Install and setup Rust development environment on WSL2.
如果要在带有WSL2的Windows上使用Rust开发,添加调试支持非常容易。 如果尚未开始使用WSL2(Linux 2的Windows子系统),则可以按照我之前的文章介绍如何在WSL2上安装和设置Rust开发环境 。
安装调试工具 (Install Debug Tools)
We’ll write a new application to go through the setup steps. You can also clone the application from Github if you don’t want to set it up locally.
我们将编写一个新的应用程序以完成设置步骤。 如果您不想在本地设置应用程序,也可以从Github克隆该应用程序。
cargo init rustapp
cd rustapp
code .
For a linux backend(WSL2 in this case), install the CodeLLDB extension on Visual Studio Code.
对于Linux后端(在本例中为WSL2 ),请在Visual Studio Code上安装CodeLLDB扩展。

配置调试器 (Configure the debugger)
Once the extension is installed, setup a debug configuration by clicking Run -> Add Configuration from the VSCode menu. Add the following launch.json configuration. You would need to change the program path when setting up the debug config for a different project.
安装扩展后,通过从VSCode菜单中单击Run -> Add Configuration来设置调试配置。 添加以下launch.json配置。 为其他项目设置调试配置时,需要更改程序路径。
{
    "version": "0.2.0",
    "configurations": [
        {
            "type": "lldb",
            "request": "launch",
            "name": "Debug",
            "program": "${workspaceFolder}/target/debug/rustapp",
            "args": [],
            "cwd": "${workspaceFolder}"
        }
    ]
}
开始调试 (Start Debugging)
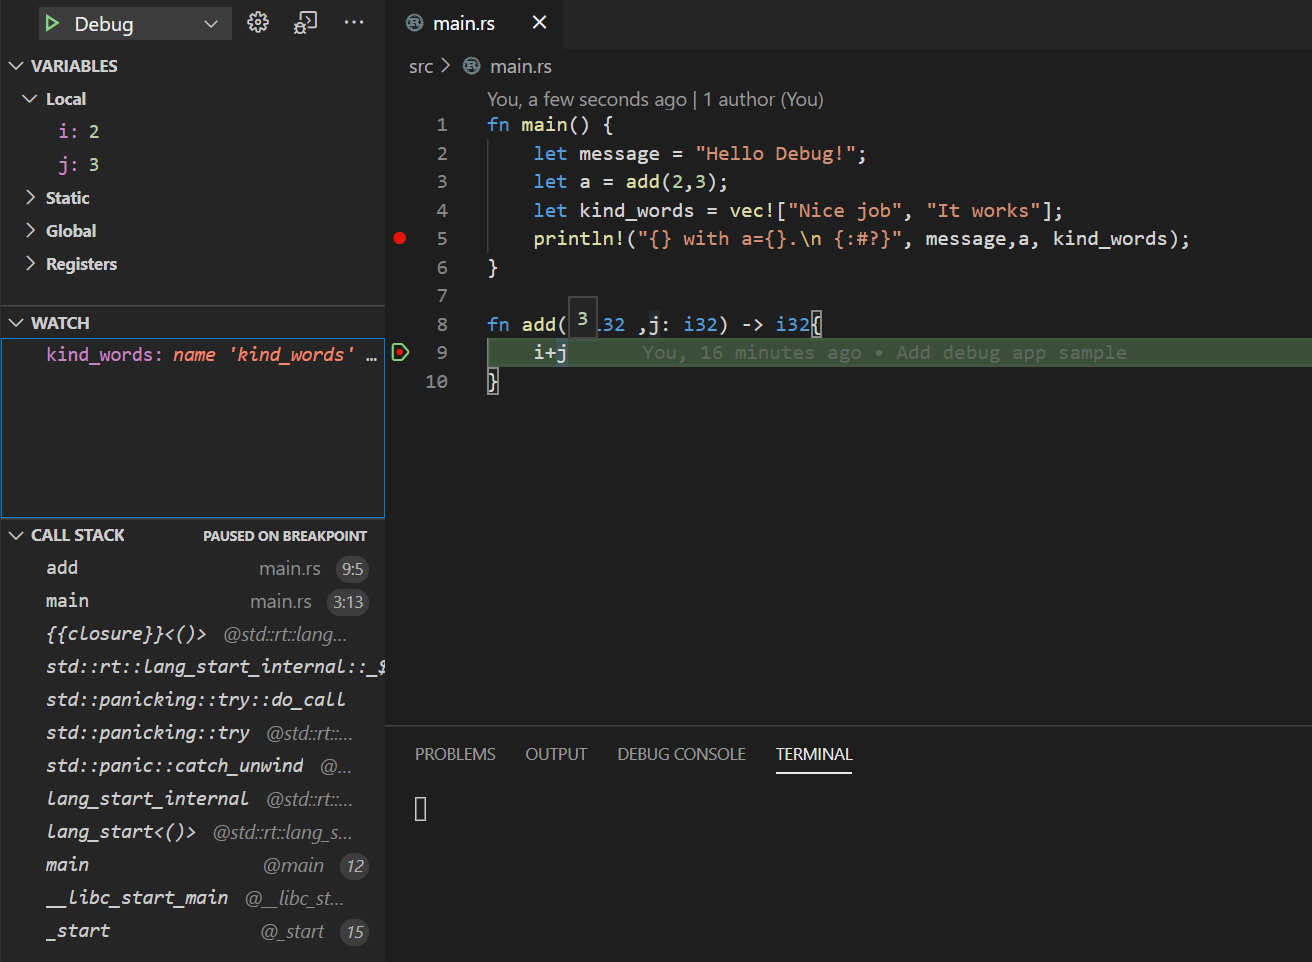
Add a breakpoint in the rust file and hit Run -> Start Debugging or press the F5 key. You should see the the debugger pause at the breakpoint.
在rust文件中添加一个断点,然后单击Run -> Start Debugging或按F5键。 您应该看到调试器在断点处暂停。
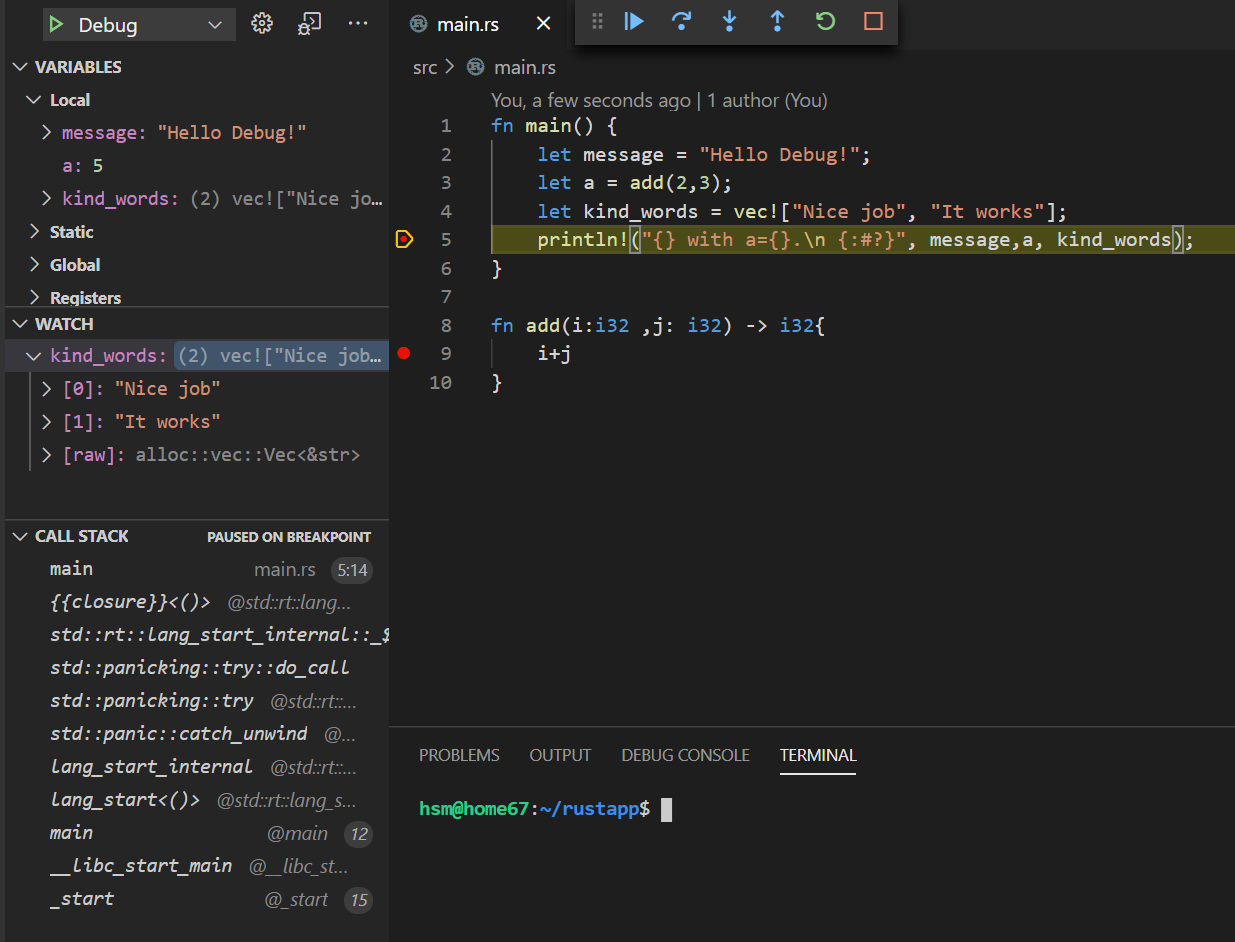
You can step through the code using the standard debug commands or by using the Debug control buttons in VsCode.
您可以使用标准调试命令或VsCode中的“调试”控制按钮来逐步执行代码。
And that’s it! Have fun developing with Rust. 😃
就是这样! 使用Rust玩得开心。 😃
翻译自: https://medium.com/@harsimran.maan/debugging-rust-code-on-wsl2-37bdc1aed5cb
wsl 安装 rust


 438
438

 被折叠的 条评论
为什么被折叠?
被折叠的 条评论
为什么被折叠?
 到【灌水乐园】发言


