


ChatGLM2-6B是智谱AI及清华KEG实验室发布的中英双语对话模型。
由于本人最近在研究大模型 ,所以这篇文章会写出在安装中遇到的详细步骤及相关问题,不说了上干货。
先按这个文章安装 conda
Ubuntu 安装 conda_ubuntu安装conda-优快云博客
然后显卡驱动安装不对参考这两篇文章 服务器上我发现显卡驱动不对用第二篇文章解决
Ubuntu下安装nvidia显卡驱动_安装nvidia-modprobe-优快云博客
安装成功后输入nvidia-smi会提示这个界面

我的显卡驱动是4090ti 12g 理论上应该跑的起来,后面我会在后续的微调文章里详细解答。
如果安装中遇到下图这个问题 基本就是版本的太低的问题了重装个新的版本。

安装conda完成后 开始安装大模型
这里呢大家可以参考这篇文章
linux环境部署清华大学大模型最新版 chatglm2-6b 图文教程_python_脚本之家
conda create -n ChatGLM2 python=3.10.6

初始化虚拟环境完成后
conda env list 可以看到虚拟环境

激活目标环境
conda activate ChatGLM2
安装git 安装成功后 然后下载代码 代码可以通过码云下载或本地下载上传到服务器虚拟环境本地磁盘目录
项目源代码地址
# 下载项目源代码
git clone https://github.com/THUDM/ChatGLM2-6B
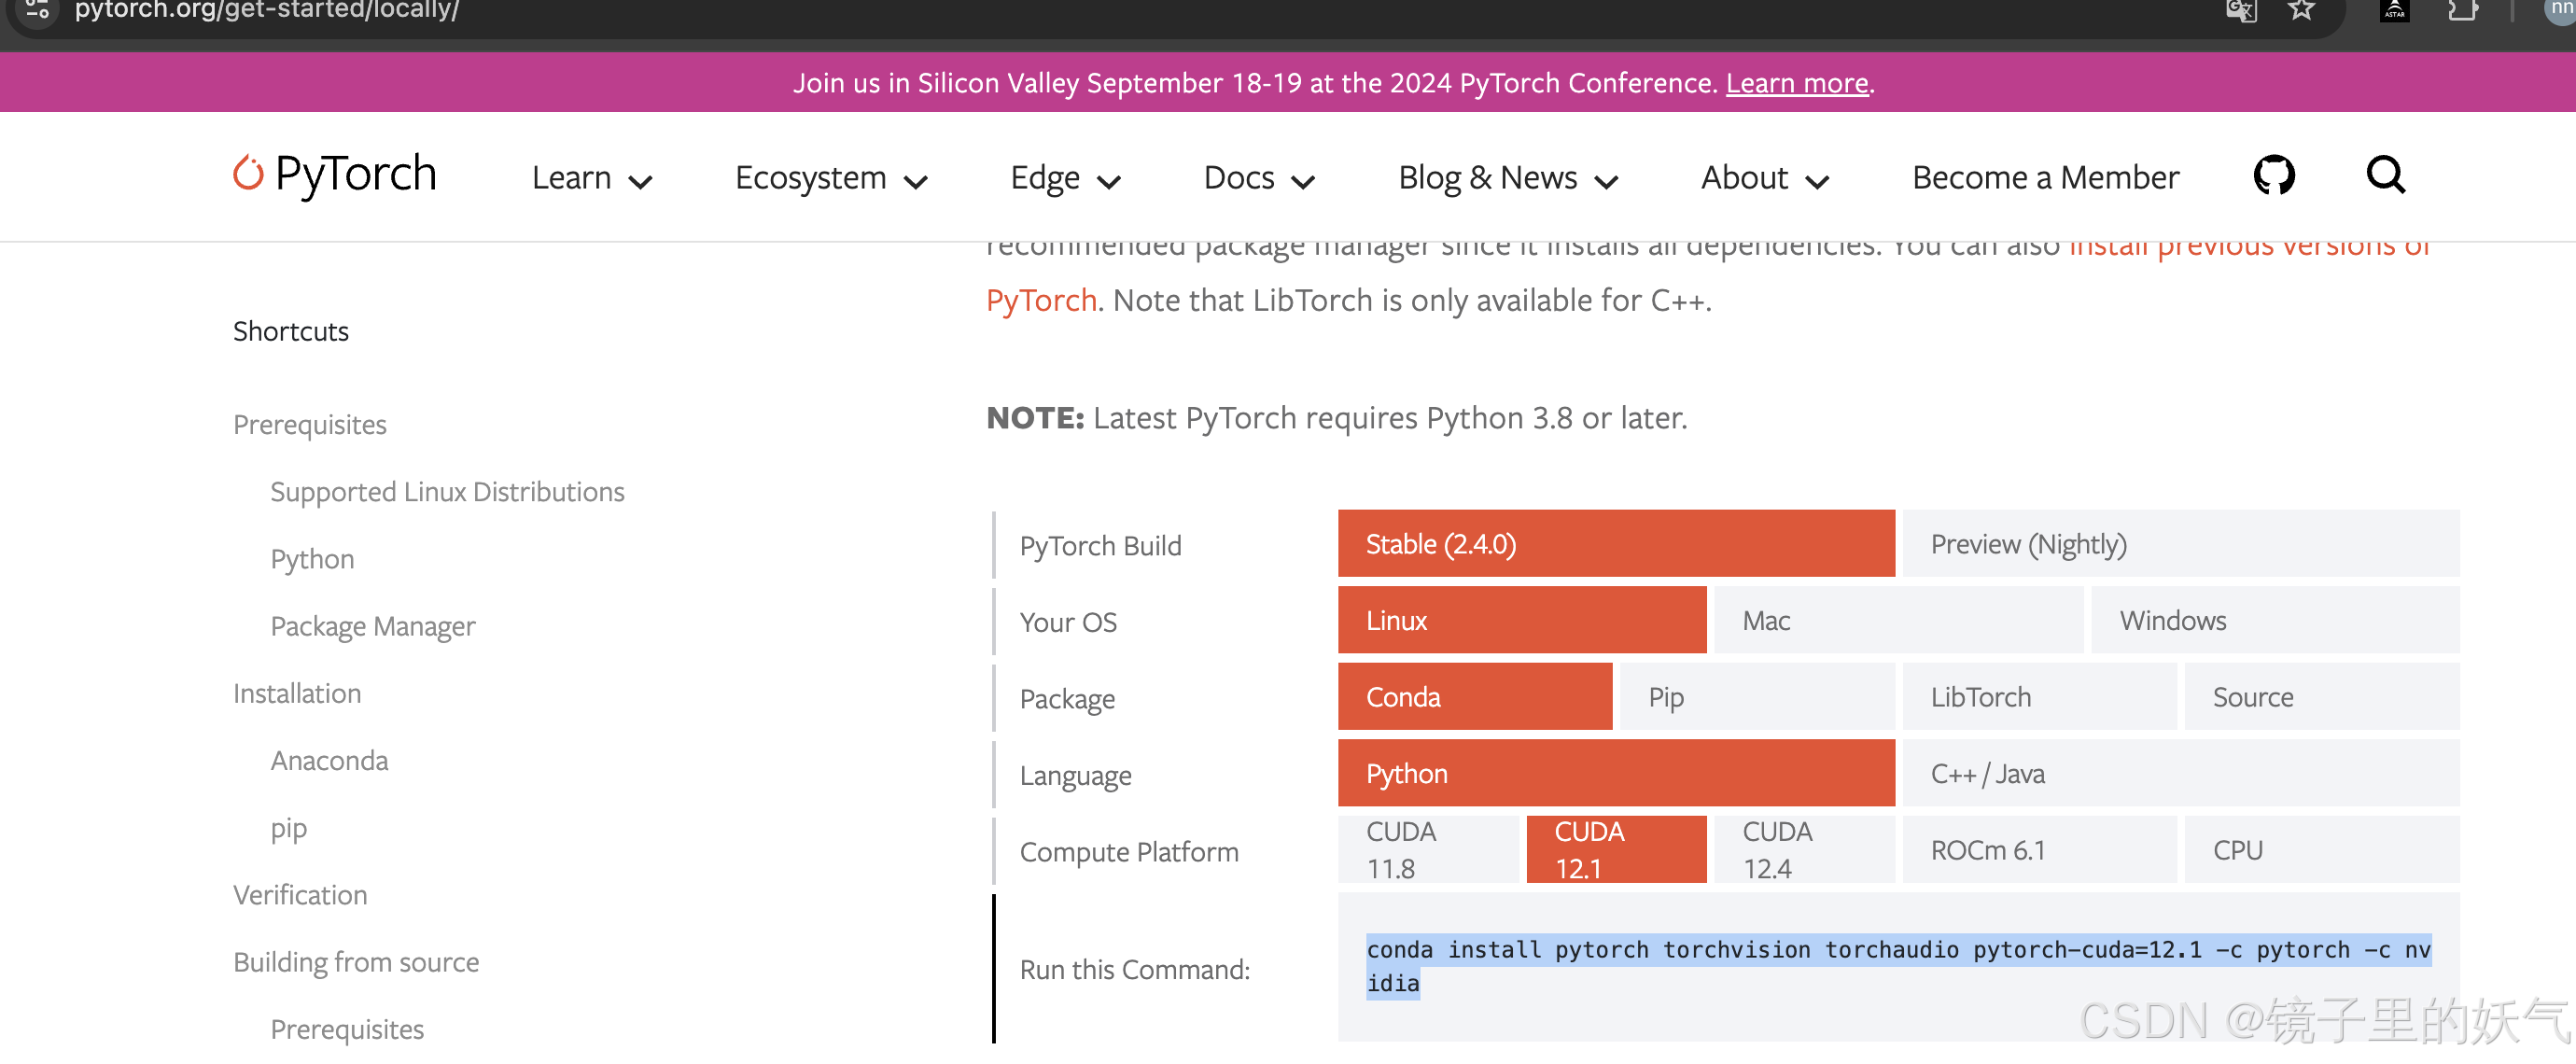
下载完成后并安装pytorch 安装这个的时候一定要进入虚拟环境安装 不然该安装到外部环境里了
https://pytorch.org/get-started/locally/
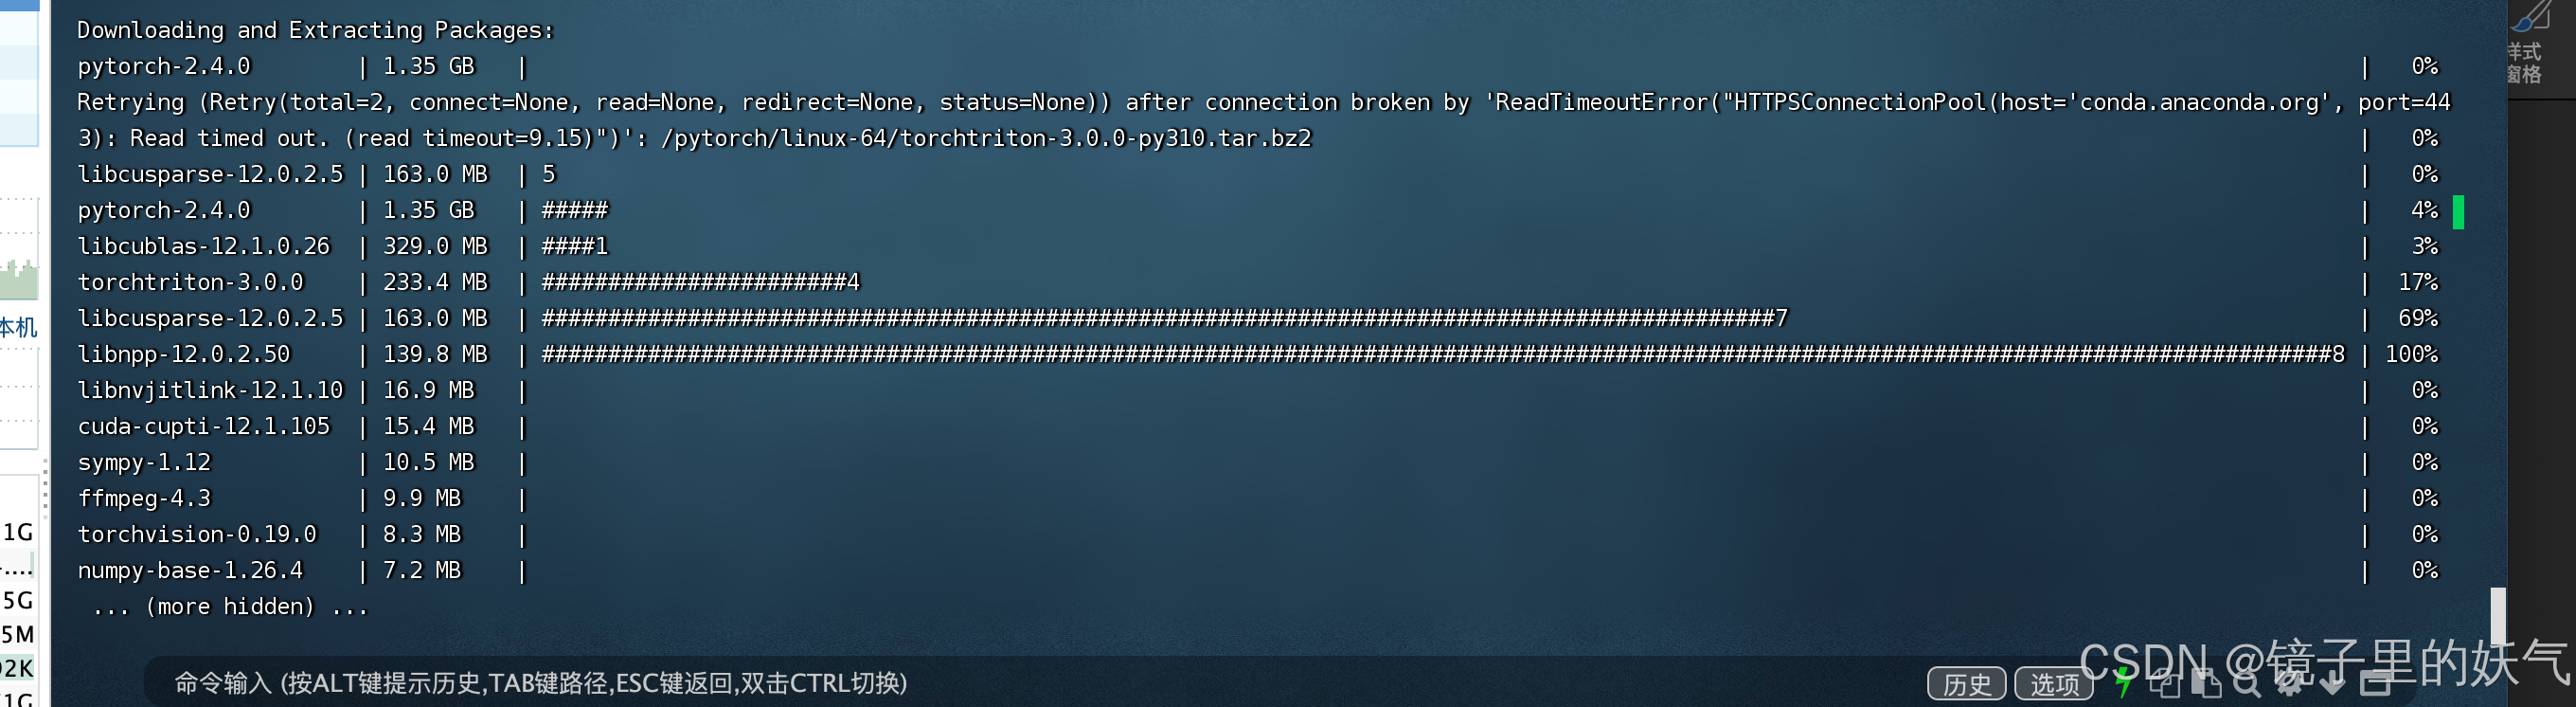
conda install pytorch torchvision torchaudio pytorch-cuda=12.1 -c pytorch -c nvidia
然后执行安装 安装的时候确保是在虚拟环境 这个目录下

pip install -r requirements.txt
安装中如果遇到这个错误

切换到清华的源就可以了
pip config set global.index-url Simple Index
然后就是安装界面

然后安装web依赖 这个大模型的web界面
pip install gradio
依赖安装完成后创建model文件 用于存放模型文件
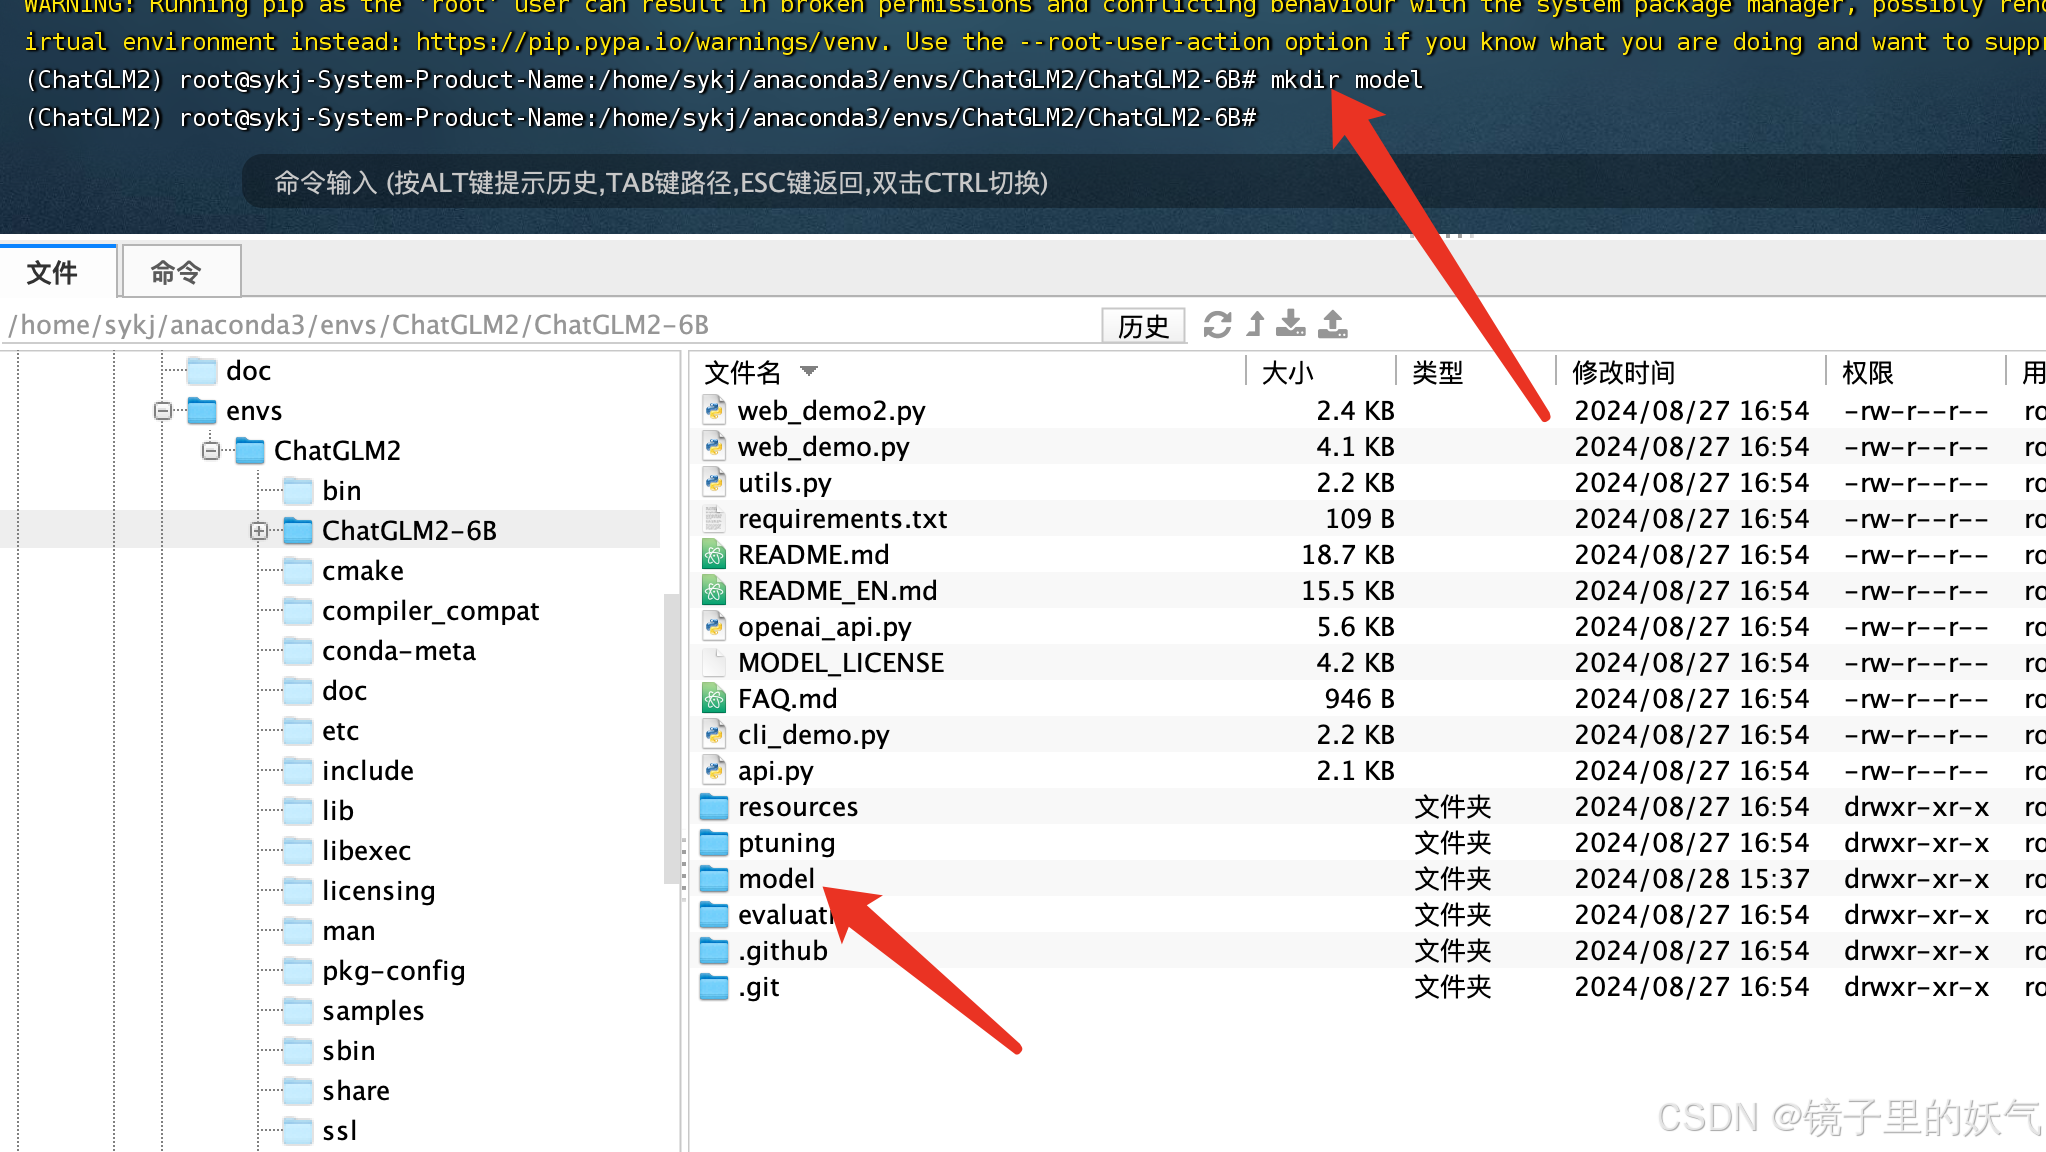
创建model文件夹存放模型及权重文件
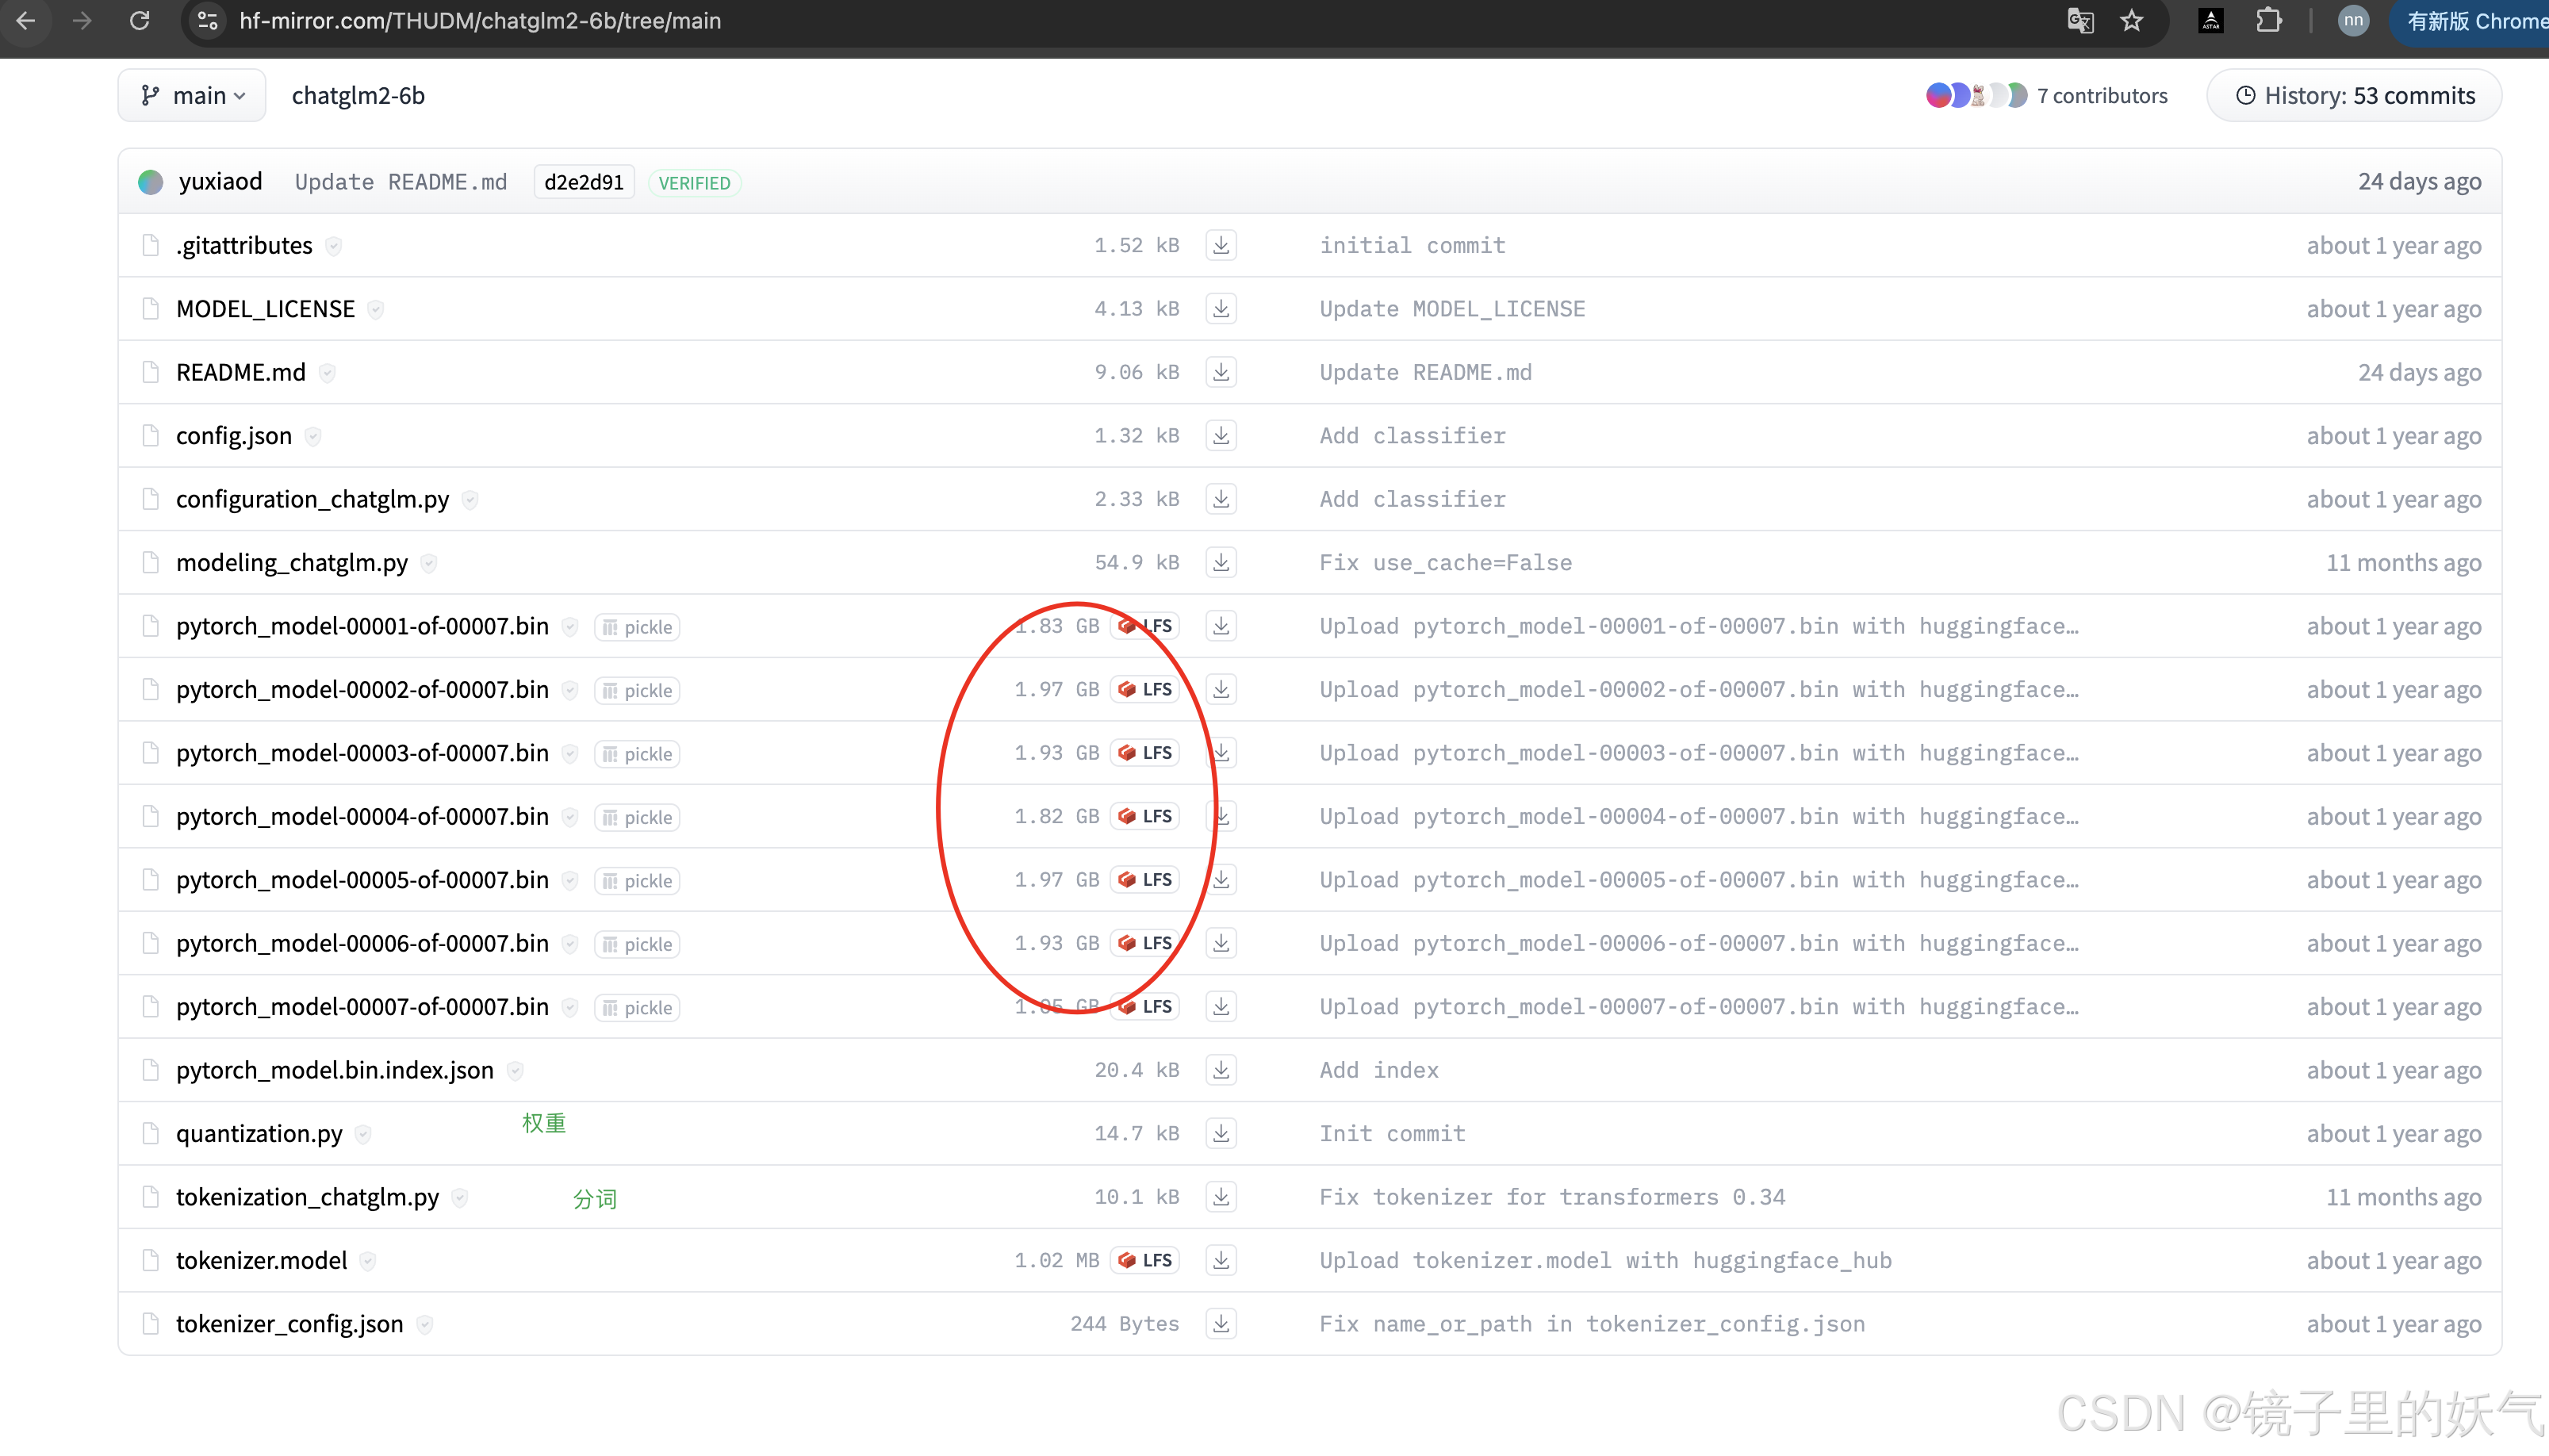
我试过git lfs速度更慢这种最好就自己手动吧 文章建议这样做。 但我试过速度太慢 所以我选择迅雷会员下载大文件然后传到服务器虚拟环境路径下。
从国内镜像地址下载
安装完之后运行大模型文件 python web_demo.py 但是提示显存不足 还是提示显存不太足 通过courch进行优化代码优化
courch是个非常好的工具
然后pip安装一些包
下面事优化后的代码 如果显存不足的可以参考我下面的代码 如果显存足就按原始代码运行就可以了。
import os
import torch
from transformers import AutoTokenizer, AutoModel, AutoConfig
import gradio as gr
import logging

# 设置日志
logging.basicConfig(level=logging.INFO)
logger = logging.getLogger(__name__)

# 设置环境变量
os.environ['PYTORCH_CUDA_ALLOC_CONF'] = 'max_split_size_mb:128'

# CUDA 检查
logger.info(f"CUDA available: {torch.cuda.is_available()}")
if torch.cuda.is_available():
    logger.info(f"CUDA device count: {torch.cuda.device_count()}")
    logger.info(f"Current CUDA device: {torch.cuda.current_device()}")
    logger.info(f"CUDA device name: {torch.cuda.get_device_name(0)}")

# 确保使用 CUDA
device = torch.device("cuda" if torch.cuda.is_available() else "cpu")
logger.info(f"Using device: {device}")

# 清理GPU内存
torch.cuda.empty_cache()

# 设置本地模型路径
LOCAL_MODEL_PATH = "/home/sykj/anaconda3/envs/ChatGLM2/ChatGLM2-6B/model"

try:
    # 加载tokenizer
    tokenizer = AutoTokenizer.from_pretrained(LOCAL_MODEL_PATH, trust_remote_code=True)
    logger.info("Tokenizer loaded successfully")

    # 配置模型
    config = AutoConfig.from_pretrained(LOCAL_MODEL_PATH, trust_remote_code=True)
    config.use_cache = False
    logger.info("Model config loaded successfully")

    # 计算可用 GPU 内存的 80%
    total_memory = torch.cuda.get_device_properties(0).total_memory
    available_memory = str(int(total_memory * 0.8 / 1024 / 1024)) + "MiB"
    logger.info(f"Setting max memory to {available_memory}")

    # 使用 8 位量化加载模型
    model = AutoModel.from_pretrained(
        LOCAL_MODEL_PATH,
        config=config,
        trust_remote_code=True,
        device_map="auto",
        load_in_8bit=True,
        max_memory={0: available_memory},
        torch_dtype=torch.float16
    )
    logger.info("Model loaded successfully")

    logger.info(f"Model device map: {model.hf_device_map}")
    logger.info(f"Model is on device: {next(model.parameters()).device}")
    logger.info(f"Model dtype: {next(model.parameters()).dtype}")

    # 打印 GPU 内存使用情况
    logger.info(torch.cuda.memory_summary(device=None, abbreviated=False))

    # 启用内存高效的注意力机制
    model.enable_input_require_grads()
    logger.info("Model optimization complete")

except Exception as e:
    logger.error(f"An error occurred: {str(e)}", exc_info=True)
    raise

def predict(input, history, max_length, top_p, temperature):
    logger.info(f"Received input: {input}")
    with torch.no_grad():
        response, new_history = model.chat(tokenizer, input, history=history, max_length=max_length, top_p=top_p, temperature=temperature)
    logger.info(f"Generated response: {response}")
    return response, new_history

# Gradio 界面
with gr.Blocks() as demo:
    gr.HTML("""<h1 align="center">ChatGLM2-6B 演示</h1>""")

    chatbot = gr.Chatbot()
    with gr.Row():
        with gr.Column(scale=4):
            with gr.Column(scale=12):
                user_input = gr.Textbox(show_label=False, placeholder="请输入您的问题...", lines=3)
            with gr.Column(min_width=32, scale=1):
                submitBtn = gr.Button("发送", variant="primary")
        with gr.Column(scale=1):
            emptyBtn = gr.Button("清空对话")
            retryBtn = gr.Button("重新生成")
            undoBtn = gr.Button("撤回")

    with gr.Row():
        max_length = gr.Slider(0, 32768, value=8192, step=1.0, label="最大长度", interactive=True)
        top_p = gr.Slider(0, 1, value=0.8, step=0.01, label="Top P", interactive=True)
        temperature = gr.Slider(0, 1, value=0.95, step=0.01, label="温度", interactive=True)

    history = gr.State([])

    def user(user_message, history):
        return "", history + [[user_message, None]]

    def bot(history, max_length, top_p, temperature):
        if len(history) == 0:
            return [], []
        user_message = history[-1][0]
        bot_message, new_history = predict(user_message, history[:-1], max_length, top_p, temperature)
        history[-1][1] = bot_message
        return history, new_history

    def clear():
        return [], []

    def retry(history, chat_history):
        if len(history) == 0:
            return [], []
        if history[-1][1] is not None:
            history[-1][1] = None  # 只移除最后一条机器人的回复
        return history, chat_history

    def undo(history, chat_history):
        if len(history) > 0:
            history.pop()
            chat_history = chat_history[:-1]
        return history, chat_history

    submitBtn.click(user, [user_input, chatbot], [user_input, chatbot]).then(
        bot, [chatbot, max_length, top_p, temperature], [chatbot, history]
    )
    emptyBtn.click(clear, outputs=[chatbot, history])
    retryBtn.click(retry, [chatbot, history], [chatbot, history]).then(
        bot, [chatbot, max_length, top_p, temperature], [chatbot, history]
    )
    undoBtn.click(undo, [chatbot, history], [chatbot, history])

    user_input.submit(user, [user_input, chatbot], [user_input, chatbot]).then(
        bot, [chatbot, max_length, top_p, temperature], [chatbot, history]
    )

if __name__ == "__main__":
    logger.info("Starting Gradio interface...")
    try:
        demo.queue()
        logger.info("Gradio queue initialized.")
        demo.launch(server_name="0.0.0.0", server_port=7860, share=False)
        logger.info("Gradio interface launched successfully.")
    except Exception as e:
        logger.error(f"Error launching Gradio interface: {str(e)}", exc_info=True)
这个完整的代码包含了以下优化和特性:
· 设置环境变量以避免内存碎片。
· 使用 device_map="auto" 自动处理模型在 GPU 和 CPU 之间的分配。
· 使用半精度 (FP16) 加载模型以减少内存使用。
· 应用 LoRA 进行参数高效微调。
· 启用梯度检查点以进一步节省内存。
· 保留了原有的聊天功能。
· 添加了训练功能,允许用户上传训练数据并设置训练参数。
这个版本应该能够在您的 4070 Ti (12GB VRAM) 上运行,并提供聊天和训练功能。如果您在运行这个代码时仍然遇到任何问题,请提供具体的错误信息,我会继续帮您解决。
另外,请确保您已经安装了所有必要的库,包括 transformers, peft, gradio, 和 datasets。如果没有,您可以使用以下命令安装它们:
启动这样启动
nohup python web_demo.py > output.log 2>&1 &
结束
pkill -f web_demo.py或者
ps aux | grep python
各位看官老爷 喜欢就点个赞吧


 912
912

 被折叠的 条评论
为什么被折叠?
被折叠的 条评论
为什么被折叠?
 到【灌水乐园】发言


