


 本文详细介绍ActiveMQ的环境搭建过程,包括安装与管理后台访问,并通过一个集成demo展示queue和topic模式的使用。同时,提供了生产者与消费者分离实例,帮助理解不同模式下消息的传递特性。
一、activemq环境搭建:
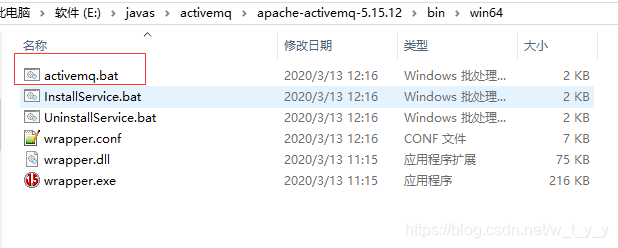
1、安装:官网http://activemq.apache.org/download.html,我这里下载的是windows的,windows的比较简单,下载后解压,进入bin目录双击bat文件即可启动服务:
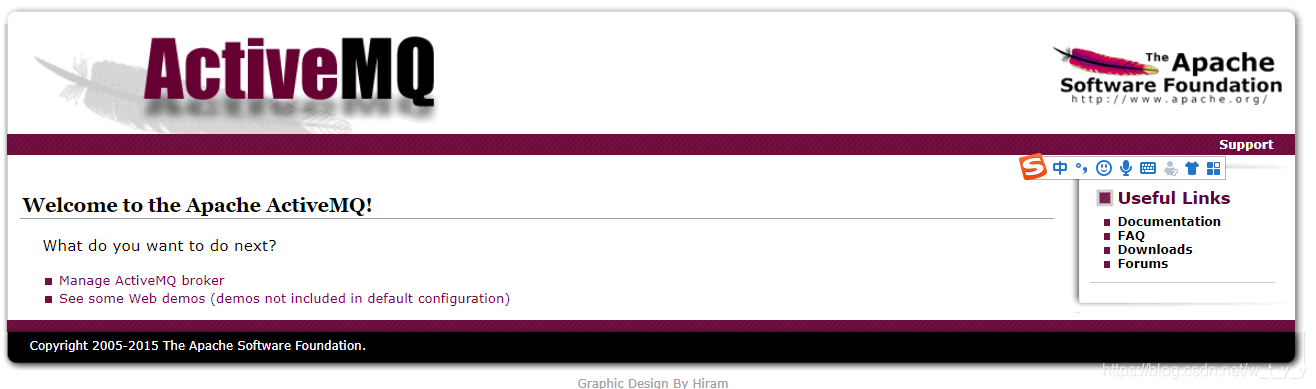
2、管理后台:浏览器输入http://localhost:8161/,弹框输入用户名密码,初始值均为admin
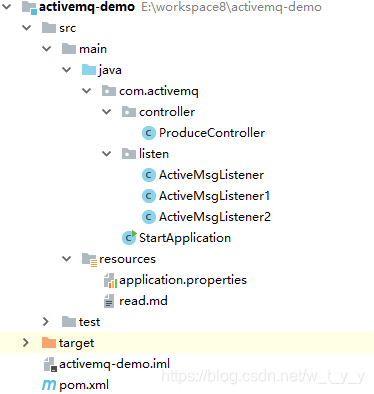
二、实例:一个简单的 activemq集成demo。activemq有两种模式queue和topic,可以通过配置指定:
1)、默认情况下activemq提供的是queue模式
2)、若要使用topic模式需要在application.properties配置文件加上下面配置:
   spring.jms.pub-sub-domain=true
代码:
1、pom:
<?xml version="1.0" encoding="UTF-8"?>
<project xmlns="http://maven.apache.org/POM/4.0.0"
         xmlns:xsi="http://www.w3.org/2001/XMLSchema-instance"
         xsi:schemaLocation="http://maven.apache.org/POM/4.0.0 http://maven.apache.org/xsd/maven-4.0.0.xsd">
    <modelVersion>4.0.0</modelVersion>

    <groupId>com.activemq</groupId>
    <artifactId>activemq-demo</artifactId>
    <version>1.0-SNAPSHOT</version>
    <!-- springBoot -->
    <parent>
        <groupId>org.springframework.boot</groupId>
        <artifactId>spring-boot-starter-parent</artifactId>
        <version>1.4.1.RELEASE</version>
    </parent>

    <dependencies>
        <dependency>
            <groupId>org.springframework.boot</groupId>
            <artifactId>spring-boot-starter-web</artifactId>
            <version>RELEASE</version>
        </dependency>

        <dependency>
            <groupId>org.springframework.boot</groupId>
            <artifactId>spring-boot-starter-activemq</artifactId>
        </dependency>

    </dependencies>

    <!--指定仓库,解决maven下载失败生成update后缀的文件-->
    <repositories>
        <repository>
            <id>spring-milestones</id>
            <name>Spring Milestones</name>
            <url>https://repo.spring.io/libs-milestone</url>
            <snapshots>
                <enabled>false</enabled>
            </snapshots>
        </repository>
    </repositories>

</project>
2、配置文件:
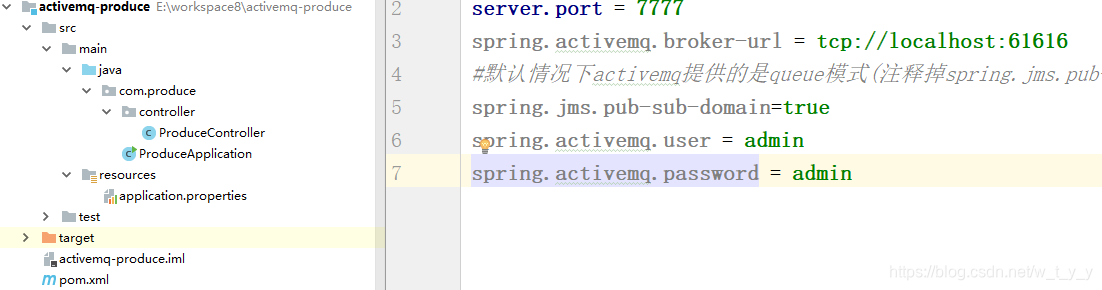
server.port = 9999
spring.activemq.broker-url = tcp://localhost:61616
#默认情况下activemq提供的是queue模式(注释掉spring.jms.pub-sub-domain=true),若要使用topic模式需要配置下面配置
spring.jms.pub-sub-domain=true
spring.activemq.user = admin
spring.activemq.password = admin
3、生产者controller:
package com.activemq.controller;
import org.springframework.beans.factory.annotation.Autowired;
import org.springframework.jms.core.JmsTemplate;
import org.springframework.jms.core.MessageCreator;
import org.springframework.scheduling.annotation.Scheduled;
import org.springframework.web.bind.annotation.RequestMapping;
import org.springframework.web.bind.annotation.RestController;

import javax.jms.JMSException;
import javax.jms.Message;
import javax.jms.Session;
import javax.jms.TextMessage;
@RestController
public class ProduceController {
    @Autowired
    private JmsTemplate jmsTemplate;

    @RequestMapping("/sendMsg")
    public void sendMsg(String msg) {
        jmsTemplate.send("q2", new MessageCreator() {
            @Override
            public Message createMessage(Session session) throws JMSException {

                TextMessage textMessage = session.createTextMessage();
                textMessage.setText(msg);
                return textMessage;
            }
        });
    }
}
4、三个消费者:代码都是一样的
消费者1:
package com.activemq.listen;

import org.springframework.jms.annotation.JmsListener;
import org.springframework.stereotype.Service;


@Service
public class ActiveMsgListener {

    @JmsListener(destination = "q2")
    public void rctiveMsg(String message){
        System.out.println("------监听到activemq的数据:"+message);
    }

}
消费者2:
package com.activemq.listen;

import org.springframework.jms.annotation.JmsListener;
import org.springframework.stereotype.Service;


@Service
public class ActiveMsgListener1 {

    @JmsListener(destination = "q2")
    public void rctiveMsg(String message){
        System.out.println("******1监听到activemq的数据:"+message);
    }

}
消费者3:
package com.activemq.listen;

import org.springframework.jms.annotation.JmsListener;
import org.springframework.stereotype.Service;


@Service
public class ActiveMsgListener2 {

    @JmsListener(destination = "q2")
    public void rctiveMsg(String message){
        System.out.println("======2监听到activemq的数据:"+message);
    }

}
5、启动类:
package com.activemq;

import org.springframework.boot.SpringApplication;
import org.springframework.boot.autoconfigure.SpringBootApplication;

@SpringBootApplication
public class StartApplication {
    public static void main(String args[]){
        SpringApplication.run(StartApplication.class,args);
    }
}
测试:
本例有三个消费者,
(1)如果使用的是queue模式,数据只会被某一个消费者消费:后台打印:
======2监听到activemq的数据:测试第一次

------监听到activemq的数据:测试第二次

******1监听到activemq的数据:测试第三次

======2监听到activemq的数据:测试第四次
可以看到,消息被消费者轮询接收。
(2)如果使用topic模式,则所有的消费者都会消费到:后台打印:
******1监听到activemq的数据:测试第一次
======2监听到activemq的数据:测试第一次
------监听到activemq的数据:测试第一次
******1监听到activemq的数据:测试第二次
------监听到activemq的数据:测试第二次
======2监听到activemq的数据:测试第二次
三、生产者与消费者分离实例:上例的生产者和消费者在一个项目中,现在拆分项目:
新建三个项目,一个生产者,两个消费者,代码直接拷贝即可
1、生产者:
2、消费者1:
3、消费者2:
同上面2。
注:生产者、消费者的模式(queue/topic) 需要保持一致,才可以正常运行。
如本例,生产者为queue,消费者1为queue,消费者2为topic,则消费者1正常消费,消费者2不消费;
生产者为topic,消费者1为queue,消费者2为topic,则消费者2正常消费,消费者1不消费。


 253
253

 被折叠的 条评论
为什么被折叠?
被折叠的 条评论
为什么被折叠?
 到【灌水乐园】发言


