


 本文详细介绍如何在Unity中实现Bloom(光晕)特效,包括亮度提取、高斯模糊及图像叠加过程,附带C#与Shader代码。
前言
Bloom(光晕)是一种计算机图形效果,用于视频游戏,演示和高动态范围渲染(HDRR)中,以再现真实相机的成像伪像。该效果会产生从图像中明亮区域的边界延伸的条纹(或羽毛),从而造成超亮的光使摄像机或眼睛捕捉场景的幻觉。
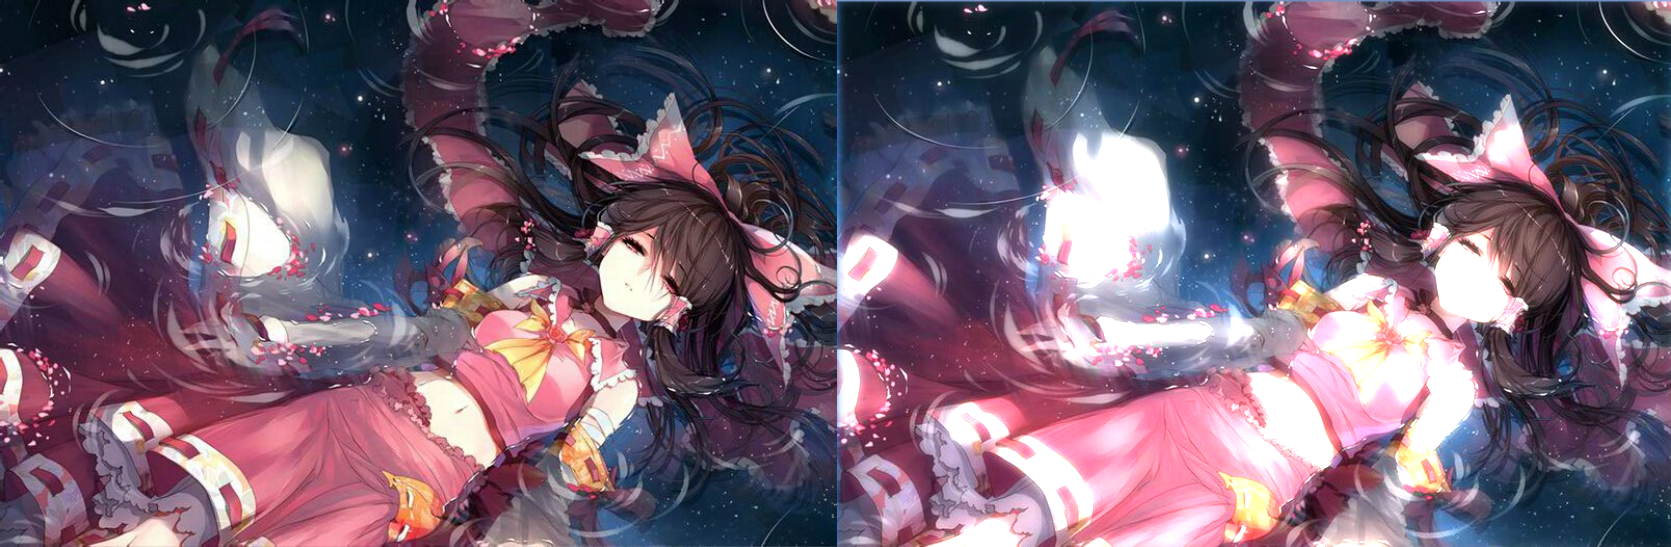
效果对比如下:
左边是原图, 右边Bloom处理后的
原理:
Bloom的实现原理非常简单,大致分为三步:
-
对需要处理的图像经过亮度提取, 并且通过一个阙值来控制亮度
-
对经过亮度提取后的图像进行模糊处理(这里是采用高斯模糊)
-
最后再叠加原图和模糊处理后的图像,输出即可
实现
下面我们来逐步的通过代码实现一下。
既然是后期特效, 那么基本框架和之前的后期处理一样, 首先在Camera上挂载一个C#脚本来捕捉摄像机渲染后的图像。
一 C#实现
新建一个Bloom.cs
PostEffectsBase 基类可以在这里获取(来自《Unity Shader入门精要》)
     using

     System
     .
     Collections
     ;


     using

     UnityEngine
     ;


     // ---------------------------【Bloom 全屏泛光后期】---------------------------


     //编辑状态下也运行


     [
     ExecuteInEditMode
     ]


     public

     class

     Bloom

     :

     PostEffectsBase


     {


     public

     Shader
      bloomShader
     ;


     private

     Material
      mMaterial
     ;


     //bloom处理的shader


     public

     Material
      material

     {


     get


     {

            mMaterial
     =

     CheckShaderAndCreateMaterial
     (
     bloomShader
     ,
      mMaterial
     )
     ;


     return
      mMaterial
     ;


     }


     }


     //迭代次数


     [
     Range
     (
     0
     ,

     4
     )
     ]


     public

     int
      iterations
     =

     3
     ;


     //模糊扩散范围


     [
     Range
     (
     0.2f
     ,

     3.0f
     )
     ]


     public

     float
      blurSpread
     =

     0.6f
     ;


     // 降频


     private

     int
      downSample
     =

     1
     ;


     // 亮度阙值


     [
     Range
     (
     -
     1.0f
     ,

     1.0f
     )
     ]


     public

     float
      luminanceThreshold
     =

     0.6f
     ;


     // bloom 强度


     [
     Range
     (
     0.0f
     ,

     5.0f
     )
     ]


     public

     float
      bloomFactor
     =

     1
     ;


     // bloom 颜色值


     public

     Color
      bloomColor
     =

     new

     Color
     (
     1
     ,

     1
     ,

     1
     ,

     1
     )
     ;


     void

     Awake
     (
     )


     {

        bloomShader
     =
      Shader
     .
     Find
     (
     "lcl/screenEffect/Bloom"
     )
     ;


     }


     //-------------------------------------【OnRenderImage函数】------------------------------------


     // 说明:此函数在当完成所有渲染图片后被调用,用来渲染图片后期效果


     //--------------------------------------------------------------------------------------------------------


     private

     void

     OnRenderImage
     (
     RenderTexture
      source
     ,

     RenderTexture
      destination
     )


     {


     if

     (
     material
     )


     {


     int
      rtW
     =
      source
     .
     width
     >>
      downSample
     ;


     int
      rtH
     =
      source
     .
     height
     >>
      downSample
     ;


     RenderTexture
      texture1
     =
      RenderTexture
     .
     GetTemporary
     (
     rtW
     ,
      rtH
     ,

     0
     )
     ;


     RenderTexture
      texture2
     =
      RenderTexture
     .
     GetTemporary
     (
     rtW
     ,
      rtH
     ,

     0
     )
     ;


     // 亮度提取 - 通道0

            material
     .
     SetFloat
     (
     "_LuminanceThreshold"
     ,
      luminanceThreshold
     )
     ;

            Graphics
     .
     Blit
     (
     source
     ,
      texture1
     ,
      material
     ,

     0
     )
     ;


     // 高斯模糊 - 通道1


     for

     (
     int
      i
     =

     0
     ;
      i
     <
      iterations
     ;
      i
     ++
     )


     {


     //垂直高斯模糊

                material
     .
     SetVector
     (
     "_offsets"
     ,

     new

     Vector4
     (
     0
     ,

     1.0f

     +
      i
     *
      blurSpread
     ,

     0
     ,

     0
     )
     )
     ;

                Graphics
     .
     Blit
     (
     texture1
     ,
      texture2
     ,
      material
     ,

     1
     )
     ;


     //水平高斯模糊

                material
     .
     SetVector
     (
     "_offsets"
     ,

     new

     Vector4
     (
     1.0f

     +
      i
     *
      blurSpread
     ,

     0
     ,

     0
     ,

     0
     )
     )
     ;

                Graphics
     .
     Blit
     (
     texture2
     ,
      texture1
     ,
      material
     ,

     1
     )
     ;


     }


     //用模糊图和原始图计算出轮廓图  - 通道2

            material
     .
     SetColor
     (
     "_BloomColor"
     ,
      bloomColor
     )
     ;

            material
     .
     SetFloat
     (
     "_BloomFactor"
     ,
      bloomFactor
     )
     ;

            material
     .
     SetTexture
     (
     "_BlurTex"
     ,
      texture1
     )
     ;

            Graphics
     .
     Blit
     (
     source
     ,
      destination
     ,
      material
     ,

     2
     )
     ;


     }


     }


     }
二 Shader实现
下面我们重点来看看Shader是如何实现的:
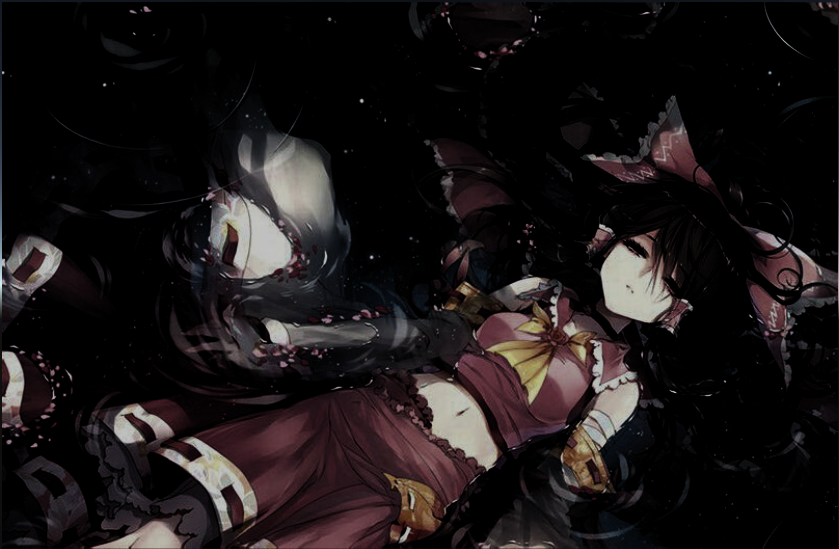
1.首先我们对图像的亮度的提取
亮度的提取非常简单, 通过一个公式即可提取: 0.2125
r + 0.7154
g + 0.0721 * b , 这里的原理就不细说了, 感兴趣的可以去Google一下。 亮度提取成功之后我们可以通过一个阙值来控制,并且把值限制在0-1范围内
关键shader代码如下:
     // 亮度提取


     fixed

     luminance
     (
     fixed4
      color
     )

     {


     return

     0.2125

     *
      color
     .
     r
     +

     0.7154

     *
      color
     .
     g
     +

     0.0721

     *
      color
     .
     b
     ;


     }


     // 片元着色器


     fixed4

     fragExtractBright
     (
     v2fExtBright
      i
     )

     :
      SV_Target
     {


     fixed4
      color
     =

     tex2D
     (
     _MainTex
     ,
      i
     .
     uv
     )
     ;


     // clamp 约束到 0 - 1 区间


     fixed
      val
     =

     clamp
     (
     luminance
     (
     color
     )

     -
      _LuminanceThreshold
     ,

     0.0
     ,

     1.0
     )
     ;


     return
      color
     *
      val
     ;


     }
呈现效果如下:
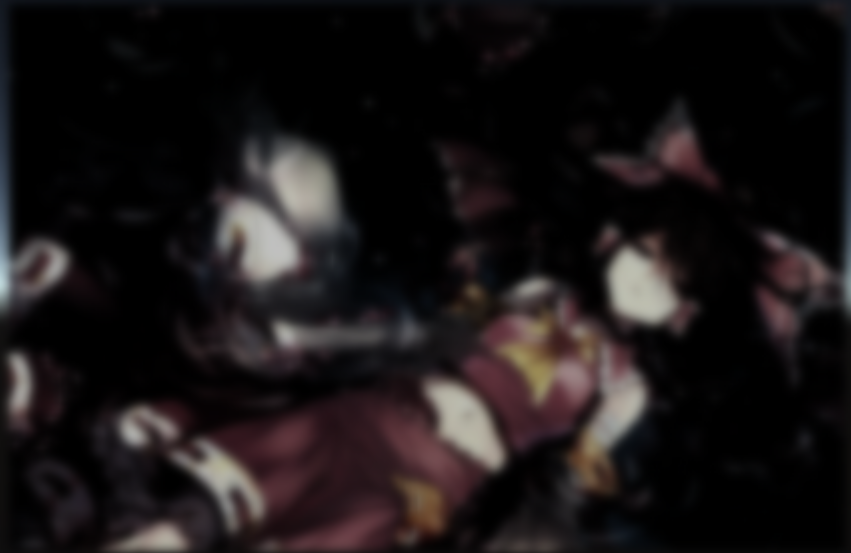
2.模糊处理
然后我们再对以上得到的图像经过高斯模糊处理一下, 这里也可以采用简单的均值模糊处理。 这里的模糊处理教程也不细说了,篇幅太长,可以参考我之前的一篇文章:
Unity Shader - 均值模糊和高斯模糊
关键代码:
     // ---------------------------【高斯模糊 - start】---------------------------


     struct

     v2fBlur


     {


     float4
      pos
     :
      SV_POSITION
     ;

     //顶点位置


     float2
      uv
     :
      TEXCOORD0
     ;

     //纹理坐标


     float4
      uv01
     :
      TEXCOORD1
     ;

     //一个vector4存储两个纹理坐标


     float4
      uv23
     :
      TEXCOORD2
     ;

     //一个vector4存储两个纹理坐标


     }
     ;


     //高斯模糊顶点着色器


     v2fBlur

     vertBlur
     (
     appdata_img
      v
     )


     {


     v2fBlur
      o
     ;

    o
     .
     pos
     =

     UnityObjectToClipPos
     (
     v
     .
     vertex
     )
     ;


     //uv坐标

    o
     .
     uv
     =
      v
     .
     texcoord
     .
     xy
     ;


     //计算一个偏移值,offset可能是(1,0,0,0)也可能是(0,1,0,0)这样就表示了横向或者竖向取像素周围的点

    _offsets
     *=
      _MainTex_TexelSize
     .
     xyxy
     ;


     //由于uv可以存储4个值,所以一个uv保存两个vector坐标,_offsets.xyxy * float4(1,1,-1,-1)可能表示(0,1,0-1),表示像素上下两个


     //坐标,也可能是(1,0,-1,0),表示像素左右两个像素点的坐标,下面*2.0,*3.0同理

    o
     .
     uv01
     =
      v
     .
     texcoord
     .
     xyxy
     +
      _offsets
     .
     xyxy
     *

     float4
     (
     1
     ,

     1
     ,

     -
     1
     ,

     -
     1
     )
     ;

    o
     .
     uv23
     =
      v
     .
     texcoord
     .
     xyxy
     +
      _offsets
     .
     xyxy
     *

     float4
     (
     1
     ,

     1
     ,

     -
     1
     ,

     -
     1
     )

     *

     2.0
     ;


     return
      o
     ;


     }


     //高斯模糊片段着色器


     fixed4

     fragBlur
     (
     v2fBlur
      i
     )

     :
      SV_Target

     {


     fixed4
      color
     =

     fixed4
     (
     0
     ,
     0
     ,
     0
     ,
     0
     )
     ;

    color
     +=

     0.4026

     *

     tex2D
     (
     _MainTex
     ,
      i
     .
     uv
     )
     ;

    color
     +=

     0.2442

     *

     tex2D
     (
     _MainTex
     ,
      i
     .
     uv01
     .
     xy
     )
     ;

    color
     +=

     0.2442

     *

     tex2D
     (
     _MainTex
     ,
      i
     .
     uv01
     .
     zw
     )
     ;

    color
     +=

     0.0545

     *

     tex2D
     (
     _MainTex
     ,
      i
     .
     uv23
     .
     xy
     )
     ;

    color
     +=

     0.0545

     *

     tex2D
     (
     _MainTex
     ,
      i
     .
     uv23
     .
     zw
     )
     ;


     return
      color
     ;


     }


     // ---------------------------【高斯模糊 - end】---------------------------
处理后的效果如下:
3.最后叠加原图和模糊处理后的图像
关键代码如下
     // 片元着色器


     fixed4

     fragBloom
     (
     v2fBloom
      i
     )

     :
      SV_Target
     {


     //对原图进行uv采样


     fixed4
      mainColor
     =

     tex2D
     (
     _MainTex
     ,
      i
     .
     uv
     )
     ;


     //对模糊处理后的图进行uv采样


     fixed4
      blurColor
     =

     tex2D
     (
     _BlurTex
     ,
      i
     .
     uv
     )
     ;


     //输出 = 原始图像 + 模糊图像 * bloom颜色 * bloom权值


     fixed4
      resColor
     =
      mainColor
     +
      blurColor
     *
      _BloomColor
     *
      _BloomFactor

     return
      resColor
     ;


     }
原图和Bloom的对比效果如下(左原图,右bloom):
最终的完整Shader代码:
     // ---------------------------【泛光 Bloom】---------------------------

Shader
     "lcl/screenEffect/Bloom"


     {


     // ---------------------------【属性】---------------------------

    Properties

     {

        _MainTex
     (
     "Texture"
     ,

     2D
     )

     =

     "white"

     {
     }


     }


     // ---------------------------【子着色器】---------------------------

    SubShader

     {


     //后处理效果一般都是这几个状态

        ZTest Always
        Cull Off
        ZWrite
     Off

        Fog
     {
      Mode Off
     }


        CGINCLUDE

     #include
     "UnityCG.cginc"


     sampler2D
      _MainTex
     ;


     half4
      _MainTex_TexelSize
     ;


     sampler2D
      _BlurTex
     ;


     float4
      _offsets
     ;


     float
      _LuminanceThreshold
     ;


     fixed4
      _BloomColor
     ;


     float
      _BloomFactor
     ;


     // ---------------------------【亮度提取 - start】---------------------------


     struct

     v2fExtBright

     {


     float4
      pos
     :
      SV_POSITION
     ;


     half2
      uv
     :
      TEXCOORD0
     ;


     }
     ;


     // 顶点着色器


     v2fExtBright

     vertExtractBright
     (
     appdata_img
      v
     )

     {


     v2fExtBright
      o
     ;


            o
     .
     pos
     =

     UnityObjectToClipPos
     (
     v
     .
     vertex
     )
     ;

            o
     .
     uv
     =
      v
     .
     texcoord
     ;


     return
      o
     ;


     }


     // 亮度提取


     fixed

     luminance
     (
     fixed4
      color
     )

     {


     return

     0.2125

     *
      color
     .
     r
     +

     0.7154

     *
      color
     .
     g
     +

     0.0721

     *
      color
     .
     b
     ;


     }


     // 片元着色器


     fixed4

     fragExtractBright
     (
     v2fExtBright
      i
     )

     :
      SV_Target
     {


     fixed4
      color
     =

     tex2D
     (
     _MainTex
     ,
      i
     .
     uv
     )
     ;


     // clamp 约束到 0 - 1 区间


     fixed
      val
     =

     clamp
     (
     luminance
     (
     color
     )

     -
      _LuminanceThreshold
     ,

     0.0
     ,

     1.0
     )
     ;


     return
      color
     *
      val
     ;


     }


     // ---------------------------【亮度提取 - end】---------------------------


     // ---------------------------【高斯模糊 - start】---------------------------


     struct

     v2fBlur


     {


     float4
      pos
     :
      SV_POSITION
     ;

     //顶点位置


     float2
      uv
     :
      TEXCOORD0
     ;

     //纹理坐标


     float4
      uv01
     :
      TEXCOORD1
     ;

     //一个vector4存储两个纹理坐标


     float4
      uv23
     :
      TEXCOORD2
     ;

     //一个vector4存储两个纹理坐标


     }
     ;


     //高斯模糊顶点着色器


     v2fBlur

     vertBlur
     (
     appdata_img
      v
     )


     {


     v2fBlur
      o
     ;

            o
     .
     pos
     =

     UnityObjectToClipPos
     (
     v
     .
     vertex
     )
     ;


     //uv坐标

            o
     .
     uv
     =
      v
     .
     texcoord
     .
     xy
     ;


     //计算一个偏移值,offset可能是(1,0,0,0)也可能是(0,1,0,0)这样就表示了横向或者竖向取像素周围的点

            _offsets
     *=
      _MainTex_TexelSize
     .
     xyxy
     ;


     //由于uv可以存储4个值,所以一个uv保存两个vector坐标,_offsets.xyxy * float4(1,1,-1,-1)可能表示(0,1,0-1),表示像素上下两个


     //坐标,也可能是(1,0,-1,0),表示像素左右两个像素点的坐标,下面*2.0,*3.0同理

            o
     .
     uv01
     =
      v
     .
     texcoord
     .
     xyxy
     +
      _offsets
     .
     xyxy
     *

     float4
     (
     1
     ,

     1
     ,

     -
     1
     ,

     -
     1
     )
     ;

            o
     .
     uv23
     =
      v
     .
     texcoord
     .
     xyxy
     +
      _offsets
     .
     xyxy
     *

     float4
     (
     1
     ,

     1
     ,

     -
     1
     ,

     -
     1
     )

     *

     2.0
     ;


     return
      o
     ;


     }


     //高斯模糊片段着色器


     fixed4

     fragBlur
     (
     v2fBlur
      i
     )

     :
      SV_Target

     {


     fixed4
      color
     =

     fixed4
     (
     0
     ,
     0
     ,
     0
     ,
     0
     )
     ;

            color
     +=

     0.4026

     *

     tex2D
     (
     _MainTex
     ,
      i
     .
     uv
     )
     ;

            color
     +=

     0.2442

     *

     tex2D
     (
     _MainTex
     ,
      i
     .
     uv01
     .
     xy
     )
     ;

            color
     +=

     0.2442

     *

     tex2D
     (
     _MainTex
     ,
      i
     .
     uv01
     .
     zw
     )
     ;

            color
     +=

     0.0545

     *

     tex2D
     (
     _MainTex
     ,
      i
     .
     uv23
     .
     xy
     )
     ;

            color
     +=

     0.0545

     *

     tex2D
     (
     _MainTex
     ,
      i
     .
     uv23
     .
     zw
     )
     ;


     return
      color
     ;


     }


     // ---------------------------【高斯模糊 - end】---------------------------


     // ---------------------------【Bloom(高斯模糊和原图叠加) - start】---------------------------


     struct

     v2fBloom

     {


     float4
      pos
     :
      SV_POSITION
     ;


     half2
      uv
     :
      TEXCOORD0
     ;


     }
     ;


     // 顶点着色器


     v2fBloom

     vertBloom
     (
     appdata_img
      v
     )

     {


     v2fBloom
      o
     ;


            o
     .
     pos
     =

     UnityObjectToClipPos
     (
     v
     .
     vertex
     )
     ;

            o
     .
     uv
     =
      v
     .
     texcoord
     ;


     return
      o
     ;


     }


     // 片元着色器


     fixed4

     fragBloom
     (
     v2fBloom
      i
     )

     :
      SV_Target
     {


     //对原图进行uv采样


     fixed4
      mainColor
     =

     tex2D
     (
     _MainTex
     ,
      i
     .
     uv
     )
     ;


     //对模糊处理后的图进行uv采样


     fixed4
      blurColor
     =

     tex2D
     (
     _BlurTex
     ,
      i
     .
     uv
     )
     ;


     //输出 = 原始图像 + 模糊图像 * bloom颜色 * bloom权值


     fixed4
      resColor
     =
      mainColor
     +
      blurColor
     *
      _BloomColor
     *
      _BloomFactor
     ;


     return
      resColor
     ;


     }


     // ---------------------------【Bloom - end】---------------------------


        ENDCG


     // 亮度提取

        Pass
     {

            CGPROGRAM

     #
     pragma
      vertex vertExtractBright


     #
     pragma
      fragment fragExtractBright

            ENDCG

     }


     //高斯模糊

        Pass
     {

            CGPROGRAM

     #
     pragma
      vertex vertBlur


     #
     pragma
      fragment fragBlur

            ENDCG

     }


     // Bloom

        Pass
     {

            CGPROGRAM

     #
     pragma
      vertex vertBloom


     #
     pragma
      fragment fragBloom

            ENDCG

     }


     }


     }
最后
有兴趣的小伙伴可以来我的
GitHub
逛逛, 欢迎Star,谢谢! 里面有我平时学习unity shader过程中实现的一些特效demo。


 1534
1534

 被折叠的 条评论
为什么被折叠?
被折叠的 条评论
为什么被折叠?
 到【灌水乐园】发言


