


 本文详细介绍如何利用SpringCloud Bus实现在不重启微服务的情况下自动更新配置信息,涵盖Bus概念介绍、配置中心与用户服务改造步骤及测试流程。
16 Spring Cloud Bus服务总线
1.问题
前面已经完成了将微服务中的配置文件集中存储在远程Git仓库,并且通过配置中心微服务从Git仓库拉取配置文件, 当用户微服务启动时会连接配置中心获取配置信息从而启动用户微服务。
如果我们更新Git仓库中的配置文件,那用户微服务是否可以及时接收到新的配置信息并更新呢?
1.1 修改远程Git配置
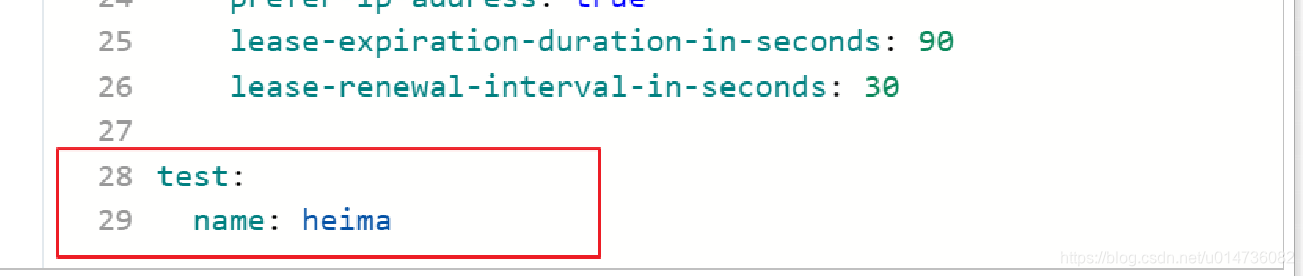
修改在码云上的user-dev.yml文件,添加一个属性test.name。
1.2. 修改UserController
修改 user-service 工程中的处理器类;
package com.itheima.user.controller;

import com.itheima.user.pojo.User;
import com.itheima.user.service.UserService;
import org.springframework.beans.factory.annotation.Autowired;
import org.springframework.beans.factory.annotation.Value;
import org.springframework.cloud.context.config.annotation.RefreshScope;
import org.springframework.web.bind.annotation.GetMapping;
import org.springframework.web.bind.annotation.PathVariable;
import org.springframework.web.bind.annotation.RequestMapping;
import org.springframework.web.bind.annotation.RestController;

@RestController
@RequestMapping("/user")
@RefreshScope //刷新配置
public class UserController {

    @Autowired
    private UserService userService;

    @Value("${test.name}")
    private String name;

    @GetMapping("/{id}")
    public User queryById(@PathVariable Long id){
        System.out.println("配置文件中的test.name为:" + name);
        return userService.queryById(id);
    }
}
1.3测试
依次启动注册中心 eureka-server 、配置中心 config-server 、用户服务 user-service ;然后修改Git仓库中的配 置信息,访问用户微服务,查看输出内容。
结论:通过查看用户微服务控制台的输出结果可以发现,我们对于Git仓库中配置文件的修改并没有及时更新到用户 微服务,只有重启用户微服务才能生效。
如果想在不重启微服务的情况下更新配置该如何实现呢? 可以使用Spring Cloud Bus来实现配置的自动更新。
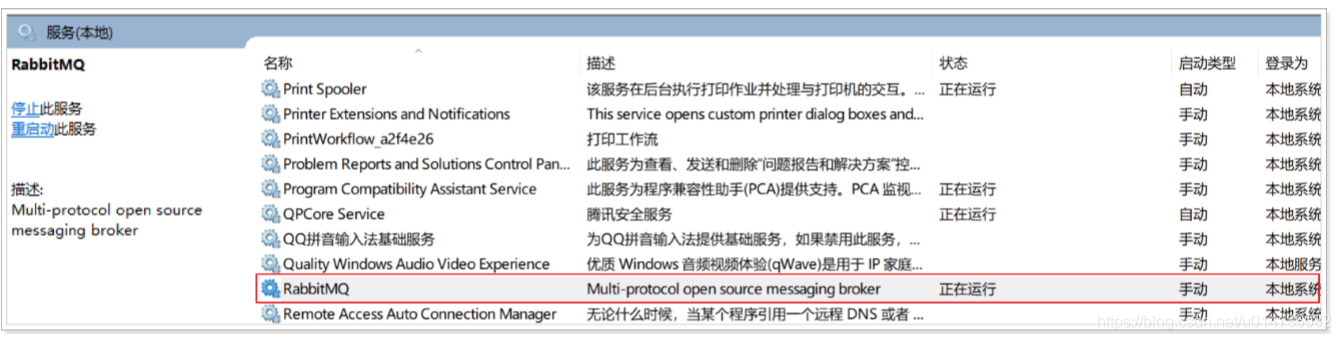
需要注意的是Spring Cloud Bus底层是基于RabbitMQ实现的,默认使用本地的消息队列服务,所以需要提前 启动本地RabbitMQ服务(安装RabbitMQ以后才有),如下
2. Spring Cloud Bus简介
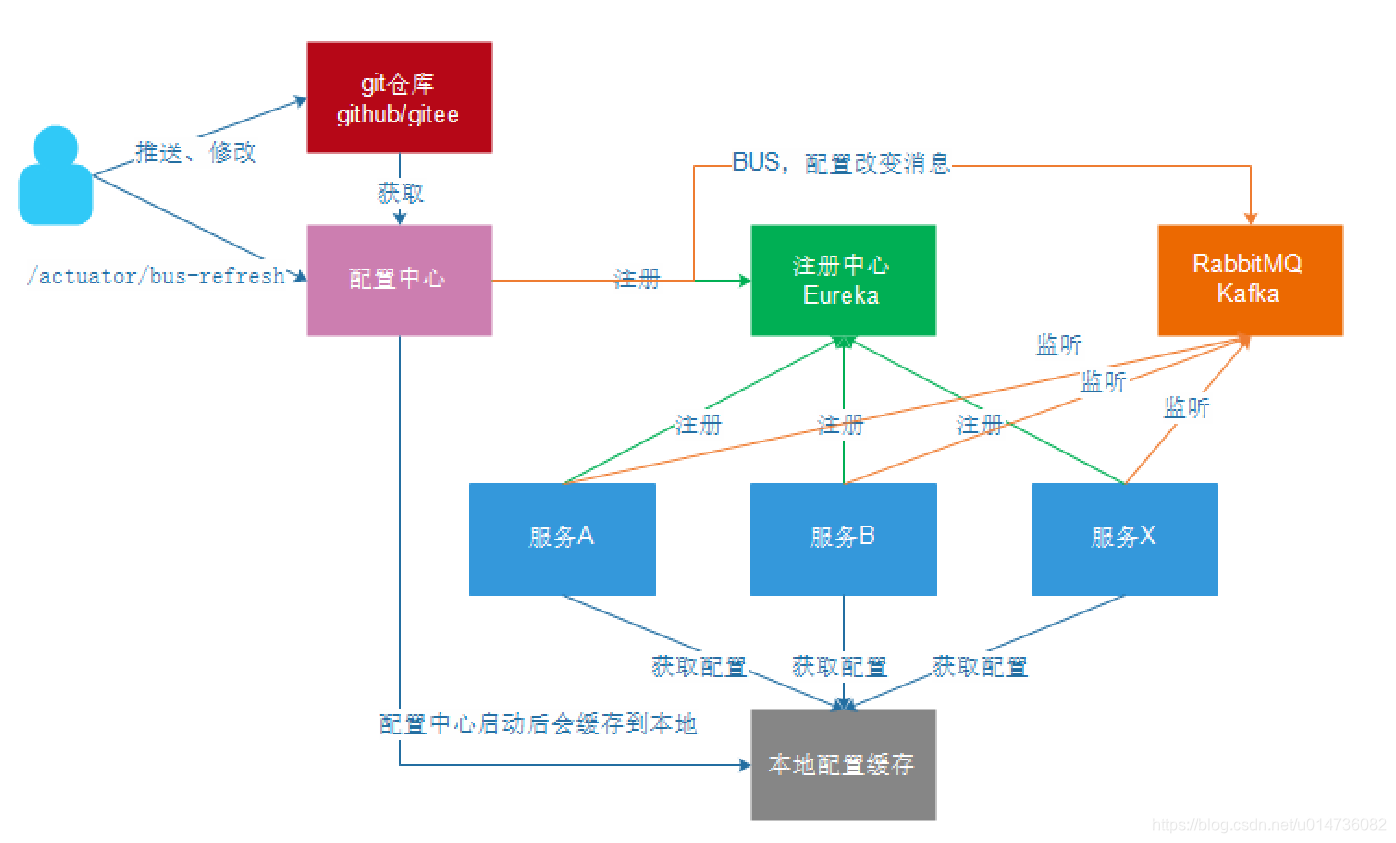
Spring Cloud Bus是用轻量的消息代理将分布式的节点连接起来,可以用于广播配置文件的更改或者服务的监控管 理。也就是消息总线可以为微服务做监控,也可以实现应用程序之间相互通信。 Spring Cloud Bus可选的消息代理 有RabbitMQ和Kafka。
使用了Bus之后的架构:
3.改造配置中心
1.在 config-server 项目的pom.xml文件中加入Spring Cloud Bus相关依赖
<dependency>
            <groupId>org.springframework.cloud</groupId>
            <artifactId>spring-cloud-bus</artifactId>
        </dependency>
        <dependency>
            <groupId>org.springframework.cloud</groupId>
            <artifactId>spring-cloud-stream-binder-rabbit</artifactId>
        </dependency>
2.在 config-server 项目修改application.yml文件如下:
server:
  port: 12000
spring:
  application:
    name: config-server
  cloud:
    config:
      server:
        git:
          uri: https://gitee.com/goheima/heima-config.git
  # 配置rabbitmq信息;如果是都与默认值一致则不需要配置
  rabbitmq:
    host: localhost
    port: 5672
    username: guest
    password: guest
eureka:
  client:
    service-url:
      defaultZone: http://127.0.0.1:10086/eureka
management:
  endpoints:
    web:
      exposure:
        # 暴露触发消息总线的地址
        include: bus-refresh
4.改造用户服务
1.在用户微服务 user-service 项目的pom.xml中加入Spring Cloud Bus相关依赖
<dependency>
                <groupId>org.springframework.cloud</groupId>
                <artifactId>spring-cloud-bus</artifactId>
            </dependency>
            <dependency>
                <groupId>org.springframework.cloud</groupId>
                <artifactId>spring-cloud-stream-binder-rabbit</artifactId>
            </dependency>
            <dependency>
                <groupId>org.springframework.boot</groupId>
                <artifactId>spring-boot-starter-actuator</artifactId>
            </dependency>
2.修改 user-service 项目的bootstrap.yml如下:
spring:
  cloud:
    config:
      # 要与仓库中的配置文件的application保持一致
      name: user
      # 要与仓库中的配置文件的profile保持一致
      profile: dev
      # 要与仓库中的配置文件所属的版本(分支)一样
      label: master
      discovery:
        # 使用配置中心
        enabled: true
        # 配置中心服务名
        service-id: config-server
  # 配置rabbitmq信息;如果是都与默认值一致则不需要配置
  rabbitmq:
    host: localhost
    port: 5672
    username: guest
    password: guest

eureka:
  client:
    service-url:
      defaultZone: http://127.0.0.1:10086/eureka
3.改造用户微服务 user-service 项目的UserController
package com.piziwang.user.controller;
import com.piziwang.user.pojo.User;
import com.piziwang.user.service.UserService;
import org.springframework.beans.factory.annotation.Autowired;
import org.springframework.beans.factory.annotation.Value;
import org.springframework.cloud.context.config.annotation.RefreshScope;
import org.springframework.web.bind.annotation.GetMapping;
import org.springframework.web.bind.annotation.PathVariable;
import org.springframework.web.bind.annotation.RequestMapping;
import org.springframework.web.bind.annotation.RestController;

@RestController
@RequestMapping("/user")
@RefreshScope //刷新配置
public class UserController {

    @Autowired
    private UserService userService;

    @Value("${test.name}")
    private String name;

    @GetMapping("/{id}")
    public User queryById(@PathVariable Long id) {
        /*try {
            Thread.sleep(2000);
        } catch (InterruptedException e) {
            e.printStackTrace();
        }*/
        System.out.println("配置文件中的test.name为:" + name);
        return userService.queryById(id);
    }
}
5.测试
前面已经完成了配置中心微服务和用户微服务的改造,下面来测试一下,当我们修改了Git仓库中的配置文件,用户 微服务是否能够在不重启的情况下自动更新配置信息。
测试步骤:
第一步:依次启动注册中心 eureka-server 、配置中心 config-server 、用户服务 user-service
第二步:访问用户微服务http://localhost:9091/user/8;查看IDEA控制台输出结果
第三步:修改Git仓库中配置文件 user-dev.yml 的 test.name 内容
第四步:使用Postman或者RESTClient工具发送POST方式请求访问地址http://127.0.0.1:12000/actuator/bus-refre sh
第五步:访问用户微服务系统控制台查看输出结果
说明:
1、Postman或者RESTClient是一个可以模拟浏览器发送各种请求(POST、GET、PUT、DELETE等)的工具
2、请求地址http://127.0.0.1:12000/actuator/bus-refresh中 /actuator是固定的,/bus-refresh对应的是配置 中心config-server中的application.yml文件的配置项include的内容 3、请求http://127.0.0.1:12000/actuator/bus-refresh地址的作用是访问配置中心的消息总线服务,消息总线 服务接收到请求后会向消息队列中发送消息,各个微服务会监听消息队列。当微服务接收到队列中的消息后, 会重新从配置中心获取新的配置信息。
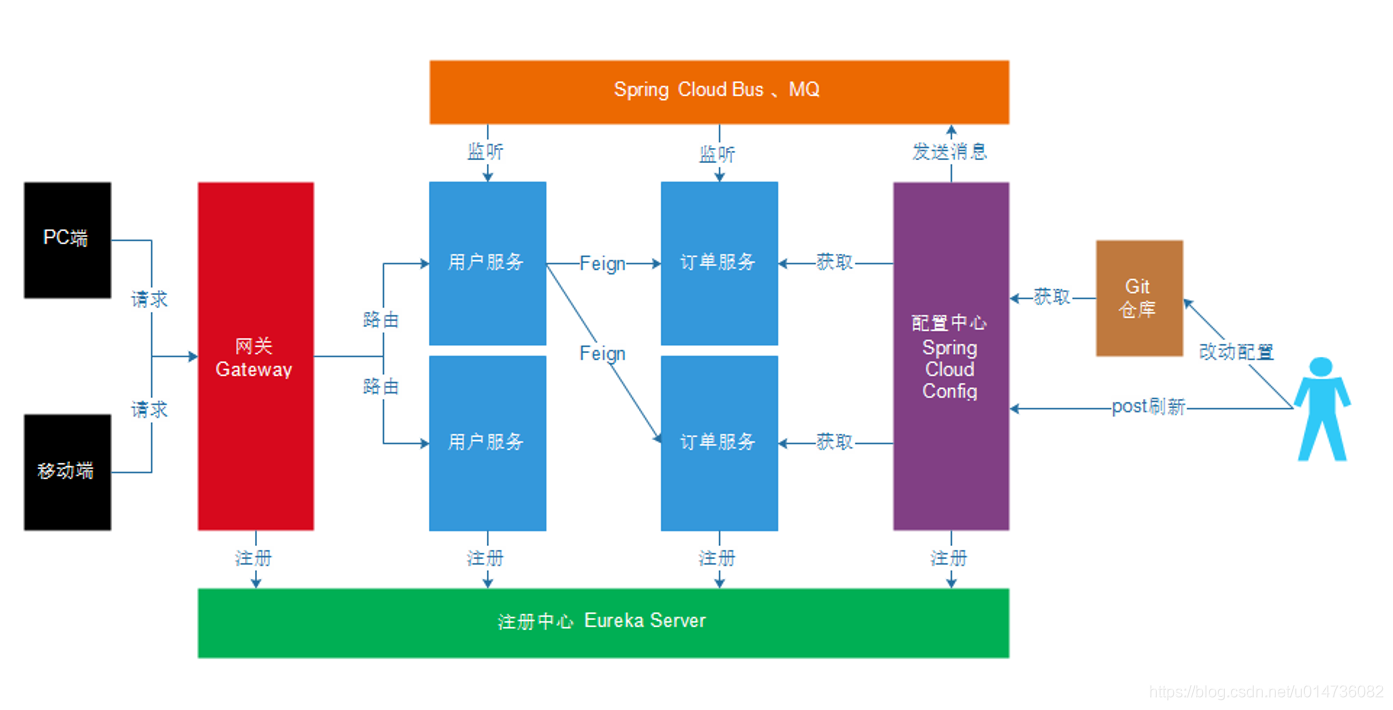
6. Spring Cloud 体系技术综合应用概览
中心config-server中的application.yml文件的配置项include的内容 3、请求http://127.0.0.1:12000/actuator/bus-refresh地址的作用是访问配置中心的消息总线服务,消息总线 服务接收到请求后会向消息队列中发送消息,各个微服务会监听消息队列。当微服务接收到队列中的消息后, 会重新从配置中心获取新的配置信息。
6. Spring Cloud 体系技术综合应用概览


 6485
6485

 被折叠的 条评论
为什么被折叠?
被折叠的 条评论
为什么被折叠?
 到【灌水乐园】发言


