


注:本文为 “Windows 10/11 家庭版中启用 Hyper-V ” 相关合辑。
英文引文,机翻未校。
中文引文,略作重排
如有内容异常,请看原文。
Windows 10/11 home 启用 Hyper-V
一、Hyper-V 基础介绍
-
Hyper-V is a virtualization technology from Microsoft that allows you to create and manage virtual machines on your Windows computer. It is a hypervisor-based technology enabling users to run multiple operating systems simultaneously on a single physical machine, offering robust virtualization capabilities for development, testing, and deployment of applications in isolated environments.
Hyper-V 是微软推出的虚拟化技术,可在 Windows 电脑上创建和管理虚拟机。它基于虚拟机监视器,支持在单台物理机上同时运行多个操作系统,为应用程序的开发、测试和隔离部署提供强大的虚拟化能力。 -
Hyper-V lets you create and manage virtual machines, which is super handy if you’re into testing software or running different operating systems without the need for extra hardware.
Hyper-V 能帮助用户创建和管理虚拟机,无需额外硬件即可测试软件或运行不同操作系统,实用性极强。
二、Hyper-V 的版本支持情况
-
Hyper-V is available by default on Windows 10 / 11 Pro, Enterprise, Education editions.
默认情况下,Hyper-V 支持 Windows 10 / 11 专业版、企业版、教育版。 -
Hyper-V is not officially available on Windows 10 Home or Windows 11 Home editions due to licensing and feature segmentation, but it can be enabled with workarounds (e.g., scripts, command-line modifications).
由于许可和功能划分限制,Windows 10 / 11 家庭版官方不支持 Hyper-V,但可通过变通方法(如脚本、命令行修改)启用。
三、启用 Hyper-V 的系统要求
1. 硬件要求
-
Processor: 64-bit CPU with Second Level Address Translation (SLAT) support; Intel VT-x or AMD-V virtualization technology (must be enabled in BIOS/UEFI).
处理器: 支持二级地址转换(SLAT)的 64 位 CPU;需支持 Intel VT-x 或 AMD-V 虚拟化技术(必须在 BIOS/UEFI 中启用)。 -
RAM: Minimum 4 GB (8 GB or more recommended for optimal performance).
内存: 最低 4 GB(建议 8 GB 及以上以获得最佳性能)。 -
Hardware-based Data Execution Prevention (DEP): CPU must support DEP.
硬件级数据执行保护(DEP): CPU 必须支持 DEP 功能。
2. 软件要求
-
Windows Version: Windows 10 Pro/Enterprise/Education; Windows 11 Pro/Enterprise/Education; or Windows 11 Home (v24H2 recommended for workarounds).
Windows 版本: 支持 Windows 10 / 11 专业版/企业版/教育版;Windows 11 家庭版需 v24H2 版本(便于使用变通方法)。 -
Administrator Privileges: Required to modify system settings and run scripts/commands.
管理员权限: 需具备管理员权限以修改系统设置和运行脚本/命令。
四、Hyper-V 启用方法
1. 适用于 Windows 11 Home 的启用方法
方法 1:通过批处理脚本
-
Step 1: Open Notepad
Start by opening Notepad. Press the Windows Key, type “Notepad,” and hit Enter.
打开记事本:按下 Windows 键,输入“记事本”,按回车键。 -
Step 2: Copy and Paste the Script
Copy the following script into Notepad:
复制以下脚本粘贴到记事本:pushd "%~dp0" dir /b %SystemRoot%servicingPackages*Hyper-V*.mum >hyper-v.txt for /f %%i in ('findstr /i . hyper-v.txt 2^>nul') do dism /online /norestart /add-package:"%SystemRoot%servicingPackages%%i" del hyper-v.txt Dism /online /enable-feature /featurename:Microsoft-Hyper-V-All /LimitAccess /ALLThis script enables Hyper-V via the Deployment Imaging Service and Management Tool (DISM).
该脚本通过部署映像服务和管理工具(DISM)启用 Hyper-V。 -
Step 3: Save the Script
Save the file with a.batextension (e.g., “EnableHyperV.bat”) using “Save As” (include quotes to ensure the extension is correct).
以.bat扩展名保存文件(如“EnableHyperV.bat”,需包含引号以确保扩展名正确)。 -
Step 4: Run the Script as Administrator
Navigate to the.batfile, right-click it, and select “Run as administrator” (requires elevated permissions).
右键点击.bat文件,选择“以管理员身份运行”(需提升权限)。 -
Step 5: Restart Your Computer
Reboot to apply changes and enable Hyper-V.
重启电脑以应用更改并启用 Hyper-V。
方法 2:通过 PowerShell 和 DISM 命令
-
Step 1: Update Windows 11 Home to v24H2
Open Settings > Windows Update, click “Check for updates,” install available updates, and restart.
将系统更新至 v24H2:打开 设置 > Windows 更新,点击“检查更新”,安装更新并重启。 -
Step 2: Enable Hardware Virtualization in BIOS/UEFI
Restart and enter BIOS/UEFI (press F2, F10, DEL, or ESC during boot), enable “Intel VT-x,” “AMD-V,” or “SVM,” save changes, and exit.
在 BIOS/UEFI 中启用虚拟化:重启电脑并进入 BIOS/UEFI(启动时按 F2、F10、DEL 或 ESC),启用“Intel VT-x”“AMD-V”或“SVM”,保存并退出。 -
Step 3: Enable Features via PowerShell
Open Windows Terminal as Administrator, run:
以管理员身份打开 Windows 终端,运行:dism /online /enable-feature /featurename:Microsoft-Hyper-V-All /LimitAccess /EL /NoRestartOr:
或:Enable-WindowsOptionalFeature -Online -FeatureName Microsoft-Hyper-V -All -
Step 4: Enable Hypervisor via Boot Configuration
Open Command Prompt as Administrator, run:
以管理员身份打开 命令提示符,运行:bcdedit /set hypervisorlaunchtype autoRestart the computer.
重启电脑。
2. 适用于官方支持版本(如 Windows 11 Pro)的启用方法
- Via Windows Features: Press
Windows + R, typeoptionalfeatures, check “Hyper-V,” click OK, and restart.
通过 Windows 功能:按下Windows + R,输入optionalfeatures,勾选“Hyper-V”,点击确定并重启。
五、常见问题及解决方法
1. Hyper-V 未在 Windows 功能中显示
-
Check Windows Edition: Ensure you’re using Pro/Enterprise/Education editions (Home editions don’t natively support it).
检查版本:确认使用专业版/企业版/教育版(家庭版不原生支持)。 -
Enable via PowerShell: Run as Administrator:
通过 PowerShell 启用:以管理员身份运行:dism /Online /Enable-Feature /All /FeatureName:Microsoft-Hyper-VRestart after completion.
完成后重启。 -
Check BIOS Settings: Ensure virtualization (Intel VT-x/AMD-V) is enabled in BIOS/UEFI.
检查 BIOS 设置:确保在 BIOS/UEFI 中启用了虚拟化功能。 -
Repair System Files: Use System File Checker:
修复系统文件:使用系统文件检查器:sfc /scannowOr DISM:
或 DISM:DISM /Online /Cleanup-Image /RestoreHealth
2. Hyper-V 启用后无法运行
-
Verify SLAT Support: Ensure CPU supports Second Level Address Translation.
确认 SLAT 支持:检查 CPU 是否支持二级地址转换。 -
Check Hypervisor Launch Type: Run in Command Prompt (Admin):
检查虚拟机监视器启动类型:在命令提示符(管理员)中运行:bcdedit /set hypervisorlaunchtype autoRestart the computer.
重启电脑。
六、Windows 11 Home 的替代虚拟化方案
-
VirtualBox: A free, powerful tool from Oracle. Download from the official site, install, and create VMs without Hyper-V.
VirtualBox: 甲骨文推出的免费虚拟化工具,可从官网下载安装,无需 Hyper-V 即可创建虚拟机。 -
VMware Workstation Player: A free version for personal use. Download from VMware’s site to run multiple OS environments.
VMware Workstation Player: 免费个人版虚拟化工具,可从官网下载,支持运行多操作系统。 -
Windows Subsystem for Linux (WSL 2): Enables Linux distributions with virtualization capabilities. Enable via PowerShell:
WSL 2: 支持运行具备虚拟化功能的 Linux 发行版,通过 PowerShell 启用:wsl --install
七、升级系统以原生支持 Hyper-V
- Upgrade to Windows 11 Pro:
Open Settings > System > Activation, under “Upgrade your edition of Windows,” click “Open Store,” purchase the upgrade, and follow prompts. After upgrading, enable Hyper-V via Control Panel > Programs > Turn Windows features on or off (check “Hyper-V” and restart).
升级至 Windows 11 专业版:
打开 设置 > 系统 > 激活,在“升级 Windows 版本”中点击“打开商店”,购买升级并按提示操作。升级后,通过 控制面板 > 程序 > 打开或关闭 Windows 功能 勾选“Hyper-V”并重启即可启用。
Windows 10 家庭版中无法找到 Hyper-V 的解决方法
落花雨12138 2022-08-30 13:20:25 发布
在安装虚拟机 VMware Workstation Pro 16 时,发现无法找到 Hyper-V 功能选项。
Windows 10 家庭版默认隐藏了 Hyper-V 功能,以下是开启 Hyper-V 的方法。
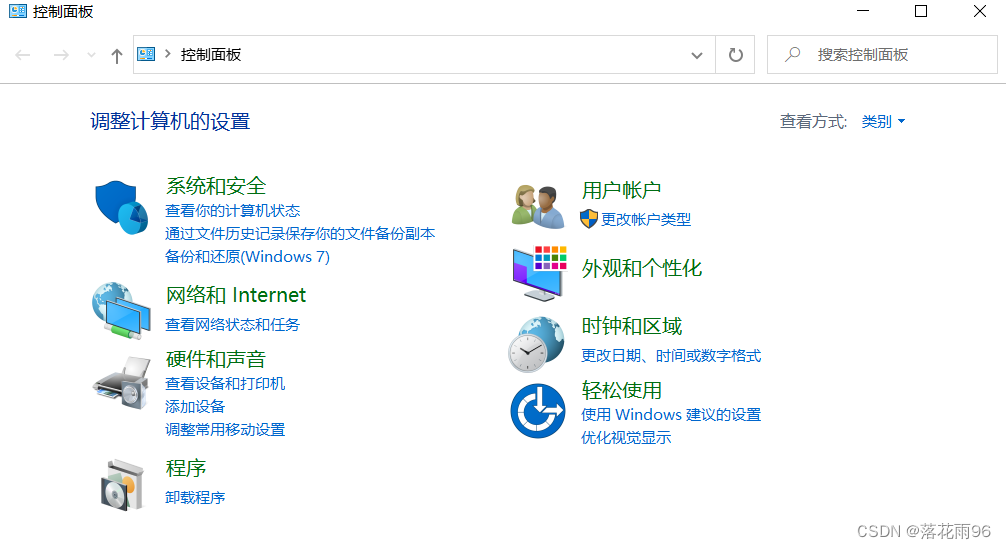
一、通过控制面板开启 Hyper-V
-
打开控制面板,选择“程序”。
-
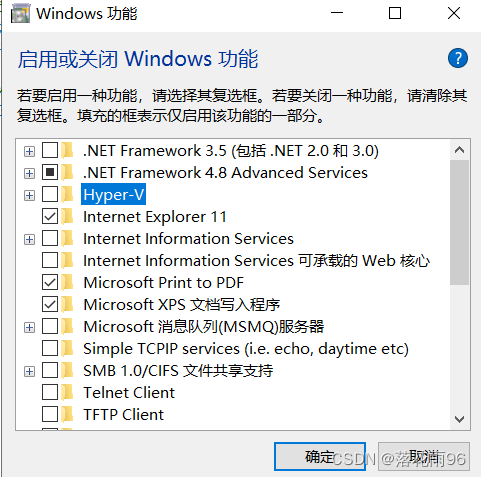
选择“启用或关闭 Windows 功能”。

-
在功能列表中找到 Hyper-V,点击“关闭”或“打开”。
二、若未找到 Hyper-V 的解决办法
-
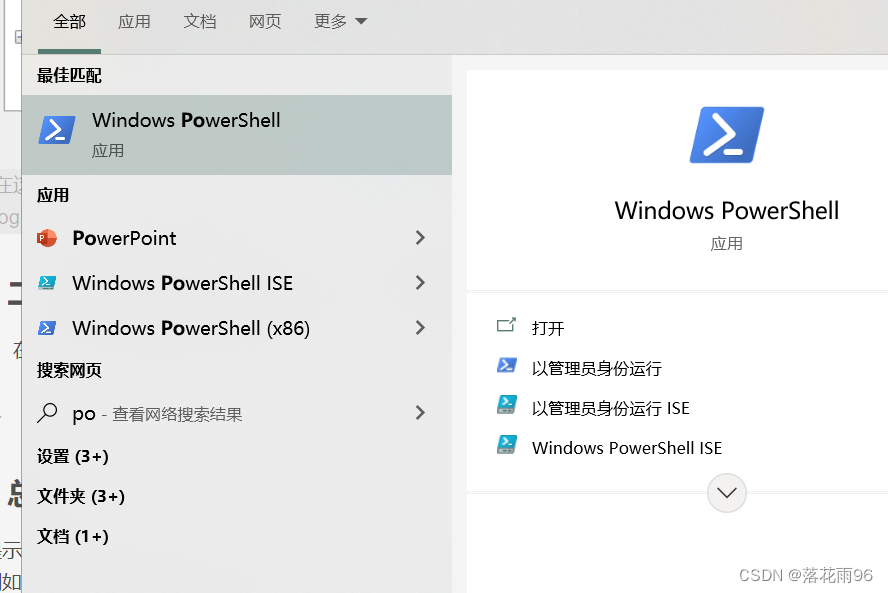
在 Windows 10 搜索框中,搜索“PowerShell”。
-
打开 Windows PowerShell,输入以下命令:
systeminfo命令执行后,会显示处理器相关信息,在信息末尾有“Hyper-V 要求”,若四个条件均为“是”,则表示系统支持 Hyper-V 功能。
-
在桌面新建一个记事本文件,将其后缀名改为
.cmd或.bat,复制以下代码:pushd "%~dp0" dir /b %SystemRoot%\servicing\Packages\*Hyper-V*.mum > hyper-v.txt for /f %%i in ('findstr /i . hyper-v.txt 2^>nul') do dism /online /norestart /add-package:"%SystemRoot%\servicing\Packages\%%i" del hyper-v.txt Dism /online /enable-feature /featurename:Microsoft-Hyper-V-All /LimitAccess /ALL -
右键单击该文件,选择“以管理员身份运行”。
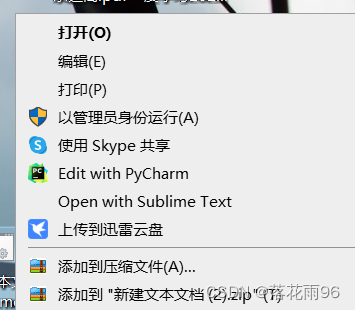
代码执行完成后,重启计算机即可。
via:
-
How to Enable Hyper-V in Windows 11 Home: A Step-by-Step Guide - October 3, 2024 by Matthew Burleigh
https://www.solveyourtech.com/how-to-enable-hyper-v-in-windows-11-home-a-step-by-step-guide/ -
How to Enable and Install Hyper-V in Windows 11 Home [v24H2] - July 18, 2025 by UMATechnology
https://umatechnology.org/how-to-enable-and-install-hyper-v-in-windows-11-home-v24h2-2/ -
How to Fix Hyper-V Not Showing in Windows 11, 10 - By GeekChamp Team Published May 17, 2025
https://geekchamp.com/how-to-fix-hyper-v-not-showing-in-windows-11-10/ -
Win10 家庭版 找不到 Hyper-V 的解决办法,亲测可行_没有 hyper-v-优快云 博客
https://blog.youkuaiyun.com/qq_44368508/article/details/126601570 -
Windows 系统没有 Hyper-v 的解决方法_启用或关闭 windows 功能没有 hyper-优快云 博客
https://blog.youkuaiyun.com/qq_73735007/article/details/139504235


 3152
3152

 被折叠的 条评论
为什么被折叠?
被折叠的 条评论
为什么被折叠?
 到【灌水乐园】发言


