


安装pybind11
为了使用C++ 编写python的扩展程序,参见[1],这里要介绍的是使用pybind11[3], pybind11使用比较简单,文档也比较详细。
本人的开发/测试环境为:
- Ubuntu 18.04
- pybind11
- Anaconda3, with python 3.6
- cmake
pybind11下载:https://github.com/pybind/pybind11
下载好后,进入该目录进行安装:
mkdir build
cd build
cmake ..
make check -j 4
最后目录里的文件如下:

cpp+python
简单的例子:example.cpp
#include <pybind11/pybind11.h>

int add(int i, int j) {
    return i + j;
}

PYBIND11_MODULE(example, m) {
    m.doc() = "pybind11 example plugin"; // optional module docstring

    m.def("add", &add, "A function which adds two numbers");
}
编译:
c++ -O3 -Wall -shared -std=c++11 -fPIC `python3 -m pybind11 --includes` example.cpp -o example`python3-config --extension-suffix`会生成一个.so文件 example.cpython-36m-x86_64-linux-gnu.so
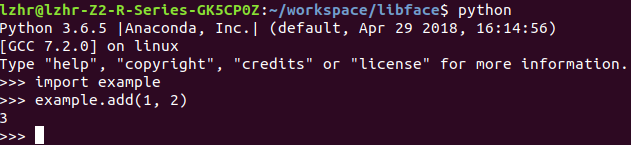
添加python环境变量:当前.so文件所在路径,这样python就能使用这个模块了
export PYTHONPATH=$PYTHONPATH:/home/lzhr/workspace/libface运行:
接下来,将其改成参数支持numpy,可参考官网文档,pybind11—python numpy与C++数据传递:
#include<iostream>
#include<pybind11/pybind11.h>
#include<pybind11/numpy.h>

namespace py = pybind11;

/*
1d矩阵相加
*/
py::array_t<double> add_arrays_1d(py::array_t<double>& input1, py::array_t<double>& input2) {

    // 获取input1, input2的信息
    py::buffer_info buf1 = input1.request();
    py::buffer_info buf2 = input2.request();

    if (buf1.ndim !=1 || buf2.ndim !=1)
    {
        throw std::runtime_error("Number of dimensions must be one");
    }

    if (buf1.size !=buf2.size)
    {
        throw std::runtime_error("Input shape must match");
    }

    //申请空间
    auto result = py::array_t<double>(buf1.size);
    py::buffer_info buf3 = result.request();

    //获取numpy.ndarray 数据指针
    double* ptr1 = (double*)buf1.ptr;
    double* ptr2 = (double*)buf2.ptr;
    double* ptr3 = (double*)buf3.ptr;

    //指针访问numpy.ndarray
    for (int i = 0; i < buf1.shape[0]; i++)
    {
        ptr3[i] = ptr1[i] + ptr2[i];
    }

    return result;

}


PYBIND11_MODULE(example, m) {
    m.doc() = "Simple demo using numpy!";
    m.def("add_arrays_1d", &add_arrays_1d);
}
执行同样的编译命令,然后python测试:

cmake编译pybind11
如果是用CMake编译的话,pybind11文件夹拷贝到/home/lzhr/workspace/libface/pydemo目录下,和example.cpp代码同级。
CMakeLists.txt如下:
cmake_minimum_required(VERSION 2.8.12)
project(example)

add_subdirectory(pybind11)
pybind11_add_module(example example.cpp)
执行命令:
cmake .
make
编译成功后,添加下PYTHONPATH,就可以调用了

【参考】
[1] 如何实现 C/C++ 与 Python 的通信?
https://www.zhihu.com/question/23003213
[2] python 调用c++处理数组和图片
https://blog.youkuaiyun.com/koibiki/article/details/89478458
[3] pybind11官网介绍
https://pybind11.readthedocs.io/en/stable/basics.html
[4] pybind11—opencv图像处理(numpy数据交换)
https://www.jianshu.com/p/be16847b0b74
[5] pybind11—目标跟踪demo(深度学习人脸检测跟踪)


 390
390

 被折叠的 条评论
为什么被折叠?
被折叠的 条评论
为什么被折叠?
 到【灌水乐园】发言


