


【写在前面】
首先,抛开字幕本身的格式不说。
一般的字幕分三种,内封字幕、内嵌字幕和外挂字幕。
而本篇所讲的是外挂字幕,主要内容有:
1、FFmpeg过滤图基础。
2、使用FFmpeg字幕过滤器添加字幕。
【正文开始】
-
前面提到,字幕有三种形式:
内封字幕:字幕封装在容器中,成为字幕流。
内嵌字幕:字幕嵌入视频,即成为视频图像的一部分。
外挂字幕:字幕以文件形式提供,通常是srt,ssa,ass格式。
其中外挂字幕最为灵活,并且不会对视频造成影响。
实际上,在FFmpeg中添加字幕相当容易,它使用视频叠加( overlay )的技术来实现。
在其内部,会使用 libass 将字幕渲染成位图 ( Bitmap ),然后将位图覆盖在视频上。
而对于我们来说,无需关心内部细节,FFmpeg提供了非常简单方式进行叠加字幕,当然,还有一些坑。
- 首先,先介绍一下 Filter、Filter Chain、Filter Graph :
Filter 是过滤器、滤镜、滤波器,而在FFmpeg中,它们通常代表了对应的一些算法。
简单来说,使用 Filter 就是使用一些算法将数据进行处理的过程。
多个 Filer 进行链接形成过滤链( Filter Chain ),而多个过滤链组合形成过滤图。
FFmpeg有很多 Filter,这里我们只需使用字幕过滤器( Subtitle Filter ) ,并且只有一条过滤链。
- 使用 Filter 之前,我们先要创建它:
bool SubtitleDecoder::init_subtitle_filter(AVFilterContext * &buffersrcContext, AVFilterContext * &buffersinkContext,
                                           QString args, QString filterDesc)
{
    const AVFilter *buffersrc = avfilter_get_by_name("buffer");
    const AVFilter *buffersink = avfilter_get_by_name("buffersink");
    AVFilterInOut *output = avfilter_inout_alloc();
    AVFilterInOut *input = avfilter_inout_alloc();
    AVFilterGraph *filterGraph = avfilter_graph_alloc();

    auto release = [&output, &input] {
        avfilter_inout_free(&output);
        avfilter_inout_free(&input);
    };

    if (!output || !input || !filterGraph) {
        release();
        return false;
    }

    //创建输入过滤器,需要arg
    if (avfilter_graph_create_filter(&buffersrcContext, buffersrc, "in",
                                     args.toStdString().c_str(), nullptr, filterGraph) < 0) {
        qDebug() << "Has Error: line =" << __LINE__;
        release();
        return false;
    }

    if (avfilter_graph_create_filter(&buffersinkContext, buffersink, "out",
                                     nullptr, nullptr, filterGraph) < 0) {
        qDebug() << "Has Error: line =" << __LINE__;
        release();
        return false;
    }

    output->name = av_strdup("in");
    output->next = nullptr;
    output->pad_idx = 0;
    output->filter_ctx = buffersrcContext;

    input->name = av_strdup("out");
    input->next = nullptr;
    input->pad_idx = 0;
    input->filter_ctx = buffersinkContext;

    if (avfilter_graph_parse_ptr(filterGraph, filterDesc.toStdString().c_str(),
                                 &input, &output, nullptr) < 0) {
        qDebug() << "Has Error: line =" << __LINE__;
        release();
        return false;
    }

    if (avfilter_graph_config(filterGraph, nullptr) < 0) {
        qDebug() << "Has Error: line =" << __LINE__;
        release();
        return false;
    }

    release();
    return true;
}
1、使用 avfilter_get_by_name() 获取一个Filter。
buffer是特殊的视频过滤器,称为缓冲源,它没有输入,对应的音频过滤器 abuffer,创建缓冲源需要[ arg ]。
buffersink 是特殊的视频过滤器,称为缓存槽,它没有输出,对应的音频过滤器 abuffersink 。
大概这样:[ buffer ] + |--------Filter Graph--------| + [ buffersink ]
2、使用 avfilter_inout_alloc() 分配两个AVFilterInOut,因为这里是简单Filter,所以只使用两个( in,out )。
3、使用 avfilter_graph_alloc() 分配一个过滤图。
4、使用 avfilter_graph_create_filter() 创建Filter实例( 实例是 AVFilterContext ),并将其添加到过滤图中,其中,缓冲源的 args 为:
    QString args = QString::asprintf("video_size=%dx%d:pix_fmt=%d:time_base=%d/%d:pixel_aspect=%d/%d",
                                     m_width, m_height, codecContext->pix_fmt, time_base.num, time_base.den,
                                     codecContext->sample_aspect_ratio.num, codecContext->sample_aspect_ratio.den);
5、配置过滤链的输入输出,为了帮助理解,我花了张图:
|--------------Filter Graph--------------|
out in
[data frame] ==> (input)|buffersrc| => |Filter| => (output)|buffersink|
6、使用 avfilter_graph_parse_ptr() 将字符串描述的过滤图添加到过滤图中。
提示:本篇所用的字幕过滤器对应的 ffmpeg 命令为:
./ffmpeg -i test.mp4 -vf "subtitles=filename='D\:\\test.ass':original_size=900x600" out.mp4
其中,"subtitles=filename='D\:\\test.ass':original_size=900x600" 正是字符串描述的过滤图,当然,这里很简单。
字幕相关的过滤器有两个:subtitles 和 ass,但 ass 只支持 ANSI 和 UTF-8。
注意:路径格式是D\:\\test.ass,: 前面有一个 \ ,因为 : 有其他用途,所以需要转义。
7、最后,使用 avfilter_graph_config() 检查有效性并配置过滤图中的所有链接和格式。
至此,Filter 就创建完成了。
- 现在我们要使用 Filter,代码看起来略多,实际上很简单:
    while (m_runnable && av_read_frame(formatContext, packet) >= 0) {
        if (packet->stream_index == videoIndex) {
            //发送给解码器
            int ret = avcodec_send_packet(codecContext, packet);

            while (ret >= 0) {
                //从解码器接收解码后的帧
                ret = avcodec_receive_frame(codecContext, frame);

                if (ret == AVERROR(EAGAIN) || ret == AVERROR_EOF) break;
                else if (ret < 0) goto Run_End;

                //如果字幕成功打开,则输出使用subtitle filter过滤后的图像
                if (subtitleOpened) {
                    if (av_buffersrc_add_frame_flags(buffersrcContext, frame, AV_BUFFERSRC_FLAG_KEEP_REF) < 0)
                        break;

                    while (true) {
                        ret = av_buffersink_get_frame(buffersinkContext, filter_frame);

                        if (ret == AVERROR(EAGAIN) || ret == AVERROR_EOF) break;
                        else if (ret < 0) goto Run_End;

                        int dst_linesize[4];
                        uint8_t *dst_data[4];
                        av_image_alloc(dst_data, dst_linesize, m_width, m_height, AV_PIX_FMT_RGB24, 1);
                        SwsContext *swsContext = sws_getContext(filter_frame->width, filter_frame->height,
                                                                AVPixelFormat(filter_frame->format), m_width,
                                                                m_height, AV_PIX_FMT_RGB24, SWS_BILINEAR, nullptr, nullptr, nullptr);
                        sws_scale(swsContext, filter_frame->data, filter_frame->linesize, 0, filter_frame->height, dst_data, dst_linesize);
                        sws_freeContext(swsContext);
                        QImage image = QImage(dst_data[0], m_width, m_height, QImage::Format_RGB888).copy();
                        av_freep(&dst_data[0]);

                        m_frameQueue.enqueue(image);
                        av_frame_unref(filter_frame);
                    }
                } else {
                    //未找到字幕,直接输出图像
                    if (ret == AVERROR(EAGAIN) || ret == AVERROR_EOF) break;
                    else if (ret < 0) goto Run_End;

                    int dst_linesize[4];
                    uint8_t *dst_data[4];
                    av_image_alloc(dst_data, dst_linesize, m_width, m_height, AV_PIX_FMT_RGB24, 1);
                    SwsContext *swsContext = sws_getContext(m_width, m_height, codecContext->pix_fmt, m_width, m_height, AV_PIX_FMT_RGB24,
                                                            SWS_BILINEAR, nullptr, nullptr, nullptr);
                    sws_scale(swsContext, frame->data, frame->linesize, 0, frame->height, dst_data, dst_linesize);
                    sws_freeContext(swsContext);
                    QImage image = QImage(dst_data[0], m_width, m_height, QImage::Format_RGB888).copy();
                    av_freep(&dst_data[0]);

                    m_frameQueue.enqueue(image);

                }
                av_frame_unref(frame);
            }
        }

        av_packet_unref(packet);
    }
1、我们从解码器获得一帧 AVFrame 后,使用 av_buffersrc_add_frame_flags() 添加到缓冲源中。
2、使用 av_buffersink_get_frame() 从缓存槽获取一帧过滤过的数据,而我们的过滤就是添加字幕,因此,这一帧就是添加了数据的图像。
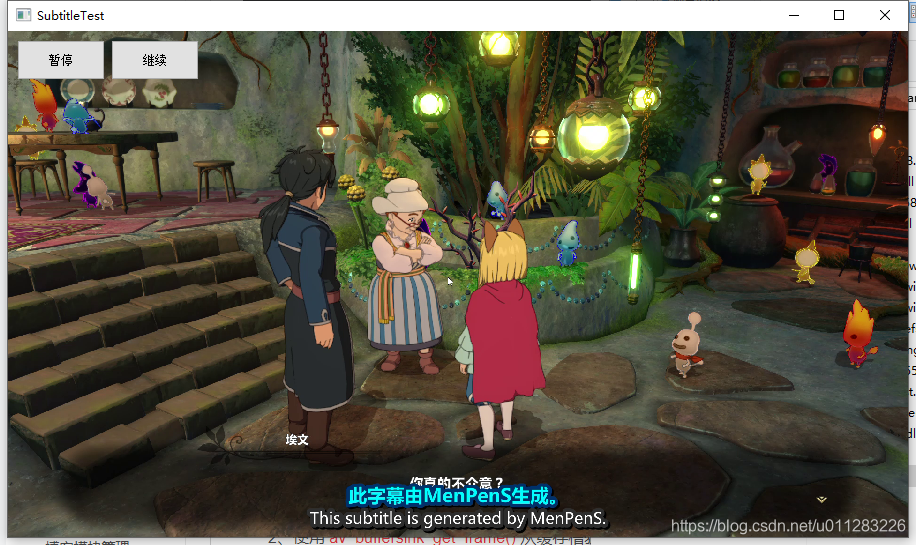
至此,我们就完成了使用字幕过滤器给视频添加字幕的工作。
效果图如下:
【结语】
呼~终于写完了。。本篇文章不仅讲了 FFmpeg 的 Filter Graph 的基本使用方法,还介绍了字幕过滤器的使用方法( 命令和API )。
然后我要吐槽 FFmpeg Filter 资料是真的少,官方的例子也是被鞭尸了一遍又一遍(全是copy官方例子,还没有多少讲解)。。而且字幕相关的基本没有(当然国外也几乎没有),所以写起来也是异常艰难。
最后,附上项目地址:
Github的:https://github.com/mengps/FFmpeg-Learn 。
优快云的:FFmpeg过滤图,以及如何使用字幕过滤器_ffmpeg过滤字幕-图像处理文档类资源-优快云下载 包含一个ass和mp4文件便于测试。


 2674
2674

 被折叠的 条评论
为什么被折叠?
被折叠的 条评论
为什么被折叠?
 到【灌水乐园】发言


