


 本文详细介绍了React Native中FlatList和SectionList的使用方法及属性,包括数据绑定、渲染方式等,并提供了具体示例。
在我的上一篇博客中用ListView实现了列表数据的渲染,但是ListView的使用步骤较为繁琐,而且ReactNative官方文档提倡使用FlatList与SectionList来替代ListView。其中FlatList用来渲染一维的数据,SectionList用于渲染二维数据。
1、FlatList
常用的属性:
- data:定义flatlist的数据来源
- keyExtractor:定义数组元素的key值,react根据key来区分同类元素的不同个体 ,以便在刷新时能够确定其变化的位置,减少重新渲染的开销。例如定义keyExtactor函数返回index为key:
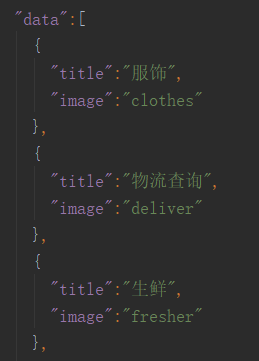
keyExtractor = {(item, index) => index.toString()}若不指定此函数,则默认抽取数据中的key值。则数据需要定义如下:
"data":[
    {
      "key":1,                    //在数据中定义key值
      "title":"服饰",
      "image":"clothes"
    },
否则两者都不指定,程序会警告。
- renderItem:定义每个元素组件的渲染方式,默认传入参数rowData。例如要访问上面数据中的的"title"可以通过rowData.item.title访问到。
- ItemSeparatorComponent:定义每个元素之间分割组件
- ListHeaderComponent:定义头部组件
- ListFooterComponent:定义底部组件
- ListEmptyComponent:data为空时显示的组件
- columnWrapperStyle:定义每个组件栏的包裹样式,不支持单行组件
- numColumns:number,定义每行显示的元素个数
- refreshControl:定义头部刷新组件,例如:
refreshControl={ //下拉刷新组件 <RefreshControl refreshing={this.state.refreshing} //通过bool值refreshing控制是否刷新 onRefresh={this._onRefresh.bind(this)} //刷新时需要执行的函数 /> } - onEndReached:在列表滚动到底部一定距离时调用这个函数,一般在此定义滚动到底部时加载新的数据。
- onEndReachedThreshold:决定当距离内容最底部还有多远时触发
onEndReached回调。注意此参数是一个比值而非像素单位。比如,0.5表示距离内容最底部的距离为当前列表可见长度的一半时触发。
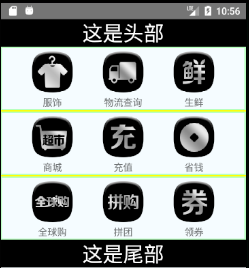
例如:将下面左边的一维数组数据渲染为右边的一个列表
class App extends Component {
  render(){
    return (
      <View style={styles.container}>
        <FlatList
          data={icons}   numColumns={3}                     //数据源 每三个为一栏
          keyExtractor = {(item, index) => index.toString()}//为每条数据赋予键值
          columnWrapperStyle={styles.columnWrapper}         //每一栏的样式
          renderItem={this.renderIcon}                      //定义每条数据的渲染方法
          ListHeaderComponent={this.renderHeader}           //定义头部渲染方法
          ListFooterComponent={this.renderFooter}           //定义底部渲染方法
          ItemSeparatorComponent={this.renderSeparator}     //定义栏之间分割的渲染
        />
      </View>
    )
  }

  //每个图标渲染方法
  renderIcon(rowData){
    return(
      <TouchableOpacity activeOpacity={0.5}>
        <View style={styles.iconItem}>
          <Image style={styles.iconImg} source={{uri:'mipmap/'+rowData.item.image}} />
          <Text style={styles.iconTitle}>{rowData.item.title}</Text>
        </View>
      </TouchableOpacity>
    )
  }
  renderHeader (){
    return <Text style={styles.txt}>这是头部</Text>;
  }
  renderFooter (){
    return <Text style={styles.txt}>这是尾部</Text>;
  }
  renderSeparator (){
    return <View style={{height:2,backgroundColor:'yellow'}}/>;
  }
}
FlatList常用的方法:
- scrollToEnd():跳转到列表底部
- scrollToIndex(viewPosition,index):跳转到指定第几个元素,viewPosition控制跳转到元素的位置,取值范围0~1,0代表顶部,1代表底部,例如跳转到第三个元素的中间位置:
renderHeader (){
  return <Text style={styles.txt} onPress={()=>flatList.scrollToIndex({viewPosition:0.5,index:3})}>这是头部</Text>;
}
2、SectionList
SectionList的使用与FlatList类似,不同的是其可以用来渲染二维数据。
SectionList常用属性基本与FlatList相同,不同的是它的数据传入不是使用data,而是使用sections,并且它还特有的分组头部渲染方法renderSectionHeader用于渲染每个分组的头部。
例如将下面左边的数据渲染为右边


注意:左边的数据中每个数组的key必须为"data",这样才会被正确的识别为分组。
首先在页面内使用SectionList组件,定义数据、头部、分组、每行的渲染方法:
render() {
  return(
    <View style={styles.container}>
      <SectionList sections={carData}                             //传入数据
                   keyExtractor={(item,index)=>index}
                   renderSectionHeader={this.renderCarSection}    //定义分组头部渲染方法
                   renderItem={this.renderCarRow}                 //定义row的渲染方法
                   ListHeaderComponent={this.renderHeader}        //列表头部的渲染方法
      />
    </View>
  )
}
实现上述渲染方法:
renderCarSection(carData){
  return(
    <View style={styles.sectionBar}>
      <Text style={styles.sectionTxt}>{carData.section.title}</Text>
    </View>
  )
}
renderCarRow(carData){
  return(
    <TouchableOpacity activeOpacity={0.5}>
      <View style={styles.carItem}>
        <Image source={{uri:'asset:/cars/'+carData.item.icon}} style={styles.carImg} />
        <Text style={styles.carTitle}>{carData.item.name}</Text>
      </View>
    </TouchableOpacity>
  )
}
renderHeader(){
  return(
    <TouchableOpacity activeOpacity={0.5}>
      <Text style={styles.header}>头部组件</Text>
    </TouchableOpacity>
  )
}
SectionList常用方法:
- scrollToLocation:类似于FlatList的scrollToIndex,将视图滚动到指定分组下的指定行的指定位置,例如要跳转到第三组的第二个元素的中间位置:
this.sectionList.scrollToLocation({
  sectionIndex: 3,             //分组索引
  itemIndex: 2,                //元素索引
  viewPosition: 0.5,           //元素位置
})


 1218
1218

 被折叠的 条评论
为什么被折叠?
被折叠的 条评论
为什么被折叠?
 到【灌水乐园】发言


