


 本文详细介绍了如何在STM32上设置USART窗口通讯,包括波特率设置、硬件准备、使用MDK5编程、上位机使用串口调试助手或自编程接收"Hello Windows!"消息,以及如何通过发送"Stop, STM32"指令停止STM32的发送。同时,文章提供了实验代码下载链接及ST-Link配置步骤。"
113044102,10537127,Unity Reflect:实时同步BIM到3D环境,加速建筑项目,"['android显示3d模型', 'Unity', '建筑设计', 'BIM', '实时3D环境']
本文详细介绍了如何在STM32上设置USART窗口通讯,包括波特率设置、硬件准备、使用MDK5编程、上位机使用串口调试助手或自编程接收"Hello Windows!"消息,以及如何通过发送"Stop, STM32"指令停止STM32的发送。同时,文章提供了实验代码下载链接及ST-Link配置步骤。"
113044102,10537127,Unity Reflect:实时同步BIM到3D环境,加速建筑项目,"['android显示3d模型', 'Unity', '建筑设计', 'BIM', '实时3D环境']
STM32的USART窗口通讯程序
一、准备工作
硬件原理图:

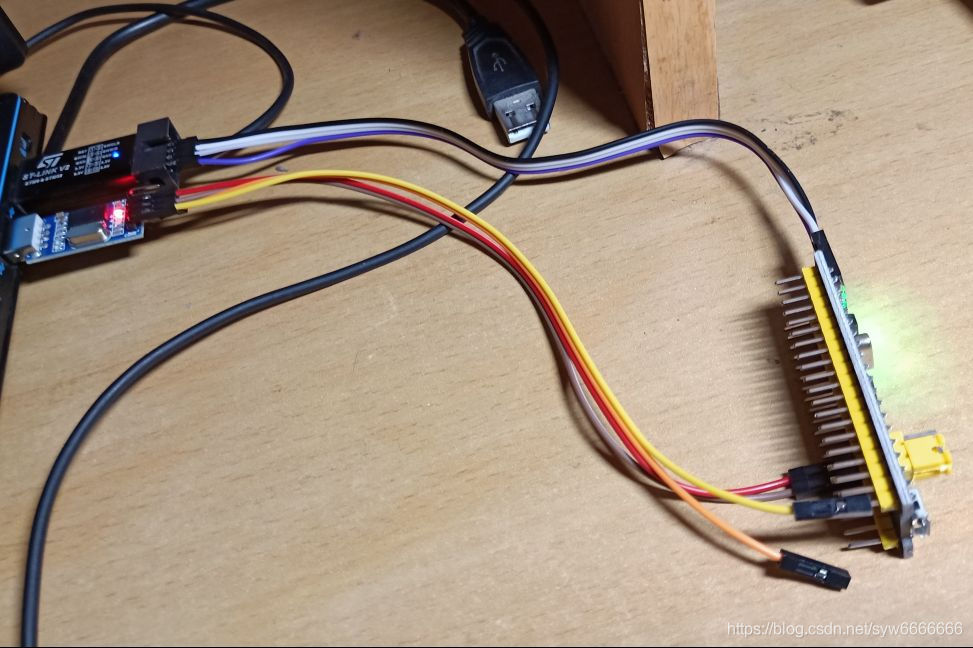
所用器件:核心版、下载线ST–Link、usb转TTL线
所用编程软件:MDK5.33

二、操作目的
-
设置波特率为115200,1位停止位,无校验位。
-
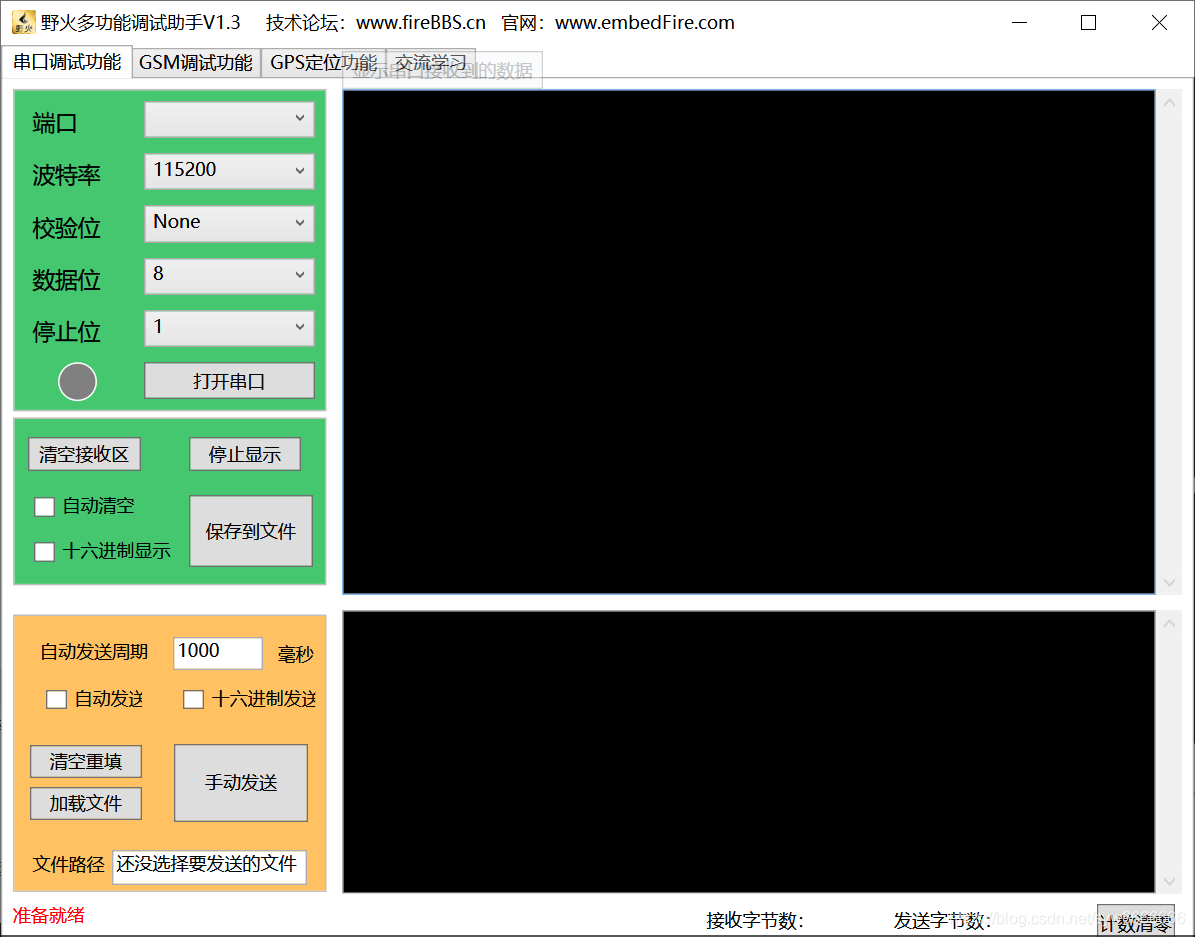
STM32系统给上位机(win10)连续发送“hello windows!”,上位机接收程序可以使用“串口调试助手“,也可自己编程。
-
当上位机给stm32发送“Stop,stm32”后,stm32停止发送。
三、实验操作
1.实验所需代码
#include "led.h"
#include "delay.h"
#include "key.h"
#include "sys.h"
#include "usart.h"
#include <stdlib.h>
int hcr=1;


 int main(void)
 {


  char stop[]={'S','t','o','p',',','s','t','m','3','2'};
 	u16 t;
	u16 len;
	u16 times=0;

	delay_init();	    	 //延时函数初始化
	NVIC_PriorityGroupConfig(NVIC_PriorityGroup_2); //设置NVIC中断分组2:2位抢占优先级,2位响应优先级
	uart_init(115200);	 //串口初始化为115200
 	LED_Init();			     //LED端口初始化
	KEY_Init();          //初始化与按键连接的硬件接口

 	while(hcr)
	{
		if(USART_RX_STA&0x8000)
		{
			len=USART_RX_STA&0x3fff;//得到此次接受到的数据长度
			printf("\r\nhello windows!:\r\n\r\n");
			for(t=0;t<len&&USART_RX_BUF[t]==stop[t];hcr++,t++)
				{if (hcr>=10) {hcr=0;break;}}


			for(t=0;t<len;t++)
			{
				USART_SendData(USART1, USART_RX_BUF[t]);//向串口[1]发送数据

				while(USART_GetFlagStatus(USART1,USART_FLAG_TC)!=SET);//等待发送结束
			}
			printf("\r\n\r\n");//插入换行
			USART_RX_STA=0;
		}

		else
		{
			times++;
			if(times%500==0)
			{
				printf("\r\n嵌入式串口实验\r\n");
				printf("hcr@2219491180qqcom\r\n\r\n");

			}
			if(times%200==0){printf("hello windows!%d\n",hcr);hcr=1;}
			if(times%30==0)LED0=!LED0;//闪烁LED,提示系统正在运行
			delay_ms(10);
		}
	}
 }
附野火所有产品资料下载链接:http://products.embedfire.com
2. 相关软件安装
野火多功能调试助手:
Keil 5:
3.烧录程序
- 首先将电脑与核心板连接起来
- 配置下载环境
- 配置魔术棒,点击Debug,选择ST-Link Debugger
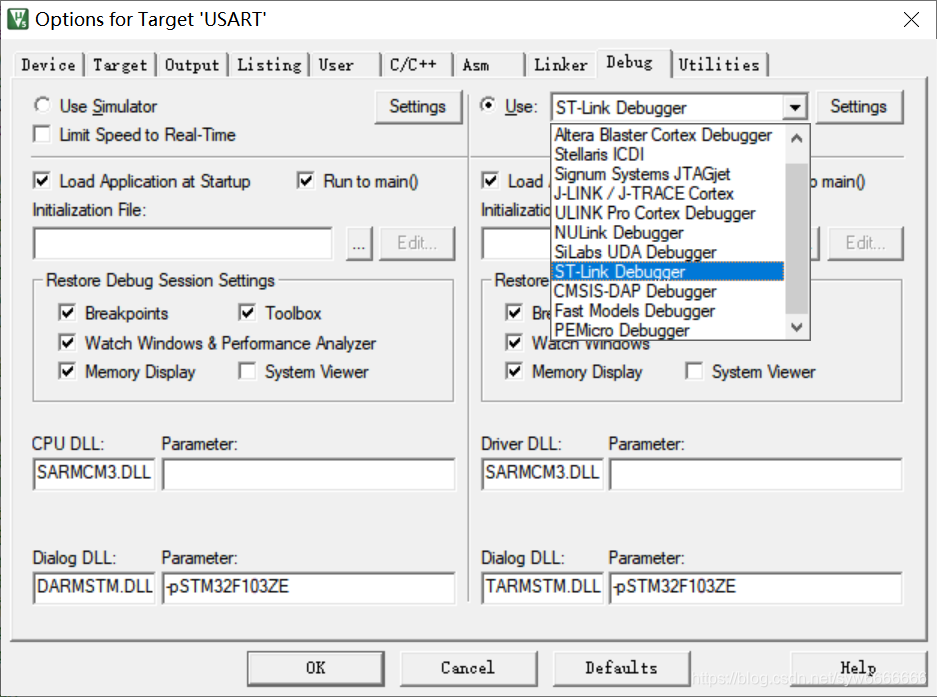
- 点击Setting进入设置界面,进行配置
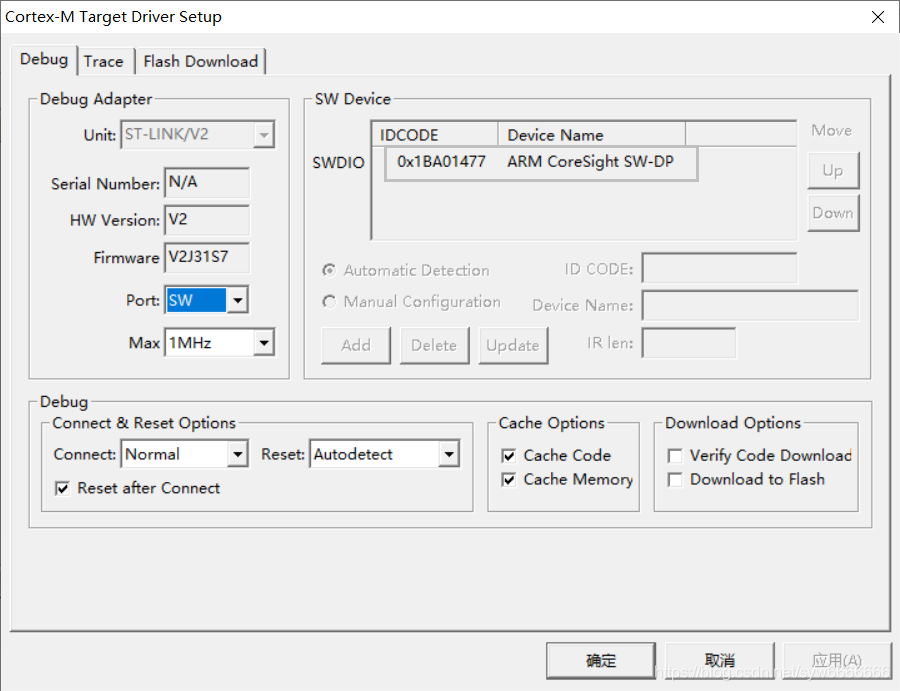
-
点击Flash Download,选择Add添加,选择第一个
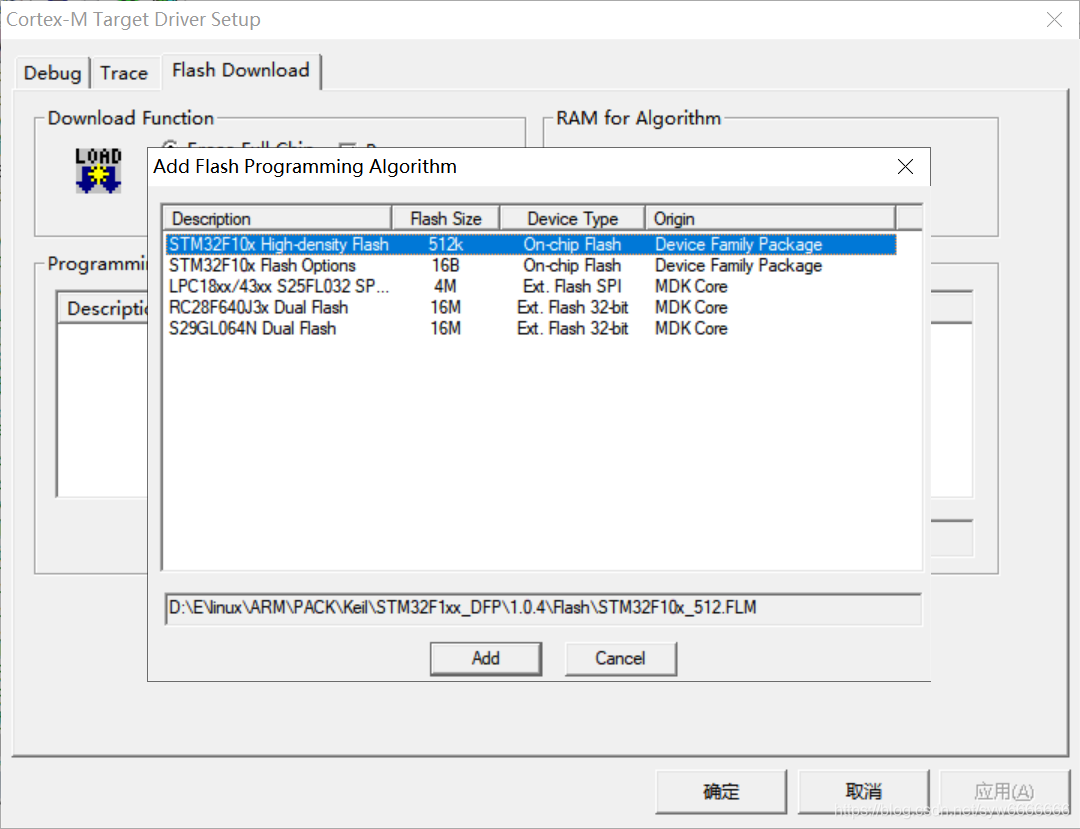
-
配置完成点击确定,打开电脑设备管理器,显示STM32 STLink已连接,如下:

这里可能会出现无法配置的问题,只需要卸载STM32 STLink驱动并重新安装即可
4.程序验证
输入“Stop stm32”停止


 686
686

 被折叠的 条评论
为什么被折叠?
被折叠的 条评论
为什么被折叠?
 到【灌水乐园】发言


