


 本文演示了如何在安装TensorFlow后使用自带的TensorBoard工具。通过定义计算图并运行会话,生成summary数据到指定目录,然后启动TensorBoard查看模型视图。此过程展示了从代码实现到可视化展示的完整流程。
安装Tensorflow后自带Tensorboard工具
演示代码如下,运行后在./Desktop/ComputationGrap目录下生成数据文件events.out.tfevents.xxxxxxx.xxxxxxxx
# Import the deep learning library
import tensorflow as tf

# Define our compuational graph
W1 = tf.constant(5.0, name = "x")
W2 = tf.constant(3.0, name = "y")
W3 = tf.cos(W1, name = "cos")
W4 = tf.sin(W2, name = "sin")
W5 = tf.multiply(W3, W4, name = "mult")
W6 = tf.divide(W1, W2, name = "div")
W7 = tf.add(W5, W6, name = "add")

# Open the session
with tf.Session() as sess:

    cos = sess.run(W3)
    sin = sess.run(W4)
    mult = sess.run(W5)
    div = sess.run(W6)
    add = sess.run(W7)

    # Before running TensorBoard, make sure you have generated summary data in a log directory by creating a summary writer
    writer = tf.summary.FileWriter("./Desktop/ComputationGraph", sess.graph)

    # Once you have event files, run TensorBoard and provide the log directory
    # Command: tensorboard --logdir="path/to/logs"
运行命令tensorboard --logdir="tensorboard --logdir="D:\xxxxxx\Desktop\ComputationGraph"
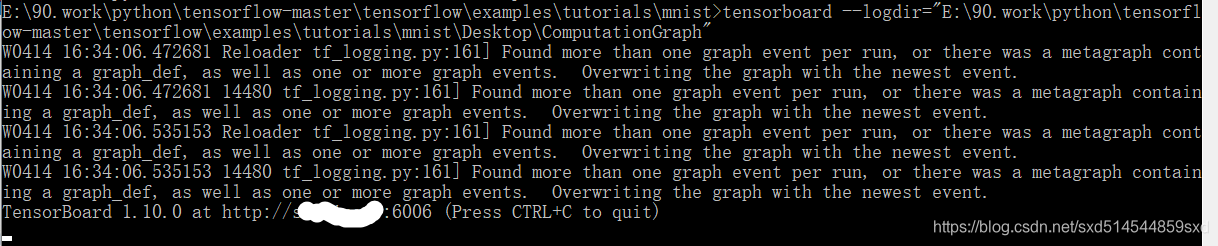
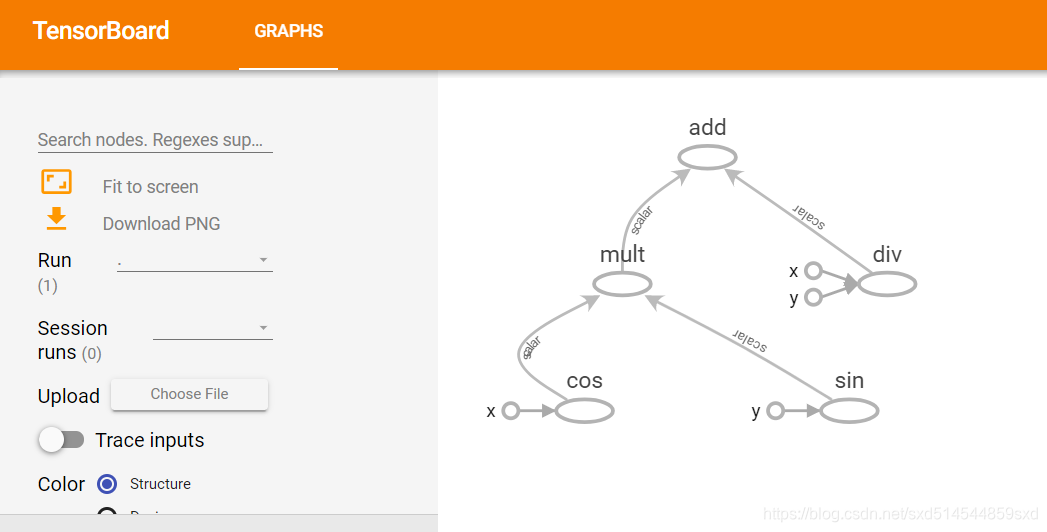
浏览器中打开提示地址:http://xxxxx:6006,将看到模型视图


 7586
7586

 被折叠的 条评论
为什么被折叠?
被折叠的 条评论
为什么被折叠?
 到【灌水乐园】发言


