


 本文介绍如何使用React Native中的TabNavigator实现一个特殊的底部导航栏效果,其中包含一个凸起的Tab。通过自定义Tab并利用绝对布局,可以轻松实现这一设计。
https://blog.youkuaiyun.com/u014041033/article/details/79046736
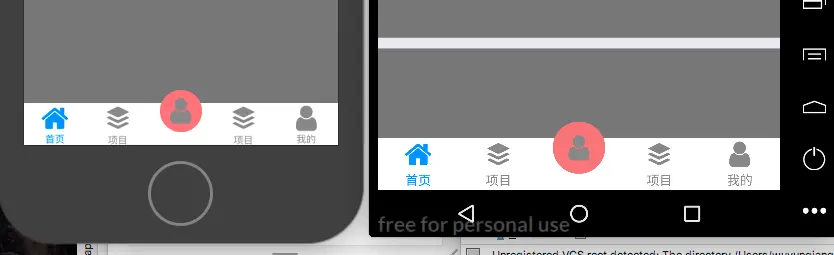
其实这种效果很简单只要实现自定义tab然后将需要凸起的Tab单独拿出来设置成绝对布局就可以实现了。
关键代码:
    render(){
        const {navigation,jumpToIndex} = this.props;
        const {routes,} = navigation.state;
        const focused = 1 === navigation.state.index;
        const color = focused ? this.props.activeTintColor : this.props.inactiveTintColor;
        let TabScene = {
            focused:focused,
            route:routes[1],
            tintColor:color
        };
        return (
        <View style={{width:WIDTH}}>
            <View style={styles.tab}>
                {routes && routes.map((route,index) => this.renderItem(route, index))}
            </View>
          //需要凸起的tab 设置绝对布局
            <TouchableOpacity
            key={"centerView"}
            style={[styles.tabItem,{position:'absolute',bottom:0,left:(WIDTH-SCALE(100))/2,right:WIDTH-SCALE(100),height:SCALE(120)}]}
            onPress={() => jumpToIndex(1)}
        >
            <View
                style={styles.tabItem}>
                {this.props.renderIcon(TabScene)}
                <Text style={{ ...styles.tabText,marginTop:SCALE(10),color }}>{this.props.getLabel(TabScene)}</Text>
            </View>
        </TouchableOpacity>
        </View>
        );
}- 1
- 2
- 3
- 4
- 5
- 6
- 7
- 8
- 9
- 10
- 11
- 12
- 13
- 14
- 15
- 16
- 17
- 18
- 19
- 20
- 21
- 22
- 23
- 24
- 25
- 26
- 27
- 28
- 29
- 30


 被折叠的 条评论
为什么被折叠?
被折叠的 条评论
为什么被折叠?
 到【灌水乐园】发言


