


In this part, I will discuss activation functions, recreate one called ReLU in Cangjie, and plug it into our network.
Introduction
There exist a number of activation functions, the choice of which depends on a problem that you are trying to solve. However, all of these functions work the same way - they modify neurons’ output. There are 2 main types: functions that work on the output of neurons in hidden layers and functions that work on the output layer of the network itself (for classification problems, it usually is Softmax, for regression - Sigmoid, etc.). We will start with ReLU that works on the level of hidden layers.
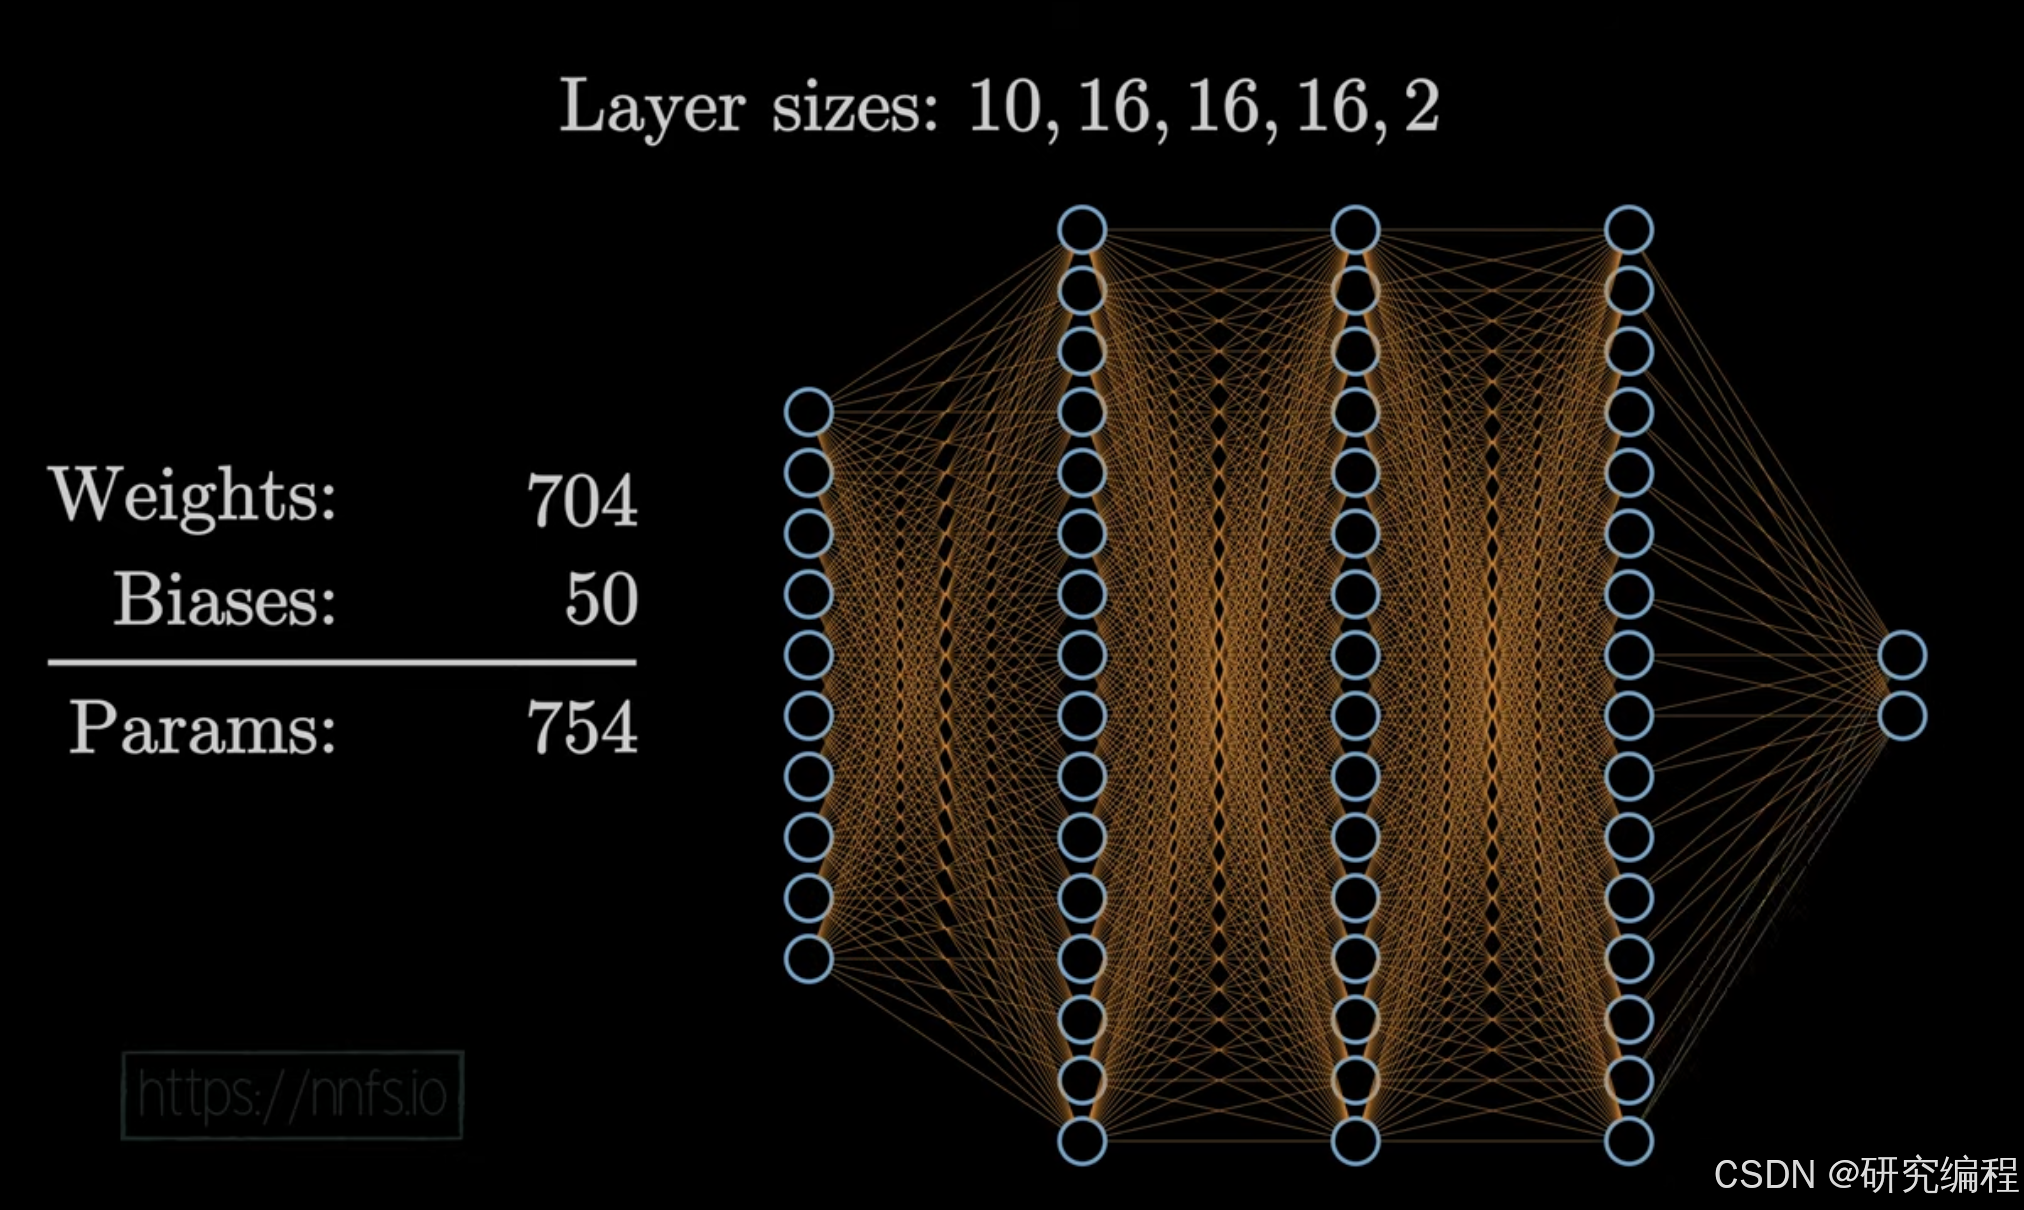
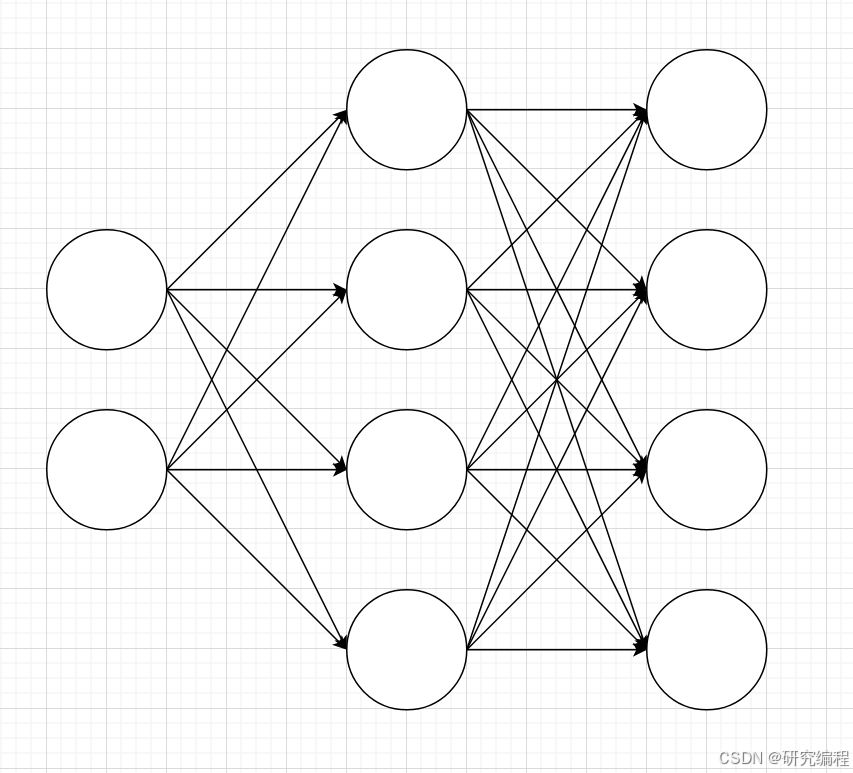
A network typically has 2 and more hidden layers. If you recall, we actually created a 2x4x4 network in part 2 of this tutorial series. It had 1 input layer and 2 hidden layers, with 4 neurons in each layer.
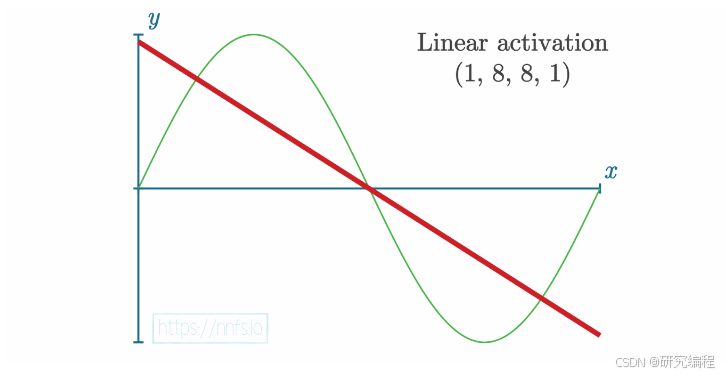
Neural networks are best fit for non-linear data. For linear data, statistical methods can be a more efficient approach. An example of linear data is height and weight: the taller we are, the heavier we tend to be, and this relationship is true 99% of the time. But in many cases, data is non-linear - it can be a curve (like the decline of efficiency over time), a spiral, a group of lines, and every shape imaginable. If we have data that has a pattern like below, linear functions won’t be able to capture any relationships in it.
We need a way to capture such non-linear relationships.
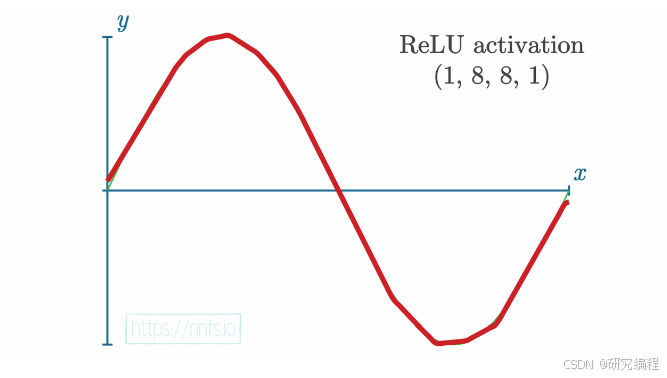
The most widely used function in the non-linear category is the Rectified Linear Activation Function (ReLU). ReLU, by working on the output of individual neurons, can break a line into multiple segments, and with the help of backpropagation, which will be discussed in a future tutorial, move these pieces by breakpoints in a way that would follow the pattern in the data. In this case, a sinusoid and 16 segments (8+8).
How are these segments arranged to form a curve? Let’s take a look at a simpler example to help visualize the relationship between the output of a neuron and an activation function. Consider a linear function y = x, in which the input = the output, meaning that the activation function doesn’t modify a layer’s output.
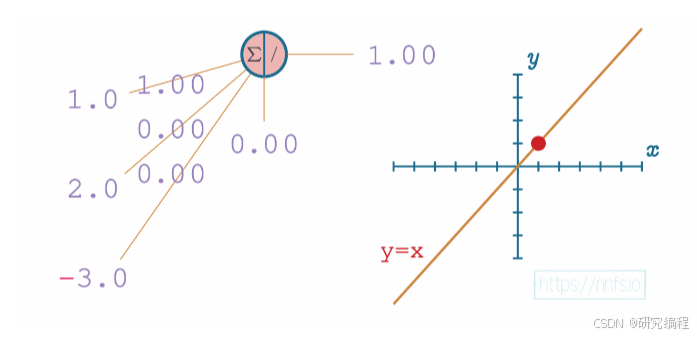
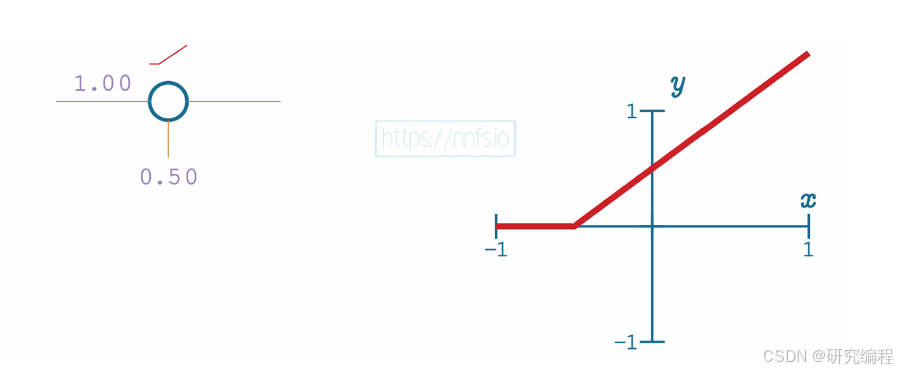
With a weight of 1.0 and the bias of 0.0, the output is 1.0.
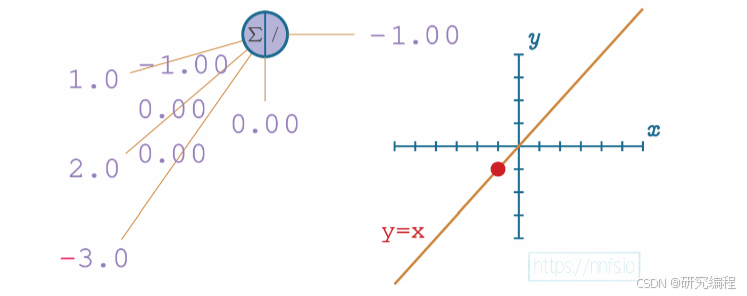
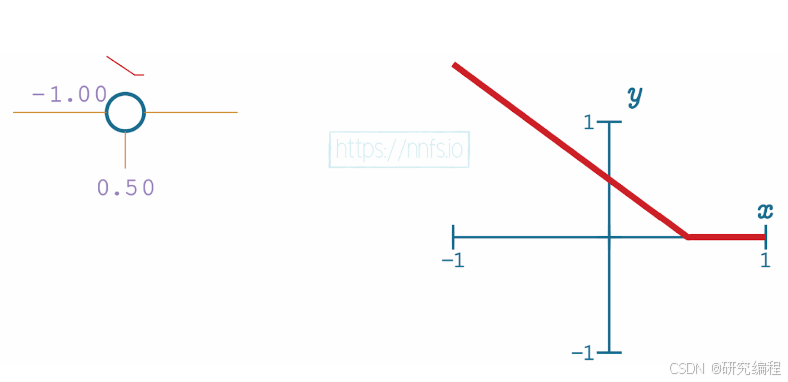
If the weight is -1.0 and the bias is 0.0, the output is -1.0.
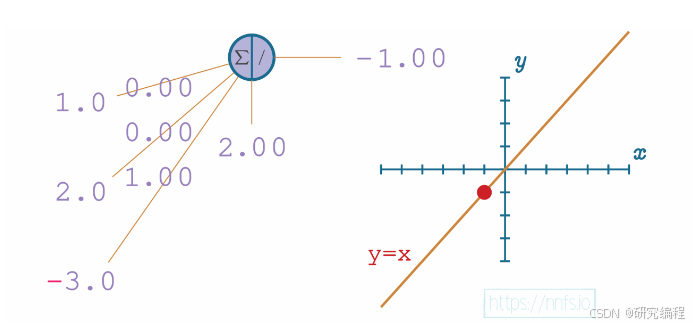
The same is true if we change both weights and the bias. The output remains linear, and the values can potentially range from negative infinity to positive infinity.
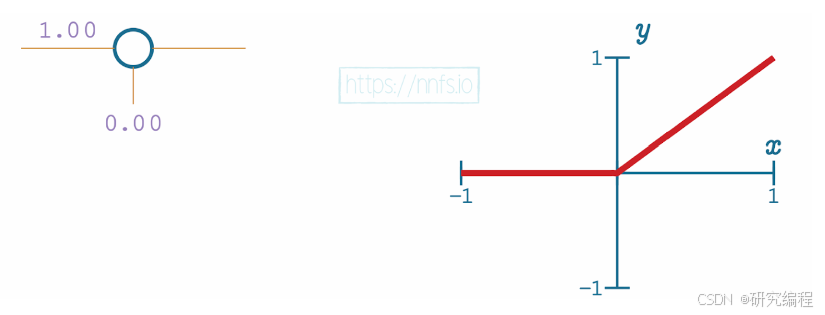
ReLU is a modified version of the linear function, which clips values that are <= 0 at 0, but keeps values that are > 0 unchanged. This gives the network the ability to break the line at certain points, controlled by adjusting weights and the bias - the neuron’s output - during the backward pass: if the value is <=0, the line is broken up.
Remember that every line is represented by a linear equation: y = mx + b, in which x is the input, m is the weight, b is the bias, and y is the output. Because bias controls the slope in the y = mx + b equation, by adding 0.50 as the bias, we can shift the line left.
By adjusting a weight to -1.0, we shift the intercept, basically mirroring the line.
Below is an illustration of this process at full scale.
ReLU
Coding ReLU
Coding the ReLU function is very straightforward. The idea is to replace x <= 0 with 0 and ignore x > 0 - output it as is.
First, we take an array of input values. Then, we pipe the input array through the map function, which takes each element of the array, clips it at 0, and reconstructs the results back as an array with the help of the collectArray function (see my tutorial on how to use different array functions in Cangjie).
func ReLU(input: Array<Float64>): Array<Float64> {
    func clip(i: Float64): Float64 {
        if (i > 0.0) {
            return i
        } else {
            return 0.0
        }
    }

    let output = input |> map {i => clip(i)} |> collectArray

    return output
}

let input = [0.0, 2.0, -1.0, 3.3, -2.7, 1.1, 2.2, -100.0]

println(ReLU(input))

We can see that the function works as expected.
Now we need to turn it into something we can use with our network.
class Activation_ReLU {
    var output: Array<Array<Float64>>

    public init() {
        this.output = []
    }

    public func forward(inputs: Array<Array<Float64>>) {
        let output = ArrayList<Array<Float64>>([])

        for (array in inputs) {
            output.append(maximum(array))
        }

        this.output = output.toArray()
    }

    private func maximum(input: Array<Float64>): Array<Float64> {
        func clip(i: Float64): Float64 {
            if (i > 0.0) {
                return i
            } else {
                return 0.0
            }
        }

        let output = input |> map {i => clip(i)} |> collectArray

        return output
    }
}
Because we are batching our input, the inputs array is a 2D matrix and not a flat array as in the example above. In order to scale the function up to work with nested array, we need one more step, which is looping through the outermost container array. Because we standardize our method names, we call the method forward to match the dense layer’s code.
Now that we have the ReLU activation function, we can plug it into our code:
import matrix4cj.*
import std.collection.*
import std.random.*
import csv4cj.*
import std.os.posix.*
import std.fs.*
import std.convert.*

let random = Random(0) // seed = 0

main() {
    let X: Array<Array<Float64>>
    let y: Array<Int64>

    (X, y) = getData()

    let dense1 = Layer_Dense(2, 4, X.size)
    let activation1 = Activation_ReLU()

    let dense2 = Layer_Dense(4, 4, X.size)
    let activation2 = Activation_ReLU()

    dense1.forward(X)
    activation1.forward(dense1.output)
    println(activation1.output[..5])

    dense2.forward(activation1.output)
    activation2.forward(dense2.output)
    println(activation2.output[..5])
}

class Activation_ReLU {
    var output: Array<Array<Float64>>

    public init() {
        this.output = []
    }

    public func forward(inputs: Array<Array<Float64>>) {
        let output = ArrayList<Array<Float64>>([])

        for (array in inputs) {
            output.append(maximum(array))
        }

        this.output = output.toArray()
    }

    private func maximum(input: Array<Float64>): Array<Float64> {
        func clip(i: Float64): Float64 {
            if (i > 0.0) {
                return i
            } else {
                return 0.0
            }
        }

        let output = input |> map {i => clip(i)} |> collectArray

        return output
    }
}

class Layer_Dense {
    var weights: Matrix
    var biases: Matrix
    var output: Array<Array<Float64>>

    public init(nInputs: Int64, nNeurons: Int64, batchSize: Int64) {
        this.weights = Matrix(
            Array<Array<Float64>>(nNeurons, {_ => Array<Float64>(nInputs, {_ => random.nextFloat64() * 0.01})}))

        this.biases = Matrix(Array<Array<Float64>>(batchSize, {_ => Array<Float64>(nNeurons, {_ => 0.0})}))
        this.output = []
    }

    public func forward(inputs: Array<Array<Float64>>) {
        this.output = Matrix(inputs).times(this.weights.transpose()).plus(this.biases).getArray()
    }
}

func getData() {
    let yIdx: Int64 = 2
    let X = ArrayList<Array<Float64>>([])
    let y = ArrayList<Int64>([])

    let path: String = getcwd()
    let fileStream = File("${path}/test.csv", OpenOption.Open(true, false))

    //打开文件流
    if (fileStream.canRead()) {
        //创建字符读取的解析流
        let stream = UTF8ReaderStream(fileStream)
        let reader = CSVReader(stream)

        //创建格式化的解析参数
        let format: CSVParseFormat = CSVParseFormat.DEFAULT

        //创建解析器
        let csvParser = CSVParser(reader, format)
        for (csvRecord in csvParser) {
            let values = csvRecord.getValues()
            X.append(Array<Float64>(values[..yIdx].size, {j => Float64.parse(values[..yIdx][j].toString())}))
            y.append(Int64.parse(values[yIdx].toString()))
        }

        fileStream.close()
    }

    return (X.toArray(), y.toArray())
}

At this point, ReLU is not used at all, as we don’t have any negative values in our network, but this will change when we add more complexity to it.
The next step is to implement the Softmax activation function that will set up our network for classification tasks.


 被折叠的 条评论
为什么被折叠?
被折叠的 条评论
为什么被折叠?
 到【灌水乐园】发言


