


系列文章目录
HarmonyOS Next 系列之省市区弹窗选择器实现(一)
HarmonyOS Next 系列之验证码输入组件实现(二)
HarmonyOS Next 系列之底部标签栏TabBar实现(三)
HarmonyOS Next 系列之HTTP请求封装和Token持久化存储(四)
HarmonyOS Next 系列之从手机选择图片或拍照上传功能实现(五)
HarmonyOS Next 系列之可移动悬浮按钮实现(六)
HarmonyOS Next 系列之沉浸式状态实现的多种方式(七)
HarmonyOS Next系列之Echarts图表组件(折线图、柱状图、饼图等)实现(八)
HarmonyOS Next系列之地图组件(Map Kit)使用(九)
HarmonyOS Next系列之半圆环进度条实现(十)
HarmonyOS Next 系列之列表下拉刷新和触底加载更多数据实现(十一)
HarmonyOS Next系列之实现一个左右露出中间大两边小带缩放动画的轮播图(十二)
前言
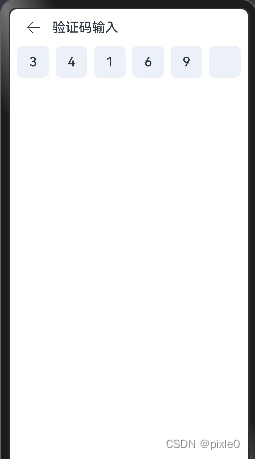
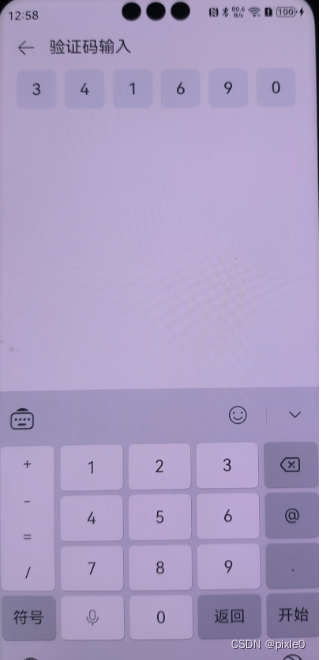
HarmonyOS Next(基于API11) 实现一个验证码输入组件(VerifyCodeInput),不可复制粘贴,输入验证码无光标自动定位到下一格,删除自动定位到前一格,验证码个数可配置。

一、实现原理
为了解决输入或删除自动移格通过Text组件来显示验证码而非TextInput,键盘输入通过inputMethod.InputMethodController 自绘控件绑定输入法形式进行输入内容监听,最后通过组件本身
onVisibleAreaChange事件判断页面是隐藏(跳转下一页)或者显示(返回)动态控制键盘弹出和隐藏
二、代码实现
VerifyCodeInput.ets
1.定义参数和变量配置
@Component
export default struct VerifyCodeInput {
  //单个输入框高
  @Prop iheight:number|string=48
  //单个输入框宽
  @Prop iwidth:number|string=48
  //验证码字体大小
  @Prop fontsize:number|string='20fp'
  //验证码框个数
  @Prop count:number=6
  //输入法客户端实例
  private inputController: inputMethod.InputMethodController = inputMethod.getController();
  //自绘编辑框配置
  private textConfig: inputMethod.TextConfig = {
    inputAttribute: {
      textInputType: inputMethod.TextInputType.NUMBER, //只能输入数字
      enterKeyType: inputMethod.EnterKeyType.GO
    },
  };
  //用户输入的验证码
  @Link inputCode: string
  //验证码输入框个数数组
  @State countArr: number[] = new Array(this.count??6).fill(' ') //count个空元素数组
  //是否第一次加载
  private isFirst:boolean=true
说明:首先定义了一些组件参数如单个输入框宽高、字体大小、输入框个数等和新建输入法实例inputController并设置只能输入数字。
2、自绘控件输入法事件回调设置和事件解绑
 //自绘控件绑定输入法 @params isFocus:是否聚焦拉起键盘
  async onAttachInput(isFocus?:boolean) {
    try {
      //绑定成功默认拉起键盘
      await this.inputController.attach(isFocus??true, this.textConfig);
    }
    catch (e) {
      console.log(JSON.stringify(e))
    }
  }

  //自绘控件解绑输入法
  async onDetachInput() {
    try {
      await this.inputController.detach()
    }
    catch (e) {
      console.log(JSON.stringify(e))
    }

  }

  //绑定输入法输入和删除事件
  onInputEvent() {
    //输入数字
    this.inputController.on("insertText", (text: string) => {
      if (text && this.inputCode.length < this.count && !isNaN(Number(text))) {
        this.inputCode += text;
      }
    })
    //删除数字
    this.inputController.on("deleteLeft", (length: number) => {
      this.inputCode = this.inputCode.substring(0, this.inputCode.length - 1);
    })
  }
  //解除输入法事件
  offInputEvent(){
    this.inputController.off("insertText");
    this.inputController.off("deleteLeft");
  }

  //组件销毁解除所有绑定
  aboutToDisappear() {
    this.offInputEvent()
    this.onDetachInput()
  }
说明:此步骤主要是输入法初始化配置和定义输入事件(输入和删除)回调设置,以及解绑以上所有事件
3、验证码输入框布局和输入法绑定与解绑
 build() {
    Column() {
      Row() {
        ForEach(this.countArr, (item: string, index: number) => {
          Text(this.inputCode[index])
            .width(this.iwidth)
            .height(this.iheight)
            .borderRadius('8')
            .backgroundColor('#ECF1F7')
            .fontSize(this.fontsize)
            .fontWeight(500)
            .textAlign(TextAlign.Center)
            .margin({ left: index === 0 ? 0 : 5, right: index === 5 ? 0 : 5 })
            .flexGrow(1)
            .onClick(() => {
              //点击控件重新绑定弹出键盘
              this.onAttachInput()
            })

        }, (item: string, index: number) => index.toString())
      }
      .justifyContent(FlexAlign.SpaceBetween)
      .onVisibleAreaChange([0.0, 1.0], async(isVisible: boolean, currentRatio: number)=>{
        if (isVisible && currentRatio >= 1.0) {//页面显示
          //延迟200ms兼容绑定失效问题
          setTimeout(async()=>{
            try {
              //绑定输入法和设置聚焦状态弹出键盘
              await this.onAttachInput(true)
            }
            catch (e) {
            }
            if(this.isFirst){//首次加载
              //绑定输入事件
              this.onInputEvent()
              this.isFirst=false
            }

          },200)

        }

        if (!isVisible && currentRatio <= 0.0) {//页面隐藏
          //隐藏键盘
          this.onAttachInput(false)
        }

      })

    }.width('100%')
  }
说明:绘制count(默认6个)个验证码输入框,首次加载绑定键盘输入事件,并通过onVisibleAreaChange事件来辅助判断页面是否跳转或返回(重新显示页面),页面跳转时候隐藏键盘,页面重现时恢复弹出键盘,这边有个坑,在页面返回时候需要延迟绑定输入法弹否则弹出键盘会有异常。
入参有:
iheight:组件高 number|string
iwidth:组件宽 number|string
count 验证码个数 number 默认值6
value 用户输入的验证码 string 双向绑定值
完整代码:
目录:

VerifyCodeInput.ets
import { inputMethod } from '@kit.IMEKit';

@Component
export default struct VerifyCodeInput {
  //单个输入框高
  @Prop iheight:number|string=48
  //单个输入框宽
  @Prop iwidth:number|string=48
  //验证码字体大小
  @Prop fontsize:number|string='20fp'
  //验证码框个数
  @Prop count:number=6
  //输入法客户端实例
  private inputController: inputMethod.InputMethodController = inputMethod.getController();
  //自绘编辑框配置
  private textConfig: inputMethod.TextConfig = {
    inputAttribute: {
      textInputType: inputMethod.TextInputType.NUMBER, //只能输入数字
      enterKeyType: inputMethod.EnterKeyType.GO
    },
  };
  //用户输入的验证码
  @Link inputCode: string

  //验证码输入框个数数组
  @State countArr: number[] = new Array(this.count??6).fill(' ') //count个空元素数组
  //是否第一次加载
  private isFirst:boolean=true


  //自绘控件绑定输入法 @params isFocus:是否聚焦拉起键盘
  async onAttachInput(isFocus?:boolean) {
    try {
      //绑定成功默认拉起键盘
      await this.inputController.attach(isFocus??true, this.textConfig);
    }
    catch (e) {
      console.log(JSON.stringify(e))
    }
  }

  //自绘控件解绑输入法
  async onDetachInput() {
    try {
      await this.inputController.detach()
    }
    catch (e) {
      console.log(JSON.stringify(e))
    }

  }

  //绑定输入法输入和删除事件
  onInputEvent() {
    //输入数字
    this.inputController.on("insertText", (text: string) => {
      if (text && this.inputCode.length < this.count && !isNaN(Number(text))) {
        this.inputCode += text;
      }
    })
    //删除数字
    this.inputController.on("deleteLeft", (length: number) => {
      this.inputCode = this.inputCode.substring(0, this.inputCode.length - 1);
    })
  }
  //解除输入法事件
  offInputEvent(){
    this.inputController.off("insertText");
    this.inputController.off("deleteLeft");
  }

  //组件销毁解除所有绑定
  aboutToDisappear() {
    this.offInputEvent()
    this.onDetachInput()
  }


  build() {
    Column() {
      Row() {
        ForEach(this.countArr, (item: string, index: number) => {
          Text(this.inputCode[index])
            .width(this.iwidth)
            .height(this.iheight)
            .borderRadius('8')
            .backgroundColor('#ECF1F7')
            .fontSize(this.fontsize)
            .fontWeight(500)
            .textAlign(TextAlign.Center)
            .margin({ left: index === 0 ? 0 : 5, right: index === 5 ? 0 : 5 })
            .flexGrow(1)
            .onClick(() => {
              //点击控件重新绑定弹出键盘
              this.onAttachInput()
            })

        }, (item: string, index: number) => index.toString())
      }
      .justifyContent(FlexAlign.SpaceBetween)
      .onVisibleAreaChange([0.0, 1.0], async(isVisible: boolean, currentRatio: number)=>{
        if (isVisible && currentRatio >= 1.0) {//页面显示
          //延迟200ms兼容绑定失效问题
          setTimeout(async()=>{
            try {
              //绑定输入法和设置聚焦状态弹出键盘
              await this.onAttachInput(true)
            }
            catch (e) {
            }
            if(this.isFirst){//首次加载
              //绑定输入事件
              this.onInputEvent()
              this.isFirst=false
            }

          },200)

        }

        if (!isVisible && currentRatio <= 0.0) {//页面隐藏
          //隐藏键盘
          this.onAttachInput(false)
        }

      })

    }.width('100%')
  }
}
页面调用
Index.ets
import VerifyCodeInput from '../components/VerifyCodeInput/VerifyCodeInput'

@Entry
@Component
struct Index {
  //输入的验证码,双向绑定
  @State value:string=''

  build() {
    Navigation() {
      Column() {
        VerifyCodeInput({inputCode:this.value})
      }.width('100%')
    }.title('验证码输入')
    .titleMode(NavigationTitleMode.Mini)
  }
}
效果:


 1144
1144

 被折叠的 条评论
为什么被折叠?
被折叠的 条评论
为什么被折叠?
 到【灌水乐园】发言


