


数字图像处理知识
1.线性变换
#简单线性变换
import cv2 as cv
import numpy as np
grayImage = cv.imread("Lenna_RGB.tif", 0)
height = grayImage.shape[0]
width = grayImage.shape[1]
NLImage = np.zeros((height, width), np.uint8)
for i in range(height):
    for j in range(width):
        gray = int(grayImage[i, j])*int(grayImage[i, j]) / 255
        NLImage[i, j] = np.uint8(gray)
cv.imshow('Input', grayImage)
cv.imshow('NLImage', NLImage)
cv.waitKey(0)
cv.destroyAllWindows()
运行结果

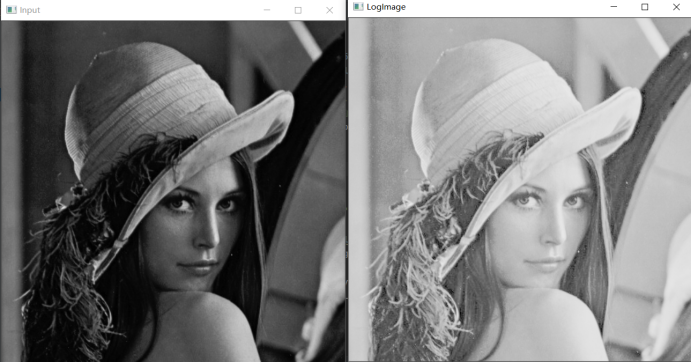
2.非线性变换
#对数变化
import cv2 as cv
import numpy as np
import matplotlib.pyplot as plt
def log_plot(Cons):
    x = np.arange(0, 256, 0.01)
    y = Cons * np.log(1 + x)
    plt.plot(x, y, 'r', linewidth=1)
    plt.rcParams['font.sans-serif'] = ['SimHei']
    plt.title('对数变换函数')
    plt.xlim(0, 255), plt.ylim(0, 255)
    plt.show()
C = 43
grayImage = cv.imread("Lenna_RGB.tif", 0)
LogImage = C * np.log(1.0 + grayImage)
LogImage = np.uint8(LogImage + 0.5)
cv.imshow('Input', grayImage)
cv.imshow('LogImage', LogImage)
log_plot(C)
cv.waitKey(0)
cv.destroyAllWindows()
运行结果
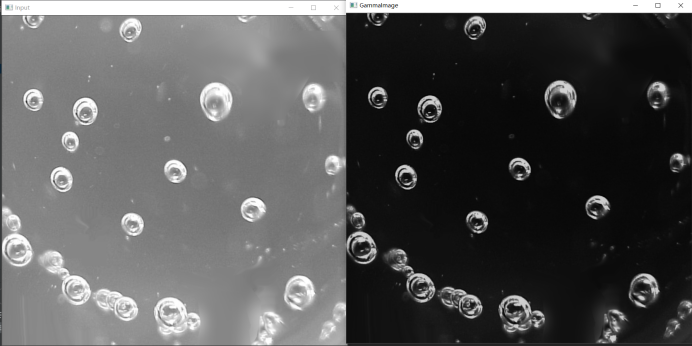
#伽马变换
import cv2 as cv
import numpy as np
import matplotlib.pyplot as plt
def gamma_plot(c, v):
    x = np.arange(0, 256, 0.01)
    y = c*x**v
    plt.plot(x, y, 'r', linewidth=1)
    plt.rcParams['font.sans-serif'] = ['SimHei']
    plt.title('伽马变换函数')
    plt.xlim([0, 255]), plt.ylim([0, 255])
    plt.show()
def gamma(img, c, v):
    lut = np.zeros(256, dtype=np.float32)
    for i in range(256):
        lut[i] = c * i ** v
    output_img = cv.LUT(img, lut)
    output_img = np.uint8(output_img+0.5)
    return output_img
grayImage = cv.imread("Bubbles.tif", 0)
GammaImage = gamma(grayImage, 0.00000005, 4.0)
cv.imshow('Input', grayImage)
cv.imshow('GammaImage', GammaImage)
gamma_plot(0.00000005, 4.0)
cv.waitKey(0)
cv.destroyAllWindows()
运行结果
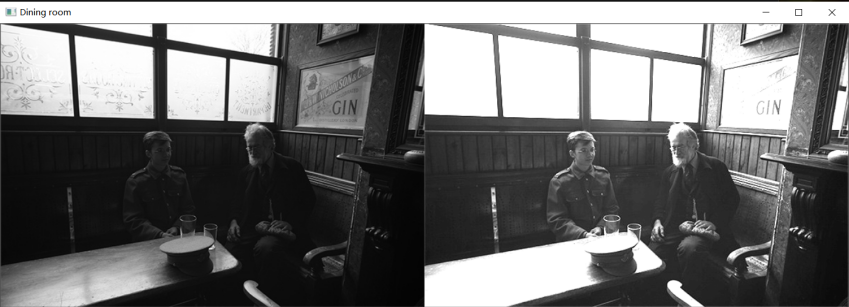
3.同态滤波
import cv2
import numpy as np
#同态滤波
def homomorphic_filter(src, d0=1, r1=2, rh=2, c=4, h=2.0, l=0.5):
    # 图像灰度化处理
    gray = src.copy()
    if len(src.shape) > 2:  # 维度>2
        gray = cv2.cvtColor(src, cv2.COLOR_BGR2GRAY)
    gray = np.float64(gray)  # 图像格式处理
    rows, cols = gray.shape  # 设置数据维度n
    gray_fft = np.fft.fft2(gray)  # 傅里叶变换
    gray_fftshift = np.fft.fftshift(gray_fft)  # 将零频点移到频谱的中间,就是中间化处理
    # 生成一个和gray_fftshift一样的全零数据结构
    # dst_fftshift = np.zeros_like(gray_fftshift)
    # arange函数用于创建等差数组,分解f(x,y)=i(x,y)r(x,y)
    M, N = np.meshgrid(np.arange(-cols // 2, cols // 2), np.arange(-rows // 2, rows // 2))  # 注意,//就是除法
    # 使用频率增强函数处理原函数(也就是处理原图像dst_fftshift)
    D = np.sqrt(M ** 2 + N ** 2)  # **2是平方
    Z = (rh - r1) * (1 - np.exp(-c * (D ** 2 / d0 ** 2))) + r1
    dst_fftshift = Z * gray_fftshift
    dst_fftshift = (h - l) * dst_fftshift + l
    # 傅里叶反变换(之前是正变换,现在该反变换变回去了)
    dst_ifftshift = np.fft.ifftshift(dst_fftshift)
    dst_ifft = np.fft.ifft2(dst_ifftshift)
    # 选取元素的实部
    dst = np.real(dst_ifft)
    # dst中,比0小的都会变成0,比0大的都变成255
    # uint8是专门用于存储各种图像的(包括RGB,灰度图像等),范围是从0–255
    dst = np.uint8(np.clip(dst, 0, 255))
    return dst
img = cv2.imread("E:\\DIP_Photo\\Diningroom.jpg", 0)
img_new = homomorphic_filter(img)  # 将图片执行同态滤波器
result = np.hstack((img, img_new))  # 输入和输出合并在一起输出
cv2.imshow('Dining room', result)
cv2.waitKey()
cv2.destroyAllWindows()
运行结果


 1776
1776

 被折叠的 条评论
为什么被折叠?
被折叠的 条评论
为什么被折叠?
 到【灌水乐园】发言


