


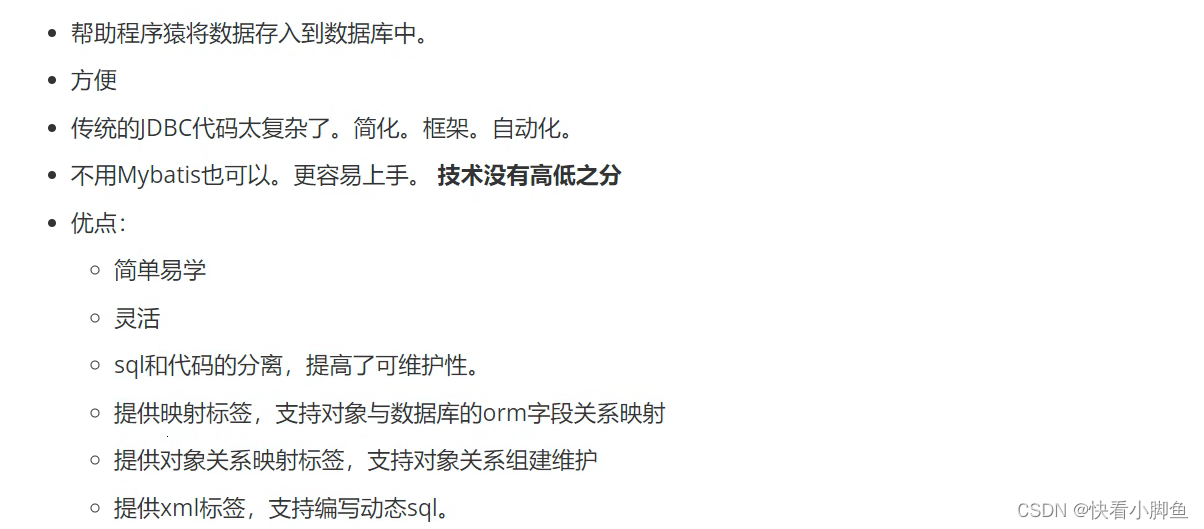
为什么要使用Mybatis ?
Mybatis使用
依赖:
        <dependency>
            <groupId>mysql</groupId>
            <artifactId>mysql-connector-java</artifactId>
        </dependency>
        <dependency>
            <groupId>org.mybatis.spring.boot</groupId>
            <artifactId>mybatis-spring-boot-starter</artifactId>
            <version>2.3.1</version>
        </dependency>
配置:
# 应用服务 WEB 访问端口
server:
  port: 8080
spring:
  datasource:
    driver-class-name: com.mysql.cj.jdbc.Driver
    url: jdbc:mysql://localhost:3306/mybatistest
    username: root
    password: root
  logging:
    level:
      com.example.demo.mapper: debug

mybatis:
  #如果xml文件和mapper文件不放在同一个目录下么就需要配置
  mapper-locations: classpath:mapper/*.xml
  #mybatis的sql日志输出
  configuration:
    log-impl: org.apache.ibatis.logging.stdout.StdOutImpl
动态SQL,查改增删
<!-- 按照指定条件查询 -->
    <select id="list_one" resultType="com.example.demo.pojo.User">
        select * from user where id=#{id}
    </select>

    <!-- 多条件查询,并且有值查,无值不查-->
    <select id="list_object" resultType="com.example.demo.pojo.User">
        select * from user
        <where>
            <if test="id != null">
                id=#{id}
            </if>
            <if test="name != null">
                and name=#{name}
            </if>
        </where>
    </select>

    <!-- 添加一条数据-->
    <insert id="add" parameterType="com.example.demo.pojo.User">
        insert into user(id,name,age,phone) values (#{id},#{name},#{age},#{phone})
    </insert>

    <!-- 批量添加-->
    <insert id="addlots">
        insert into user(id,name,age,phone) values
        <foreach collection="list" separator="," item="user">
            (#{user.id},#{user.name},#{user.age},#{user.phone})
        </foreach>
    </insert>

    <!-- 更新 -->
    <update id="update">
        update user
        <set>
            <if test="name != null"> name=#{name}</if>
            <if test="age != null"> age=#{age}</if>
            <if test="phone != null"> phone=#{phone}</if>
        </set>
        where id=#{id}
    </update>

    <!-- 删除 -->
    <delete id="delete">
        delete from user where id=#{id}
    </delete>

    <!-- 模糊查询-->
    <!-- select * from user where name like concat('%',#{s},'%') 也是可以的-->
    <select id="like" resultType="com.example.demo.pojo.User">
        select * from user where name like "%"#{s}"%"
    </select>
分页查询
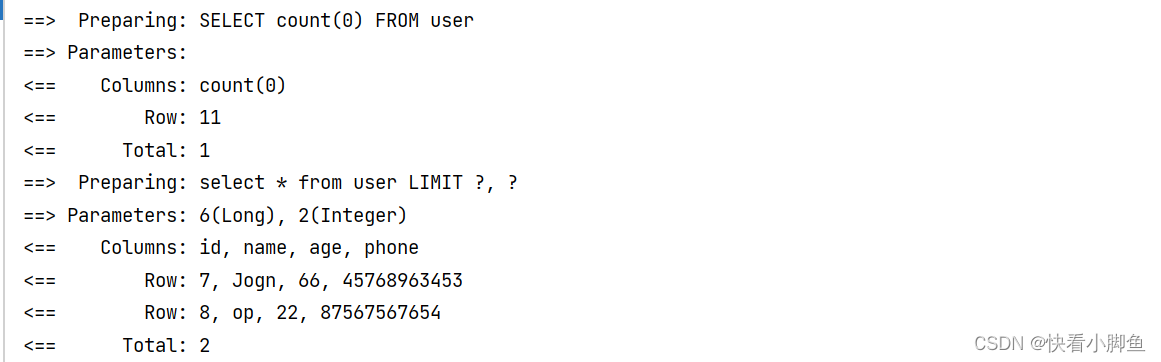
三种方式:①原生SQL语句,limit。②RowBounds,将符合条件的数据先存到内存再分页。③PageHelper,拦截器。
原生SQL:是物理分页
    //mapper层
    List<User> limit(Map map);


    //mapperxml层
    <resultMap id="map" type="com.example.demo.pojo.User">
        <id property="id" column="id"></id>
        <result property="name" column="name"></result>
        <result property="age" column="age"></result>
        <result property="phone" column="phone"></result>
    </resultMap>

    <!-- sql语句方式进行 分页查询-->
    <select id="limit" resultType="map">
        select * from user limit #{index},#{size}
    </select>
RowBounds:通过JAVA代码方式实现分页。是逻辑分页
PageHelper:
        //引入依赖
        <dependency>
            <groupId>com.github.pagehelper</groupId>
            <artifactId>pagehelper</artifactId>
            <version>5.2.0</version>
        </dependency>
//yml配置
pagehelper:
helper-dialect: mysql
reasonable: true
support-methods-arguments: true //Controller层,传两个参数
//分页查询---PageHelper方式
@GetMapping("/limit01/{index}/{size}")
public Result limit01(@PathVariable("index")Integer index,@PathVariable("size") Integer size){
PageInfo<User> userList = userService.limit01(index, size);
return Result.success(userList);
}
//Service层进行分页处理
public List<User> limit01(Integer index,Integer size) {
//第一种方式:
//开始分页
PageHelper.startPage(index,size);
//这里查出来的数据就是要分页的初始数据
List<User> userList = userMapper.limit01();
//通过pageInfo包装一下
PageInfo<User> pageInfo = new PageInfo<>(userList);
System.out.println("列表:"+pageInfo.getList());
return pageInfo.getList();
//第二种方式:
PageHelper.startPage(index,size);
Page<User> page = (Page<User>) userMapper.limit01();
return page.getResult();
}
//mapper层就是去查你的初始数据,我这里是默认查全部
@Select("select * from user")
List<User> limit01();
如果不生效的话就要添加如下配置类:
@Configuration
public class PageHelperConfigure {

    @Bean
    public Interceptor[] plugins() {
        return new Interceptor[]{new PageInterceptor()};
    }
}
底层就是拦截器实现:
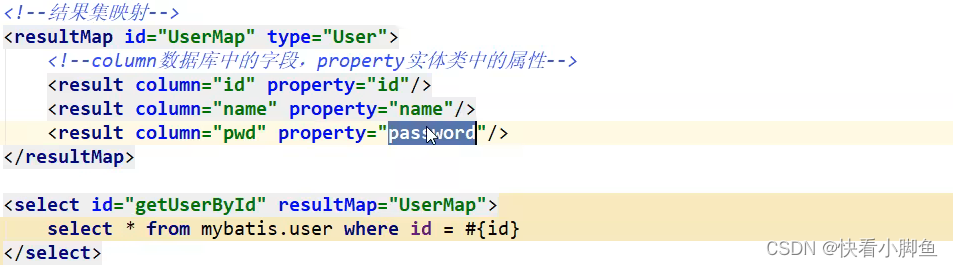
实体类名和数据库名不一致
使用ResultMap进行映射:
Mybatis日志工厂
①stdout
  configuration:
    log-impl: org.apache.ibatis.logging.stdout.StdOutImpl
②log4j
#mybatis的sql日志输出
configuration:
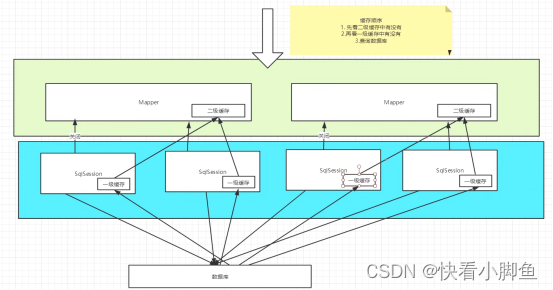
log-impl: org.apache.ibatis.logging.log4j2.Log4j2ImplMybatis的缓存机制
首先Mybatis是提供了两级缓存的机制去提高数据的检索效率,避免每一次都去数据库中查数据。默认情况下是开启一级缓存(SqlSession级别的缓存,也称为本地缓存),在一级缓存下,每个SQLSession都会把从数据库查询到的数据保存在自己的一级缓存中,当该SQLSession下次进行相同的查询时就可以直接走缓存而不用去数据库中查。
二级缓存则需要手动开启,是基于namespace级别的缓存。也就是说一个mapper中的所有SQLSession都用的一个二级缓存。每个SQLSession被关闭之后,其一级缓存中的数据会被刷新到二级缓存中。开启二级缓存之后,每个SQLSession进行查询动作时会先去二级缓存中看是否有,如果有就直接命中,如果没有则去看一级缓存中有没有,如果还没有就只能去数据库中查。


 243
243

 被折叠的 条评论
为什么被折叠?
被折叠的 条评论
为什么被折叠?
 到【灌水乐园】发言


