


 本文详细介绍了CocosCreator中的脚本生命周期,包括onLoad、onEnable、start、update等回调函数的使用。同时,讲解了如何访问节点、组件,以及节点的常用属性如激活、位置、旋转和缩放的修改。此外,还阐述了计时器的管理和场景切换、自定义事件的监听与取消监听方法。
1脚本
1.1脚本的生命周期
onLoad 会在节点首次激活时触发
onEnable当组件的 enabled 属性从 false 变为 true 时,或者所在节点的 active 属性从
false 变为 true 时倘若节点第一次被创建且 enabled 为 true ,则会在 onLoad 之后,
start 之前被调用。
start 回调函数会在组件第一次激活前,也就是第一次执行 update 之前触发。
update 游戏开发的一个关键点是在每一帧渲染前更新物体的行为,状态和方位。
lateUpdate 会在所有动画更新前执行,但如果我们要在动效(如动画、粒子、物理等)更新之后
才进行一些额外操作,或者希望在所有组件的 update 都执行完之后才进行其它操作,那就需要用
到 lateUpdate 回调。
onDisable 当组件的 enabled 属性从 true 变为 false 时,或者所在节点的 active 属性从
true 变为 false 时
onDestroy 当组件或者所在节点调用了 destroy() ,则会调用 onDestroy 回调,并在当帧结束
时统一回收组件。
1.2访问节点和其他组件
获得组件所在的节点很简单,只要在组件方法里访问 this.node 变量:
start() {
    let node = this.node;
    node.setPosition(0.0, 0.0, 0.0);
}
如果你经常需要获得同一个节点上的其它组件,这就要用到 getComponent 这个 API,它会帮你查找你要的组件。
import { _decorator, Component, Label } from 'cc';
const { ccclass, property } = _decorator;
@ccclass("test")
export class test extends Component {
    private label: any = null
    start() {
        this.label = this.getComponent(Label);
        let text = this.name + 'started';
        // Change the text in Label Component
        this.label.string = text;
   }
}
还有一种方法利用属性检查器设置组件
然后去获取组件信息
1.3利用属性检查器设置节点
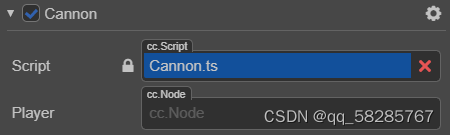
2.访问别的节点
2.1利用属性检查器设置节点来访问别的节点
import { _decorator, Component, Node } from 'cc';
const { ccclass, property } = _decorator;
@ccclass("Cannon")
export class Cannon extends Component {
    // 声明 Player 属性
    @property({ type: Node })
    private player = null;
}
2.2访问子节点
let cannons = this.node.children;
this.node.getChildByName("Cannon 01");
2.3访问父节点
tips:这里讲一下 scene场景 以及canvas画布关系 摄像机
this.node.parent2.4全局名字查找
this.backNode = find("Canvas/Menu/Back");3.节点的常用属性
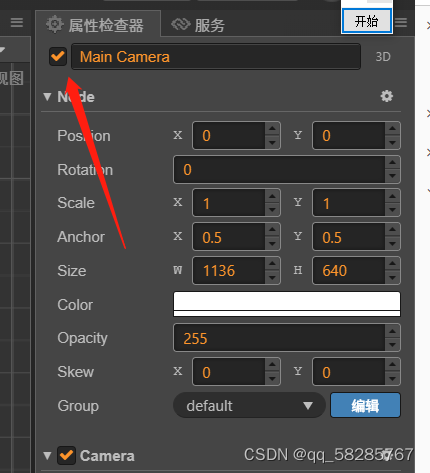
3.1节点的激活与关闭
节点默认是激活的,我们可以在代码中设置它的激活状态,方法是设置节点的 active 属性:
this.node.active = false;或者可以图形化操作
3.2更改节点的父节点假设父节点为 parentNode,子节点为 this.node,您可以:
this.node.parent = parentNode;或者
this.node.removeFromParent(false);
parentNode.addChild(this.node);
3.3更改节点位置
有以下两种方法:
1. 使用 setPosition 方法:
this.node.setPosition(100, 50, 100);
this.node.setPosition(new Vec3(100, 50, 100));
2. 设置 position 变量:
this.node.position = new Vec3(100, 50, 100);
3.4更改节点旋转
this.node.setRotation(90, 90, 90);或通过欧拉角设置本地旋转:
this.node.setRotationFromEuler(90, 90, 90);3.5更改节点缩放
this.node.setScale(2, 2, 2);4.计时器
4.1 开始一个计时器
this.schedule(function() {
// 这里的 this 指向 component
this.doSomething();
}, 5);
上面这个计时器将每隔 5s 执行一次。
4.2 更灵活的计时器
// 以秒为单位的时间间隔
 let interval = 5;
 // 重复次数
 let repeat = 3;
 // 开始延时
 let delay = 10;
 this.schedule(function() {
     // 这里的 this 指向 component
     this.doSomething();
 }, interval, repeat, delay);
上面的计时器将在 10 秒后开始计时,每 5 秒执行一次回调,重复 3 + 1 次。
4.3 只执行一次的计时器(快捷方式)
this.scheduleOnce(function() {
     // 这里的 this 指向 component
     this.doSomething();
 }, 2);
上面的计时器将在两秒后执行一次回调函数,之后就停止计时。
4.4 取消计时器
开发者可以使用回调函数本身来取消计时器:
this.count = 0;
 this.callback = function () {
     if (this.count == 5) {
         // 在第六次执行回调时取消这个计时器
         this.unschedule(this.callback);
     }
     this.doSomething();
     this.count++;
 }
 this.schedule(this.callback, 1);
注意:组件的计时器调用回调时,会将回调的 this 指定为组件本身,因此回调中可以直接使用
this 。
下面是 Component 中所有关于计时器的函数:
schedule:开始一个计时器
scheduleOnce:开始一个只执行一次的计时器
unschedule:取消一个计时器
unscheduleAllCallbacks:取消这个组件的所有计时器
注意: Node 不包含计时器相关 API
5.切换场景
cc.director.loadScene("hallScene")
//只有这一个api 不像2dx有第一个场景加载与后续场景切换两个api
6自定义事件
6.1 监听事件
监听事件可以通过 eventTarget.on() 接口来实现,方法如下:
// 该事件监听每次都会触发,需要手动取消注册
eventTarget.on(type, func, target?);
6.2 取消监听事件
当我们不再关心某个事件时,我们可以使用 off 接口关闭对应的监听事件。
off 接口的使用方式有以下两种:
// 取消对象身上所有注册的该类型的事件
eventTarget.off(type);
// 取消对象身上该类型指定回调指定目标的事件
eventTarget.off(type, func, target);


 3527
3527

 被折叠的 条评论
为什么被折叠?
被折叠的 条评论
为什么被折叠?
 到【灌水乐园】发言


