


VS2022使用MFC编写FTP客户端
VS2022配置MFC环境
1.打开Visual Studio Installer
1.点击修改

2.选择使用C++的桌面开发,勾选红线部分

3.选择完成之后,点击上方的“单个组件”
勾选红线部分
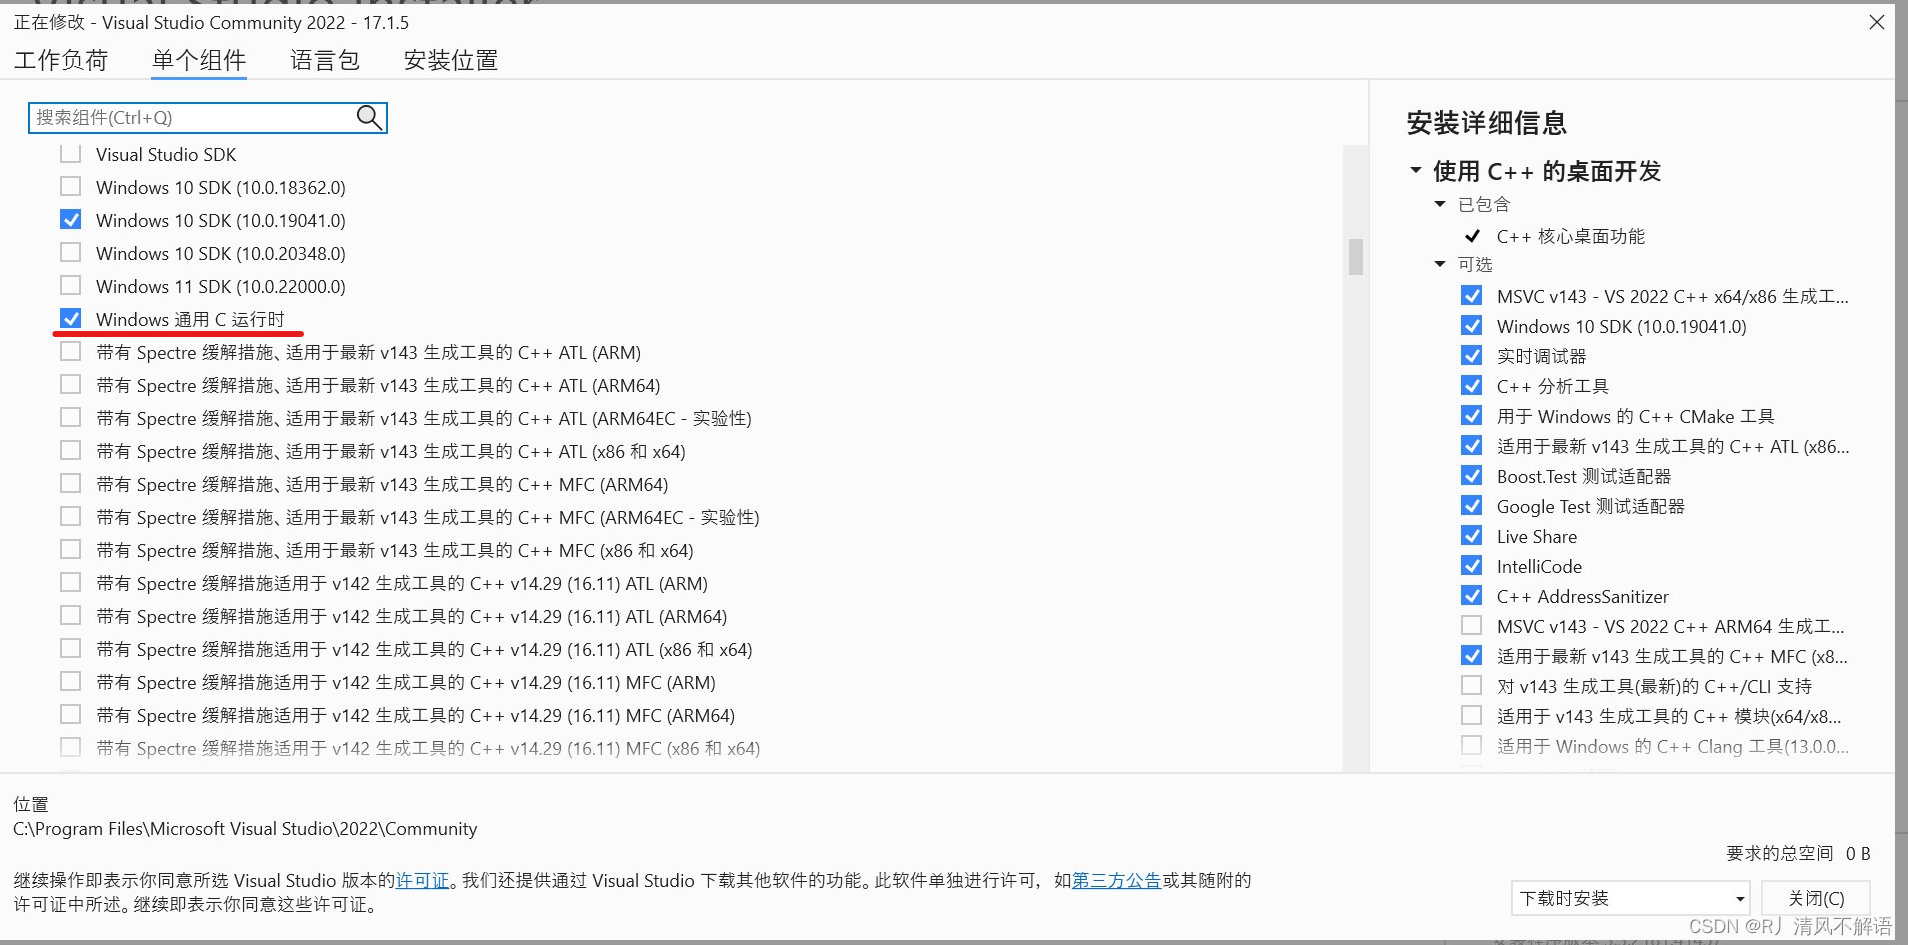
4.点击最右下角的修改,等待安装
2.创建MFC应用
1.创建新项目:
搜索找到MFC应用并点击下一步

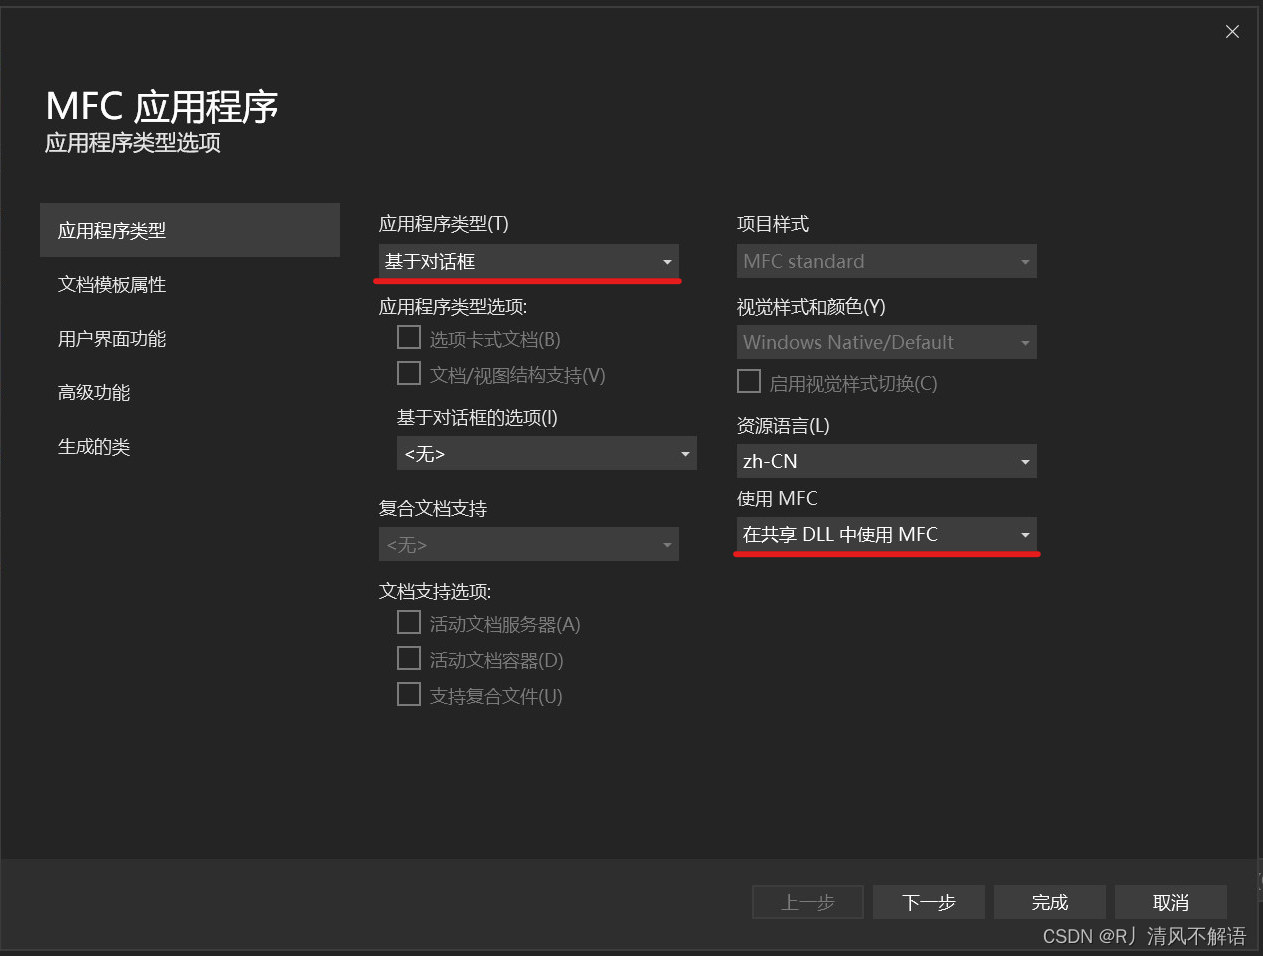
2.配置MFC应用程序:
配置下列红线中的项目
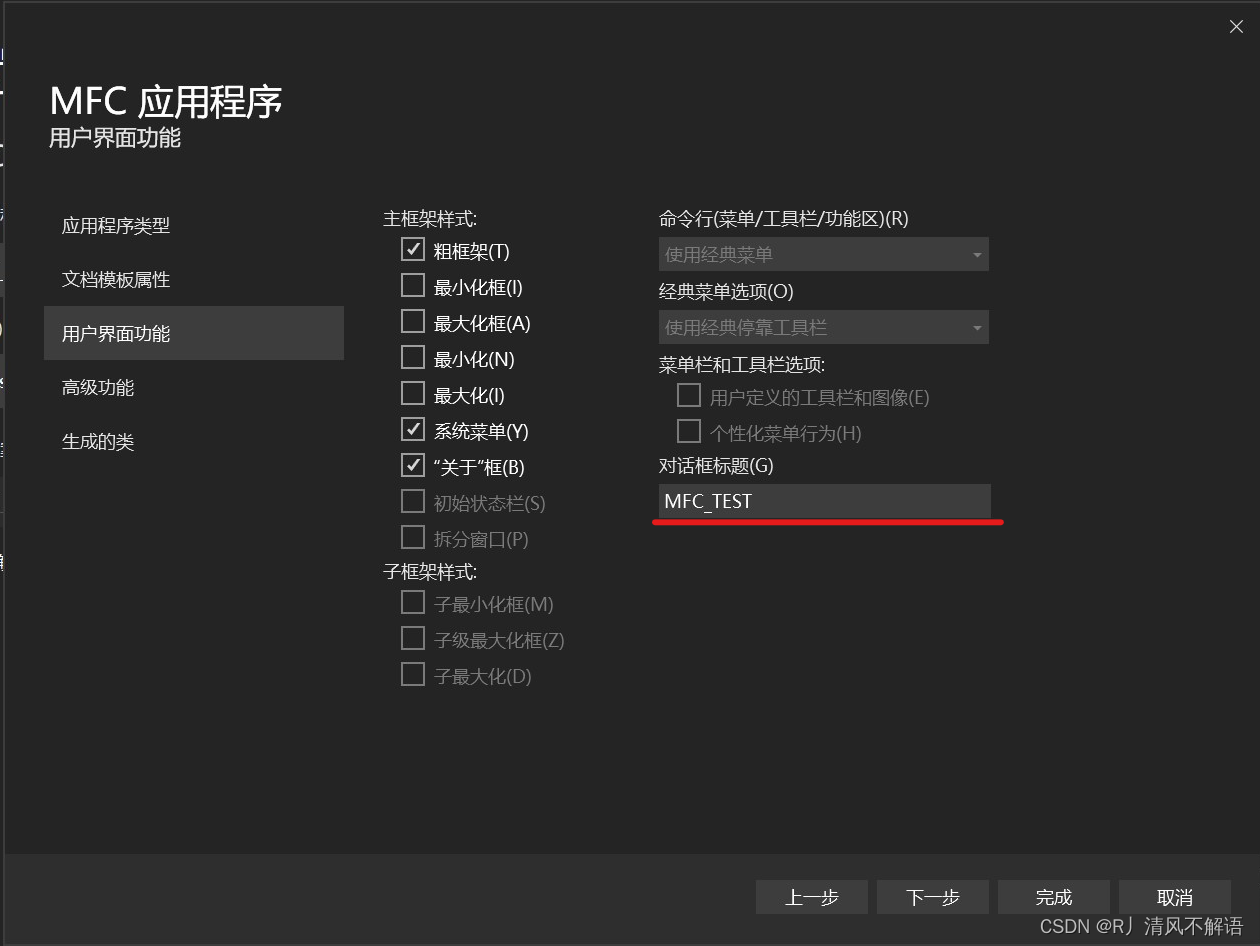
3.修改对话框标题
这里随意修改自己想要的标题
4.勾选Windows套接字
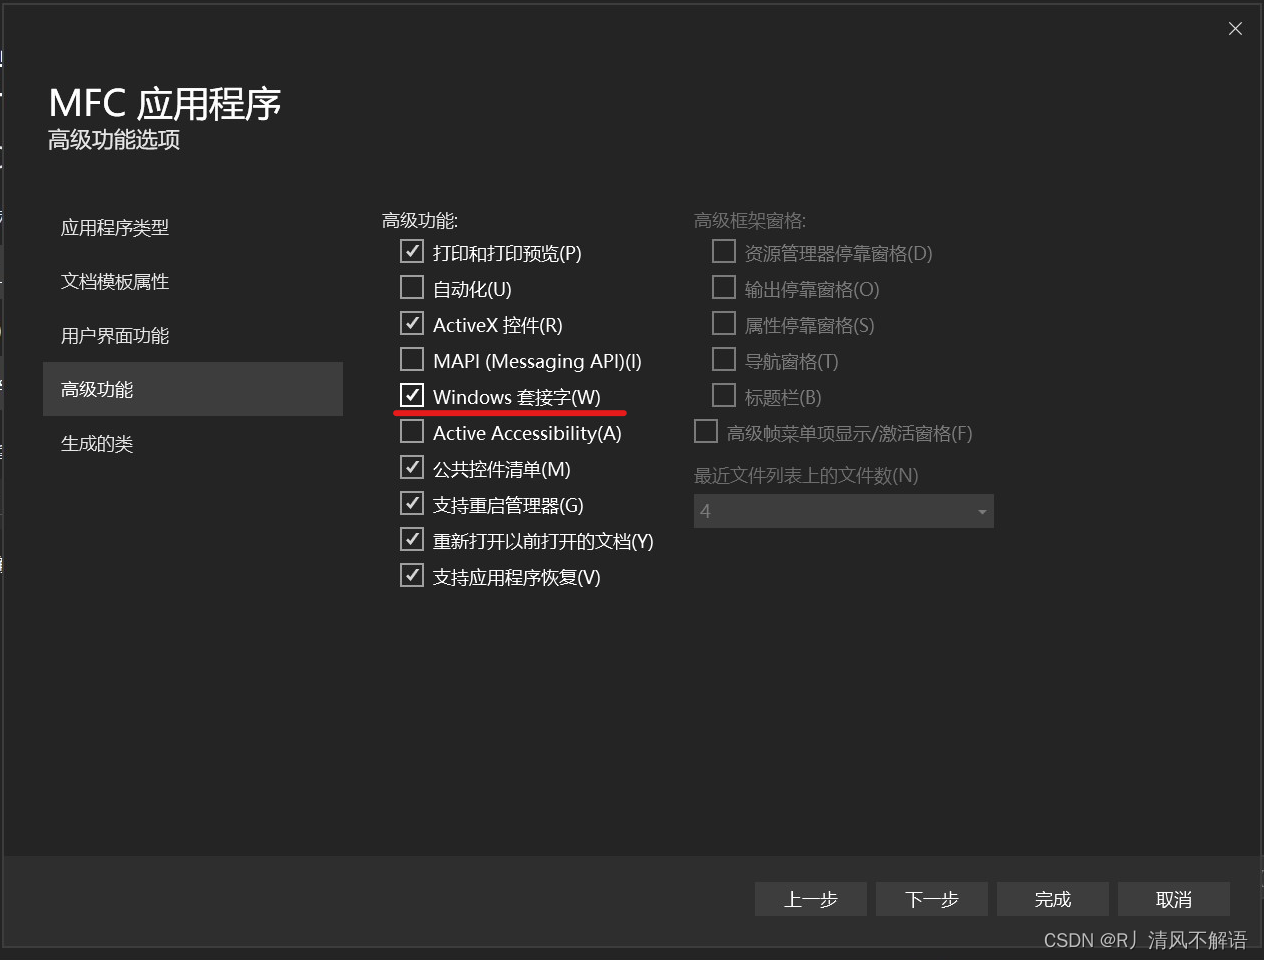
5.之后点击右下角“完成”,等待十几秒
3.编写MFC项目
1.在工具箱中找到这次项目会用到的四个组件:
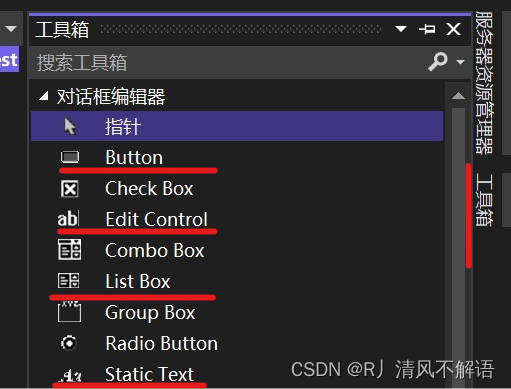
没有工具箱的可以点击vs最上方的视图,在这一栏中找到工具箱。
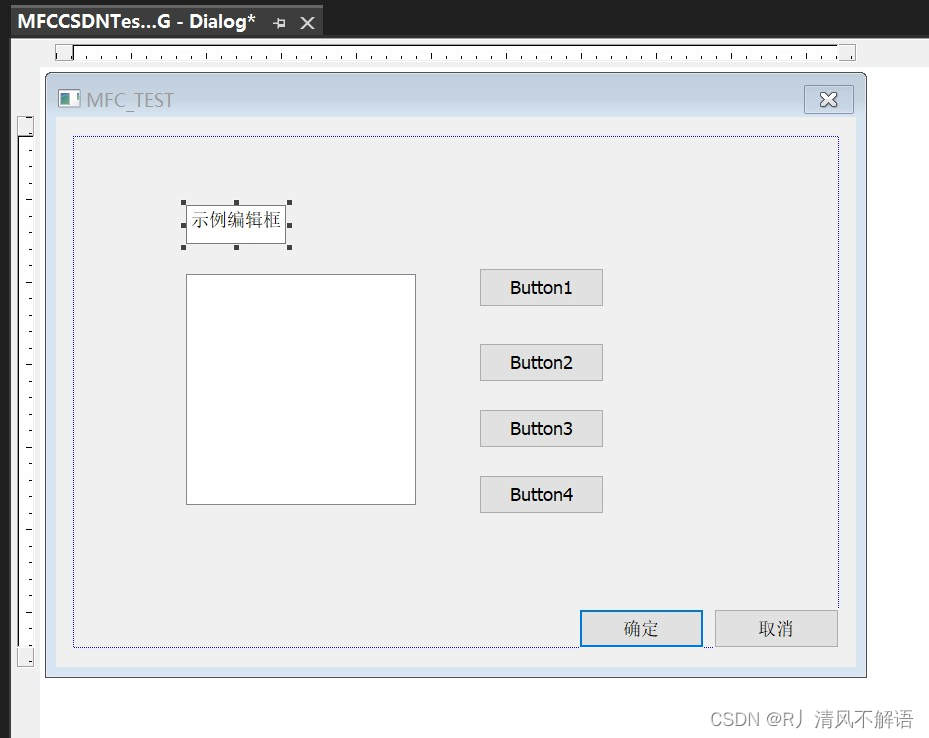
2.将四个Button,一个Edit Control,一个List Box和若干个Static Text拖拽到Dialog文件当中。
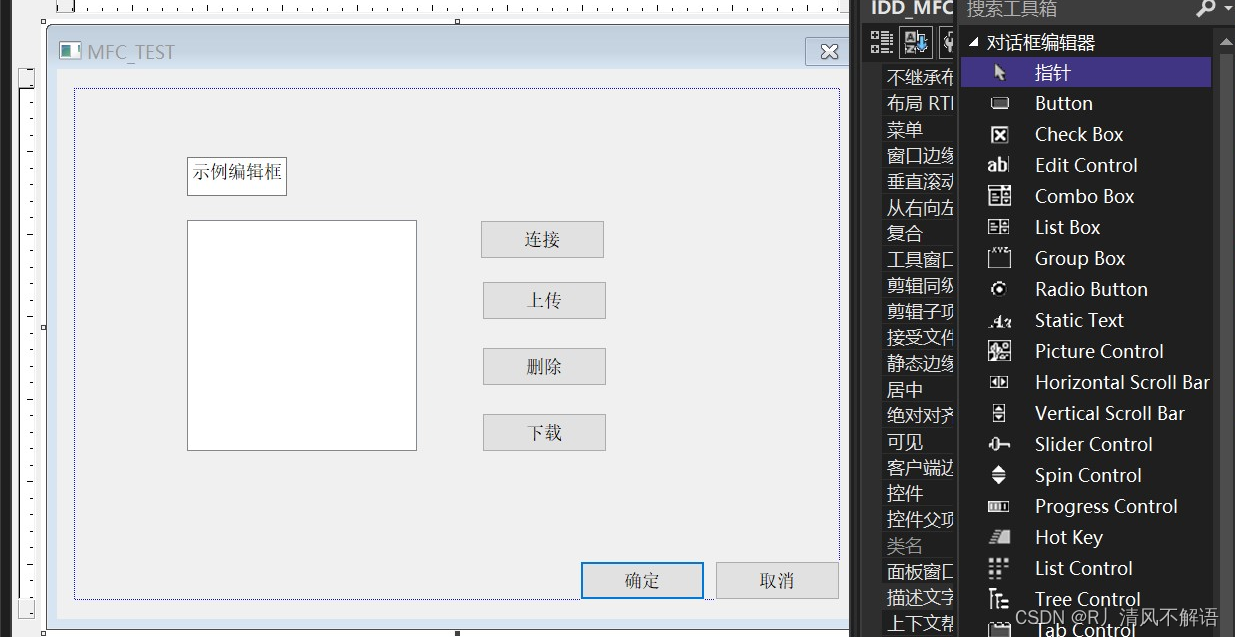
3.右键每一个工具,然后点击属性,在属性当中配置一些相关信息
更改Edit Control的ID

然后更改ListBox的
ID改为IDC_ListBox
然后更改Button1的
ID改为IDC_Connect
描述文字改为连接
然后更改Button2的
ID改为IDC_Update
描述文字改为上传
然后更改Button3的
ID改为IDC_Delete
描述文字改为删除
然后更改Button4的
ID改为IDC_Download
描述文字改为下载
4.添加变量
右键每一个组件(Button&&EditControl&&ListBox)
然后选择添加变量
更改名称:
(为了方便,我将所有的名称都更改为:On+==控件ID的IDC_==的后半部分,这里不逐个演示了,看到下面这个例子就会懂)
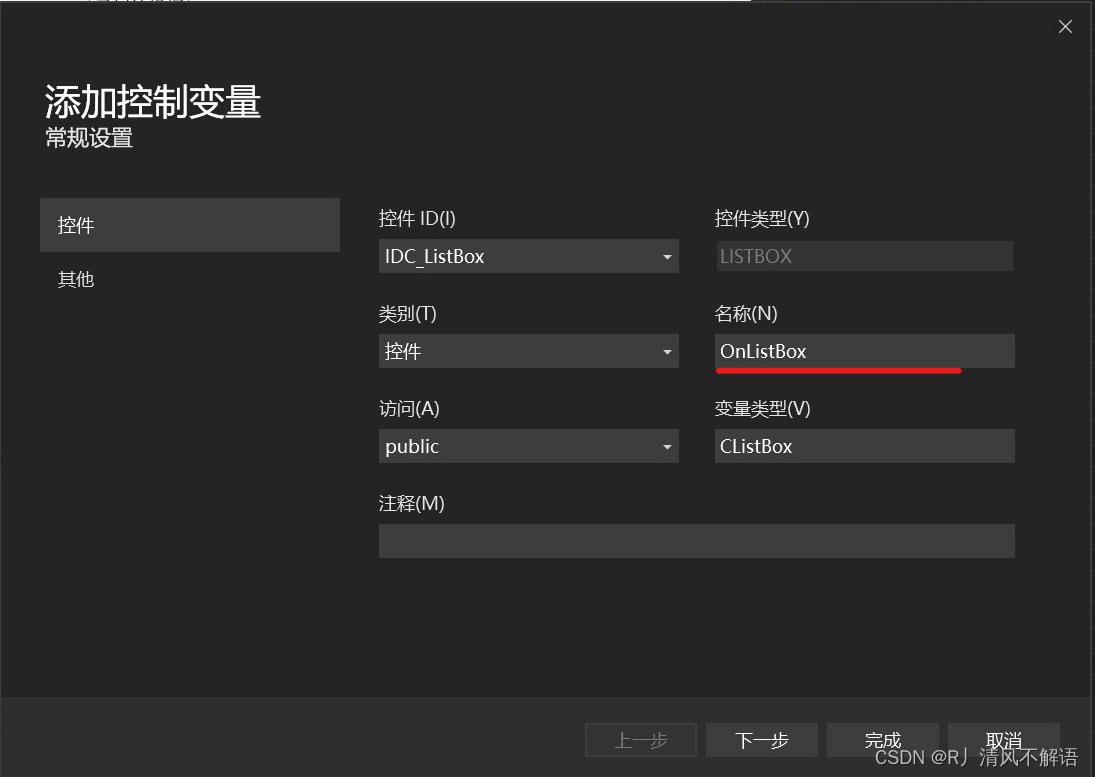
更改完之后点击完成。
5.类向导
右键任意一个组件
然后选择类向导
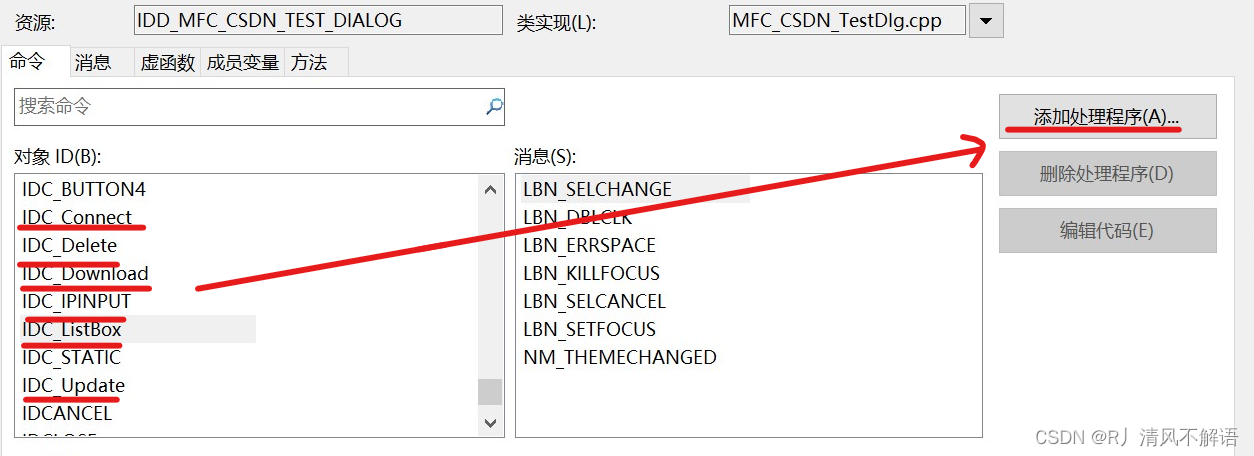
点击这六个对象ID,然后点击添加到处理程序
然后点击确定
6.方法
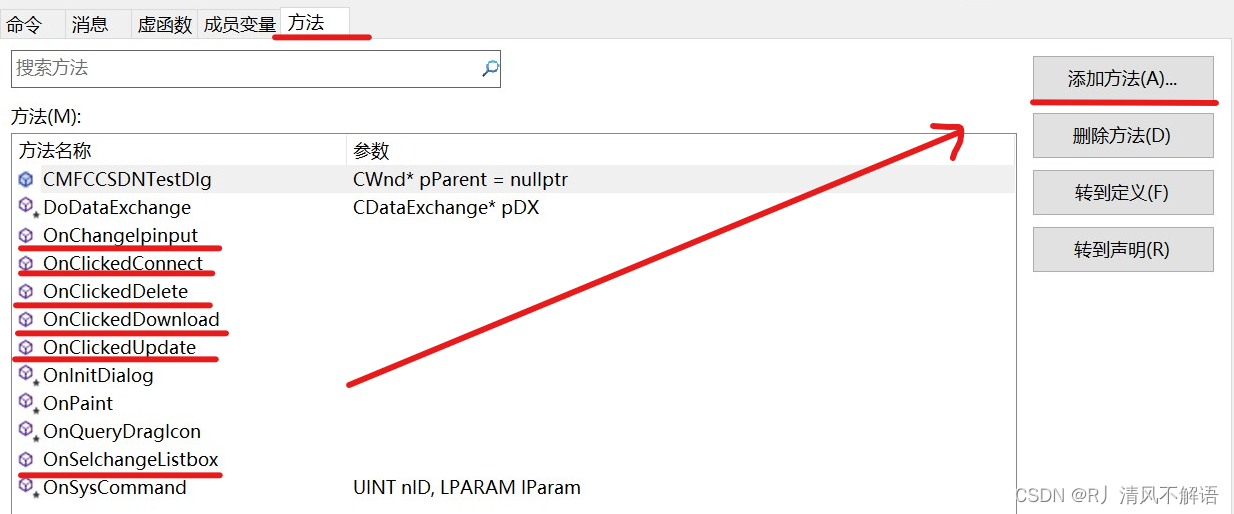
将这些添加到方法,
以OnClickedConnect为例:
函数名为:For+Connect ,返回类型:void
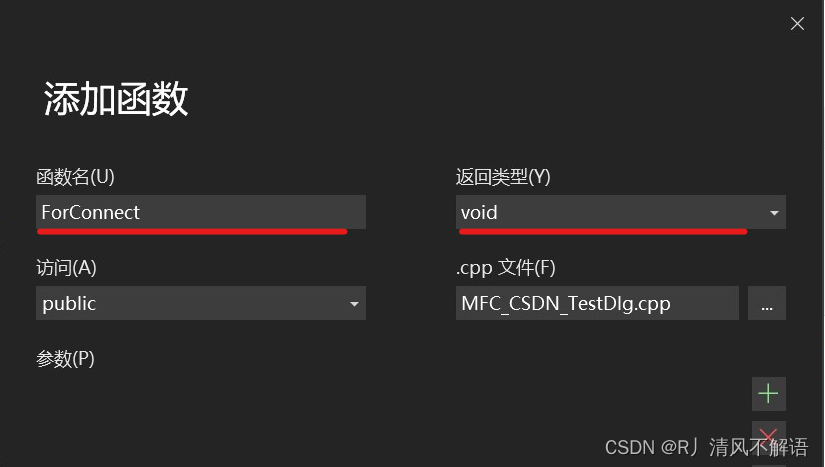
然后点击确定。
7.可能会出现的问题:
问题1.未定义表示符:
找到头文件MFC_优快云_TestDlg.cpp
添加头文件:
#include "resource.h"
2.然后再资源管理器中点击resource.h,出现什么都点确定
4.函数编写
1.添加头文件
在framework.h文件当中添加:
#include<afxinet.h>
#include<afxsock.h>
2.添加变量
在Dlg.cpp文件当中添加:
CInternetSession* m_pInetSession;
CFtpConnection* m_pFtpConnection;
CFtpFileFind* m_pRemoteFile;
CString m_pRemoteFileName, m_LocateFileName;
3.在Dlg.cpp文件中编写函数:
ForConnect函数:
注意
在这个函数中,传入的参数增加一个
CString m_IPadress
	CString m_strUser;
	CString m_strPass;
	m_strPass = "123456";//密码
	m_strUser = "sjc";//用户名
	m_pInetSession = new CInternetSession(AfxGetAppName(), 1, PRE_CONFIG_INTERNET_ACCESS);
	m_pFtpConnection = m_pInetSession->GetFtpConnection(m_IPadress, m_strUser, m_strPass);
	m_pRemoteFile = new CFtpFileFind(m_pFtpConnection);
ForDelete函数:
		CString selfile;
	OnListBox.GetText(OnListBox.GetCurSel(), selfile);
	if (!selfile.IsEmpty())
	{
		if (AfxMessageBox(L"确定要删除这个文件吗?", 4 + 48) == 6)
		{
			m_pFtpConnection->Remove(selfile);
		}
		CString strdir;
		m_pFtpConnection->GetCurrentDirectory(strdir);
		m_pInetSession->Close();
		this->OnClickedConnect();
		m_pFtpConnection->SetCurrentDirectory(strdir);
		this->OnSelchangeListbox();
	}
ForDownload函数:
	CString selfile;
	OnListBox.GetText(OnListBox.GetCurSel(), selfile);
	if (!selfile.IsEmpty())
	{
		CFileDialog file(FALSE, NULL, selfile, OFN_HIDEREADONLY | OFN_OVERWRITEPROMPT, L"所有文件(*.*)|*.*|", this);
		if (file.DoModal() == IDOK)
		{
			CString strname;
			strname = file.GetFileName();
			CString strdir;
			m_pFtpConnection->GetCurrentDirectory(strdir);
			m_pFtpConnection->GetFile(selfile, strname);
			m_pInetSession->Close();
			this->OnClickedConnect();
			m_pFtpConnection->SetCurrentDirectory(strdir);
			this->ForListbox();
			AfxMessageBox(_T("下载成功!"));
		}
	}
ForUpdate函数:
	CString str;
	CString strname;
	CFileDialog file(true, NULL, NULL, OFN_HIDEREADONLY | OFN_OVERWRITEPROMPT, L"所有文件(*.*)|*.*|", this);
	if (file.DoModal() == IDOK)
	{
		str = file.GetPathName();
		strname = file.GetFileName();

	}

	CString strdir;
	m_pFtpConnection->GetCurrentDirectory(strdir);
	BOOL bput = m_pFtpConnection->PutFile((LPCTSTR)str, (LPCTSTR)strname);
	if (bput)
	{
		m_pInetSession->Close();
		this->OnClickedConnect();
		m_pFtpConnection->SetCurrentDirectory(strdir);
		this->ForListbox();
		AfxMessageBox(_T("上传成功!"));
	}
ForListbox函数:
	OnListBox.ResetContent();
	CFtpFileFind ftpfind(m_pFtpConnection);
	CString strdirpath;
	m_pFtpConnection->GetCurrentDirectory(strdirpath);
	BOOL bfind = ftpfind.FindFile(strdirpath);
	while (bfind)
	{
		bfind = ftpfind.FindNextFile();
		CString strpath;
		if (ftpfind.IsDots())
		{
			continue;
		}
		if (!ftpfind.IsDirectory())
		{
			strpath = ftpfind.GetFileName();
			OnListBox.AddString(strpath);
		}
		else
		{
			strpath = ftpfind.GetFilePath();
			OnListBox.AddString(strpath);
		}
	}
OnClickedConnect()函数:
	CString Adress;
	GetDlgItemText(IDC_IPINPUT, Adress);
	ForConnect(Adress);
	this->ForListbox();
OnClickedUpdate()函数:
	this->ForUpdate();
	this->ForListbox();
OnClickedDownload()函数:
	this->ForDownload();
	this->ForListbox();
OnClickedDelete()函数:
	this->ForDelete();
	this->ForListbox();
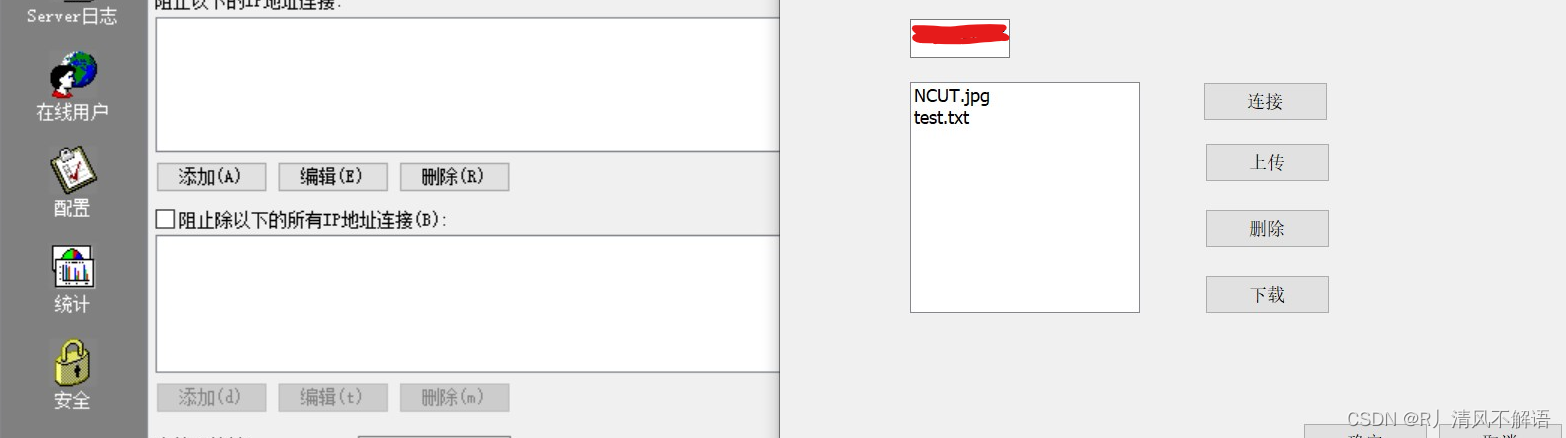
5.测试
连接成功


 1万+
1万+

 被折叠的 条评论
为什么被折叠?
被折叠的 条评论
为什么被折叠?
 到【灌水乐园】发言


