


 本文详细介绍了Spring中Bean的环境配置,包括XML和Properties方式。讨论了Bean的实例化,如构造器、静态工厂和实例工厂方式。讲解了Bean的作用域,如singleton和prototype,并探讨了Bean的生命周期和装配方式,包括基于XML和Annotation的装配以及自动装配。
Javaweb学习笔记(Spring的Bean)
Bean的环境配置
Spring容器支持XMLhe Properties两种方式配置文件,在Spring中XML配置文件的根元素是< bens>,< beans>中包含了< bean>,每一个< bean>子元素定义了一个Bean,并描述了该Bean如何被装配到Spring容器中。< bean>中常用的元素。
| 属性或子元素名称 | 描述 |
|---|---|
| id | 是一个Bean的唯一一个表示符,Spring容器瑞Bean的配置、管理都通过该属性来描述。 |
| name | Spring容器同样可以通过此属性此属性的对容器中的Bean进行配置和管理,name属性中Bean指定多个名称,没个名称直接用逗号分开。 |
| class | 该属性指定了Bean的具体实现类,它必须是一个完整的类名,使用类的全假定名 |
| scope | 用来设定Bean实例的作用域其属性值:singletion(单例),prototype(双例),request,session,global Session,application,websocket,默认值是singleton |
| constructor-arg | < bean>元素的子元素,了可以使用此元素传入构造参数进行实例化,钙元素index构造参数的序号,type属性指定构造参数的类型,参数值可以通过ref属性或value实行直接指定,也可以通过ref或者value子元素指定 |
| ref | < property>、< constructor-arg>等元素的属性或子元素,可以用于指定对Bean工厂中的某个Bean实例的引用。 |
| value | < property>、< constuctor-arg>等元素的属性或子元素,可以用于指定对Bean工厂中Bean实例的引用。 |
| list | 用于封装List或数字类型的依赖注入 |
| set | 用于封装Set类型的依赖注入 |
| map | 用于封装Map类型属性的依赖注入 |
| entry | < map>元素的子元素,用于设置一个键值对,器key属性指定字符串类型的键值。 |
在配置文件中,通常一个普通的Bean只需定义id和class两个属性即可。定义Bean的方式如下:
<?xml version="1.0" encoding="UTF-8"?>
<beans xmlns="http://www.springframework.org/schema/beans"
    xmlns:xsi="http://www.w3.org/2001/XMLSchema-instance"
    xsi:schemaLocation="http://www.springframework.org/schema/beans
        http://www.springframework.org/schema/beans/spring-beans.xsd">
	<!--使用id属性定义bean1-->
	<bean id="bean1" class="com.itheima.Bean1"/>
	<!--使用name属性定义bean2-->
	<bean name="bean2" class="com.itheima.Bean2"/>
</beans>
Bean的实例化
在Spring中想要使用容器中的Bean,需要先实例化Bean,实例化Bean有三种方式:构造器实例化、静态工厂方式实例化和示例工厂方式实例化。
构造器实例化
构造器示例化是指Spring容器通过Bean对应类中默认的无参构造方法来实例化Bean。
示例:
(1)在Eclipse中建立一个Web项目,在该项目的lib目录中加入Spring支持和依赖的JAR包
(2)在Bean项目的src目录下,创建一个bean.example包,创建一个Bean1类
package bean.example;

public class Bean1 {
}
(3)在bean.example包中,创建Spring的配置文件beans1.xml在配置文件中定义一个id为1的Bean。
<?xml version="1.0" encoding="UTF-8"?>
<beans xmlns="http://www.springframework.org/schema/beans"
    xmlns:xsi="http://www.w3.org/2001/XMLSchema-instance"
    xsi:schemaLocation="http://www.springframework.org/schema/beans
        http://www.springframework.org/schema/beans/spring-beans.xsd">
	<bean id="bean1" class="bean.example.Bean1"/>
</beans>
(4)在bean.example包中创建测试类InstanceTest1来测试是否能实例化Bean
 package bean.example;
import org.springframework.context.ApplicationContext;
import org.springframework.context.support.ClassPathXmlApplicationContext;
public class InstanceTest1 {
	public static void main(String [] arg){
		String xmlPath="bean/example/beans1.xml";
		ApplicationContext applicationContext=new ClassPathXmlApplicationContext(xmlPath);
		Bean1 bean=(Bean1) applicationContext.getBean("bean1");
		System.out.println(bean);
	}
}

静态工厂方式实例化
静态工厂方式实例化需要开发者创建一个静态工厂的方法来创建Bean示例,其Bean配置中的class属性所指定的不再是Bean实例的实现类,而是静态工厂类,同时还需要使用factory-method属性来制定所创建的静态工厂方法。
示例:
(1)在Bean项目中创建一个com.itheima.instance.static_factory包,创建一个Bean2类
package com.itheima.instance.static_factory;

public class Bean2 {

}
(2)创建一个MyBean2Factory类,并在类中创建一个静态方法createBean()返回Bean2实例
package com.itheima.instance.static_factory;

public class MyBean2Factory {
	public static Bean2 createBean(){
		return new Bean2();
	}
}
(3)创建一个Spring配置文件beans2.xml
<?xml version="1.0" encoding="UTF-8"?>
<beans xmlns="http://www.springframework.org/schema/beans"
    xmlns:xsi="http://www.w3.org/2001/XMLSchema-instance"
    xsi:schemaLocation="http://www.springframework.org/schema/beans
        http://www.springframework.org/schema/beans/spring-beans.xsd">
	<bean id="bean2" class="com.itheima.instance.static_factory.MyBean2Factory" factory-method="createBean"/>
</beans>
(4)创建一个测试类InstanceTest2,来测试使用静态工厂是否能实例化Bean
package com.itheima.instance.static_factory;
import org.springframework.context.ApplicationContext;
import org.springframework.context.support.ClassPathXmlApplicationContext;
public class InstanceTest2 {
	public static void main(String [] args){
		String xmlPath="com/itheima/instance/static_factory/beans2.xml";
		ApplicationContext applicationContext=new ClassPathXmlApplicationContext(xmlPath);
		System.out.println(applicationContext.getBean("bean2"));
	}
}

实例工厂方式实例化
实例工厂方式实例化不再使用静态方法创建Bean实例,而是采用直接创建Bean实例的方式,在配置文件中需要实例化的Bean也不是通过Class属性直接指向的实例类,而是通过factory-bean属性指向配置的实例工厂,然后使用factory-method属性确定使用工厂中的哪个方法。
示例:
(1)在Bean项目的src目录下,创建一个com.ithiema.instance.factory包,在该包中创建一个Bean3类。
package com.ithiema.instance.factory;

public class Bean3 {

}
(2)在com.ithiema.instance.factory包下,创建MyBean3Factory没在类中创建使用无参构造方法输出“bean3工厂实例化中”语句,并使用createBean()方法创建Bean3对象。
package com.ithiema.instance.factory;

public class MyBean3Factory {
	public MyBean3Factory(){
		System.out.println("bean3工厂实例化中");
	}
	public Bean3 createBean(){
		return new Bean3();
	}
}
(3)在com.ithiema.instance.factory包中,创建Spring配置文件bean3.xml,设置相关配置后。
<?xml version="1.0" encoding="UTF-8"?>
<beans xmlns="http://www.springframework.org/schema/beans"
    xmlns:xsi="http://www.w3.org/2001/XMLSchema-instance"
    xsi:schemaLocation="http://www.springframework.org/schema/beans
        http://www.springframework.org/schema/beans/spring-beans.xsd">
     <!-- 配置工厂 -->
	<bean id="MyBean3Factory" class="com.ithiema.instance.factory.MyBean3Factory"/>
	<!-- 使用factory-bean属性指向配置的实例工厂 -->
	<!-- 使用factory-method属性确定使用工厂中的哪个方法 -->
	<bean id="bean3" factory-bean="MyBean3Factory" factory-method="createBean"/>
</beans>
(4)在com.ithiema.instance.factory的包中,创建测试类InstanceTest3,来测试实例工厂方式能否实例化Bean。
package com.ithiema.instance.factory;
import org.springframework.context.ApplicationContext;
import org.springframework.context.support.ClassPathXmlApplicationContext;
public class InstanceTest3 {
	public static void main(String []args){
		String xmlPath="com/ithiema/instance/factory/beans3.xml";
		ApplicationContext applicationContext=new ClassPathXmlApplicationContext(xmlPath);
		System.out.println(applicationContext.getBean("bean3"));
	}
}

Bean的作用域
通过Spring容器创建一个Bean实例时,不仅可以完成Bean的实例化,还可以为Bean指定特定的作用域。
作用域的种类
Bean的实例定义了7中作用域
| 作用域名称 | 说明 |
|---|---|
| singleton(单例) | 使用singleton定义的Bean在Sring容器中将只有一个实例,无论有多少个Bean对象引用它,始终将指向同一个对象,这就是Spring容器默认值。 |
| prototype | 没词通过Spring容器获取的prototype定义的Bean时,容器都将创建一个新的Bean实例。 |
| request | 在一次HTTP请求中,容器会返回该Bean的同一个实例,对不同的HTTP请求则会产生一个新的Bean,而且该Bean仅在当前HTTP Request内有效。 |
| session | 在一次HTTP Session中,容器会返回该Bean的同一个实例,对不同HTTP请求请求则会产生一个Bean,而且Bean仅在当前HTTP Session内有效 |
| globalSession | 在一个全局HTTP Session中,容器会返回该Bean的同一个实例,仅在使用protlet上下文时有效。 |
| application | 为每个ServletContext对象创建一个实例,仅在Web相关的ApplicationContext中生效 |
| webSocket | 为没个websocket对象创建一个实例,仅在Web相关的ApplicationContext中生效 |
singleton作用域
singleton是Spring容器默认的作用域,当Bean的作用域为singleton时,Spring只会存在一个共享的Bean实例,并且所有对Bean的请求,只要id与该Bean的id属性相匹配,就会返回同一个Bean实例。singleton作用域对于无会话状态的Bean来说,是最理想的选择。
在Spring配置文件中,Bean的作用域是通过< bean>元素的scope属性来指定该属性值可以设置为,singleton、prototype、request、session、golbalSession、application和websocket七个值,分别表示代表七种作用域。如果想更改作用域,只需将scope的值更改就可。
示例:
(1)创建一个com.ithiem.scope包,包下创建一个Scope类
package com.ithiem.scope;

public class Scope {

}
(2)编写配置文件beans4.xml
<?xml version="1.0" encoding="UTF-8"?>
<beans xmlns="http://www.springframework.org/schema/beans"
    xmlns:xsi="http://www.w3.org/2001/XMLSchema-instance"
    xsi:schemaLocation="http://www.springframework.org/schema/beans
        http://www.springframework.org/schema/beans/spring-beans.xsd">
	<bean id="scope" class="com.ithiem.scope.Scope" scope="singleton"/>
</beans>
(3)编写测试类ScopeTest.java
package com.ithiem.scope;
import org.springframework.context.ApplicationContext;
import org.springframework.context.support.ClassPathXmlApplicationContext;
public class ScopeTest {
	public static void main(String [] arrgs){
		String xmlPath="com/ithiem/scope/beans4.xml";
		ApplicationContext applicationContext=new ClassPathXmlApplicationContext(xmlPath);
		System.out.println(applicationContext.getBean("scope"));
		System.out.println(applicationContext.getBean("scope"));
	}
}

prototype作用域
对需要保持会话状态Bean应该使用prototype作用域在使用prototype作用域时,Spring容器回味没个对该Bean的请求都创建一个新的实例。
示例:
修改上一个示例的beans4.xml
<?xml version="1.0" encoding="UTF-8"?>
<beans xmlns="http://www.springframework.org/schema/beans"
    xmlns:xsi="http://www.w3.org/2001/XMLSchema-instance"
    xsi:schemaLocation="http://www.springframework.org/schema/beans
        http://www.springframework.org/schema/beans/spring-beans.xsd">
	<bean id="scope" class="com.ithiem.scope.Scope" scope="prototype"/>
</beans>

Bean的生命周期
Spring容器可以管理singleton作用域的Bean的生命周期。对于prototype作用域的Bean,Spring只负责创建,当容器创建了Bean实例后,Bean的实例就交给客户端进行管理,Spring不再跟踪其生命周期。
Bean的生命周期的整个执行过程描述如下:
(1)根据配置情况调用Bean构造方法或工厂方法实例化Bean
(2)利用依赖注入完成Bean中所有属性值的配置注入
(3)如果Bean实现了BeanFactoryAware接口,则Spring调用Bean的setBeanName()方法传入当前Bean的id值
(4)如果Bean实现了BeanFactoryAware接口,则Spring调用setApplicationContext()方法传入当前实例的引用。
(5)如果Bean实现了ApplicationContextAware接口,则Spring调用setApplicationContext()方法传入当前ApplicationContext实例的引用。
(6)如果BeanPostProcessor和Bean关联,则Spring将调用该接口的预初始化方法postProcessBeforelnitialzation()对Bean进行加工操作,Spring的AOP就是用它实现的。
(7)如果Bean实现了lnitializingBean接口,则Spring将调用afterPropertiesSet()方法。
(8)如果在配置文件中通过init-method属性制定了初始化方法,则调用该方法初始化方法。
(9)如果BeanPostProcessor和Bean关联则Spring将调用该接口的初始化方法postProcessAfterlnitialization(),此时Bean已经可以被应用系统使用了。
(10)如果< bean>中制定了该Bean的作用范围为scope=“singleton”,则将该Bean放入Spring loC的缓存池中,将除法Spring对该Bean的生命周期管理,如果在< Bean>中指定该Bean的作用范围为scope=“prototype”,则将该Bean交给调用者,调用者管理该Bean的生命周期,Spring不再管理该Bean
(11)如果Bean实现了DisposableBean接口,则该Spring会调用destory()方法将Spring中的Bean销毁;如果在配置文件中通过destory-method属性制定了Bean的销毁方法,则Spring将调用该方法进行销毁。
Bean的装配方式
Bean的装配可以理解为依赖关系注入,Bean的装配方法即Bean依赖注入的方式。装配方式分为:基于XML的装配,基于注解的装配和自动装配等。
基于XML的装配
Spring提供了脸中基于XML的装配方式:设值注入和构造注入。
Spring实例化Bean的过程中Spring首先会调用Bean的默认构造方法来实例化Bean对象,然后通过反射的方式调用setter方法注入属性值,设置注入对Bean的要求:
1.Bean类必须提供一个默认的无参构造方法
2.Bean类必须为需要注入的属性提供对应的setter方法。
使用设值注入时,在Spring配置文件中,需要使用< bean>元素的子元素< property>来为每个属性注入值;而使用构造注入时,在配置文件里,需要使用< bean>元素的子元素< constructor-arg>来定义构造方法的参数,可以使用其value属性来设置该参数的值。
示例:
(1)在项目chapter02的src目录下,创建一个com.itheima.assemable包该包中创建User类,并在类中定义username、password和list集合三个属性及其对应的setter方法。
package com.itheima.assemable;
import java.util.List;
public class User {
	private String username;
	private Integer password;
	private List<String> list;
	//使用构造注入,提供带有所有参数的构造方法
	public User(String username,Integer password,List<String> list){
		this.username=username;
		this.password=password;
		this.list=list;
	}
	//使用设值注入,提供默认空参构造方法,为所有值提供setter方法
	public User(){}
	public void setUsername(String username){
		this.username=username;
	}
	public void setPassword(Integer password){
		this.password=password;
	}
	public void setList(List<String> list){
		this.list=list;
	}
	public String toString(){
		return "User [username="+username+",password="+password+",list="+list+"]";
	}
}
(2)在com.itheima.assemable,包中创建beans5.xml
<?xml version="1.0" encoding="UTF-8"?>
<beans xmlns="http://www.springframework.org/schema/beans"
    xmlns:xsi="http://www.w3.org/2001/XMLSchema-instance"
    xsi:schemaLocation="http://www.springframework.org/schema/beans
    http://www.springframework.org/schema/beans/spring-beans.xsd">
    <!-- 使用构造注入方式装配User实例 -->
    <bean id="user1" class="com.itheima.assemable.User">
    	<constructor-arg index="0" value="tom"/>
    	<constructor-arg index="1" value="123456"/>
    	<constructor-arg index="2">
    		<list>
    			<value>"constructorvalue1"</value>
    			<value>"constructorvalue2"</value>
    		</list>
    	</constructor-arg>
    </bean>
    <!-- 使用设值注入方式装配User实例 -->
    <bean id="user2" class="com.itheima.assemable.User">
    	<property name="username" value="张三"/>
    	<property name="password" value="654321"/>
    	<property name="list">
    		<list>
    			<value>"setlisvalue1"</value>
    			<value>"setlisvalue2"</value>
    		</list>
    	</property>
    </bean>
</beans>
(3)在com.itheima.assemable包中,创建XmlBeanAssembleTest.xml
package com.itheima.assemable;
import org.springframework.context.ApplicationContext;
import org.springframework.context.support.ClassPathXmlApplicationContext;
public class XmlBeanAssemable {
	public static void main(String []args){
		String xmlPath="com/itheima/assemable/beans5.xml";
		ApplicationContext applicationContext=new ClassPathXmlApplicationContext(xmlPath);
		System.out.println(applicationContext.getBean("user1"));
		System.out.println(applicationContext.getBean("user2"));
	}
}

基于Annotation的装配
Spring配置Xml文件可以实现Bean的装配工作,但如果应用中有很多Bean是,会导致XML配置文件过于臃肿。
Spring中定义了一系列注解:
1.@Component:可以使用此注解描述Spring中的Bean,但它是一个泛化的概念,仅仅表示一个组件,并且可以作用在任何层次。
2. @Repository:用于将数据访问层的类标识为Spring中的Bean,其功能与@Component
3. @Service:通常作用在业务层(Service层),用于将业务层的类标识为Spring中Bean其功能与@Component相同
4. @Controller:通常作用在控制层,用于将控制层的类标识为Spring中的Bean,其功能与@Component。
5. @Autowired:用于对Bean的属性变量、属性setter方法及构造方法进行标注,配合对应的注解处理器完成Bean的自动配置工作。
6. @Resource:作用域@Autowired一样,其区别在于@Autowired默认按照Bean类型装配而Resource默认按照Bean实例名称进行装配。
7. @Qualifier:与@Autowired注解配合使用,会将默认的按Bean类型装配修改为按Bean的实例名称装配,Bean的实例名称由@Qualifier注解的参数指定。
示例:
(1)在src目录下创建一个com.itheima.annotation包,该包中创建接口UserDao,在接口中定义一个save方法
package com.itheima.annotation;

public interface UserDao {
	public void save();
}
(2)在com.itheima.annotation包中,创建UserDao接口实现类UserDaoImpl,该类需要实现接口中save()方法。
package com.itheima.annotation;
import org.springframework.stereotype.Repository;
@Repository("userDao")
public class UserDaoImpl implements UserDao{
	public void save(){
		System.out.println("userdao...save..");
	}
}
@Repository(“userDao”)相当于
<bean id="userDao" class="com.itheima.annotation.UserServiceImpl"/>
(3)在com.itheima.annotation包中,创建接口UserService,在接口中同样定义一个save()方法
package com.itheima.annotation;

public interface UserService {
	public void save();
}
(4)在com.itheima.annotation包中,创建接口UserServiceImpl,该类需要实现接口中的save()方法。
package com.itheima.annotation;
import javax.annotation.Resource;
import org.springframework.stereotype.Service;

@Service("userService")
public class UserServiceImpl implements UserService{
	@Resource(name="userDao")
	private UserDao userDao;
	public void save(){
		this.userDao.save();
		System.out.println("userservice...save...");
	}
}
@Service(“userService”)相当于
<id ="userService" class=" com.itheima.annotation.UserServiceImpl"/>
@Resource(name=“userDao”)相当于
<property name="userDao" ref="userDao"/>
(5)在com.itheima.annotation包中,创建一个控制器类,UserController
package com.itheima.annotation;
import javax.annotation.Resource;
import org.springframework.stereotype.Controller;
@Controller("userController")
public class UserController {
	@Resource(name="userService")
	private UserService userService;
	public void save(){
		this.userService.save();
		System.out.println("userCntroller...save..");
	}
}
@Controller(“userController”)相当于
<bean id="userService" class="annotation.UserServiceImpl "/>
(6)创建配置文件beans6.xml
<?xml version="1.0" encoding="UTF-8"?>
<beans xmlns="http://www.springframework.org/schema/beans"
xmlns:context="http://www.springframework.org/schema/context"
    xmlns:xsi="http://www.w3.org/2001/XMLSchema-instance"
    xsi:schemaLocation="http://www.springframework.org/schema/beans
        http://www.springframework.org/schema/beans/spring-beans-4.3.xsd
        http://www.springframework.org/schema/context
        http://www.springframework.org/schema/context/spring-context-4.3.xsd">
    <context:component-scan base-package="com.itheima.annotation"/>
</beans>
其中<context:component-scan base-package=“com.itheima.annotation”/>相当于
 <context:annotation-config/>
    <bean id="userDao" class="annotation.UserDaoImpl"/>
    <bean id="userService" class="annotation.UserServiceImpl "/>
    <bean id="userController" class="annotation.UserController"/>
</beans>
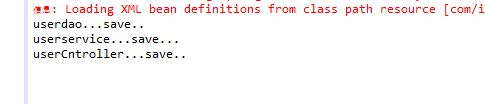
(7)创建测试类AnnotationAssembleTest。
package com.itheima.annotation;
import org.springframework.context.ApplicationContext;
import org.springframework.context.support.ClassPathXmlApplicationContext;
public class AnnotationAssembleTest {
	public static void main(String []args){
		String xmlPath="com/itheima/annotation/beans6.xml";
		ApplicationContext applicationContext=new ClassPathXmlApplicationContext(xmlPath);
		UserController userController=(UserController) applicationContext.getBean("userController");
		userController.save();
	}
}

自动装配
Spring的< bean>元素包含一个autowire属性,我们可以通过autowire属性值来自动装配Bean。Spring的< Bean>的装配,autowire的属性值来自动装配Bean。autowire属性有5个值,其值及说明:
| 属性值 | 说明 |
|---|---|
| default | 由< bean>上级标签< beans>的default-autowire属性值确定。例如:< beans defaullt-autowire=“byName”>,则该< bean>元素中的autowire属性对应的属性值就为byName。 |
| byName | 根据属性的数据的名称自动装配,容器将根据名称查找与属性完成一致的Bean,并将其属性自动装配 |
| byType | 根据属性的数据类型自动装配,如果一个Bean的数据类型,兼容另一个Bean中属性的数据类型,则自动装配。 |
| constructor | 根据构造函数参数的数据类型,进行byType模式的自动装配。 |
| no | 在默认情况下,不使用自动装配,Bean依赖必须通过ref元素定义。 |
示例
(1)在上一个示例中的UserServiceImpl中加入
public void setUserDao(UserDao userDao) {
		this.userDao = userDao;
	}
在UserController中加入
public void setUserService(UserService userService) {
		this.userService = userService;
	}
(2)修改配置文件beans6.xml
<?xml version="1.0" encoding="UTF-8"?>
<beans xmlns="http://www.springframework.org/schema/beans"
xmlns:context="http://www.springframework.org/schema/context"
    xmlns:xsi="http://www.w3.org/2001/XMLSchema-instance"
    xsi:schemaLocation="http://www.springframework.org/schema/beans
        http://www.springframework.org/schema/beans/spring-beans-4.3.xsd
        http://www.springframework.org/schema/context
        http://www.springframework.org/schema/context/spring-context-4.3.xsd">
    <bean id="userDao" class="com.itheima.annotation.UserDaoImpl"/>
    <bean id="userService" class="com.itheima.annotation.UserServiceImpl" autowire="byName"/>
    <bean id="userController" class="com.itheima.annotation.UserController" autowire="byName"/>
</beans>


 7872
7872

 被折叠的 条评论
为什么被折叠?
被折叠的 条评论
为什么被折叠?
 到【灌水乐园】发言


