


目录
引言:多多学习,卷死别人
推荐B站视频:
工业机器视觉 大家别忘了一键三连
visionpro的工具测量无脚本显示:
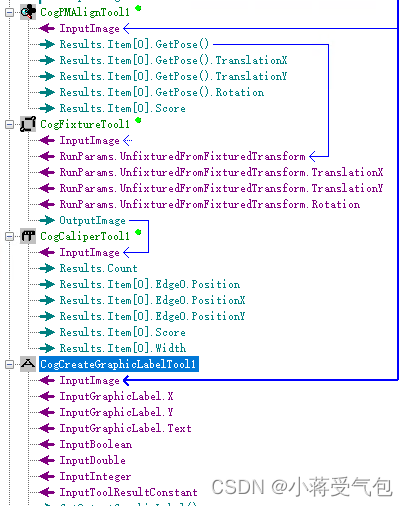
无脚本的时候不需要添加![]()
第一步:CogPMAlignTool目标定位 使用方法可以看我的另一篇博客:工业标定
第二步:CogFixtureTool 根据第一步的定位确定物体的中心坐标

可以通过lastRunoutputimage查看结果,左边的参数列表可改可不改
第三步:CogCaliperTool卡尺测量:
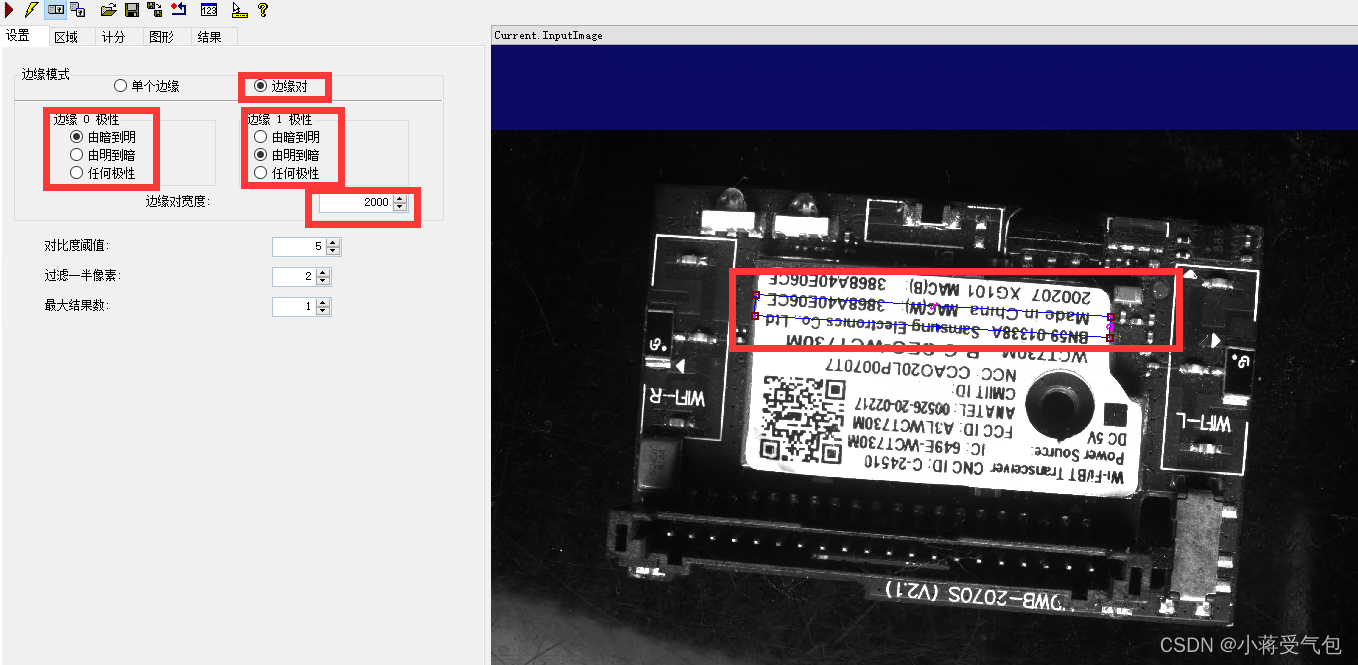
可以看到图像中 选定的为标签左右宽度
模式选择:边缘对边缘
参数列表:左边是由暗到亮,右边由亮到暗, 这里肉眼可以观察到颜色变换
边缘对宽度:默认应该是100,这里需要手动调节宽度,调节到刚好与标签长度相等

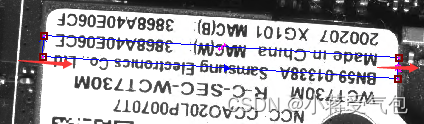
观察两根绿色线条
因为假如完全包裹住,还需要往大调整宽度,直到绿色线头包裹住两侧

第四步:CogCreateGraphicLabelTool 文字显示自连接可以连接到原图或者卡尺标注的图层
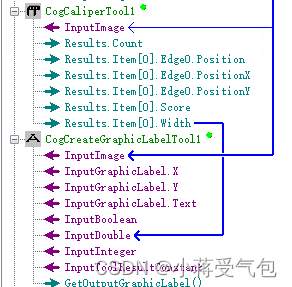
卡尺的Width与文本显示的Double类型连接
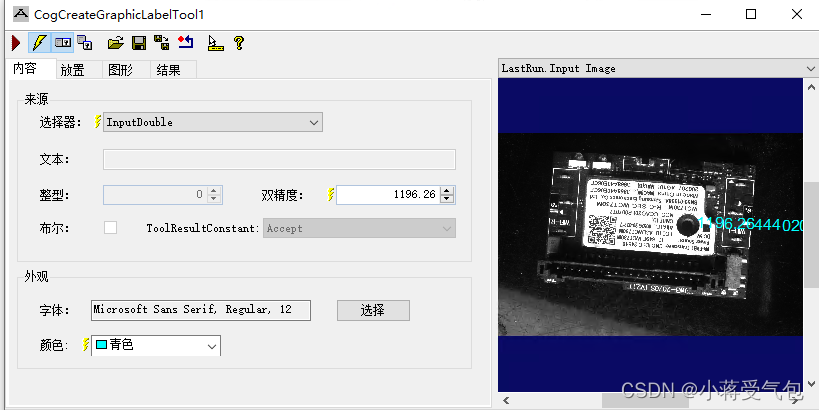
选择器类型修改为InputDouble,如果想要精确小数点末尾数的个数,需要在文本中输入{D:2f}这样就精确到小数点后2位,后面的颜色字体以及文字的显示位置可改可不改,这样就ok了
visionpro的工具测量高级脚本显示:
首先说明高级脚本高级在哪里:
程序程序只是的单方面测量是有弊端的,工业零件要求精度在0.01毫米差距,如果只是单方面测量,那又如何判断呢是否这个器件是否好坏呢?判断的标准又是什么?不单单是测量方面,还有物件的检测中阈值你又该如何设定呢,这些高级脚本中都可以修改。
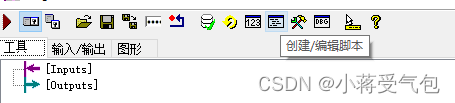
还是刚刚的程序,删除CogCreateGraphicLabelTool显示,工具栏中找到CogToolBlock
![]()
将左侧的按顺序拖拽进来
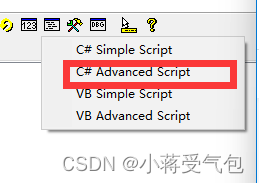
点击创建/编辑脚本,创建高级脚本,这里的编写是C#的代码
一下是我的完整代码,与视频中的稍加改动,加入了判断语句来确定精度,如果阈值在设定的范围内 显示:PASS+精度 如果不在范围内:NG+精度
pass和NG在工业检测中是经常出现的
代码中:
第一处:创建数据类型,也就是声明变量,与C++的书写格式一样
第二处:代码的具体实现,包括条件判断,循环语句等,具体的内容已经加入注释
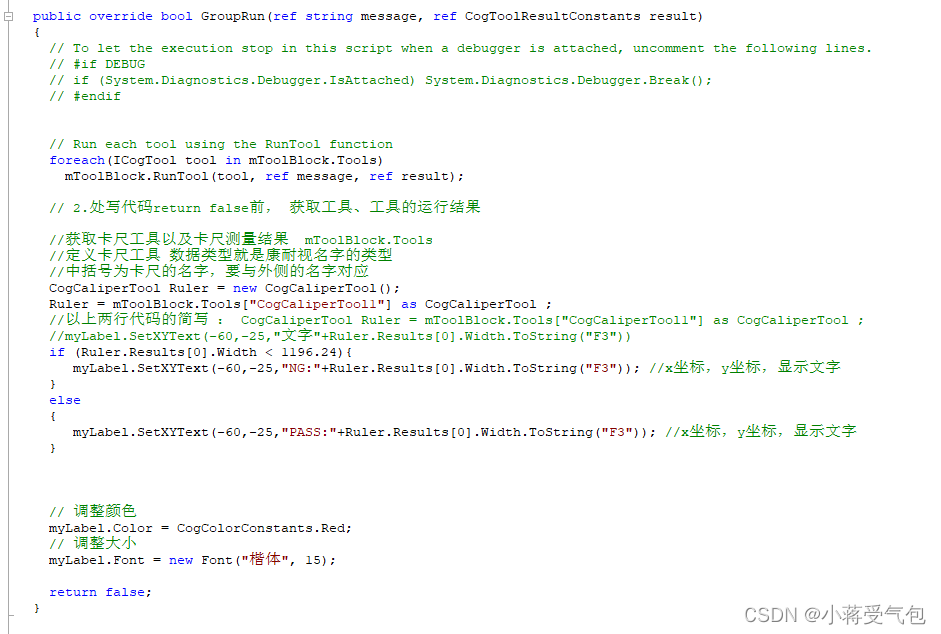
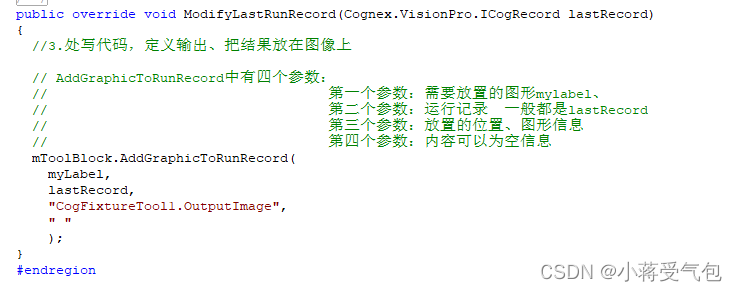
第三处:结果显示
主要就是三个参数信息
#region namespace imports
using System;
using System.Collections;
using System.Drawing;
using System.IO;
using System.Windows.Forms;
using Cognex.VisionPro;
using Cognex.VisionPro.ToolBlock;
using Cognex.VisionPro3D;
using Cognex.VisionPro.PMAlign;
using Cognex.VisionPro.CalibFix;
using Cognex.VisionPro.Caliper;
#endregion
public class CogToolBlockAdvancedScript : CogToolBlockAdvancedScriptBase
{
#region Private Member Variables
private Cognex.VisionPro.ToolBlock.CogToolBlock mToolBlock;
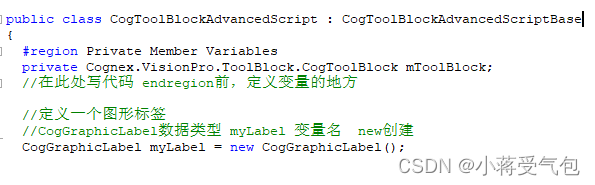
//在此处写代码 endregion前,定义变量的地方
//定义一个图形标签
//CogGraphicLabel数据类型 myLabel 变量名 new创建
CogGraphicLabel myLabel = new CogGraphicLabel();
#endregion
/// <summary>
/// Called when the parent tool is run.
/// Add code here to customize or replace the normal run behavior.
/// </summary>
/// <param name="message">Sets the Message in the tool's RunStatus.</param>
/// <param name="result">Sets the Result in the tool's RunStatus</param>
/// <returns>True if the tool should run normally,
/// False if GroupRun customizes run behavior</returns>
///
public override bool GroupRun(ref string message, ref CogToolResultConstants result)
{
// To let the execution stop in this script when a debugger is attached, uncomment the following lines.
// #if DEBUG
// if (System.Diagnostics.Debugger.IsAttached) System.Diagnostics.Debugger.Break();
// #endif
// Run each tool using the RunTool function
foreach(ICogTool tool in mToolBlock.Tools)
mToolBlock.RunTool(tool, ref message, ref result);
// 2.处写代码return false前, 获取工具、工具的运行结果
//获取卡尺工具以及卡尺测量结果 mToolBlock.Tools
//定义卡尺工具 数据类型就是康耐视名字的类型
//中括号为卡尺的名字,要与外侧的名字对应
CogCaliperTool Ruler = new CogCaliperTool();
Ruler = mToolBlock.Tools["CogCaliperTool1"] as CogCaliperTool ;
//以上两行代码的简写 : CogCaliperTool Ruler = mToolBlock.Tools["CogCaliperTool1"] as CogCaliperTool ;
//myLabel.SetXYText(-60,-25,"文字"+Ruler.Results[0].Width.ToString("F3"))
if (Ruler.Results[0].Width < 1196.24){
myLabel.SetXYText(-60,-25,"NG:"+Ruler.Results[0].Width.ToString("F3")); //x坐标,y坐标,显示文字
}
else
{
myLabel.SetXYText(-60,-25,"PASS:"+Ruler.Results[0].Width.ToString("F3")); //x坐标,y坐标,显示文字
}
// 调整颜色
myLabel.Color = CogColorConstants.Red;
// 调整大小
myLabel.Font = new Font("楷体", 15);
return false;
}
#region When the Current Run Record is Created
/// <summary>
/// Called when the current record may have changed and is being reconstructed
/// </summary>
/// <param name="currentRecord">
/// The new currentRecord is available to be initialized or customized.</param>
public override void ModifyCurrentRunRecord(Cognex.VisionPro.ICogRecord currentRecord)
{
}
#endregion
#region When the Last Run Record is Created
/// <summary>
/// Called when the last run record may have changed and is being reconstructed
/// </summary>
/// <param name="lastRecord">
/// The new last run record is available to be initialized or customized.</param>
public override void ModifyLastRunRecord(Cognex.VisionPro.ICogRecord lastRecord)
{
//3.处写代码,定义输出、把结果放在图像上
// AddGraphicToRunRecord中有四个参数:
// 第一个参数:需要放置的图形mylabel、
// 第二个参数:运行记录 一般都是lastRecord
// 第三个参数:放置的位置、图形信息
// 第四个参数:内容可以为空信息
mToolBlock.AddGraphicToRunRecord(
myLabel,
lastRecord,
"CogFixtureTool1.OutputImage",
" "
);
}
#endregion
#region When the Script is Initialized
/// <summary>
/// Perform any initialization required by your script here
/// </summary>
/// <param name="host">The host tool</param>
public override void Initialize(Cognex.VisionPro.ToolGroup.CogToolGroup host)
{
// DO NOT REMOVE - Call the base class implementation first - DO NOT REMOVE
base.Initialize(host);
// Store a local copy of the script host
this.mToolBlock = ((Cognex.VisionPro.ToolBlock.CogToolBlock)(host));
}
#endregion
}
虽然断断续续接触visionpro,但是收获还是挺大的,技多不压身我真的到现在才开始明白真正的含义
结果展示:
妈妈的吻!加密狗被人拔掉了!!我踏马程序还没保存呢! giao! !!罢了罢了,对着视频整,想要加点自己的程序看看我的代码找点思路。
结语:
三连保平安


 5035
5035

 被折叠的 条评论
为什么被折叠?
被折叠的 条评论
为什么被折叠?
 到【灌水乐园】发言


