


 本文详细介绍了在SpringBoot中如何集成并使用Mybatis进行数据库操作,包括两种方式:@Mapper注解和@MapperScan注解,并讲解了如何配置Mapper文件位置和开启日志功能。此外,还阐述了通过逆向工程生成Mapper文件的步骤。同时,文章还探讨了SpringBoot中的事务控制,展示了如何在业务方法上使用@Transactional注解以及启用@EnableTransactionManager。
一、Mybatis操作数据库
在SpringBoot框架中集成Mybatis。
使用步骤:
1、方式一:使用@Mapper注解
添加@Mapper注解后,Mybatis会创建该接口代理对象放入IoC容器中。
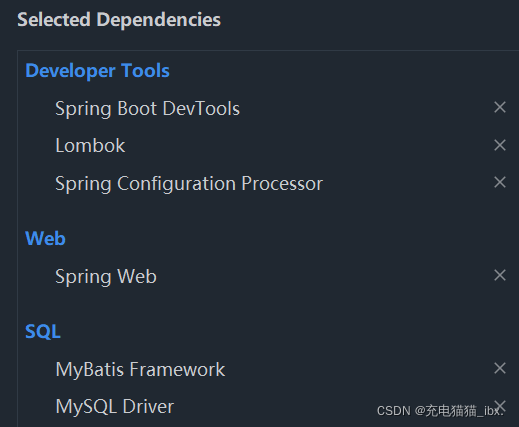
1.添加Mybatis,数据库驱动起步依赖:完成mybatis对象自动配置
2.在pom.xml中指定把src/main/java目录中的xml文件包含到classpath中
如果xml文件直接放在resources目录下则不用配置
<build>
        <resources>
            <resource>
                <directory>src/main/java</directory>
                <includes>
                  #将src/main/java目录及其子目录下的xml文件放到类路径中
                    <include>**/*.xml</include>
                </includes>
            </resource>
        </resources>
    </build>
3.创建实体类Student
@Data
@ToString
@AllArgsConstructor
@NoArgsConstructor
public class Student {
    private Integer id;
    private String name;
    private Integer age;
}
4.创建Dao接口StudentMapper
/**
 * 注解@Mapper:告诉Mybatis这是Dao接口,创建此接口的代理对象
 */
@Mapper
public interface StudentDao {

    Student selectById(@Param("stuId") Integer id);
}
5.创建Dao接口对应的Mapper文件:xml文件
<?xml version="1.0" encoding="UTF-8" ?>
<!DOCTYPE mapper
        PUBLIC "-//mybatis.org//DTD Mapper 3.0//EN"
        "http://mybatis.org/dtd/mybatis-3-mapper.dtd">
<mapper namespace="com.tracker.Dao.StudentDao">
    <select id="selectById" resultType="com.tracker.Bean.Student">
        select id,name,age from student where id=#{stuId}
    </select>
</mapper>
6、创建Service层对象:创建StudentService接口和它的实现类,调用Dao层对象,完成数据库的操作
Service包:
public interface StudentService {
    Student queryStudentById(Integer id);
}

Service.Impl包:
@Service
public class StudentServiceImpl implements StudentDao{
    @Resource
    private StudentDao studentDao;
    @Override
    public Student selectById(Integer id) {
        return studentDao.selectById(id);
    }
}
7.创建Controller层,访问Service层
@RestController
public class StuController {

    @Resource
    private StudentService studentService;

    @RequestMapping("/stu/{id}")
    public Student queryStudentById(@PathVariable("id")Integer id){

        return studentService.queryStudentById(id);
    }
}
8.在application.properties配置文件中配置数据库连接信息
spring.datasource.driver-class-name=com.mysql.cj.jdbc.Driver
spring.datasource.url=jdbc:mysql://localhost:3306/springdb?characterEncoding=UTF-8&useUnicode=true&serverTimeZone=GMT%2B8
spring.datasource.username=root
spring.datasource.password=123456
2、方式二:@MapperScan注解
不用在dao接口上添加@Mapper注解,在启动类上添加注解包扫描:@MapperScan(“com.tracker.Dao”)
@SpringBootApplication
@MapperScan(basePackages = "com.tracker.dao")//也可以使用数组,扫描多个包
public class Boot03Application {

    public static void main(String[] args) {
        SpringApplication.run(Boot03Application.class, args);
    }

}
3、将mapper文件与Dao接口分开管理
(1)在resources目录下新建mapper子目录,存放mapper文件
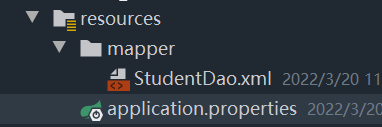
(2)在application.properties配置文件中指定mapper文件的位置
#指定mapper文件的位置
mybatis.mapper-locations=classpath:mapper/*.xml
(3)将mapper.xml文件放在resources目录下后,可以在pom.xml删除以下代码:
<build>
        <resources>
            <resource>
                <directory>src/main/java</directory>
                <includes>
                  #将src/main/java目录及其子目录下的xml文件放到类路径中
                    <include>**/*.xml</include>
                </includes>
            </resource>
        </resources>
    </build>
4、开启Mybatis的日志功能
在application.properties中配置
#开启Mybatis的日志功能,将日志输出到控制台上
mybatis.configuration.log-impl=org.apache.ibatis.logging.stdout.StdOutImpl
5、使用逆向工程插件自动生成mapper文件
(1)在项目根目录下创建GeneratorMapper.xml,与src目录平级
<?xml version="1.0" encoding="UTF-8"?>
<!DOCTYPE generatorConfiguration
PUBLIC "-//mybatis.org//DTD MyBatis Generator Configuration 1.0//EN"
"http://mybatis.org/dtd/mybatis-generator-config_1_0.dtd">
<generatorConfiguration>
<!-- 指定连接数据库的JDBC驱动包所在位置,指定到你本机的完整路径 -->
<classPathEntry location="E:\mysql-connector-java-8.0.28.jar"/>
<!-- 配置table表信息内容体,targetRuntime指定采用MyBatis3的版本 -->
<context id="tables" targetRuntime="MyBatis3">
<commentGenerator>
<!-- 是否去除自动生成的注释 true:是 : false:否 -->
<property name="suppressAllComments" value="true" />
</commentGenerator>
<!-- 配置数据库连接信息 -->
<jdbcConnection driverClass="com.mysql.cj.jdbc.Driver"
connectionURL="jdbc:mysql://localhost:3306/springdb?characterEncoding=UTF-8&useUnicode=true&serverTimeZone=GMT%2B8"
userId="root"
password="123456">
</jdbcConnection>
<!-- 生成pojo类,targetPackage指定pojo类的包名, targetProject指定生成的pojo放在哪个工程下面-->
<javaModelGenerator targetPackage="com.tracker.pojo"
targetProject="./src/main/java">
<!-- enableSubPackages:是否让schema作为包的后缀 -->
<property name="enableSubPackages" value="false" />
<!-- 从数据库返回的值被清理前后的空格 -->
<property name="trimStrings" value="true" />
</javaModelGenerator>
<!-- 生成MyBatis的Mapper.xml文件,targetPackage指定mapper.xml文件的包名, targetProject指定生成的mapper.xml放在eclipse的哪个工程下面 -->
<sqlMapGenerator targetPackage="mapper" targetProject="./src/main/resources">
<property name="enableSubPackages" value="false" />
</sqlMapGenerator>
<!-- 生成MyBatis的Mapper接口类文件,targetPackage指定Mapper接口类的包名, targetProject指定生成的Mapper接口放在eclipse的哪个工程下面 -->
<javaClientGenerator type="XMLMAPPER" targetPackage="com.tracker.dao" targetProject="./src/main/java">
<property name="enableSubPackages" value="false" />
</javaClientGenerator>
<!-- 数据库表名及对应的Java模型类名 -->
<table tableName="student" domainObjectName="Student"
enableCountByExample="false"
enableUpdateByExample="false"
enableDeleteByExample="false"
enableSelectByExample="false"
selectByExampleQueryId="false"/>
<!-- 有些表的字段需要指定java类型
<table schema="" tableName="">
<columnOverride column="" javaType="" />
</table> -->
</context>
</generatorConfiguration>
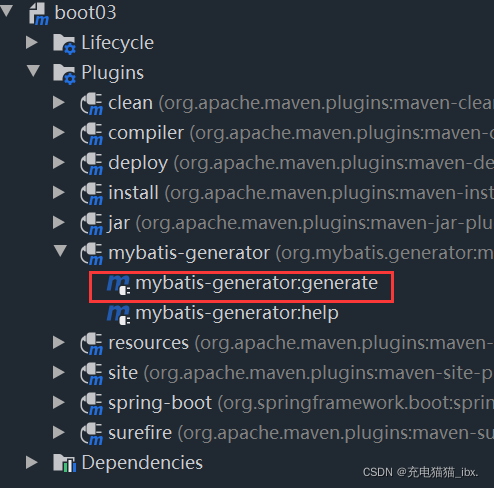
(2)在pom.xml中添加逆向工程的插件
     <!--mybatis代码自动生成插件-->
            <plugin>
                <groupId>org.mybatis.generator</groupId>
                <artifactId>mybatis-generator-maven-plugin</artifactId>
                <version>1.3.6</version>
                <configuration>
                    <!--配置文件的位置-->
                    <configurationFile>GeneratorMapper.xml</configurationFile>
                    <verbose>true</verbose>
                    <overwrite>true</overwrite>
                </configuration>
            </plugin>
(3)运行插件程序
二、事务控制
在springboot中使用事务方式:
(1)在业务方法上添加@Transactional注解
/*
    @Transactional:给该方法添加事务支持
        隔离级别:库的默认隔离级别  传播行为:REQUIRED   超时时间:-1
     */
    @Transactional
    @Override
    public int addStudent(Student student) {
        System.out.println("进入业务方法");
        int row=studentMapper.insert(student);
        System.out.println("业务方法执行完毕");
        //抛出运行时异常
        int m=10/0;
        return row;
    }
(2)在启动类上添加@EnableTransactionManager
@EnableTransactionManagement//启用事务管理器
@SpringBootApplication
@MapperScan(basePackages = "com.tracker.dao")
public class Boot03Application {

    public static void main(String[] args) {
        SpringApplication.run(Boot03Application.class, args);
    }
}


 387
387

 被折叠的 条评论
为什么被折叠?
被折叠的 条评论
为什么被折叠?
 到【灌水乐园】发言


