


1.申请OSS
1.进入阿里云-上云就上阿里云 ,登录 后,进入控制台 ,中间搜索 对象存储OSS ,进入在bucket列表中新建bucket ,配置名称,访问权限等.配置完后再概览中可以看到具体的信息.
2.在文件管理中可以查看和上传文件 ,上传的文件可以通过地址直接下载 ,地址是 bucket名称+" . "+Endpoint + 文件管理中的路径 ,或者直接在文件管理 详情中 赋值文件url

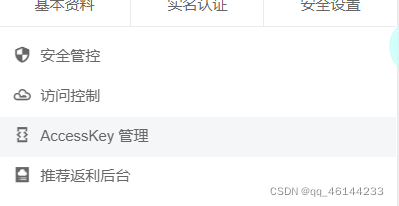
3.accesskey申请
右上的头像可得 ,点击accesskey管理按照提示加入即可
2.引入oss sdk相关
2.1maven引入jar包
<dependency>
       <groupId>com.aliyun.oss</groupId>
        <artifactId>aliyun-sdk-oss</artifactId>
        <version>3.13.0</version>
</dependency>
2.2 application文件配置变量(为了全局管理变量,便于修改,也可以直接写魔法值)
aliyun.oss.file.endpoint=第一步中获取
aliyun.oss.file.keyid=第一步中获取
aliyun.oss.file.keysecret=第一步中accesskey获取
aliyun.oss.file.bucketname=第一步中accesskey获取
2.3配置 配置类
@Component
public class ConstantPropertiesUtils implements InitializingBean {
    //读取配置文件内容
    @Value("${aliyun.oss.file.endpoint}")
    private String endpoint;
    @Value("${aliyun.oss.file.keyid}")
    private String keyId;
    @Value("${aliyun.oss.file.keysecret}")
    private String keySecret;
    @Value("${aliyun.oss.file.bucketname}")
    private String bucketName;

    public static String END_POINT;
    public static String KTY_ID;
    public static String KEY_SECRET;
    public static String BUCKET_NAME;
    @Override
    public void afterPropertiesSet() throws Exception {
        END_POINT=endpoint;
        KTY_ID=keyId;
        KEY_SECRET=keySecret;
        BUCKET_NAME=bucketName;
    }
}
2.4在service中配置保存方法
@Override
    public MyFile uploadFile(MultipartFile file) {
        String endpoint = ConstantPropertiesUtils.END_POINT;
        String accsessKeyId = ConstantPropertiesUtils.KTY_ID;
        String accsessKeySecret = ConstantPropertiesUtils.KEY_SECRET;
        String bucketName = ConstantPropertiesUtils.BUCKET_NAME;
        try {
            //前端提交的MultipartFile转成流
            InputStream inputStream = file.getInputStream();
            //自定义filename规则
            //主要的提交到OSS方法
            OSS ossClient = new OSSClientBuilder().build(endpoint, accsessKeyId, accsessKeySecret);
            ossClient.putObject(bucketName, filename, inputStream);
            ossClient.shutdown();
            //访问路径
            String url = "https://" + bucketName + "." + endpoint + "/" + filename;
            //返回所需的属性
            return file1;
        } catch (Exception e) {
            e.printStackTrace();
            return null;
        }
    }
3.文件上传配置
3.1导入maven
<dependency>
    <groupId>commons-io</groupId>
    <artifactId>commons-io</artifactId>
    <version>2.6</version>
</dependency>    <!-- https://mvnrepository.com/artifact/commons-fileupload/commons-fileupload -->
<dependency>
    <groupId>commons-fileupload</groupId>
    <artifactId>commons-fileupload</artifactId>
    <version>1.4</version>
</dependency>
3.2 application文件中取消原有的上传下载的包
spring.http.multipart.enabled=false3.3新建 配置类 要放在springboot主类可以扫描到的包下
@Configuration
public class UploadConfig {
    @Bean(name = "multipartResolver")
    public MultipartResolver multipartResolver() {
        CommonsMultipartResolver resolver = new CommonsMultipartResolver();
        resolver.setDefaultEncoding("UTF-8");
        resolver.setResolveLazily(true);
        resolver.setMaxInMemorySize(40960);
        resolver.setMaxUploadSize(50 * 1024 * 1024);
        return resolver;
    }

}
4.上传
@RequestMapping("uploadOne")
@ResponseBody
    public String uploadOne(@RequestParam("file") MultipartFile file, String mydata) throws IOException {
        if(file.isEmpty()){
            return "出错了";
        }

        System.out.println("form表单中其他参数"+mydata);
        MyFile myFile =   ossService.uploadFile(file);

        return  "成功";
    }
5.下载
OSS输入网址直接浏览器下载 ,很简单不用再操作,
所以这里测试个下载target下的文件.
@RequestMapping("downloadOne")
    public  ResponseEntity<byte[]> dow(HttpServletRequest req) throws IOException {
        //获取target目录下的classes目录实际路径
        String myPath = ClassUtils.getDefaultClassLoader().getResource("").getPath();
        //拼接文件名
        String files=myPath+"static/json/color.json";
        File file= new File(files);
        InputStream is = new FileInputStream(file);
        byte[] body=null;
        //available返回流的char[]的长度
        body=new byte[is.available()];
        is.read(body);
        HttpHeaders headers= new HttpHeaders();
        //设置以附件的形式下载文件,文件名叫color.json
        headers.add("Content-Disposition", "attchement;filename=color.json");
        HttpStatus statusCode = HttpStatus.OK;
        ResponseEntity<byte[]> entity = new ResponseEntity<>(body, headers, statusCode);
        return entity;
    }


 1万+
1万+

 被折叠的 条评论
为什么被折叠?
被折叠的 条评论
为什么被折叠?
 到【灌水乐园】发言


