


1.克隆虚拟机
请自行克隆,克隆完得到01、02、03三台虚拟机。
2.配置主机ip映射
修改02虚拟机的主机名为hadoop02,03虚拟机修改为hadoop03
vim /etc/hostname
修改hadoop02虚拟机的IPADDR最后一位为202
修改hadoop03虚拟机的IPADDR最后一位为203
vim /etc/sysconfig/network-scripts/ifcfg-ens33
重启02和03
修改01、02、03的hosts文件
vim /etc/hosts
添加ip映射

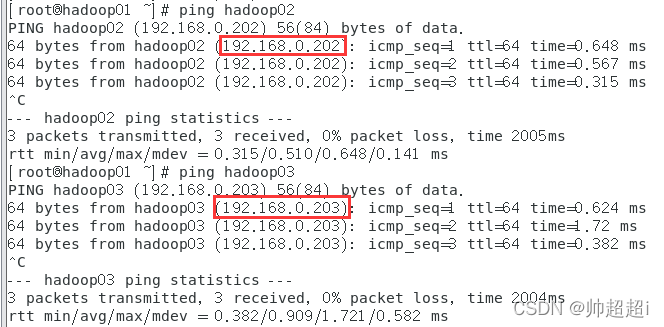
使用01ping02和03,ping通且地址正确。
3.ssh免密码登录
在三台虚拟机分别执行ssh-keygen,然后连点回车。
在三台虚拟机分别执行以下命令,执行过程中需要输入yes和用户密码
ssh-copy-id hadoop01
ssh-copy-id hadoop02
ssh-copy-id hadoop03
测试用01连接登录02和03

4.搭建Hadoop高可用集群
4.1安装ZooKeeper
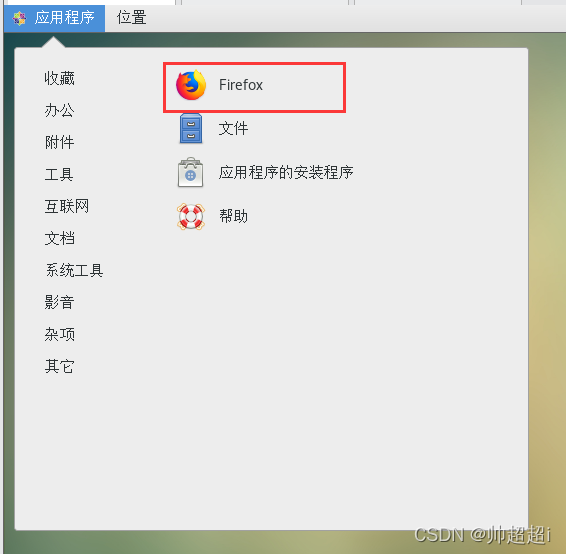
在hadoop01中打开火狐浏览器
 访问官方下载网址
https://archive.apache.org/dist/zookeeper/zookeeper-3.4.12/zookeeper-3.4.12.tar.gz
把下载好的压缩包放入/opt/packages文件夹
进入到packages目录cd /opt/packages
解压缩
tar -zxvf zookeeper-3.4.12.tar.gz -C /opt/programs
4.2配置ZooKeeper
进入ZooKeeper的目录cd /opt/programs/zookeeper-3.4.12
创建文件夹data和logs
mkdir data
mkdir logs
进入data文件夹cd data
新建一个名为myid的文件,并写入id号为1
echo '1' > myid
进入zookeeper文件夹下的conf文件夹cd ../conf
将zoo_sample.cfg文件复制并重命名为zoo.cfg
cp zoo_sample.cfg zoo.cfg
编辑zoo.cfg文件vim zoo.cfg
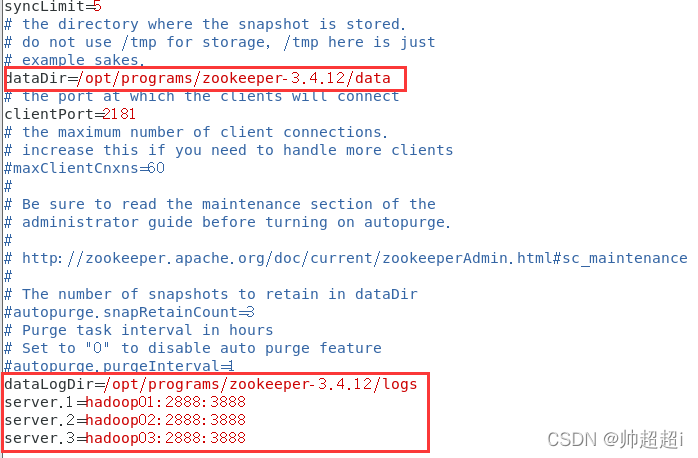
dataDir改为如下图,最后四行加上如下图
dataDir=/opt/programs/zookeeper-3.4.12/data
dataLogDir=/opt/programs/zookeeper-3.4.12/logs
server.1=hadoop01:2888:3888
server.2=hadoop02:2888:3888
server.3=hadoop03:2888:3888
执行以下命令将hadoop01的ZooKeeper复制到hadoop02和hadoop03
scp -r /opt/programs/zookeeper-3.4.12 root@hadoop02:/opt/programs/
scp -r /opt/programs/zookeeper-3.4.12 root@hadoop03:/opt/programs/
打开hadoop02,修改myid为2
vim /opt/programs/zookeeper-3.4.12/data/myid
打开hadoop03,修改myid为3
vim /opt/programs/zookeeper-3.4.12/data/myid
在三个虚拟机上分别为zookeeper配置环境变量
编辑环境变量文件vim /etc/profile
在文件末尾添加下面两行
export ZOOKEEPER_HOME=/opt/programs/zookeeper-3.4.12
export PATH=$PATH:$ZOOKEEPER_HOME/bin
在三台虚拟机上分别执行source /etc/profile刷新环境配置
在三台虚拟机上分别执行zkServer.sh start启动ZooKeeper集群
如下图则启动成功

执行zkServer.sh status查看ZooKeeper集群状态


执行zkServer.sh stop停止ZooKeeper服务
5.安装hadoop
在虚拟机中打开火狐浏览器下载或者Windows下载好后用winscp传输到虚拟机。
https://archive.apache.org/dist/hadoop/core/hadoop-2.7.6/hadoop-2.7.6.tar.gz
进入压缩包所在的目录cd /opt/packages解压缩
tar -zxvf hadoop-2.7.6.tar.gz -C /opt/programs
进入hadoop目录cd /opt/programs/hadoop-2.7.6/etc/hadoop
修改配置文件vim core-site.xml
文件内容如下
<?xml version="1.0" encoding="UTF-8"?>
<?xml-stylesheet type="text/xsl" href="configuration.xsl"?>
<!--
  Licensed under the Apache License, Version 2.0 (the "License");
  you may not use this file except in compliance with the License.
  You may obtain a copy of the License at

    http://www.apache.org/licenses/LICENSE-2.0

  Unless required by applicable law or agreed to in writing, software
  distributed under the License is distributed on an "AS IS" BASIS,
  WITHOUT WARRANTIES OR CONDITIONS OF ANY KIND, either express or implied.
  See the License for the specific language governing permissions and
  limitations under the License. See accompanying LICENSE file.
-->

<!-- Put site-specific property overrides in this file. -->

<configuration>
        <property>
                <name>fs.defaultFS</name>
	<value>hdfs://ns</value>
        </property>
       <property>
                <name>hadoop.tmp.dir</name>
                <value>/opt/programs/hadoop-2.7.6/tmp</value>
        </property>
       <property>
                <name>ha.zookeeper.quorum</name>
                <value>hadoop01:2181,hadoop02:2181,hadoop03:2181</value>
        </property>
</configuration>
修改配置文件vim hdfs-site.xml
文件内容如下
<?xml version="1.0" encoding="UTF-8"?>
<?xml-stylesheet type="text/xsl" href="configuration.xsl"?>
<!--
  Licensed under the Apache License, Version 2.0 (the "License");
  you may not use this file except in compliance with the License.
  You may obtain a copy of the License at

    http://www.apache.org/licenses/LICENSE-2.0

  Unless required by applicable law or agreed to in writing, software
  distributed under the License is distributed on an "AS IS" BASIS,
  WITHOUT WARRANTIES OR CONDITIONS OF ANY KIND, either express or implied.
  See the License for the specific language governing permissions and
  limitations under the License. See accompanying LICENSE file.
-->

<!-- Put site-specific property overrides in this file. -->

<configuration>
         <property>
                <name>dfs.replication</name>
                <value>3</value>
        </property>
        <property>
                <name>dfs.nameservices</name>
                <value>ns</value>
        </property>
        <property>
                <name>dfs.ha.namenodes.ns</name>
                <value>nn1,nn2</value>
        </property>
        <property>
                <name>dfs.namenode.rpc-address.ns.nn1</name>
                <value>hadoop01:9000</value>
        </property>
        <property>
                <name>dfs.namenode.http-address.ns.nn1</name>
                <value>hadoop01:50070</value>
        </property>
        <property>
                <name>dfs.namenode.rpc-address.ns.nn2</name>
                <value>hadoop02:9000</value>
        </property>
        <property>
                <name>dfs.namenode.http-address.ns.nn2</name>
                <value>hadoop02:50070</value>
        </property>
        <property>
                <name>dfs.namenode.shared.edits.dir</name>
                <value>qjournal://hadoop01:8485;hadoop02:8485;hadoop03:8485/ns</value>
        </property>
        <property>
                <name>dfs.journalnode.edits.dir</name>
                <value>/opt/programs/hadoop-2.7.6/journal/data</value>
        </property>
        <property>
                <name>dfs.ha.automatic-failover.enabled</name>
                <value>true</value>
        </property>
        <property>
                <name>dfs.client.failover.proxy.provider.ns</name>
                <value>org.apache.hadoop.hdfs.server.namenode.ha.ConfiguredFailoverProxyProvider</value>
        </property>
        <property>
                <name>dfs.ha.fencing.methods</name>
                <value>
                        sshfence
                        shell(/bin/true)
                </value>
        </property>
        <property>
                <name>dfs.ha.fencing.ssh.private-key-files</name>
                <value>/root/.ssh/id_rsa</value>
        </property>
        <property>
                <name>dfs.ha.fencing.ssh.connect-timeout</name>
                <value>30000</value>
        </property>
</configuration>
执行以下命令重命名
mv mapred-site.xml.template mapred-site.xml
修改配置文件vim mapred-site.xml
文件内容如下
<?xml version="1.0"?>
<?xml-stylesheet type="text/xsl" href="configuration.xsl"?>
<!--
  Licensed under the Apache License, Version 2.0 (the "License");
  you may not use this file except in compliance with the License.
  You may obtain a copy of the License at

    http://www.apache.org/licenses/LICENSE-2.0

  Unless required by applicable law or agreed to in writing, software
  distributed under the License is distributed on an "AS IS" BASIS,
  WITHOUT WARRANTIES OR CONDITIONS OF ANY KIND, either express or implied.
  See the License for the specific language governing permissions and
  limitations under the License. See accompanying LICENSE file.
-->

<!-- Put site-specific property overrides in this file. -->

<configuration>
<!-- 指定MapReduce运行时框架,这里指定在Yarn上,默认是local -->
        <property>
                <name>mapreduce.framework.name</name>
                <value>yarn</value>
        </property>
</configuration>
修改配置文件vim yarn-site.xml
文件内容如下
<?xml version="1.0"?>
<!--
  Licensed under the Apache License, Version 2.0 (the "License");
  you may not use this file except in compliance with the License.
  You may obtain a copy of the License at

    http://www.apache.org/licenses/LICENSE-2.0

  Unless required by applicable law or agreed to in writing, software
  distributed under the License is distributed on an "AS IS" BASIS,
  WITHOUT WARRANTIES OR CONDITIONS OF ANY KIND, either express or implied.
  See the License for the specific language governing permissions and
  limitations under the License. See accompanying LICENSE file.
-->
<configuration>
       <property>
                <name>yarn.resourcemanager.ha.enabled</name>
                <value>true</value>
        </property>
        <property>
                <name>yarn.resourcemanager.cluster-id</name>
                <value>yrc</value>
        </property>
        <property>
                <name>yarn.resourcemanager.ha.rm-ids</name>
                <value>rm1,rm2</value>
        </property>
        <property>
                <name>yarn.resourcemanager.hostname.rm1</name>
                <value>hadoop01</value>
        </property>
        <property>
                <name>yarn.resourcemanager.hostname.rm2</name>
                <value>hadoop02</value>
        </property>
        <property>
                <name>yarn.resourcemanager.zk-address</name>
                <value>hadoop01:2181,hadoop02:2181,hadoop03:2181</value>
        </property>
        <property>
                <name>yarn.nodemanager.aux-service</name>
                <value>mapreduce_shuffle</value>
        </property>
</configuration>
修改slaves文件vim slaves
localhost改为以下内容
hadoop01
hadoop02
hadoop03
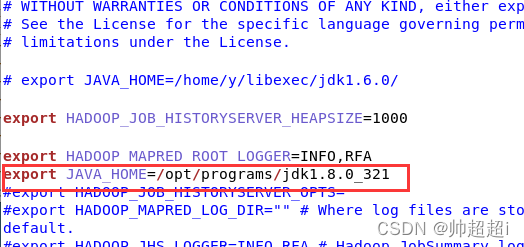
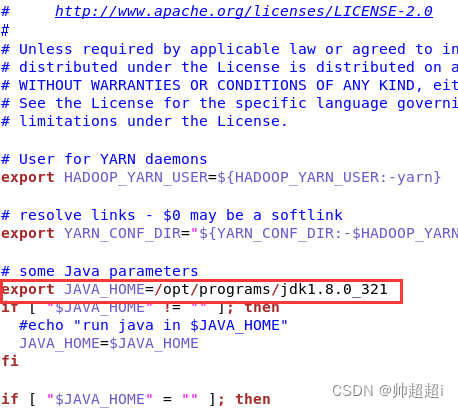
修改hadoop-evn.sh文件内JAVA_HOME的路径,我用的是jkd8的321版本。
vim hadoop-env.sh

在mapred-env.sh文件内添加JAVA_HOME的路径
vim mapred-env.sh
打开yarn-env.sh文件
vim yarn-env.sh
在JAVA_HOME所在的一行,删除注释符井号,并修改路径
执行以下命令将hadoop01的hadoop配置复制到hadoop02和hadoop03
scp -r /opt/programs/hadoop-2.7.6 root@hadoop02:/opt/programs/
scp -r /opt/programs/hadoop-2.7.6 root@hadoop03:/opt/programs/
为三台hadoop配置环境变量vim /etc/profile
文件末尾添加以下两行
export HADOOP_HOME=/opt/programs/hadoop-2.7.6
export PATH=$PATH:$HADOOP_HOME/bin:$HADOOP_HOME/sbin
source /etc/profile刷新环境配置
6.启动与测试hadoop
在三台虚拟机上分别启动JournalNode
hadoop-daemon.sh start journalnode

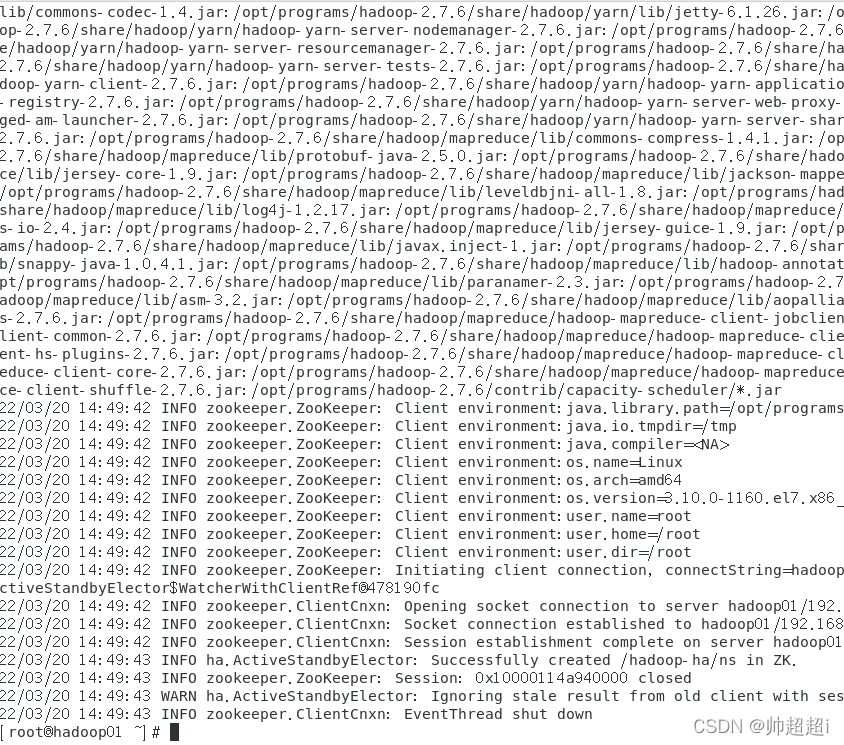
在hadoop01格式化NameNode,执行此命令时要保证三台机子都已启动ZooKeeper和JournalNode
hdfs namenode -format
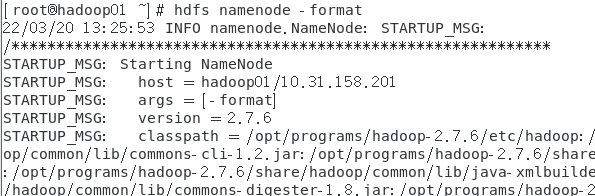
随之出现一堆如图所示的东西,格式化成功并且在hadoop目录生成了一个tmp文件夹
进入hadoop目录cd /opt/programs/hadoop-2.7.6
执行以下命令将hadoop01的tmp文件夹复制到hadoop02
scp -r tmp/ root@hadoop02:/opt/programs/hadoop-2.7.6
 此时NameNode分别存在于hadoop01和hadoop02,防止NameNode存在的hadoop01宕机导致NameNode不可用,就会造成整个集群无法访问,hadoop02的NameNode处于备用状态。
在hadoop01格式化ZKFC
hdfs zkfc -formatZK
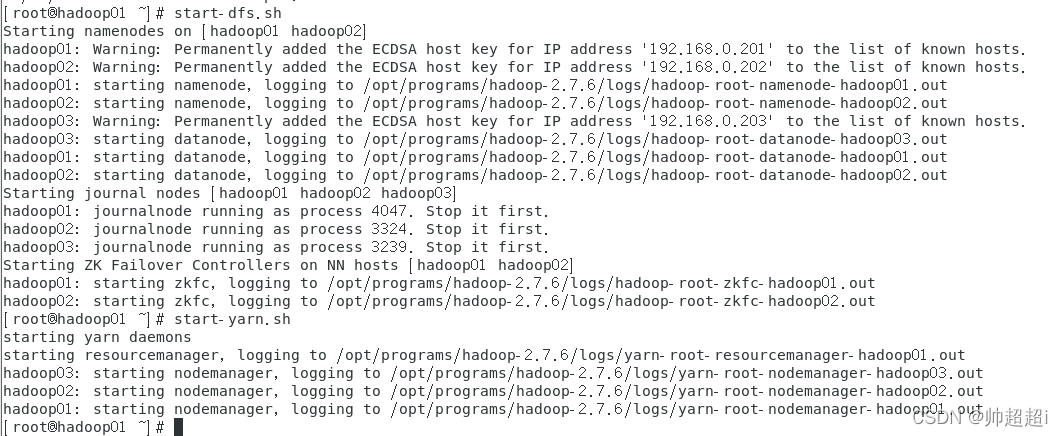
在hadoop01执行以下命令,启动HDFS和YARN
start-dfs.sh
start-yarn.sh
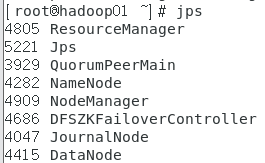
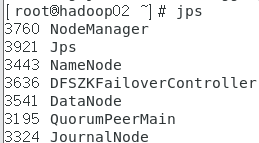
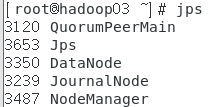
在三台虚拟机分别执行jps查看启动的进程
在物理主机输入网址 http://192.168.0.201:8088/cluster
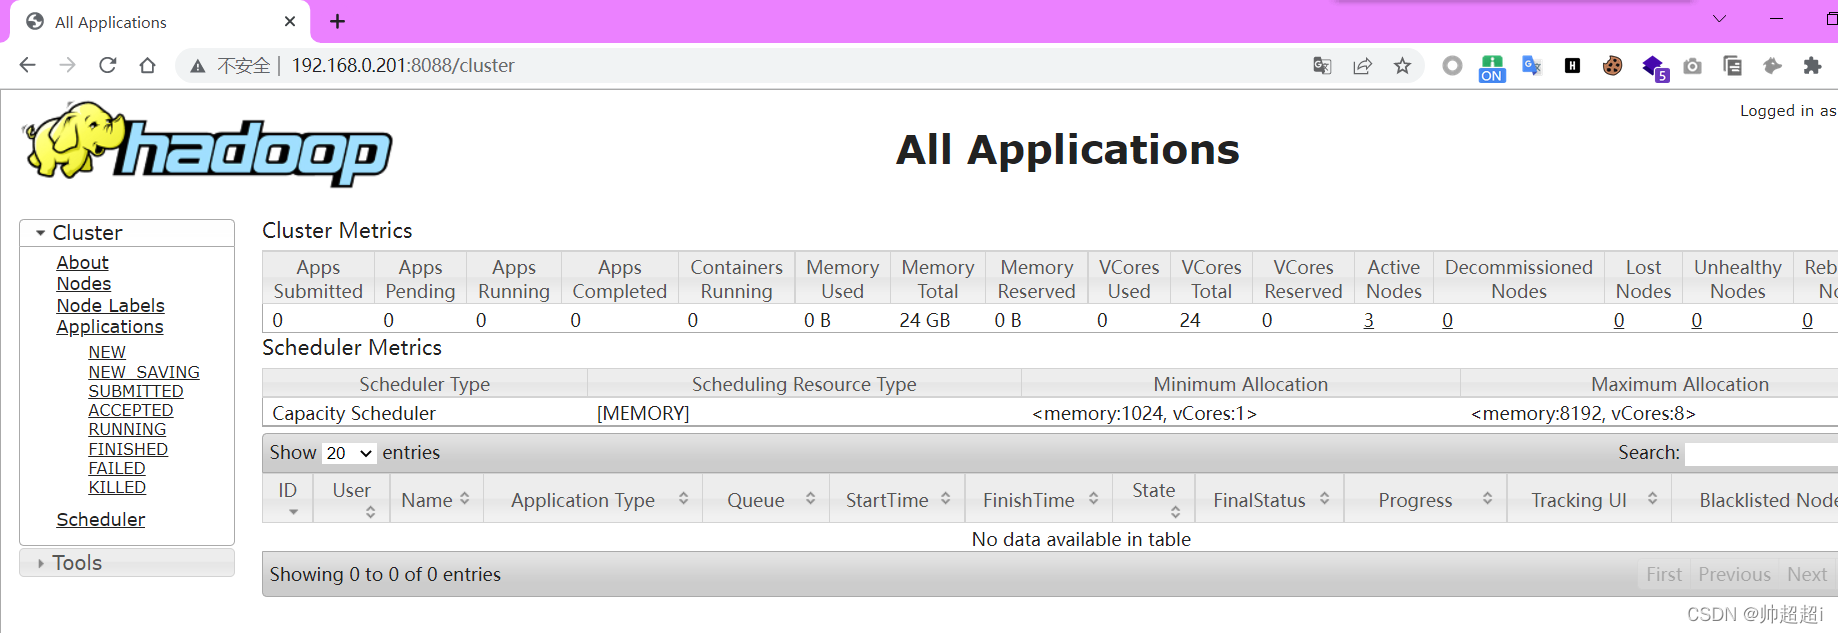 访问
访问http://192.168.0.201:50070
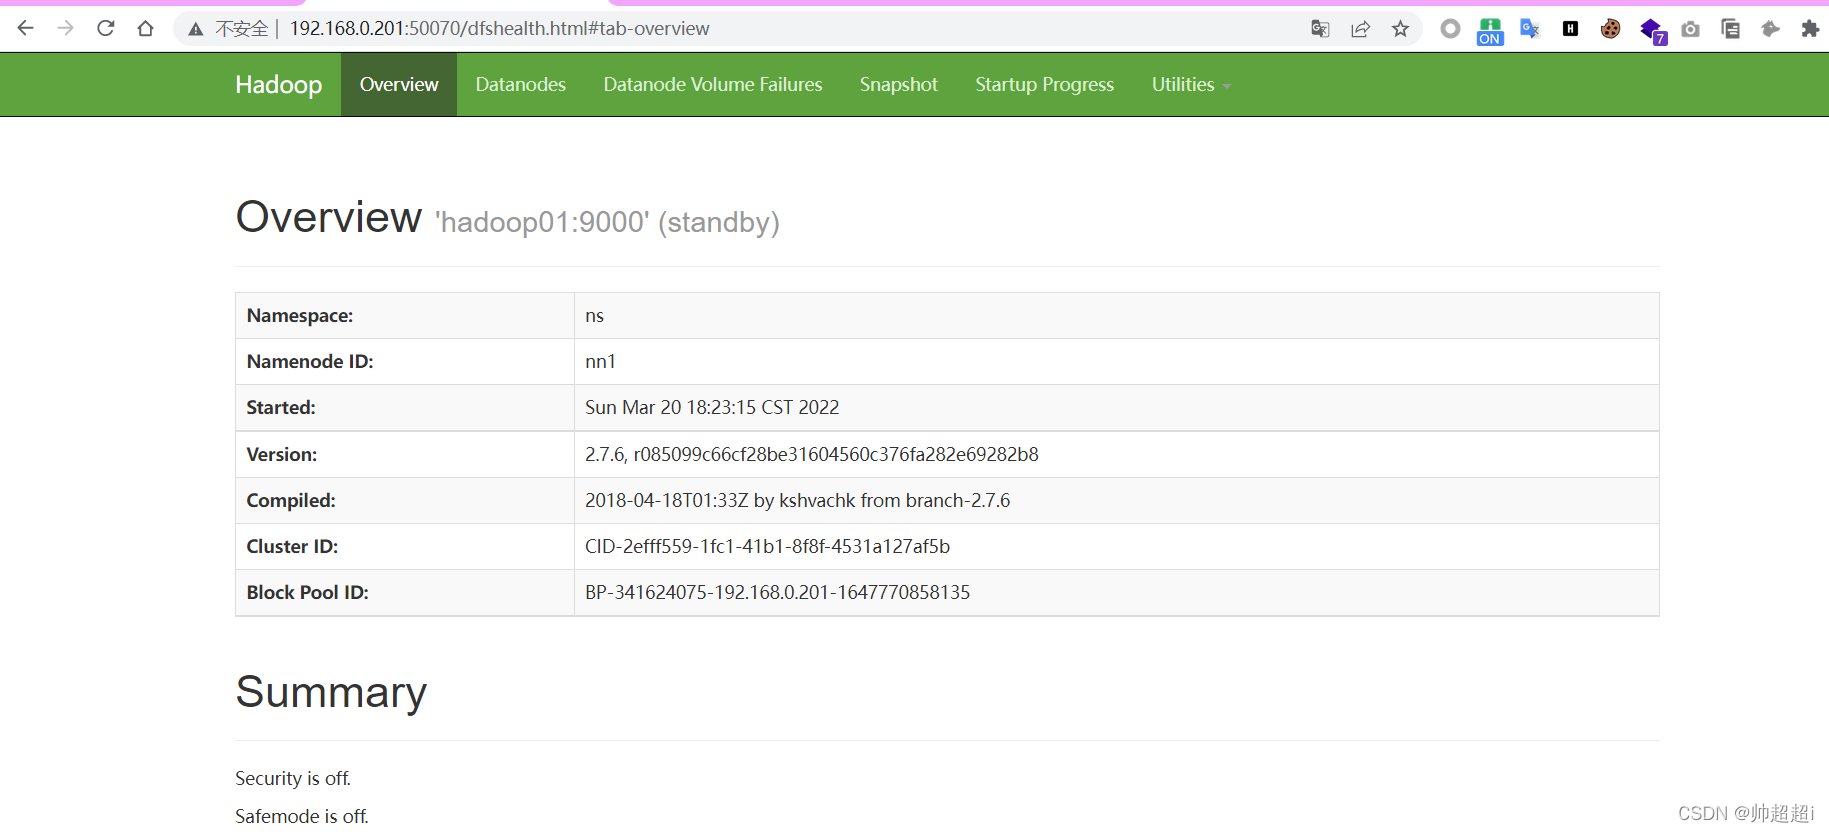
访问http://192.168.0.201:50070
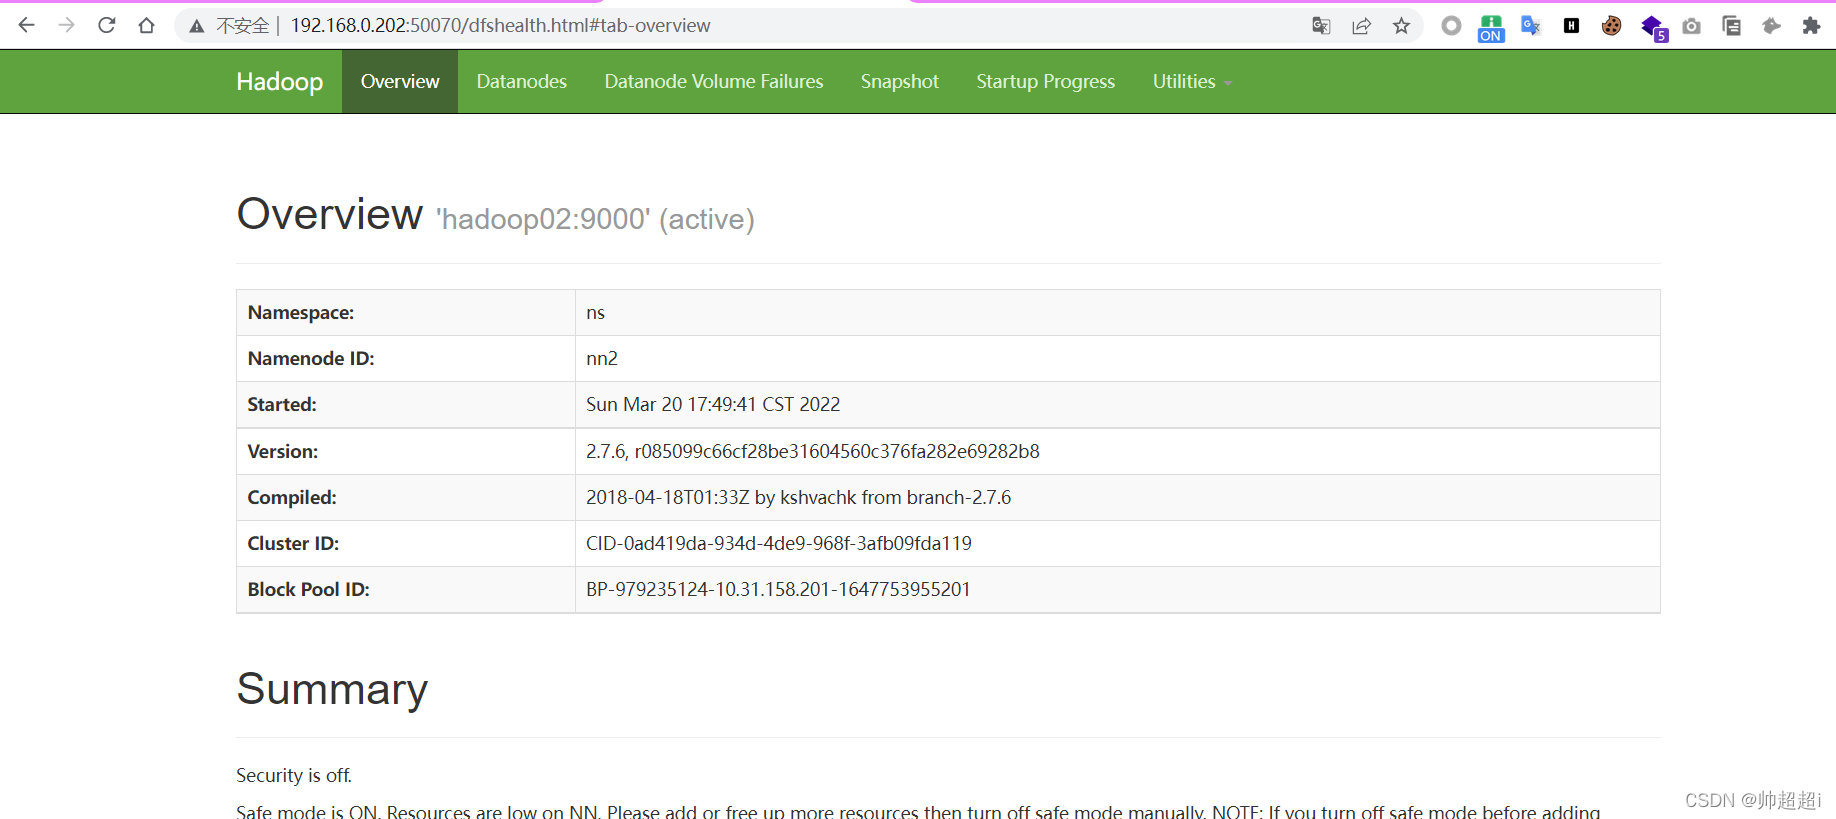
成功!


 119
119

 被折叠的 条评论
为什么被折叠?
被折叠的 条评论
为什么被折叠?
 到【灌水乐园】发言


