


一、 软件环境安装
1.VSCode及插件安装
1.1 VSCode下载
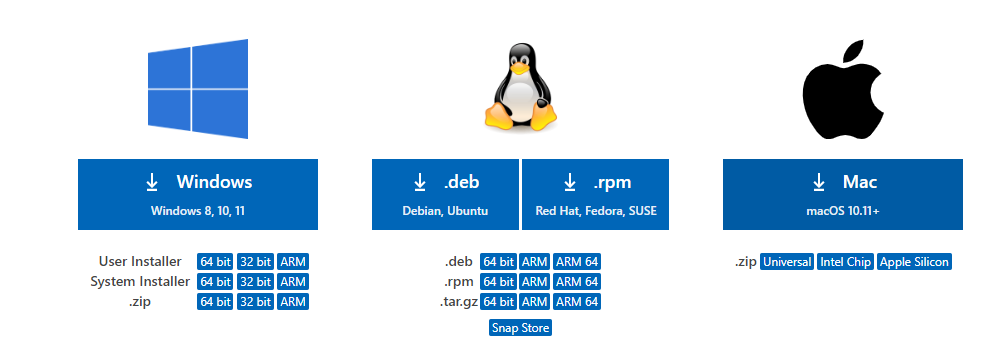
User Installer版:会安装在当前计算机帐户目录,意味着如果使用另一个帐号登陆计算机将无法使用别人安装的vscode。
System Installer版:安装在非用户目录,例如C盘根目录,任何帐户都可以使用。(建议使用此版本)
vscode默认提供的User Installer版,大多数人都是用的这个版本。
选择自己需要的版本下载就可以了,安装比较简单这里就不详述了
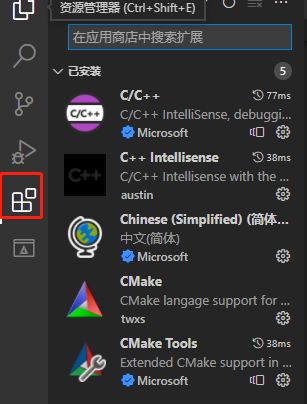
1.2 插件
C/C++
C++ Intellisense
CMake
CMake tools
Chinese(中文语言选装)
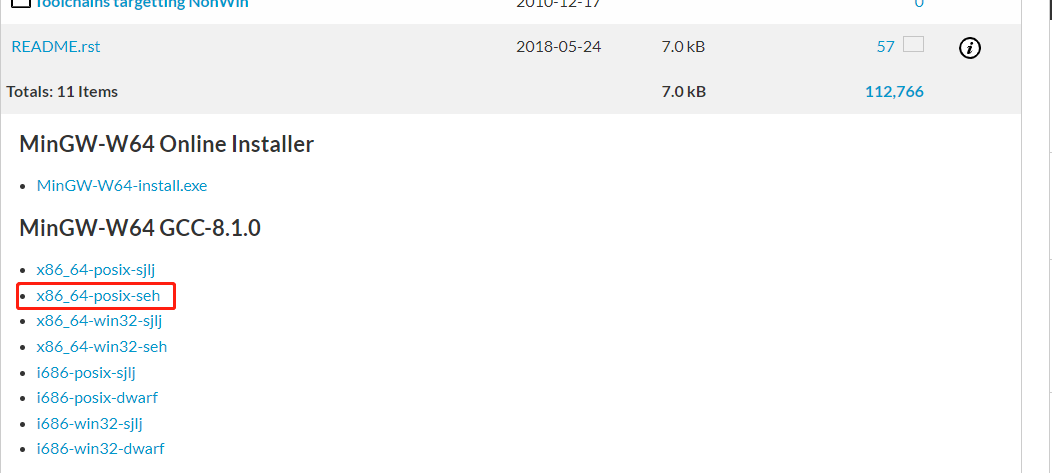
2.mingw安装
2.1 下载
2.2 解压至自定义目录
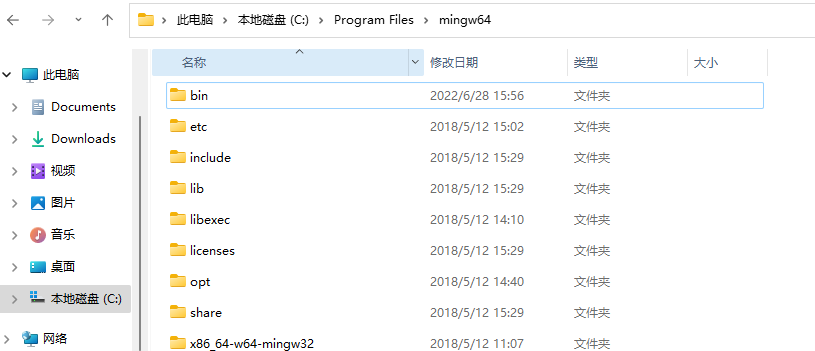
2.3 配置环境变量
进入高级系统设置->环境变量
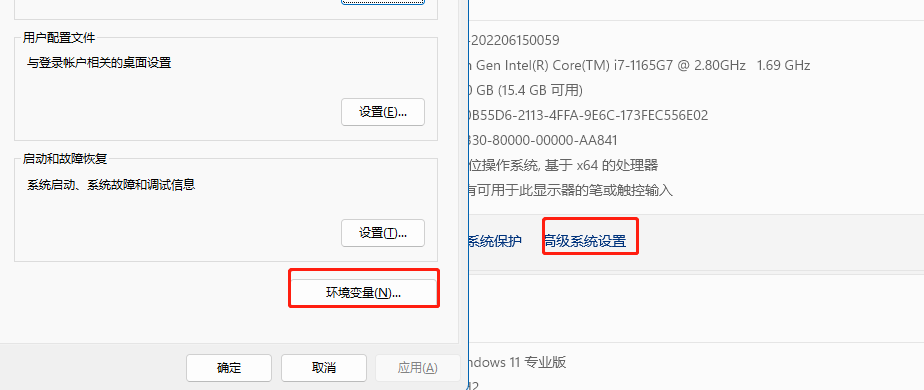
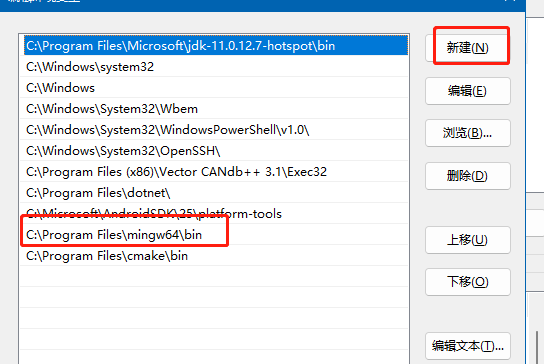
根据自己的解压路径配置,我的路径为:C:\Program Files\mingw64\bin
找到path点击进去新建
2.4 环境检查
WIN+R 输入cmd进入控制台输入:gcc -v
C:\Users\Administrator\Desktop\WorkSpace>gcc -v
Using built-in specs.
COLLECT_GCC=gcc
COLLECT_LTO_WRAPPER=C:/Program\ Files/mingw64/bin/../libexec/gcc/x86_64-w64-mingw32/8.1.0/lto-wrapper.exe
Target: x86_64-w64-mingw32
Configured with: ../../../src/gcc-8.1.0/configure --host=x86_64-w64-mingw32 --build=x86_64-w64-mingw32 --target=x86_64-w64-mingw32 --prefix=/mingw64 --with-sysroot=/c/mingw810/x86_64-810-posix-seh-rt_v6-rev0/mingw64 --enable-shared --enable-static --disable-multilib --enable-languages=c,c++,fortran,lto --enable-libstdcxx-time=yes --enable-threads=posix --enable-libgomp --enable-libatomic --enable-lto --enable-graphite --enable-checking=release --enable-fully-dynamic-string --enable-version-specific-runtime-libs --disable-libstdcxx-pch --disable-libstdcxx-debug --enable-bootstrap --disable-rpath --disable-win32-registry --disable-nls --disable-werror --disable-symvers --with-gnu-as --with-gnu-ld --with-arch=nocona --with-tune=core2 --with-libiconv --with-system-zlib --with-gmp=/c/mingw810/prerequisites/x86_64-w64-mingw32-static --with-mpfr=/c/mingw810/prerequisites/x86_64-w64-mingw32-static --with-mpc=/c/mingw810/prerequisites/x86_64-w64-mingw32-static --with-isl=/c/mingw810/prerequisites/x86_64-w64-mingw32-static --with-pkgversion='x86_64-posix-seh-rev0, Built by MinGW-W64 project' --with-bugurl=https://sourceforge.net/projects/mingw-w64 CFLAGS='-O2 -pipe -fno-ident -I/c/mingw810/x86_64-810-posix-seh-rt_v6-rev0/mingw64/opt/include -I/c/mingw810/prerequisites/x86_64-zlib-static/include -I/c/mingw810/prerequisites/x86_64-w64-mingw32-static/include' CXXFLAGS='-O2 -pipe -fno-ident -I/c/mingw810/x86_64-810-posix-seh-rt_v6-rev0/mingw64/opt/include -I/c/mingw810/prerequisites/x86_64-zlib-static/include -I/c/mingw810/prerequisites/x86_64-w64-mingw32-static/include' CPPFLAGS=' -I/c/mingw810/x86_64-810-posix-seh-rt_v6-rev0/mingw64/opt/include -I/c/mingw810/prerequisites/x86_64-zlib-static/include -I/c/mingw810/prerequisites/x86_64-w64-mingw32-static/include' LDFLAGS='-pipe -fno-ident -L/c/mingw810/x86_64-810-posix-seh-rt_v6-rev0/mingw64/opt/lib -L/c/mingw810/prerequisites/x86_64-zlib-static/lib -L/c/mingw810/prerequisites/x86_64-w64-mingw32-static/lib '
Thread model: posix
gcc version 8.1.0 (x86_64-posix-seh-rev0, Built by MinGW-W64 project)
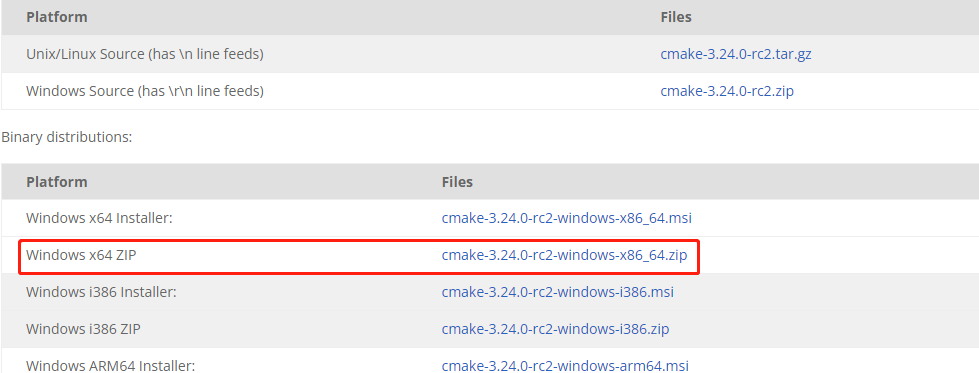
3.CMake安装
3.1 下载
3.2 解压至自定义目录
解压并更名
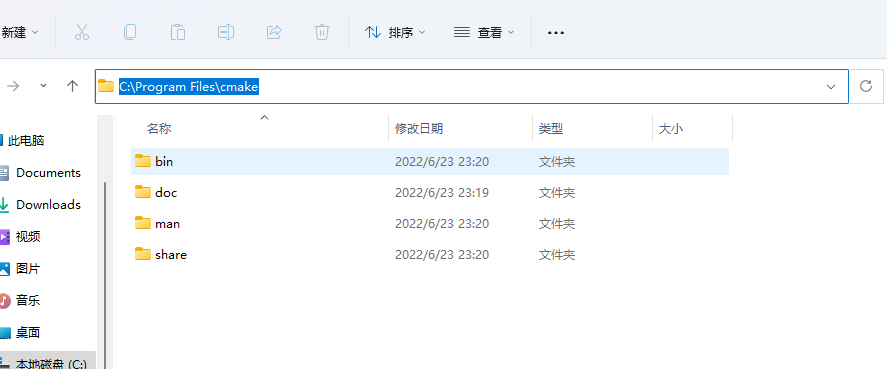
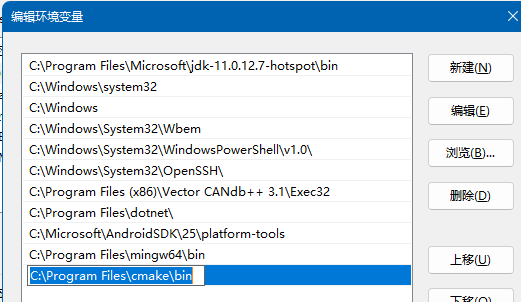
3.3 配置环境变量

根据自己的解压路径配置,我的路径为:C:\Program Files\cmake\bin
找到path点击进去新建
3.3 环境检查
WIN+R 输入cmd进入控制台输入:cmake -version
C:\Users\Administrator\Desktop\share>cmake -version
cmake version 3.24.0-rc2
CMake suite maintained and supported by Kitware (kitware.com/cmake).
二、VSCode+mingw的配置
1. 配置
在前面已经讲过mingw的配置,这里不再重复,着重VSCode 工程配置
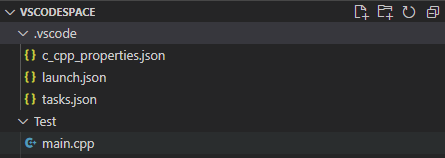
新建vsCodeSpace文件夹,用来放VSCode的项目,名称可以自定义
在vsCodeSpace文件夹下创建一个.vscode文件夹,这个名称固定的,并创建3个文件
分别是c_cpp_properties.json,launch.json,tasks.json
在vsCodeSpace文件夹下创建一个Test的子文件夹放代码,名称可以自定义,然后在文件夹下创建C/C++文件,比如我这里创建main.cpp,具体如下:
1.1 c_cpp_properties.json配置
{
    "configurations": [
        {
          "name": "Win32",
          "includePath": ["${workspaceFolder}/**"],
          "defines": ["_DEBUG", "UNICODE", "_UNICODE"],
          "windowsSdkVersion": "10.0.17763.0",
          "compilerPath": "C:\\Program Files\\mingw64\\bin\\g++.exe",   /*修改成自己bin目录下的g++.exe,这里的路径和电脑里复制的文件目录有一点不一样,这里是两个反斜杠\\*/
          "cStandard": "c11",
          "cppStandard": "c++17",
          "intelliSenseMode": "${default}"
        }
      ],
      "version": 4
}
1.2 launch.json配置
{
    // 使用 IntelliSense 了解相关属性。
    // 悬停以查看现有属性的描述。
    // 欲了解更多信息,请访问: https://go.microsoft.com/fwlink/?linkid=830387
    "version": "0.2.0",
    "configurations": [
        {
            "name": "g++.exe build and debug active file",
            "type": "cppdbg",
            "request": "launch",
            "program": "${fileDirname}\\${fileBasenameNoExtension}.exe",
            "args": [],
            "stopAtEntry": false,
            "cwd": "${workspaceFolder}",
            "environment": [],
            "externalConsole": true,
            "MIMode": "gdb",
            "miDebuggerPath": "C:\\Program Files\\mingw64\\bin\\gdb.exe",		/*修改成自己bin目录下的gdb.exe,这里的路径和电脑里复制的文件目录有一点不一样,这里是两个反斜杠\\*/
            "setupCommands": [
                {
                    "description": "为 gdb 启用整齐打印",
                    "text": "-enable-pretty-printing",
                    "ignoreFailures": true
                }
            ],
            "preLaunchTask": "task g++"
        }
    ]
}
1.3 tasks.json配置
{
    // See https://go.microsoft.com/fwlink/?LinkId=733558
    // for the documentation about the tasks.json format
    "version": "2.0.0",
    "tasks": [
        {
        "type": "shell",
        "label": "task g++",
        "command": "C:\\Program Files\\mingw64\\bin\\g++.exe",	/*修改成自己bin目录下的g++.exe,这里的路径和电脑里复制的文件目录有一点不一样,这里是两个反斜杠\\*/
        "args": [
            "-g",
            "${file}",
            "-o",
            "${fileDirname}\\${fileBasenameNoExtension}.exe",
            "-I",
            "C:\\Users\\Administrator\\Desktop\\share\\vsCodeSpace\\Test",      /*修改成自己放c/c++项目的文件夹,这里的路径和电脑里复制的文件目录有一点不一样,这里是两个反斜杠\\*/
            "-std=c++17"
        ],
        "options": {
            "cwd": "C:\\Program Files\\mingw64\\bin"	/*修改成自己bin目录,这里的路径和电脑里复制的文件目录有一点不一样,这里是两个反斜杠\\*/
        },
        "problemMatcher":[
            "$gcc"
        ],
        "group": "build",

        }

}
1.4 关于多文件编译 tasks.json的修改
{
    // See https://go.microsoft.com/fwlink/?LinkId=733558
    // for the documentation about the tasks.json format
    "version": "2.0.0",
    "tasks": [
        {
        "type": "shell",
        "label": "task g++",
        "command": "C:\\Program Files\\mingw64\\bin\\g++.exe",	/*修改成自己bin目录下的g++.exe,这里的路径和电脑里复制的文件目录有一点不一样,这里是两个反斜杠\\*/
        "args": [
            "-g",
            "${workspaceFolder}\\*.cpp",/*针对多文件编译配置,也可放入绝对路径*/
            "-o",
            "${fileDirname}\\${fileBasenameNoExtension}.exe",
            "-I",
            "${workspaceFolder}",      /*这里也可以放绝对路径 比如上一个tasks.json*/
            "-std=c++17"
        ],
        "options": {
            "cwd": "C:\\Program Files\\mingw64\\bin"	/*修改成自己bin目录,这里的路径和电脑里复制的文件目录有一点不一样,这里是两个反斜杠\\*/
        },
        "problemMatcher":[
            "$gcc"
        ],
        "group": "build",

        }
    ]
}
2.测试
按照顺序点击
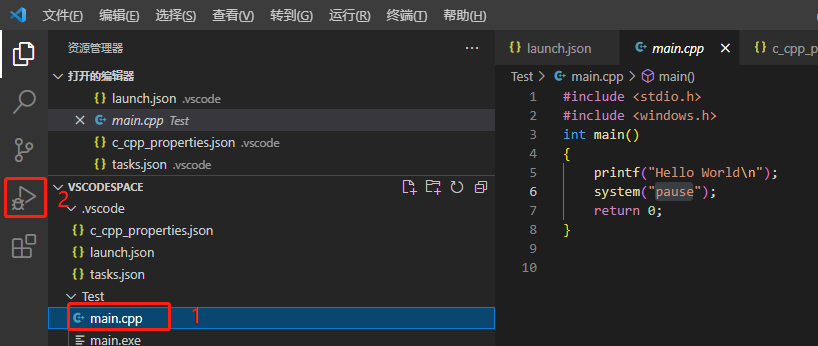
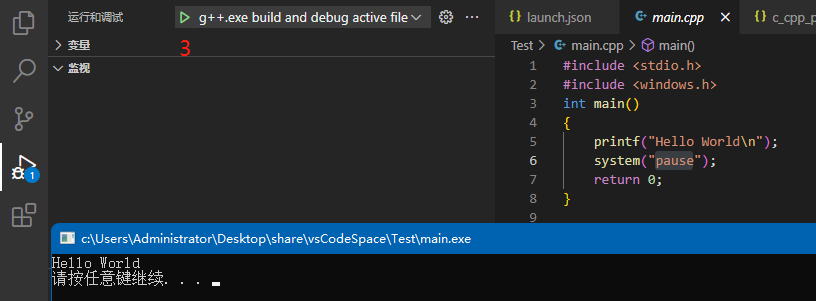
出现hello代表成功了,还有要点一下main.cpp是因为比如点在json文件上时会出现错误:vscode file format not recognized;
三、VSCode+CMake+mingw的配置
1.配置
1.1 环境要求
这里需要把mingw的bin目录中mingw32-make.exe修改为make.exe
运行gcc -v
C:\Users\Administrator\Desktop\share\vsCodeSpaceCmake>gcc -v
Using built-in specs.
COLLECT_GCC=gcc
COLLECT_LTO_WRAPPER=C:/Program\ Files/mingw64/bin/../libexec/gcc/x86_64-w64-mingw32/8.1.0/lto-wrapper.exe
Target: x86_64-w64-mingw32
Configured with: ../../../src/gcc-8.1.0/configure --host=x86_64-w64-mingw32 --build=x86_64-w64-mingw32 --target=x86_64-w64-mingw32 --prefix=/mingw64 --with-sysroot=/c/mingw810/x86_64-810-posix-seh-rt_v6-rev0/mingw64 --enable-shared --enable-static --disable-multilib --enable-languages=c,c++,fortran,lto --enable-libstdcxx-time=yes --enable-threads=posix --enable-libgomp --enable-libatomic --enable-lto --enable-graphite --enable-checking=release --enable-fully-dynamic-string --enable-version-specific-runtime-libs --disable-libstdcxx-pch --disable-libstdcxx-debug --enable-bootstrap --disable-rpath --disable-win32-registry --disable-nls --disable-werror --disable-symvers --with-gnu-as --with-gnu-ld --with-arch=nocona --with-tune=core2 --with-libiconv --with-system-zlib --with-gmp=/c/mingw810/prerequisites/x86_64-w64-mingw32-static --with-mpfr=/c/mingw810/prerequisites/x86_64-w64-mingw32-static --with-mpc=/c/mingw810/prerequisites/x86_64-w64-mingw32-static --with-isl=/c/mingw810/prerequisites/x86_64-w64-mingw32-static --with-pkgversion='x86_64-posix-seh-rev0, Built by MinGW-W64 project' --with-bugurl=https://sourceforge.net/projects/mingw-w64 CFLAGS='-O2 -pipe -fno-ident -I/c/mingw810/x86_64-810-posix-seh-rt_v6-rev0/mingw64/opt/include -I/c/mingw810/prerequisites/x86_64-zlib-static/include -I/c/mingw810/prerequisites/x86_64-w64-mingw32-static/include' CXXFLAGS='-O2 -pipe -fno-ident -I/c/mingw810/x86_64-810-posix-seh-rt_v6-rev0/mingw64/opt/include -I/c/mingw810/prerequisites/x86_64-zlib-static/include -I/c/mingw810/prerequisites/x86_64-w64-mingw32-static/include' CPPFLAGS=' -I/c/mingw810/x86_64-810-posix-seh-rt_v6-rev0/mingw64/opt/include -I/c/mingw810/prerequisites/x86_64-zlib-static/include -I/c/mingw810/prerequisites/x86_64-w64-mingw32-static/include' LDFLAGS='-pipe -fno-ident -L/c/mingw810/x86_64-810-posix-seh-rt_v6-rev0/mingw64/opt/lib -L/c/mingw810/prerequisites/x86_64-zlib-static/lib -L/c/mingw810/prerequisites/x86_64-w64-mingw32-static/lib '
Thread model: posix
gcc version 8.1.0 (x86_64-posix-seh-rev0, Built by MinGW-W64 project)
运行make -v
C:\Users\Administrator\Desktop\share\vsCodeSpaceCmake>make -v
GNU Make 4.2.1
Built for x86_64-w64-mingw32
Copyright (C) 1988-2016 Free Software Foundation, Inc.
License GPLv3+: GNU GPL version 3 or later <http://gnu.org/licenses/gpl.html>
This is free software: you are free to change and redistribute it.
There is NO WARRANTY, to the extent permitted by law.
1.2 工程目录
在vsCodeSpaceCmake创建一个Test文件夹放VScode工程
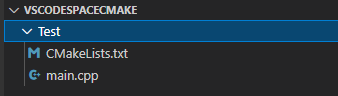
CMakeLists.txt
cmake_minimum_required(VERSION 3.0)
project(vscode_cmake_Test)
aux_source_directory(. DIR_TOOT_SRCS)
set(CMAKE_CXX_FLAGS "${CMAKE_CXX_FLAGS} -g")
add_executable(${PROJECT_NAME} ${DIR_TOOT_SRCS})
main.cpp随意写点代码
ok 就可以打开工程了
1.3 VSCode配置
一般刚安装CMake插件后 会自动提示你选择一个编译工具链,如果没有提示或者想更换其他编译工具链,那么可以通过ctrl+shifl+p,输入以下指令,然后在弹出框中选择自己安装的编译工具链

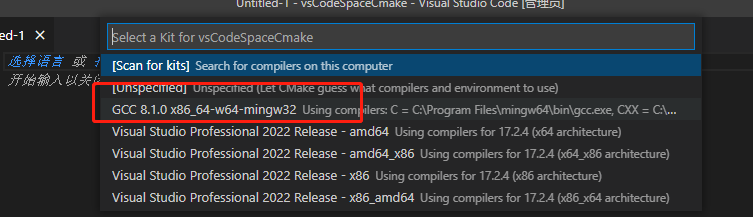


ok 这就配置完成
2. 测试
按顺序点击 看输出日志
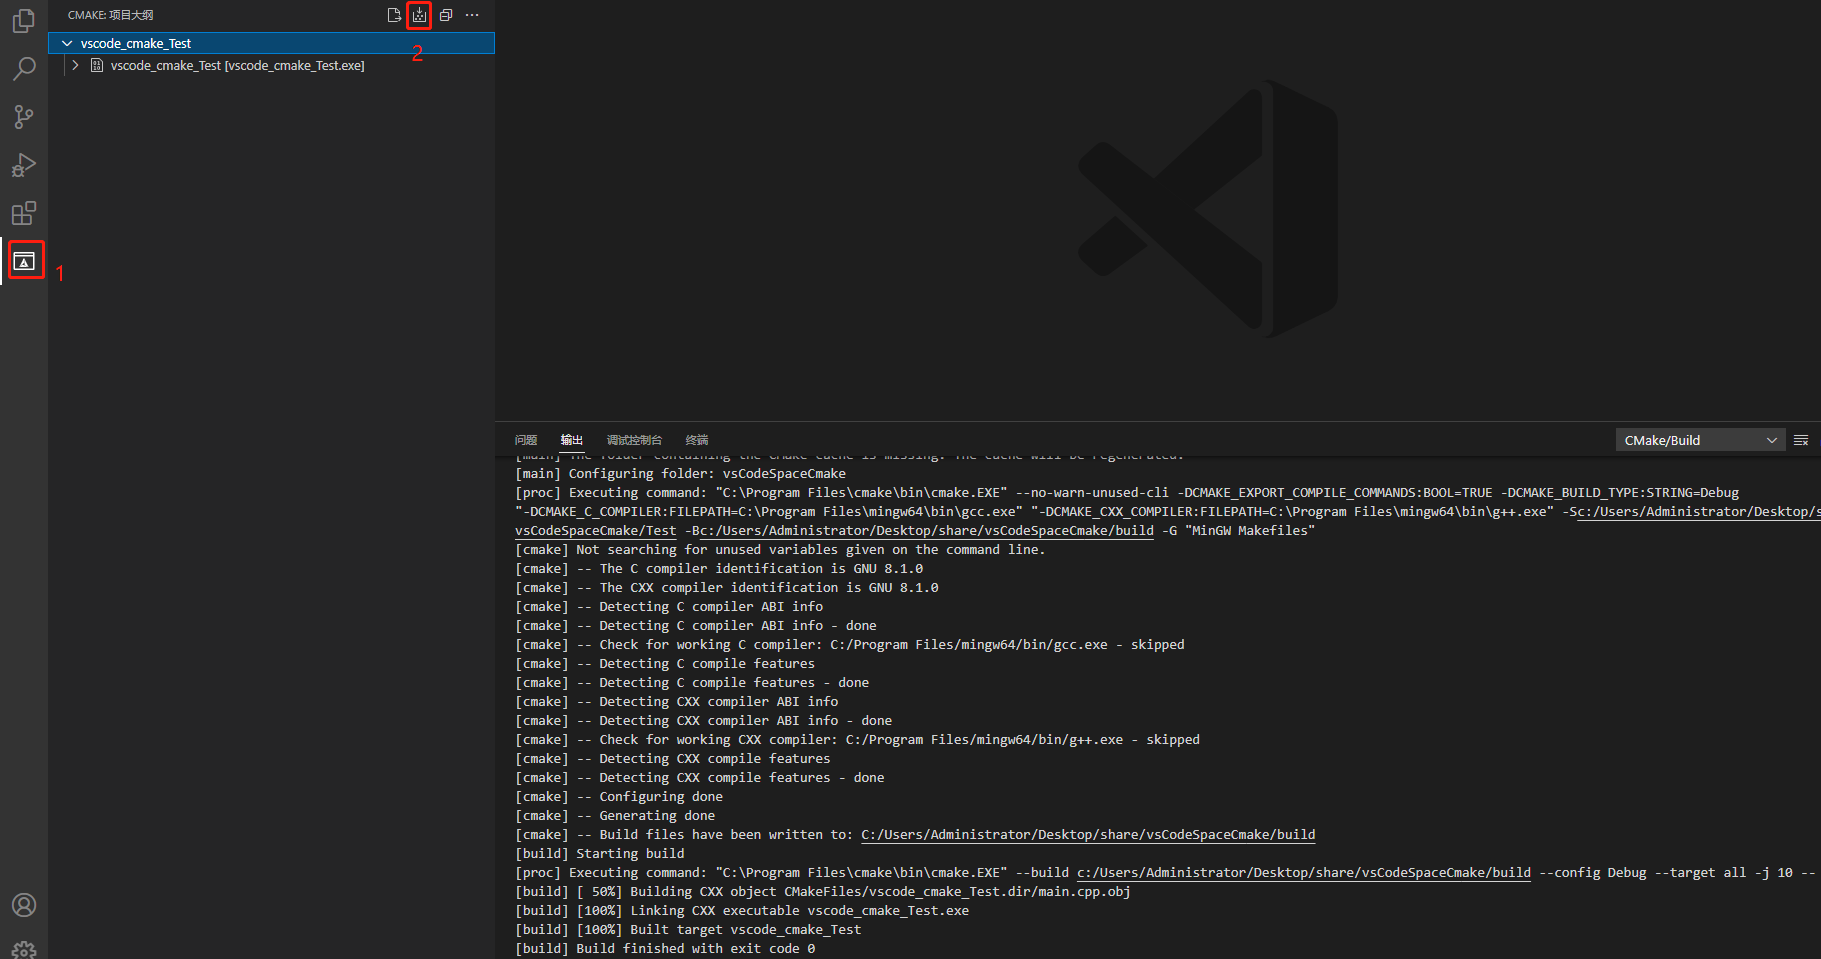
这样就ok了
四、控制台乱码(补充)
最简单快捷的方法是在main函数第一行添加如下代码:
system("chcp 65001");


 2555
2555

 被折叠的 条评论
为什么被折叠?
被折叠的 条评论
为什么被折叠?
 到【灌水乐园】发言


