


进入 CentOS 7,输入 su root 切换权限,输入密码。
![]()
1.删除旧版本
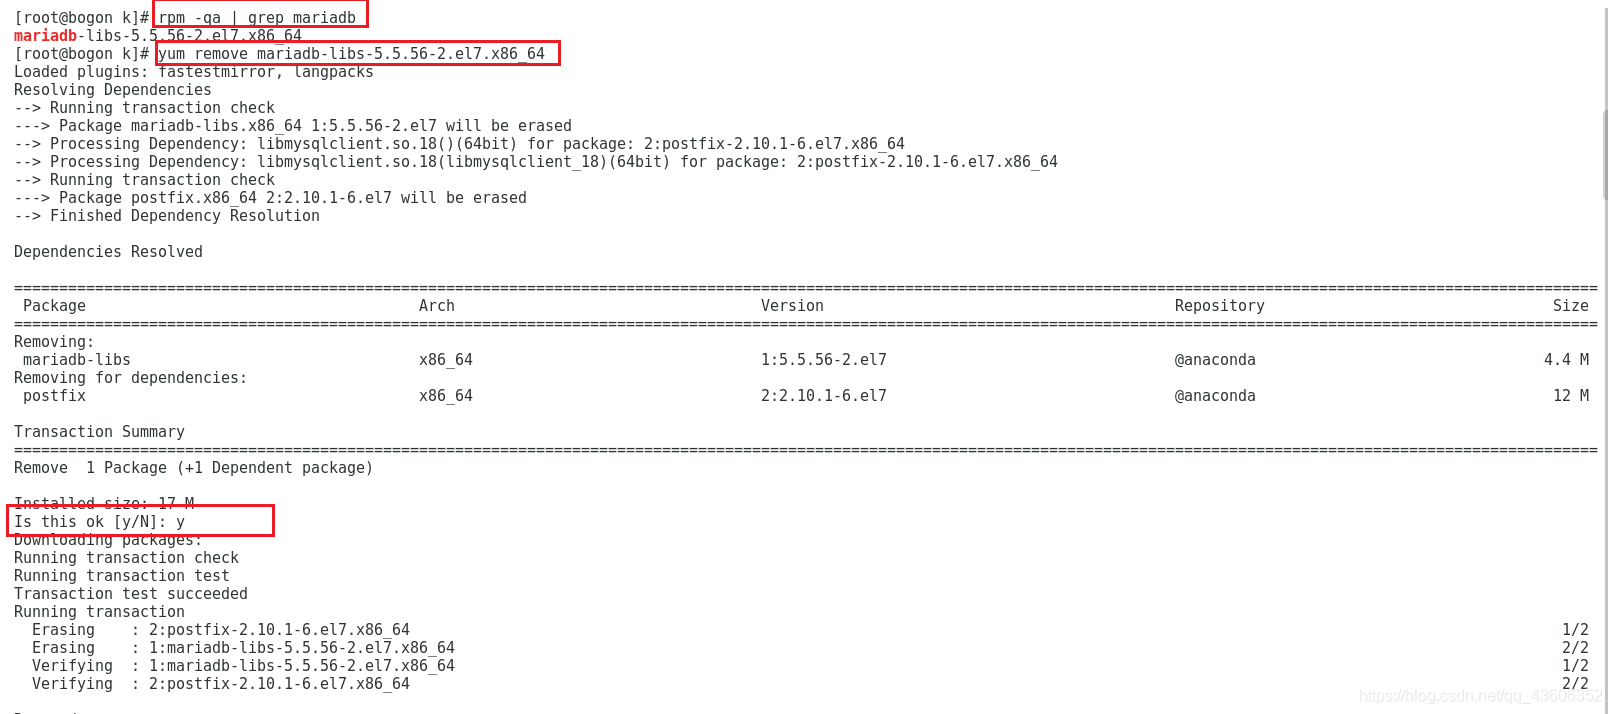
输入如下指令查看当前拥有的数据库
# rpm -qa | grep mariadb
![]()
用命令 yum 删除以上的数据库,若有多个则同理删除
# yum remove mariadb-libs-5.5.56-2.el7.x86_64
2.安装
安装 mariadb 服务
# yum install -y mariadb-server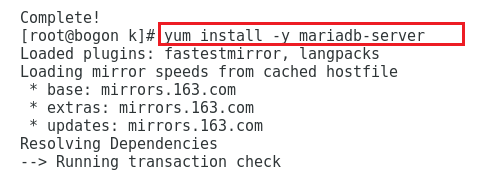
安装 mariadb 命令行客户端
# yum install -y mariadb安装 mariadb C library
# yum install -y mariadb-libs安装 mariadb 开发包
# yum install -y mariadb-devel3.更改配置
通过 vim 更改配置
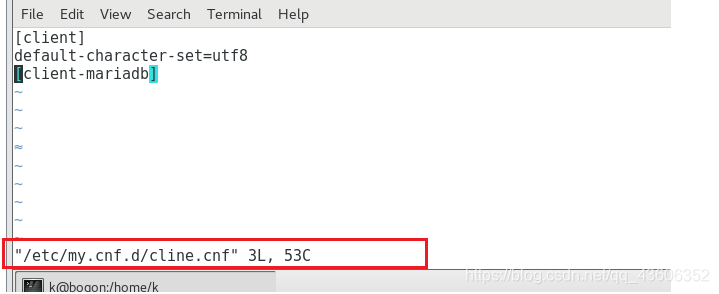
1.更改 /etc/my.cnf.d/client.cnf 文件
# vim /etc/my.cnf.d/client.cnf
进入以下页面,此时不能编辑,需要按一下 i 键进入编辑模式。编辑结束后先按 esc 按键,然后按 :wq 表示保存退出。
在该文件配置以下内容:
[client]
default-character-set = utf8
[client-mariadb]


2.更改 /etc/my.cnf.d/mysql-clients.cnf 文件,[mysql] 下加一行配置 default-character-set=utf8
# vim /etc/my.cnf.d/mysql-clients.cnf
最终内容
#
# These groups are read by MariaDB command-line tools
# Use it for options that affect only one utility
#

[mysql]
default-character-set = utf8

[mysql_upgrade]

[mysqladmin]

[mysqlbinlog]

[mysqlcheck]

[mysqldump]

[mysqlimport]

[mysqlshow]

[mysqlslap]
3.更改 /etc/my.cnf.d/server.cnf 配置
# vim /etc/my.cnf.d/server.cnf
[mysqld] 下加配置
collation-server = utf8_general_ci
init-connect='SET NAMES utf8'
character-set-server = utf8
sql-mode = TRADITIONAL
最终内容
#
# These groups are read by MariaDB server.
# Use it for options that only the server (but not clients) should see
#
# See the examples of server my.cnf files in /usr/share/mysql/
#

# this is read by the standalone daemon and embedded servers
[server]

# this is only for the mysqld standalone daemon
[mysqld]
collation-server = utf8_general_ci
init-connect = 'SET NAMES utf8'
character-set-server = utf8

sql-mode = TRADITIONAL

# this is only for embedded server
[embedded]

# This group is only read by MariaDB-5.5 servers.
# If you use the same .cnf file for MariaDB of different versions,
# use this group for options that older servers don't understand
[mysqld-5.5]

# These two groups are only read by MariaDB servers, not by MySQL.
# If you use the same .cnf file for MySQL and MariaDB,
# you can put MariaDB-only options here
[mariadb]

[mariadb-5.5]
4.启动
启动服务
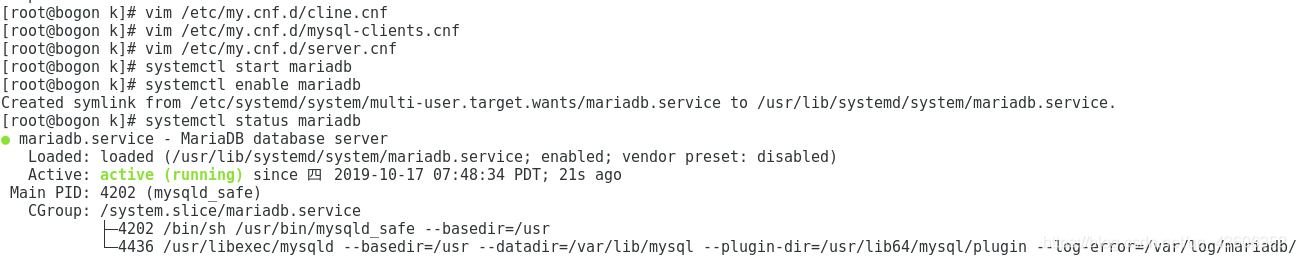
# systemctl start mariadb设置服务开启自启动
# systemctl enable mariadb查看服务状态
# systemctl status mariadb可能的输出为,注意到 Active 状态为 active (running)
测试连接
使用命令行客户端尝试连接
# mysql -uroot可能的输出为
Welcome to the MariaDB monitor.  Commands end with ; or \g.
Your MariaDB connection id is 2
Server version: 5.5.60-MariaDB MariaDB Server

Copyright (c) 2000, 2018, Oracle, MariaDB Corporation Ab and others.

Type 'help;' or '\h' for help. Type '\c' to clear the current input statement.

MariaDB [(none)]>
查看 mariadb 版本号,输入 select version();
MariaDB [(none)]> select version();
+----------------+
| version()      |
+----------------+
| 5.5.60-MariaDB |
+----------------+
1 row in set (0.01 sec)
需要退出数据库时按 ctrl+D
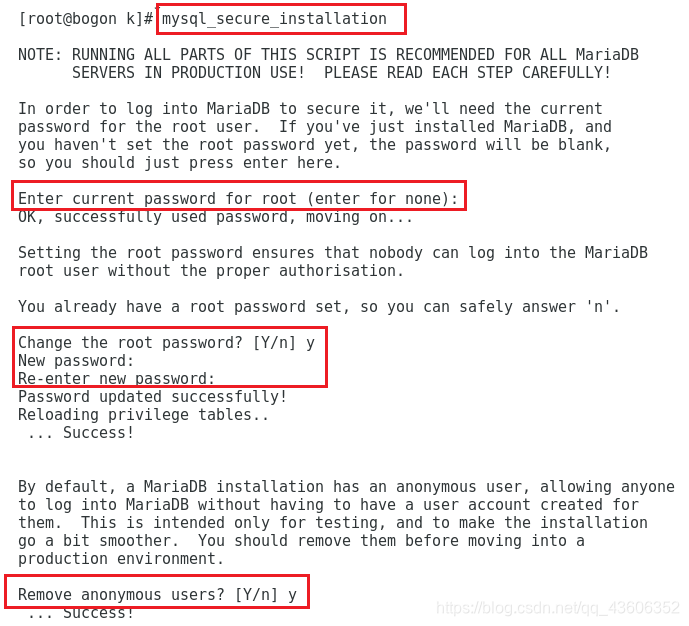
目前 mariadb 用户是没有密码的,需要执行以下步骤设置密码:
# mysql_secure_installation选择 Y/N 的时候都选 Y,
在
New password:
Re-enter new password:
时设置你自己的 root 密码
使用命令行客户端尝试连接(带密码)
# mysql -uroot -p随后输入你刚才设置的密码,可能的输出为
Welcome to the MariaDB monitor.  Commands end with ; or \g.
Your MariaDB connection id is 2
Server version: 5.5.60-MariaDB MariaDB Server

Copyright (c) 2000, 2018, Oracle, MariaDB Corporation Ab and others.

Type 'help;' or '\h' for help. Type '\c' to clear the current input statement.

MariaDB [(none)]>


 3924
3924

 被折叠的 条评论
为什么被折叠?
被折叠的 条评论
为什么被折叠?
 到【灌水乐园】发言


