


 该博客详细介绍了Oracle数据库的安装步骤,包括软件准备、内核参数修改、关闭防火墙和selinux、新建用户和组、创建安装目录、配置环境变量、解压安装文件等,还分别阐述了普通安装和静默安装的具体操作。
1、软件准备
普通安装与静默安装前七步是一样的,不同的地方在于一个是图形界面安装,一个是命令行安装
1.1 软件下载
链接:https://share.weiyun.com/5k6YjF9 密码:gzl9ge
1.2 上传文件到虚拟机的 /soft 目录中
创建目录
[root@localhost ~]# mkdir /soft
[root@localhost ~]# chmod 777 /soft/
1.4 软件包检查
使用rpm检查没有安装的包
[root@localhost ~]# rpm -q binutils \
 compat-libstdc++-33 \
 elfutils-libelf \
 gcc \
 gcc-c++ \
 glibc \
 glibc-common \
 glibc-devel \glibc-headers \
 ksh \
 libaio \
 libaio-devel \
 libgomp \
 libgcc \
 libstdc++ \
 libstdc++-devel \
 make \
 sysstat \
 unixODBC \
 unixODBC-devel \numactl-devel \
 elfutils-libelf-devel
package gcc is not installed
package gcc-c++ is not installed
package glibc-devel is not installed
package libaio-devel is not installed
package libgomp is not installed
package libstdc++-devel is not installed
package sysstat is not installed
package unixODBC is not installed
package unixODBC-devel is not installed
package numactl-devel is not installed
package elfutils-libelf-devel is not installed
使用yum安装上面没有安装的包,yum会自动解决依赖包的问题。如果不能使用yum,查看yum配置文件,具体的yum源配置见另一篇博客。
[root@localhost ~]# yum install -y gcc
[root@localhost ~]# yum install -y gcc-c++
[root@localhost ~]# yum install -y glibc-devel
[root@localhost ~]# yum install -y glibc-headers
[root@localhost ~]# yum install -y libaio-devel
[root@localhost ~]# yum install -y libgomp
[root@localhost ~]# yum install -y libstdc++-devel
[root@localhost ~]# yum install -y sysstat
[root@localhost ~]# yum install -y unixODBC
[root@localhost ~]# yum install -y unixODBC-devel
[root@localhost ~]# yum install -y numactl-devel
[root@localhost ~]# yum install -y elfutils-libelf-devel
2、内核参数
2.1 修改资源限制文件:/etc/security/limits.conf
在文件中追加下面几行
[root@localhost ~]# vim /etc/security/limits.conf
oracle soft nofile 65536
oracle hard nofile 65536
oracle soft nproc 16384
oracle hard nproc 16384
2.2 /etc/pam.d/login
在文件中追加下面几行,没有的话追加,有的话进行下一步
[root@localhost ~]# vim /etc/pam.d/login
session required /lib/security/pam_limits.so
session required pam_limits.so
2.3 /etc/profile
if [ $USER = "oracle" ]; then
	if [ $SHELL = "/bin/ksh" ]; then
		ulimit -p 16384
		ulimit -n 16384
	else
	ulimit -u 16384 -n 16384
	fi
fi
2.4 配置系统内核:/etc/sysctl.conf
[root@localhost ~]# vim /etc/sysctl.conf
fs.aio-max-nr = 1048576
fs.file-max = 6815744
kernel.shmall = 2097152
kernel.shmmax = 4294967295
kernel.shmmni = 4096
kernel.sem = 250 32000 100 128
net.ipv4.ip_local_port_range = 9000 6550
net.core.rmem_max = 4194304
net.core.wmem_default = 262144
net.core.wmem_max = 1048576
使用命令生效内核参数
[root@localhost ~]# sysctl -p
3、关闭防火墙、selinux
临时关闭防火墙
service iptables stop
永久关闭防火墙
chkconfig iptables off
查看防火墙状态
/etc/init.d/iptables status
临时关闭selinux
setenforce 0
永久关闭selinux
[root@localhost ~]# vim /etc/selinux/config
SELINUX=disabled                   ##重启生效
查看selinux状态
getenforce
4、新建用户和组
创建oinstall组和dba组
[root@localhost ~]# groupadd oinstall
[root@localhost ~]# groupadd dba
创建oracle用户,该用户的基本组为oinstall,附加组为dba
[root@localhost ~]# useradd -g oinstall -G dba -m oracle
设置oracle用户的密码
[root@localhost ~]# echo oracle | passwd --stdin oracle
5、创建安装目录
创建安装目录
[root@localhost ~]# mkdir -p /u01/app/oracle
修改目录的所属主和所属组
[root@localhost ~]# chown -R oracle:oinstall /u01/app
修改目录权限
[root@localhost ~]# chmod -R 755 /u01/app/
6、配置用户的环境变量
把oracle新的安装目录写入环境变量中。如果不写入环境变量,在执行数据库管理命令dbca时会提示命令不存在。
[root@localhost ~]# vim /home/oracle/.bash_profile
export ORACLE_SID=OCPLHR1
export ORACLE_BASE=/u01/app/oracle
export ORACLE_HOME=$ORACLE_BASE/product/11.2.0/dbhome_1
export LD_LIBRARY_PATH=$ORACLE_HOME/lib:/lib:/usr/lib
export PATH=$ORACLE_HOME/bin:$ORACLE_HOME/OPatch:$PATH
使环境变量生效
[root@localhost ~]# source /home/oracle/.bash_profile
7、解压安装文件
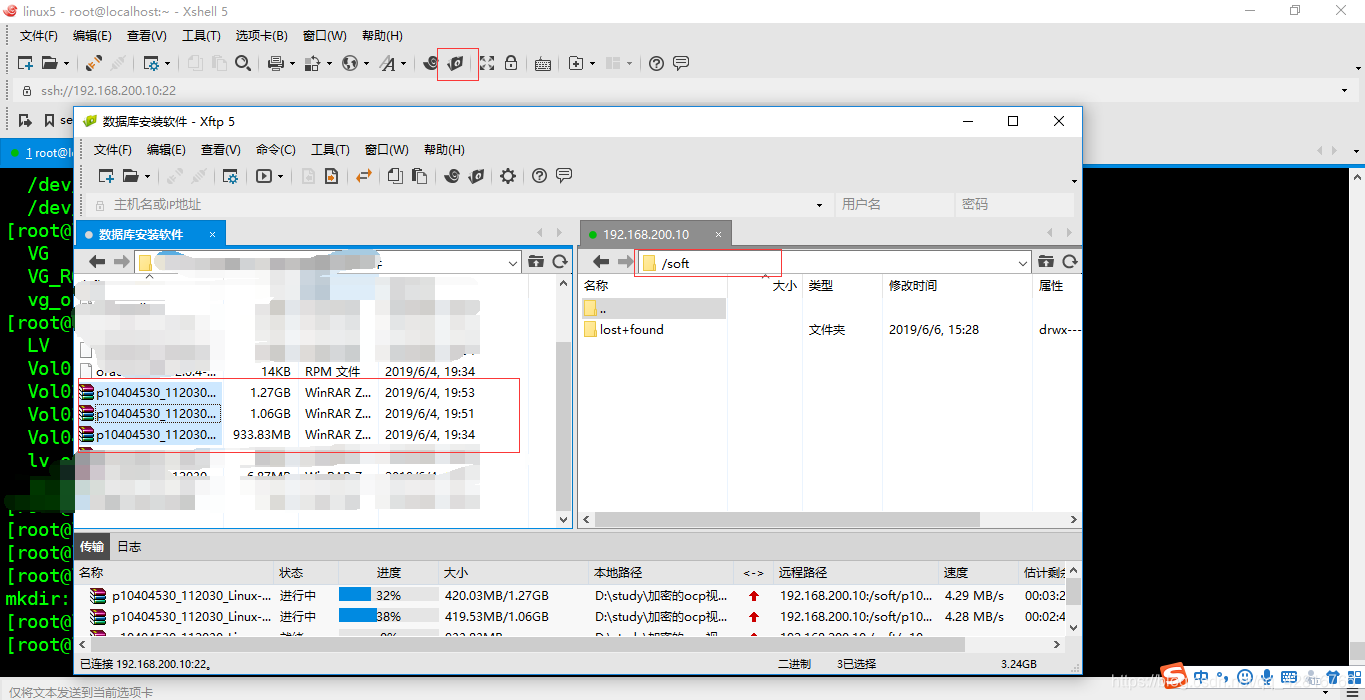
前面我们已经上传过文件了,上传完成后,linux中查看文件是否存在
[root@localhost ~]# cd /soft/
[root@localhost soft]# ll
total 3401656
drwx------ 2 root root      16384 Jun  6 15:28 lost+found
-rw-r--r-- 1 root root 1358454646 Jun  6 15:47 p10404530_112030_Linux-x86-64_1of7.zip
-rw-r--r-- 1 root root 1142195302 Jun  6 15:47 p10404530_112030_Linux-x86-64_2of7.zip
-rw-r--r-- 1 root root  979195792 Jun  6 15:48 p10404530_112030_Linux-x86-64_3of7.zip
修改安装包的权限
[root@localhost soft]# chmod -R 777 /soft/
修改安装包的属主和属组
[root@localhost soft]# chown oracle:oinstall /soft/
解压文件1和2
[root@localhost soft]# unzip p10404530_112030_Linux-x86-64_1of7.zip
[root@localhost soft]# unzip p10404530_112030_Linux-x86-64_2of7.zip
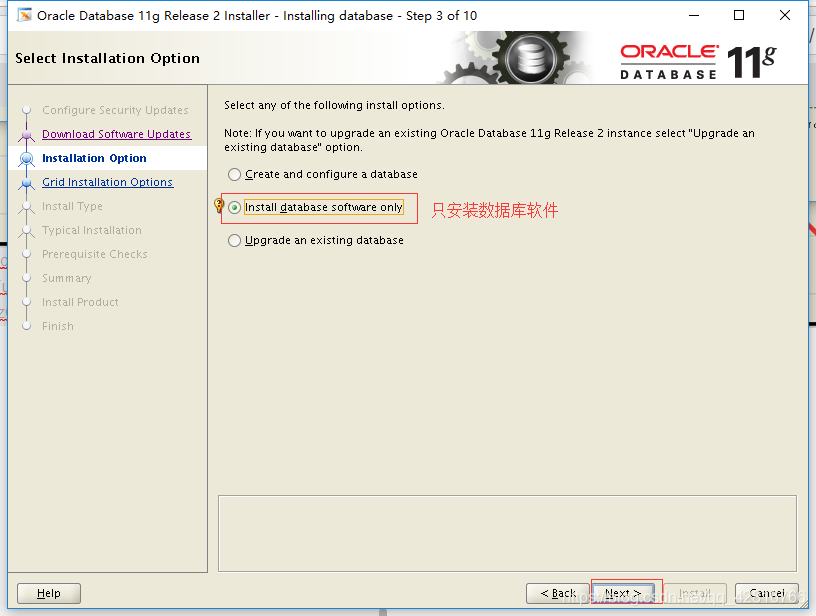
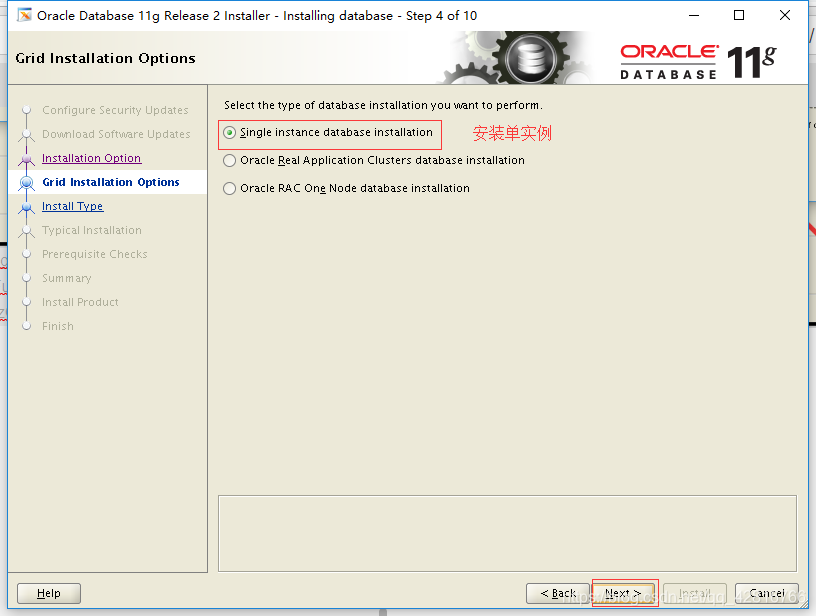
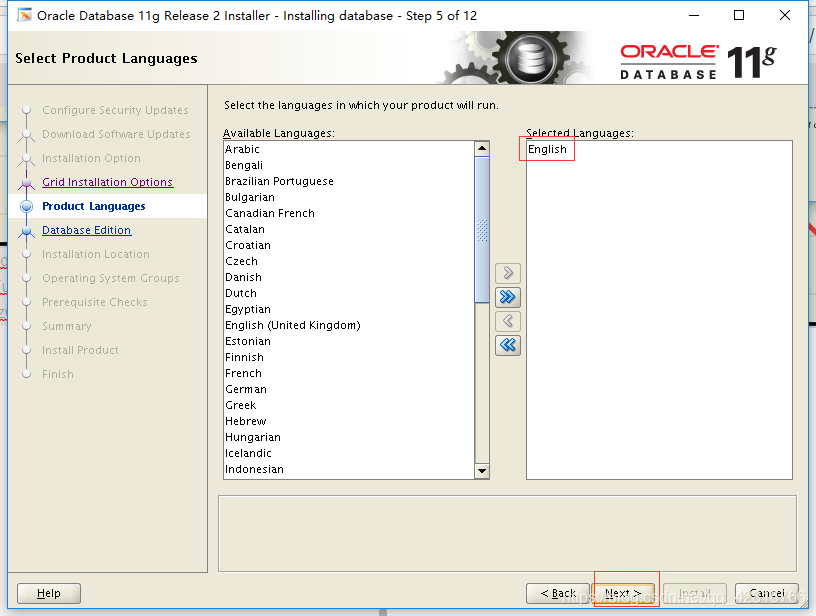
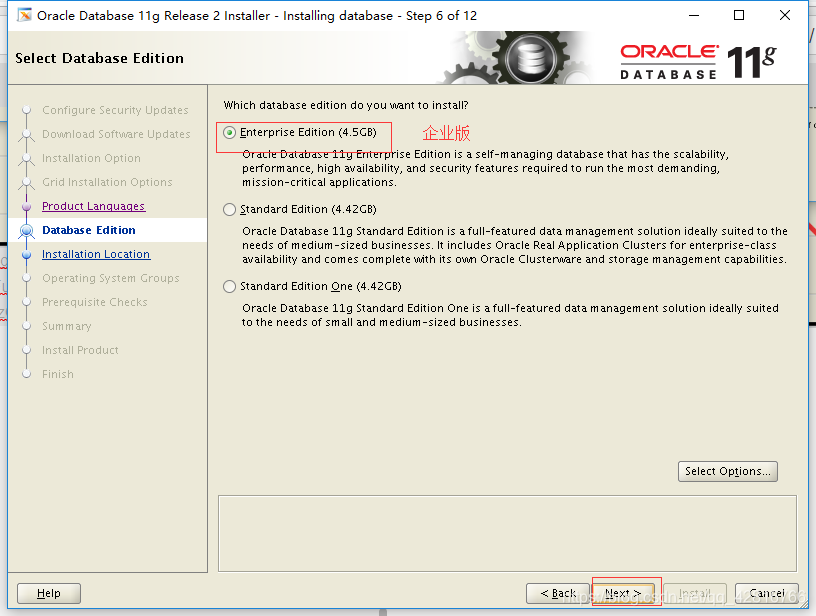
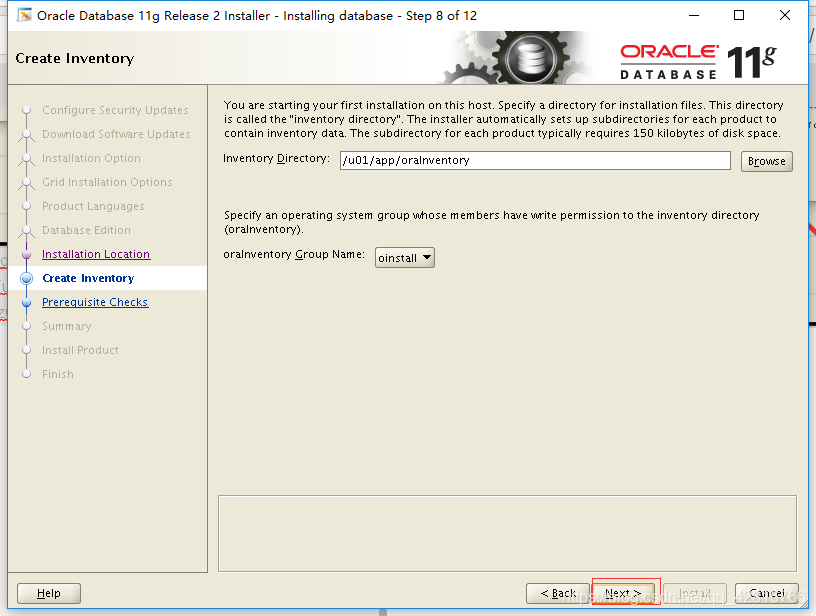
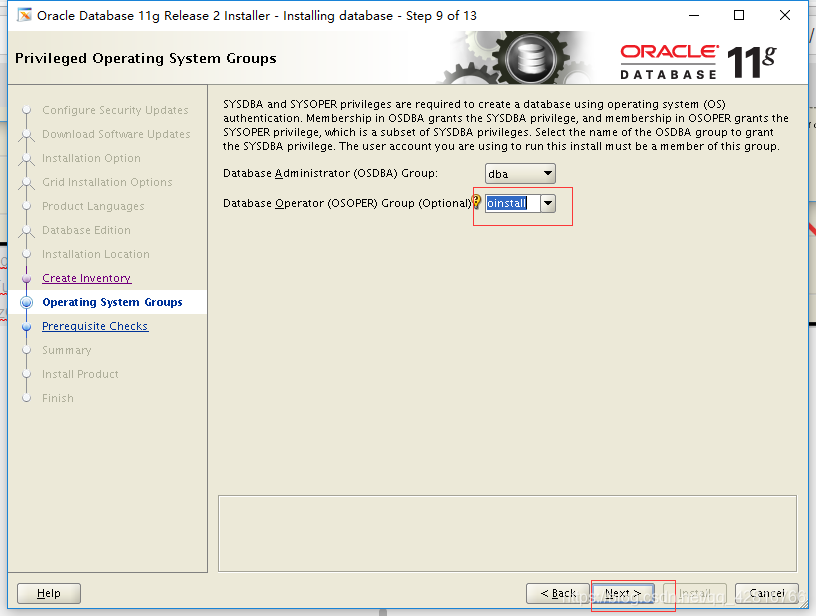
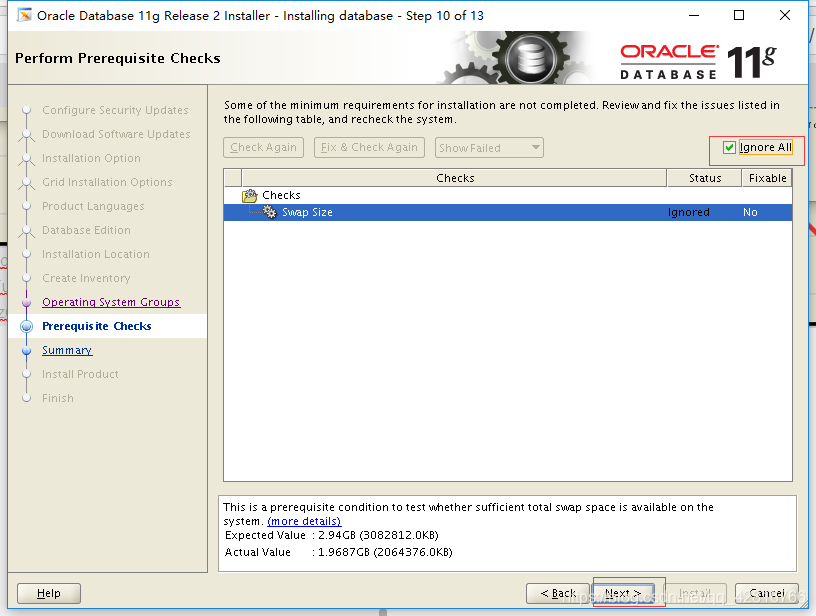
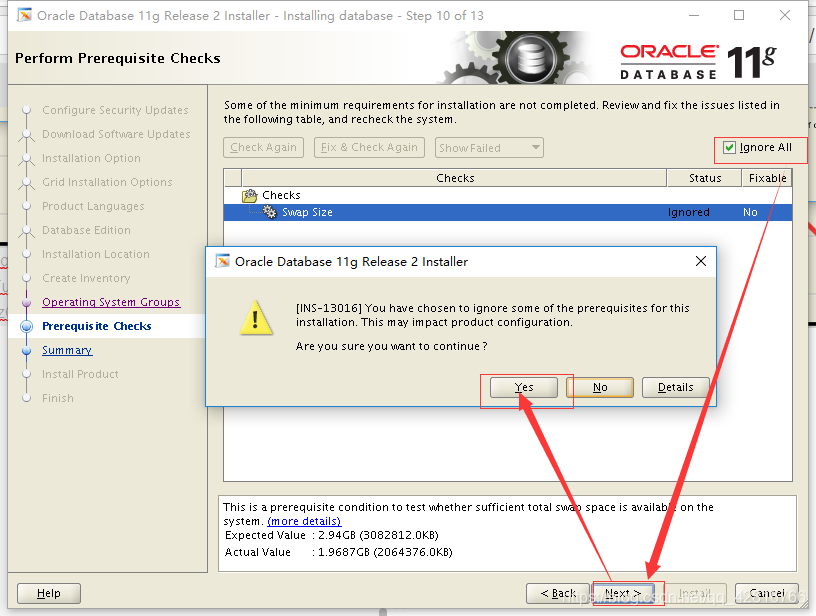
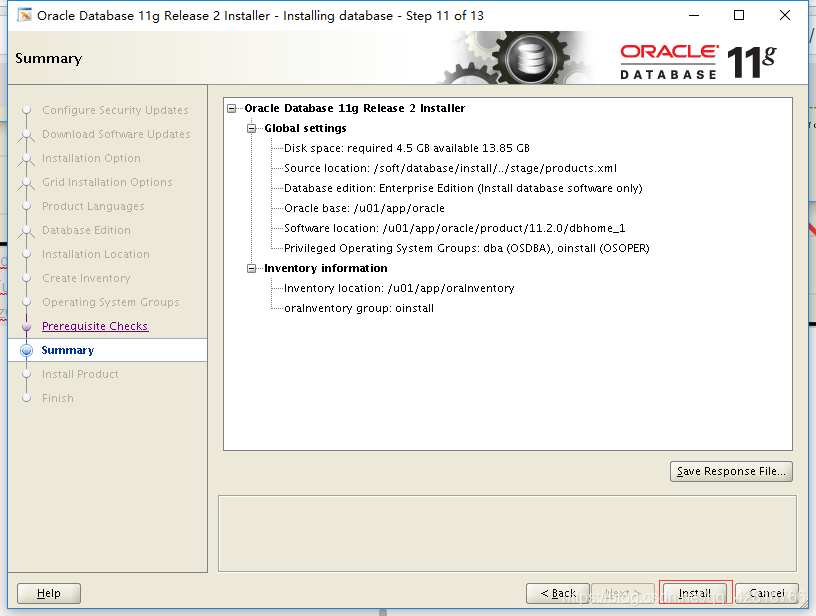
8、开始安装(普通安装)
改图形访问控制。这里是使用xshell远程连接安装必须要的。否则,只能在虚拟机里安装,且安装的时候直接用oracle用户登录,不是使用su命令切换
[root@localhost ~]# xhost +
access control disabled, clients can connect from any host
重启系统
[root@localhost ~]# reboot
使用oracle用户登录,进入soft目录,执行开始安装命令
[oracle@localhost soft]$ cd /soft/database/
[oracle@localhost database]$ ./runInstaller

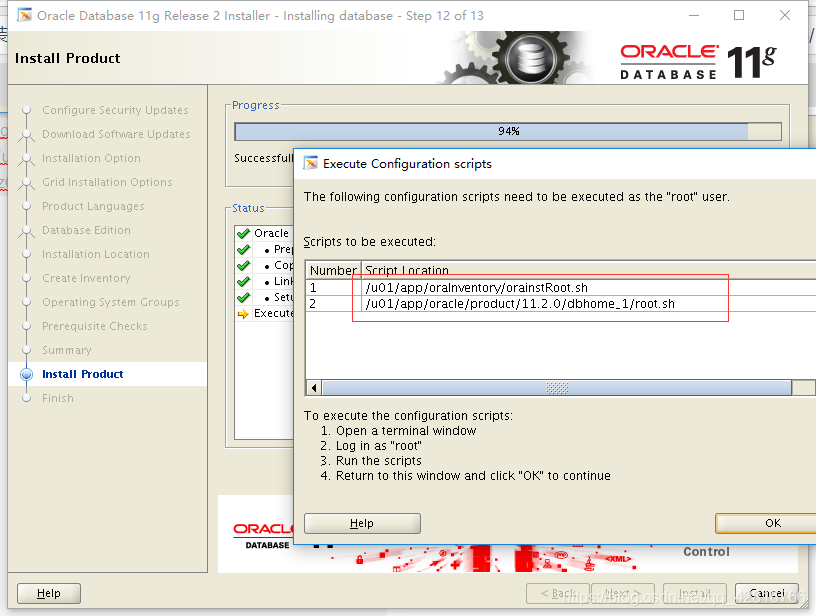
root用户下执行脚本
[root@localhost ~]# /u01/app/oraInventory/orainstRoot.sh
[root@localhost ~]# /u01/app/oracle/product/11.2.0/dbhome_1/root.sh
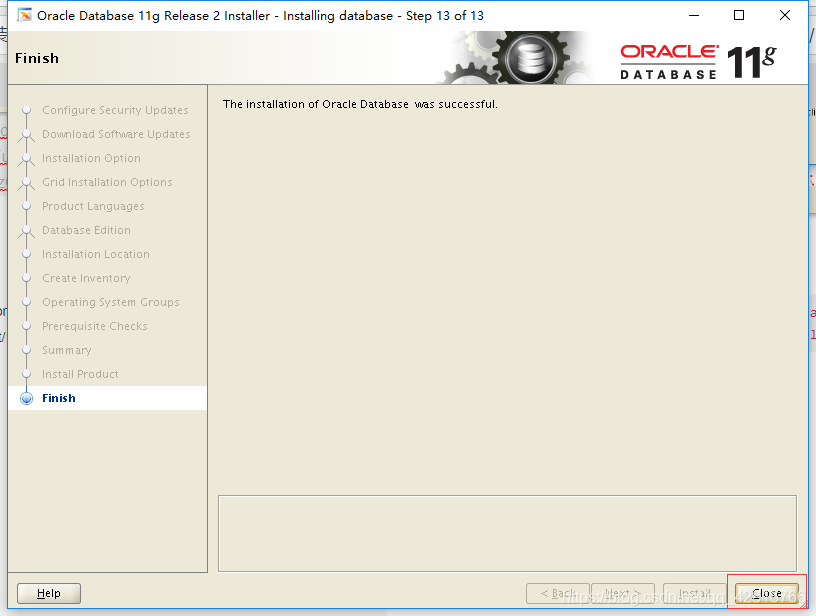
脚本执行完成后,则表示数据库已经安装完成
9、静默安装
[oracle@localhost soft]$ cd /soft/database/
[oracle@OCPLHR database]$ /soft/database/runInstaller -silent -force -noconfig -IgnoreSysPreReqs-ignorePrereq -showProgress \
oracle.install.option=INSTALL_DB_SWONLY \
DECLINE_SECURITY_UPDATES=true \
UNIX_GROUP_NAME=oinstall \
INVENTORY_LOCATION=/u01/app/oraInventory \
SELECTED_LANGUAGES=en \
ORACLE_HOME=/u01/app/oracle/product/11.2.0/dbhome_1 \
ORACLE_BASE=/u01/app/oracle \
oracle.install.db.InstallEdition=EE \
oracle.install.db.isCustomInstall=false \
oracle.install.db.DBA_GROUP=dba \
oracle.install.db.OPER_GROUP=dba \
oracle.install.db.isRACOneInstall=false \
oracle.install.db.config.starterdb.type=GENERAL_PURPOSE \
SECURITY_UPDATES_VIA_MYORACLESUPPORT=false \
oracle.installer.autoupdates.option=SKIP_UPDATES
执行脚本


 192
192

 被折叠的 条评论
为什么被折叠?
被折叠的 条评论
为什么被折叠?
 到【灌水乐园】发言


