


vmwave为centos7扩展磁盘容量
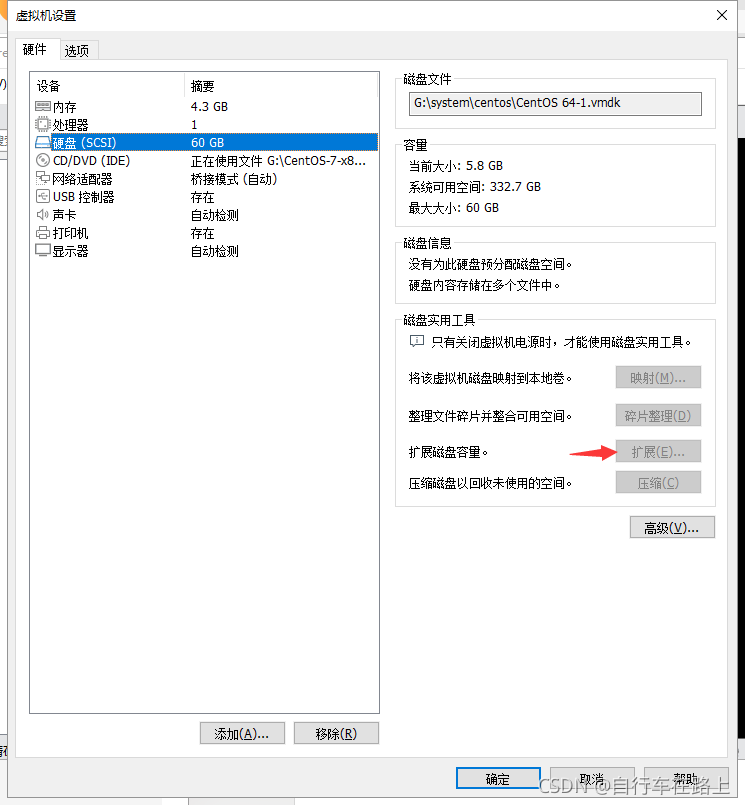
需要在没快照的且关机的情况下
linux内部扩展容量
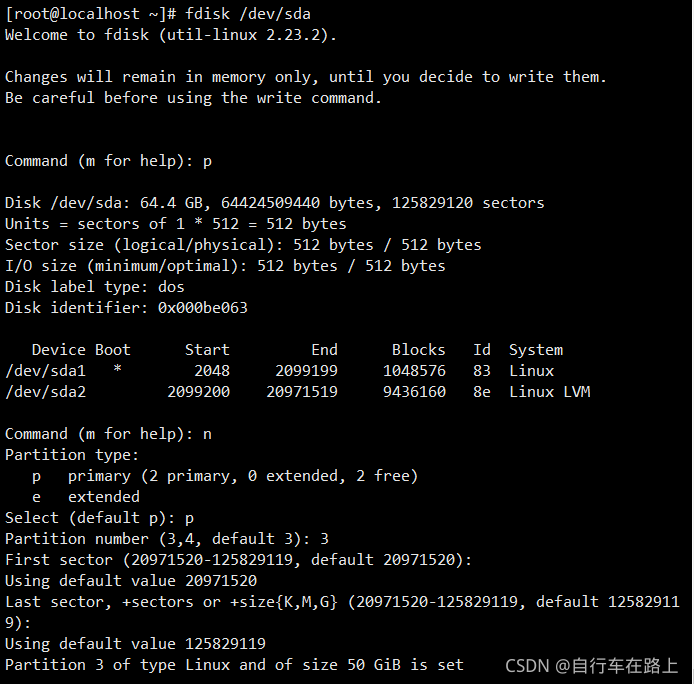
新建分区
执行“fdisk /dev/sda”,进入到fdisk
输入p指令,查看已分区数量(有两个 /dev/sda1 /dev/sda2)
输入 n {new partition}指令,新增加一个分区
输入p {primary partition},分区类型选择为主分区
输入分区号 3 {partition number} ,分区号选3(上面显示我已经有2个分区了)
回车      默认(起始扇区)
回车      默认(结束扇区)
输入t {change partition id}指令,修改分区类型
按提示输入刚才的分区号3
输入分区类型 8e {Linux LVM partition}
输入w指令,将以上改动写入分区表
最后完成,退出fdisk命令
[root@localhost ~]# fdisk /dev/sda
Welcome to fdisk (util-linux 2.23.2).

Changes will remain in memory only, until you decide to write them.
Be careful before using the write command.


Command (m for help): p

Disk /dev/sda: 64.4 GB, 64424509440 bytes, 125829120 sectors
Units = sectors of 1 * 512 = 512 bytes
Sector size (logical/physical): 512 bytes / 512 bytes
I/O size (minimum/optimal): 512 bytes / 512 bytes
Disk label type: dos
Disk identifier: 0x000be063

   Device Boot      Start         End      Blocks   Id  System
/dev/sda1   *        2048     2099199     1048576   83  Linux
/dev/sda2         2099200    20971519     9436160   8e  Linux LVM

Command (m for help): n
Partition type:
   p   primary (2 primary, 0 extended, 2 free)
   e   extended
Select (default p): p
Partition number (3,4, default 3): 3
First sector (20971520-125829119, default 20971520):
Using default value 20971520
Last sector, +sectors or +size{K,M,G} (20971520-125829119, default 125829119):
Using default value 125829119
Partition 3 of type Linux and of size 50 GiB is set

Command (m for help): t
Partition number (1-3, default 3): 3
Hex code (type L to list all codes): 8e
Changed type of partition 'Linux' to 'Linux LVM'

Command (m for help): w
The partition table has been altered!

Calling ioctl() to re-read partition table.

WARNING: Re-reading the partition table failed with error 16: Device or resource busy.
The kernel still uses the old table. The new table will be used at
the next reboot or after you run partprobe(8) or kpartx(8)
Syncing disks.
重启系统(重要)
shutdown -r now
对新增的硬盘格式化
mkfs.ext3 /dev/sda3

添加新LVM到已有的LVM组,实现扩容
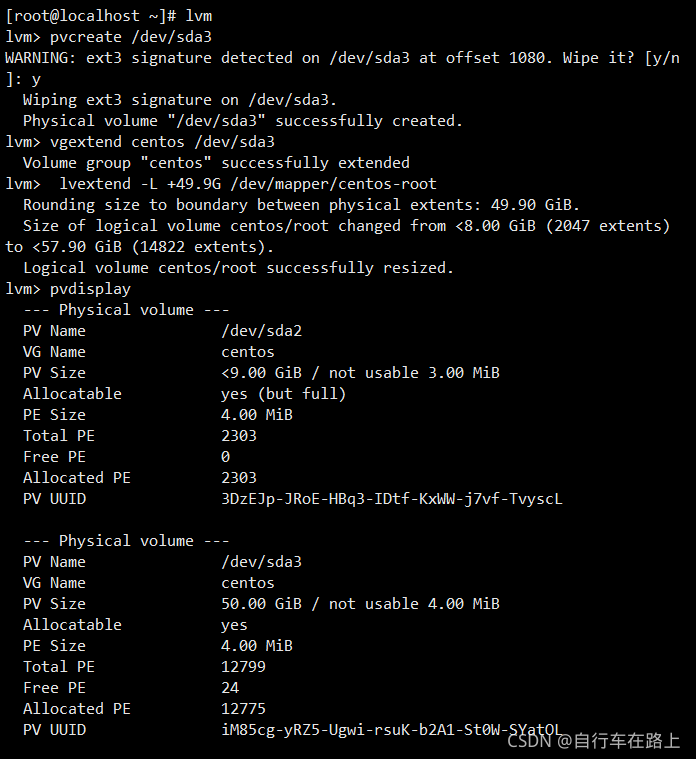
lvm             进入lvm管理
lvm> pvcreate /dev/sda3 这是初始化刚才的分区,必须的
lvm>vgextend centos /dev/sda3 将初始化过的分区加入到虚拟卷组vg_dc01
lvm>lvextend -L +39.9G /dev/mapper/centos-root  扩展已有卷的容量(注意容量大小)
lvm>pvdisplay               查看卷容量,这时你会看到一个很大的卷了
lvm>quit                  退出
文件真正扩容
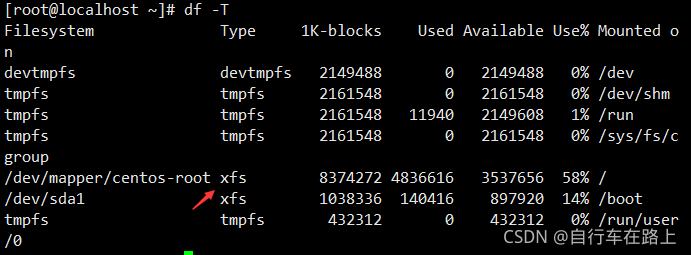
因为这里是xfs扩容的
resize2fs /dev/mapper/centos-root
因此更改命令
xfs_growfs /dev/mapper/centos-root
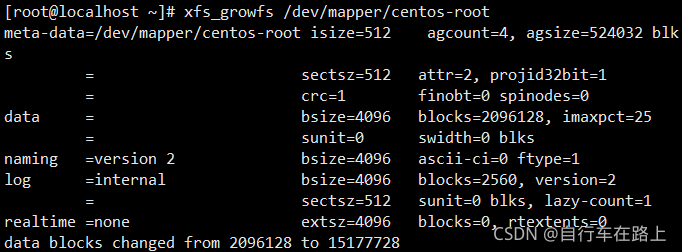
即可看到扩容后的状态
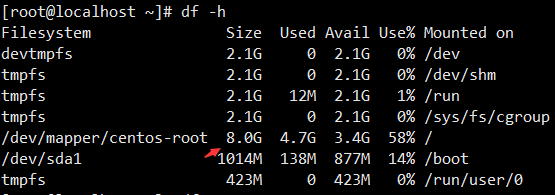
扩容前:
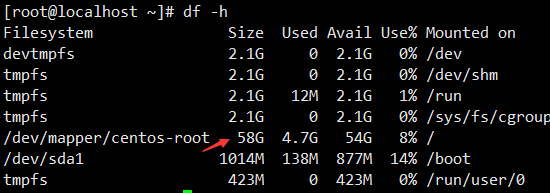
扩容后:


 5711
5711

 被折叠的 条评论
为什么被折叠?
被折叠的 条评论
为什么被折叠?
 到【灌水乐园】发言


