


1. jupyterlab介绍
1.1 用来取代Jupyter Notebook的一个基于Web的用户交互式用户界面。相当于增强版的Jupyter Notebook。
1.2 相较于Jupyter Notebook,在JupyterLab里除了建立传统的Jupyter笔记(Jupyter Notebook),还文本编辑器、终端(terminal)、方便易用的文件浏览器。
1.3 作为文本编辑器,除了编辑文本文件外,还可预览excel文件、csv文件、图片文件、json文件等。
1.4 JupyterLab非常适合数据分析、教程编写等任务。
2. 安装jupyter
2.1 安装python3
2.2 pip3安装jupyter
pip3 install jupyterlab
[root@iZuf62qojdpdfmeohedn2jZ /]# pip3 install jupyterlab3. 生成密钥(注意:两次输入的密码都是没有显示的)
[root@iZuf62qojdpdfmeohedn2jZ /]# ipython
Python 3.6.4 (default, Apr 10 2020, 10:25:04)
Type 'copyright', 'credits' or 'license' for more information
IPython 7.16.1 -- An enhanced Interactive Python. Type '?' for help.

In [1]: from notebook.auth import passwd

In [2]: passwd()
Enter password:
Verify password:
Out[2]: '这里输出的是密钥,配置文件中要用到'
4. 生成jupyter lab 的配置文件
jupyter lab --generate-config
[root@iZuf62qojdpdfmeohedn2jZ /]# jupyter lab --generate-config
Writing default config to: /root/.jupyter/jupyter_notebook_config.py
[root@iZuf62qojdpdfmeohedn2jZ /]#
5. 编辑配置文件
[root@iZuf62qojdpdfmeohedn2jZ /]# cd /root/.jupyter/
[root@iZuf62qojdpdfmeohedn2jZ .jupyter]# ls
jupyter_notebook_config.py
[root@iZuf62qojdpdfmeohedn2jZ .jupyter]# vim jupyter_notebook_config.py
修改以下配置项:
c.NotebookApp.ip = '*'
# 这里的密码填写上面生成的密钥
c.NotebookApp.password = '密钥'
# 禁止用host的浏览器打开jupyter
c.NotebookApp.open_browser = False
# 打开jupyter lab的端口,端口自定义
c.NotebookApp.port = 9010
# 允许远程访问
c.NotebookApp.allow_remote_access = True
如果嫌一个一找太麻烦的话,可以直接把这段配置代码粘贴进去
6. 启动jupyterlab
[root@iZuf62qojdpdfmeohedn2jZ /]# jupyter lab
[W 11:04:03.104 LabApp] WARNING: The notebook server is listening on all IP addresses and not using encryption. This is not recommended.
[I 11:04:03.111 LabApp] JupyterLab extension loaded from /usr/local/python3/lib/python3.6/site-packages/jupyterlab
[I 11:04:03.111 LabApp] JupyterLab application directory is /usr/local/python3/share/jupyter/lab
[C 11:04:03.114 LabApp] Running as root is not recommended. Use --allow-root to bypass.
[root@iZuf62qojdpdfmeohedn2jZ /]#
报错,原因是权限不够。后边加上 --allow-root 即可
[root@iZuf62qojdpdfmeohedn2jZ /]# jupyter lab --allow-root
[W 11:08:55.110 LabApp] WARNING: The notebook server is listening on all IP addresses and not using encryption. This is not recommended.
[I 11:08:55.116 LabApp] JupyterLab extension loaded from /usr/local/python3/lib/python3.6/site-packages/jupyterlab
[I 11:08:55.116 LabApp] JupyterLab application directory is /usr/local/python3/share/jupyter/lab
[I 11:08:55.119 LabApp] Serving notebooks from local directory: /
[I 11:08:55.119 LabApp] Jupyter Notebook 6.1.4 is running at:
[I 11:08:55.119 LabApp] http://iZuf62qojdpdfmeohedn2jZ:9010/
[I 11:08:55.119 LabApp] Use Control-C to stop this server and shut down all kernels (twice to skip confirmation).
注意:http://iZuf62qojdpdfmeohedn2jZ:9010/ 不是最终要访问的地址
启动成功!但是远程访问不了,原因是阿里云服务器实例上未开启9010端口,去阿里云开启一下9010端口即可
7. 阿里云开启映射端口
7.1 登录阿里云账号
7.2 点击进入实例详情=====>本实例安全组=====>配置规则
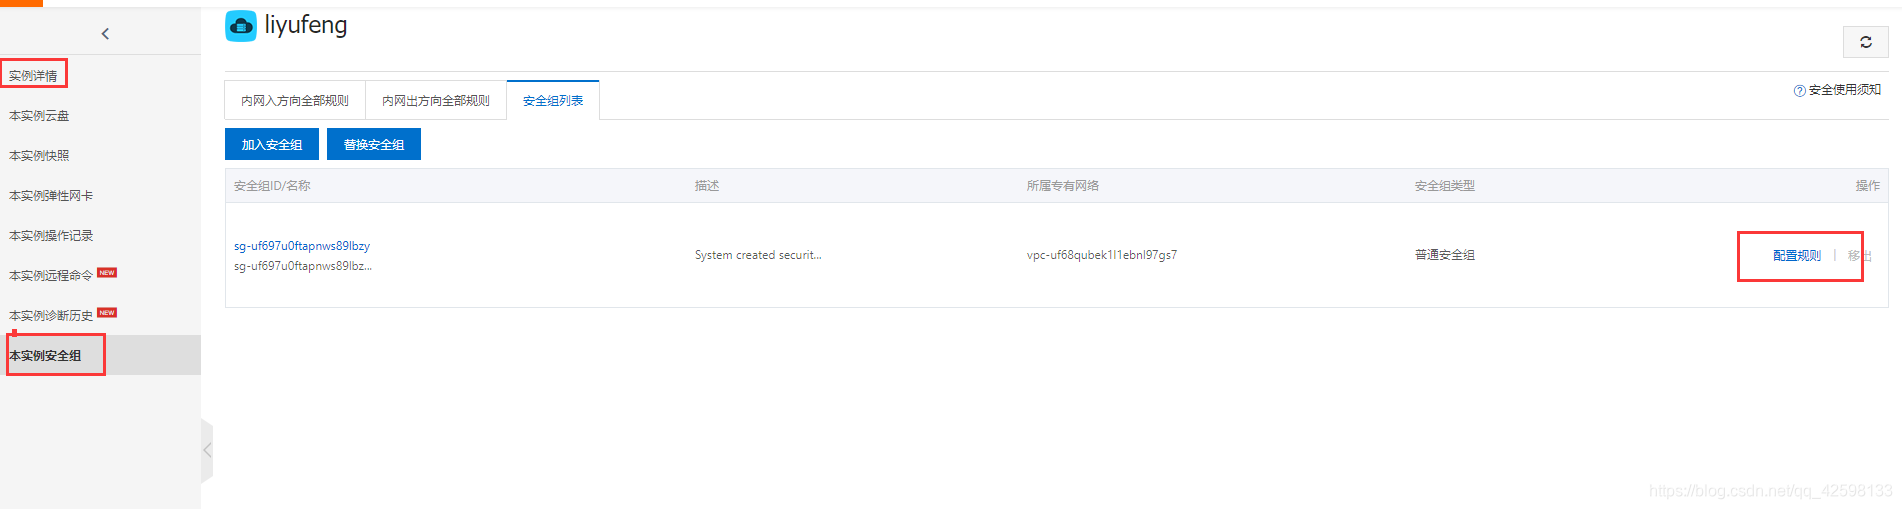
开放端口:
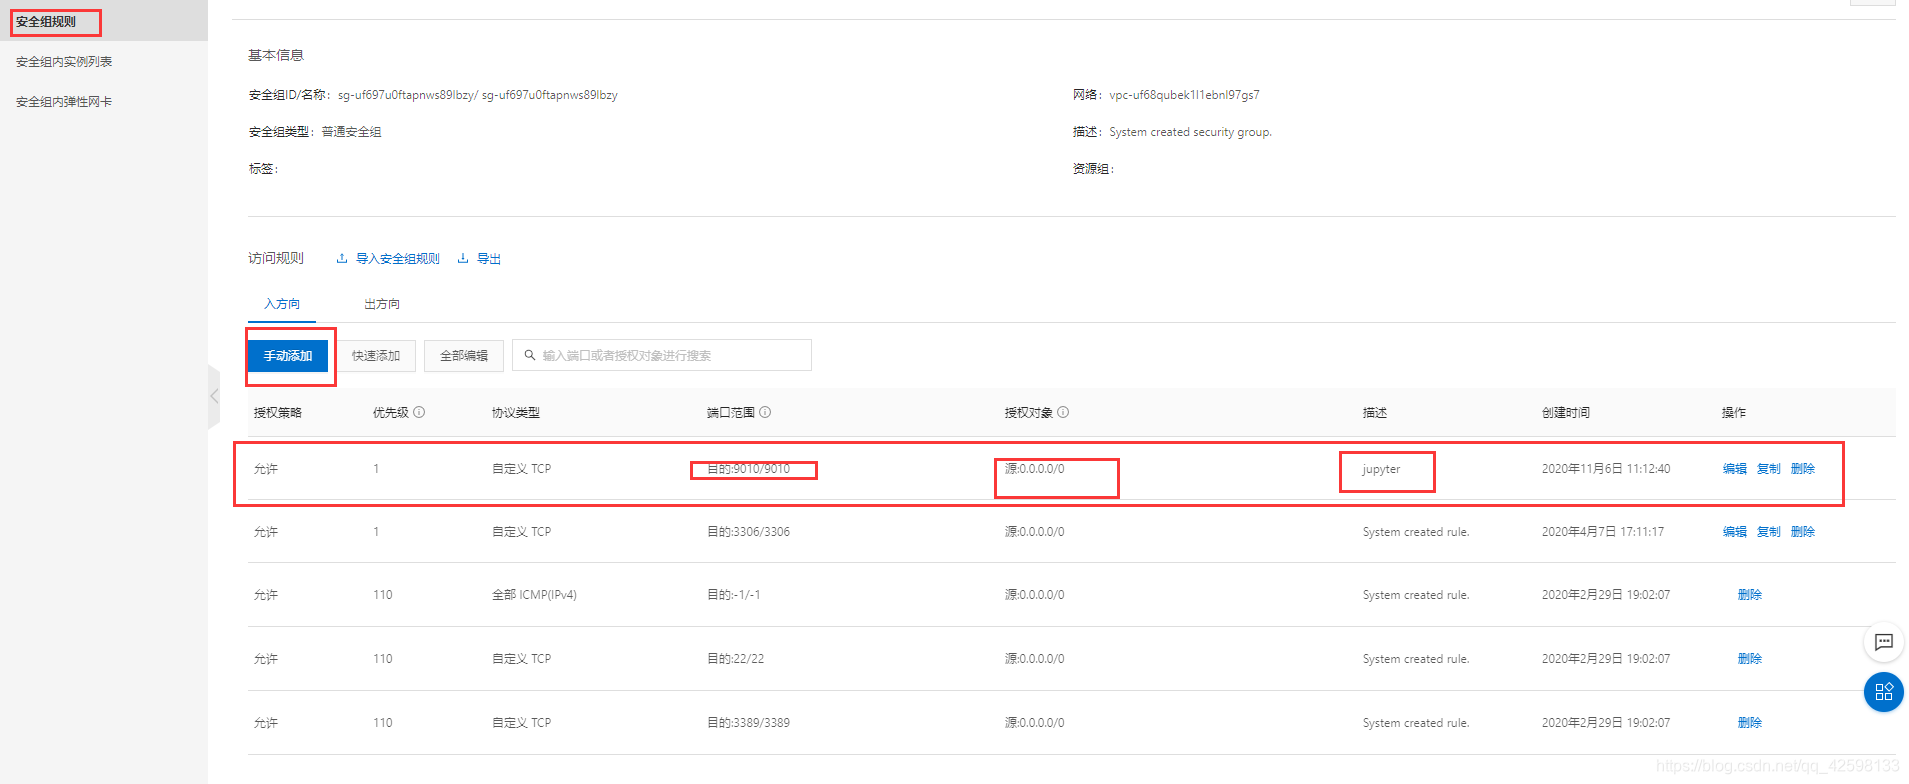
8. 重启jupyterlab
[root@iZuf62qojdpdfmeohedn2jZ /]# jupyter lab --allow-root浏览器输入: http://服务器公网IP:9010/,输入密码之后即可访问


 622
622

 被折叠的 条评论
为什么被折叠?
被折叠的 条评论
为什么被折叠?
 到【灌水乐园】发言


