


实验六 记事本小项目的实现(一)
由于项目相对来说比较中等,所以我分为两个实验来介绍给大家
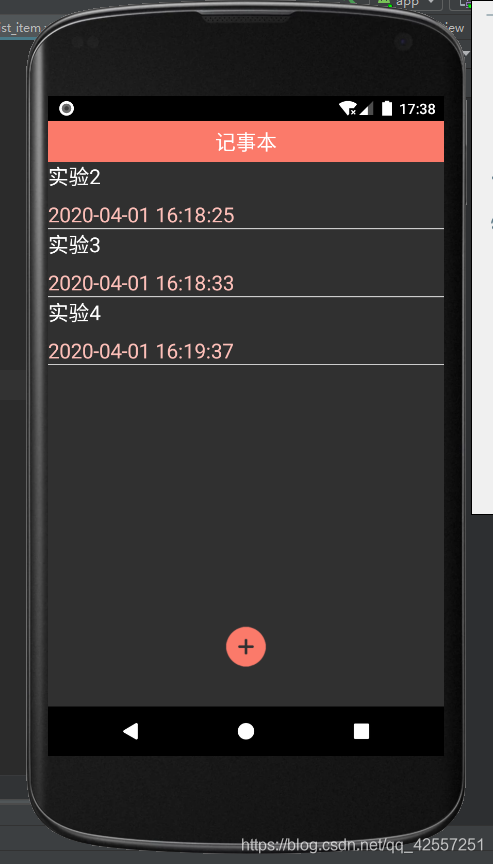
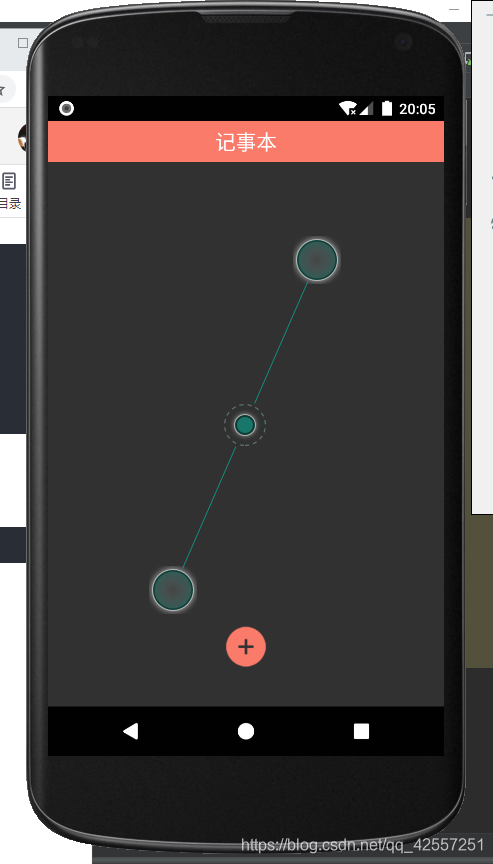
本次实验实现最终效果图如下(实现除保存按钮外的按钮监听以及界面的布局文件)
主界面
显示笔记的内容和编辑的时间
里面有一个添加按钮
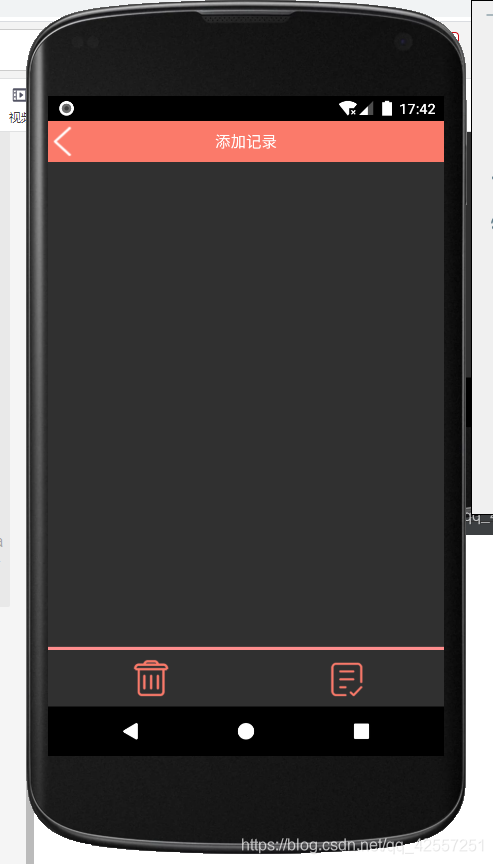
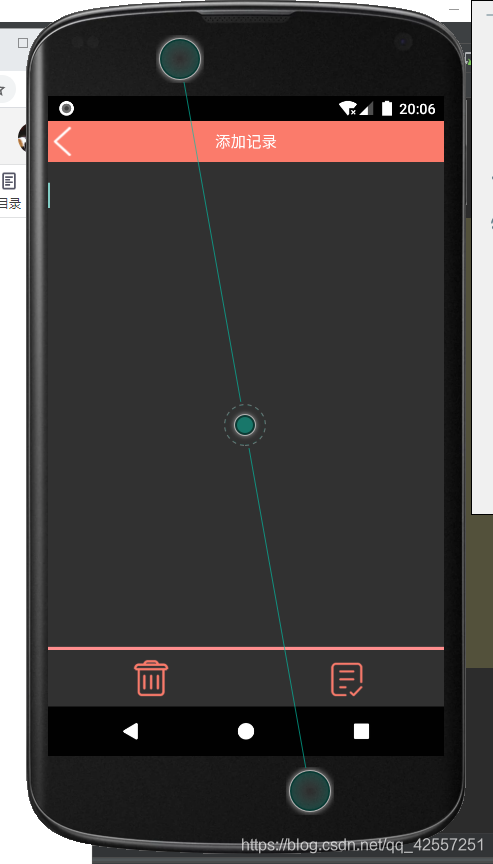
添加笔记界面
返回按钮,标题,清除图标和保存图标
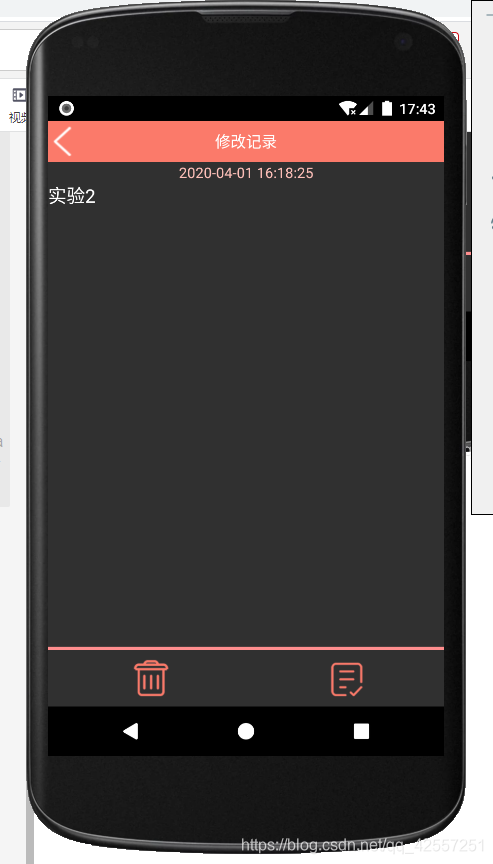
更新笔记界面
显示编辑时间,内容,清除按钮和保存按钮
实验知识点
1.按钮监听事件的复习以及界面跳转的复习
2.了解控件的基础修改
实验步骤
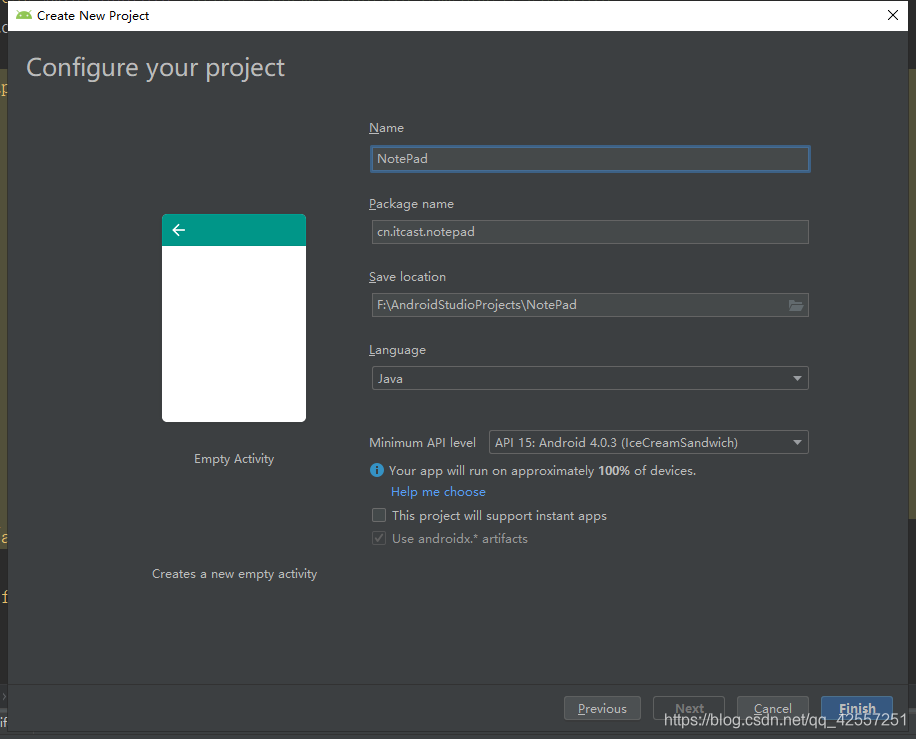
1.创建新工程,取名NotePad
2.创建MainActivity和Main2Activity(这里创两个界面是因为后两个界面布局基本一致,可以用其他方式改变上面标题的名称)
3.编辑两个xml文件
4.编辑AndroidManifest.xml文件
5.编写list_item.xml文件
6.编写添加,删除,返回按钮的监听事件
7.布局文件分析
8.运行测试一下
实验具体内容
1.创建记事本工程
2.编写我们的主界面布局,其中用到的控件有textview,listview,button
<?xml version="1.0" encoding="utf-8"?>
<LinearLayout
    xmlns:android="http://schemas.android.com/apk/res/android"
    android:layout_width="match_parent"
    android:layout_height="match_parent"
    android:orientation="vertical">
    <TextView
        android:layout_width="match_parent"
        android:layout_height="40dp"
        android:background="#FB7A6A"
        android:textColor="#FFFFFF"
        android:gravity="center"
        android:text="记事本"
        android:textSize="20sp"/>
    <RelativeLayout
        android:layout_width="match_parent"
        android:layout_height="match_parent">
        <ListView
            android:id="@+id/lv"
            android:layout_width="match_parent"
            android:layout_height="wrap_content"/>

        <Button
            android:id="@+id/btn_add"
            android:layout_width="40dp"
            android:layout_height="40dp"
            android:background="@drawable/add"
            android:layout_centerHorizontal="true"
            android:layout_marginTop="450dp"/>
    </RelativeLayout>

</LinearLayout>
3.编写添加/修改界面的布局,所用控件有textview,button,editText
<?xml version="1.0" encoding="utf-8"?>
<LinearLayout
    xmlns:android="http://schemas.android.com/apk/res/android"
    android:layout_width="match_parent"
    android:layout_height="match_parent"
    android:orientation="vertical">

    <RelativeLayout
        android:id="@+id/rl"
        android:layout_width="match_parent"
        android:layout_height="40dp"
        android:background="#FB7A6A">
        <TextView
            android:id="@+id/noteId"
            android:visibility="gone"
            android:layout_width="wrap_content"
            android:layout_height="wrap_content"
            android:text=""/>
        <TextView
            android:id="@+id/tv_title"
            android:layout_width="match_parent"
            android:layout_height="40dp"
            android:text="添加记录"
            android:gravity="center"
            android:textColor="#FFFFFF"
            android:textSize="15sp"/>
        <Button
            android:id="@+id/btn_back"
            android:layout_width="30dp"
            android:layout_height="30dp"
            android:layout_centerVertical="true"
            android:background="@drawable/back"
            />
    </RelativeLayout>
    <TextView
        android:id="@+id/tv_time"
        android:layout_width="match_parent"
        android:layout_height="20dp"
        android:gravity="center"
        android:textColor="#FDBFB8"/>

    <EditText
        android:id="@+id/et_content"
        android:layout_width="match_parent"
        android:layout_height="450dp"
        android:gravity="top"
        android:background="@null"/>
    <RelativeLayout
        android:layout_width="match_parent"
        android:layout_height="3dp"
        android:background="#FF8E8E"/>
    <RelativeLayout
        android:layout_width="match_parent"
        android:layout_height="match_parent">

        <Button
            android:id="@+id/btn_delete"
            android:layout_width="40dp"
            android:layout_height="40dp"
            android:background="@drawable/delete"
            android:layout_centerVertical="true"
            android:layout_marginLeft="80dp"/>

        <Button
            android:id="@+id/btn_save_note"
            android:layout_width="40dp"
            android:layout_height="40dp"
            android:background="@drawable/save_note"
            android:layout_centerVertical="true"
            android:layout_toRightOf="@+id/btn_delete"
            android:layout_marginLeft="150dp"/>
    </RelativeLayout>
</LinearLayout>
4.编写我们的列表布局,list_item,控件为textview
<?xml version="1.0" encoding="utf-8"?>
<LinearLayout
    xmlns:android="http://schemas.android.com/apk/res/android"
    android:layout_width="match_parent"
    android:layout_height="match_parent"
    android:orientation="vertical">
    <TextView
        android:id="@+id/tv_content"
        android:layout_width="wrap_content"
        android:layout_height="wrap_content"
        android:text="日记内容"
        android:textSize="20sp"
        android:textColor="#FFFFFF" />
    <TextView
        android:id="@+id/tv_time"
        android:layout_width="wrap_content"
        android:layout_height="wrap_content"
        android:text="时间:"
        android:textSize="20sp"
        android:layout_marginTop="10dp"
        android:layout_below="@+id/title"
        android:textColor="#FDBFB8" />
    <RelativeLayout
        android:layout_width="match_parent"
        android:layout_height="1dp"
        android:background="#CCCCCC"
        />
</LinearLayout>
5.实现添加按钮和删除按钮的监听事件
(1)主界面添加按钮的监听
// 设置添加笔记按钮事件,切换activity
        this.findViewById(R.id.btn_add).setOnClickListener(
                new View.OnClickListener() {
                    @Override
                    public void onClick(View arg0) {
                        Intent in = new Intent(MainActivity.this,Main2Activity.class);
                        startActivity(in);
                    }
                });
(2)删除按钮的监听事件
 this.findViewById(R.id.btn_delete).setOnClickListener(new View.OnClickListener() {
            @Override
            public void onClick(View v) {
                contentEditText.setText("");
            }
        });
(3)返回按钮的监听事件
//按钮监听
        this.findViewById(R.id.btn_back).setOnClickListener(
                new View.OnClickListener() {
                    @Override
                    public void onClick(View arg0) {
                        finish();
                    }
                });
6.修改AndroidManifest.xml
主要是主题改一下,美观一点
android:theme="@style/Theme.AppCompat.NoActionBar">
7.分析xml文件
主界面我们没啥好讲的,就用了个listview控件
来讲讲我们的添加记录界面的id
这里id是用来区别修改和添加界面的,如果存在id证明是修改,反之则为添加,这样我们就省去了一个界面的创建
<TextView
            android:id="@+id/noteId"
            android:visibility="gone"
            android:layout_width="wrap_content"
            android:layout_height="wrap_content"
            android:text=""/>
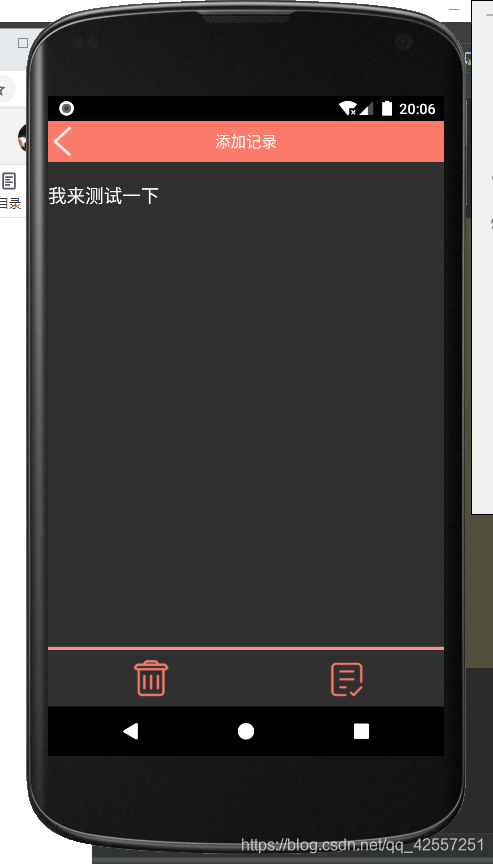
8.运行测试
打开我们的模拟器
点击加号按钮
输入一些字符
点击删除按钮
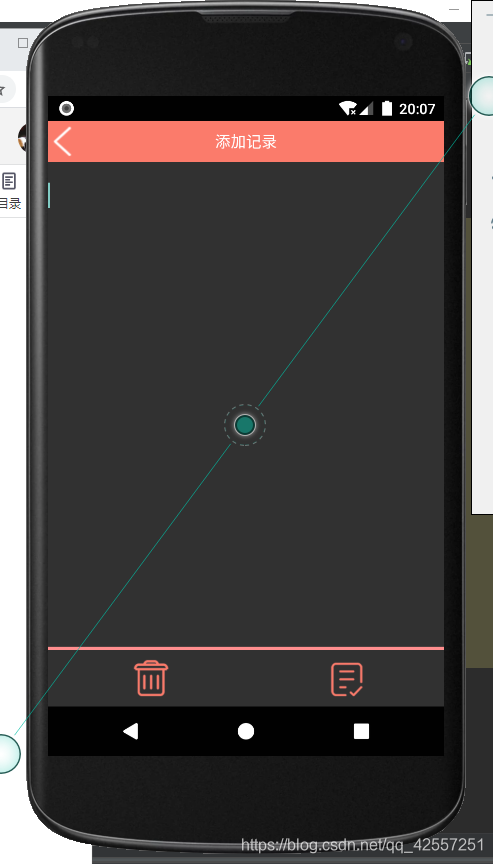
点击返回按钮


 2682
2682

 被折叠的 条评论
为什么被折叠?
被折叠的 条评论
为什么被折叠?
 到【灌水乐园】发言


