 Linux Shell 脚本入门


 本文介绍了Linux中Shell的概念,包括Shell脚本的基础知识、编写技巧及执行方法。涵盖如何创建、执行脚本,以及如何处理日志文件和系统服务的自动化管理。
一、shell的介绍
1)什么是shell?
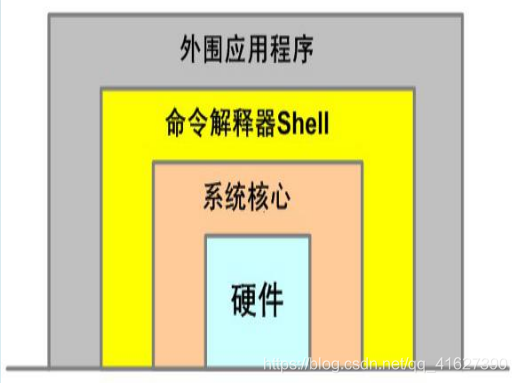
Shell是linux的一外壳,它包在linux内核的外面,为用户和内核之间的交互提供了一个接口
当用户下达指令给操作系统的时候,实际上是把指令告诉shell,经过shell解释,处理后让内核做出相应的动作
系统的回应和输出的信息也由shell处理,然后显示在用户的屏幕上
2)什么是shell脚本?
简单的说,当命令或者程序不在命令行执行,而是通过一个程序文件来执行,这个程序就被称为shell脚本
也就是在shell脚本里内置了多条命令,语句,循环控制,然后将这些命令一次性执行完毕,这种通过文件执行命令的方式称为
非交互式
3)为什么使用shell脚本?
1. 适合处理操作系统底层的业务,有众多系统命令为其做支撑(还有文本处理三兄弟grep,sed,awk)
2. 适合处理纯文本文件,linux中许多服务配置文件,启动脚本,都是纯文本(httpd,nfs,mysql,nginx,lvs)
3. linux系统脚本用shell开发更简单
二、如何查看系统默认shell
方法一:echo $SHELL
[root@localhost ~]# echo $SHELL
/bin/bash
方法二:从/etc/passwd里面查看
[root@localhost ~]# grep root /etc/passwd
root:x:0:0:root:/root:/bin/bash
operator:x:11:0:operator:/root:/sbin/nologin
三、shell脚本如何编写
第一行:#!/bin/bash
指定解释器:由哪个程序来执行脚本内容
#!:幻数
注意:#!/bin/bash必须写在第一行,否则会被认为是注释
实验1:如何清空日志
vim log.sh
#! /bin/bash
cd /var/log
> messages
echo "Logs cleaned up..." ##echo为输出
实验结果:/var/log/messages被清空
[root@localhost mnt]# vim log.sh
[root@localhost mnt]# sh log.sh
Logs cleaned up...
[root@localhost mnt]# cat /var/log/messages
实验2:写一个安装,启动并开机自启动httpd的脚本
vim installhttp.sh
#! /bin/bash
yum install httpd -y
systemctl start httpd.service
systemctl enable httpd.service
实验结果:本机已经安装过http服务了
[root@localhost mnt]# vim installhttp.sh
[root@localhost mnt]# sh installhttp.sh
Loaded plugins: langpacks
rhel_dvd | 4.1 kB 00:00
Package httpd-2.4.6-17.el7.x86_64 already installed and latest version
Nothing to do
ln -s '/usr/lib/systemd/system/httpd.service' '/etc/systemd/system/multi-user.target.wants/httpd.service'
思考:这个脚本有什么缺陷?
•1.没有用户判断,任何用户都可以执行这个脚本
•2.没有流程控制,只是把简单的命令进行顺序操作,没有成功与否的判断
下面我们对清空日志实验进行详细补充? ##其中的语法后面会介绍
vim log2.sh
#! /bin/bash
LOG_DIR=/var/log ##定义目录变量
ROOT_UID=0 ##定义root用户的id
if [ "$UID" -ne "$ROOT_UID" ];then ##判断是否为root用户
echo "Error:you should be root to run this script!"
exit 1 ##异常退出
fi
cd $LOG_DIR || { ##判断进入目录是否成功
echo "Cannot access to directory."
exit 1
}
cat /dev/null > messages && { ##清空日志,成功提示
echo "Logs cleaned up...."
exit 0 ##正常退出
}
echo "Logs cleaned failed...." ##清空日志失败
exit 1
实验结果:只有root用户可以执行
[root@localhost mnt]# vim log2.sh
[root@localhost mnt]# sh log2.sh
Logs cleaned up....
[root@localhost mnt]# su - student
[student@localhost ~]$ sh /mnt/log2.sh
Error:you should be root to run this script!
四.脚本的执行过程
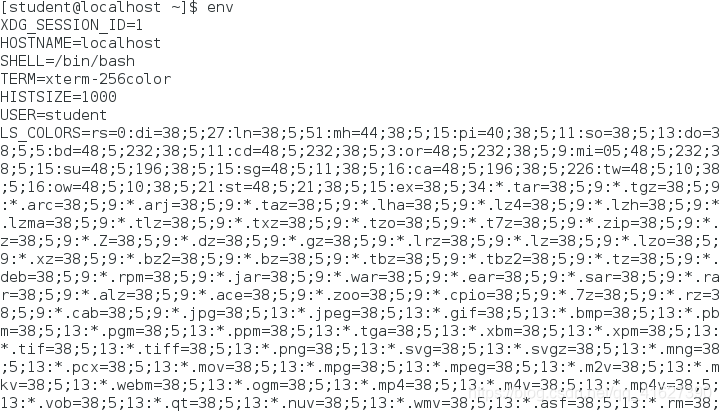
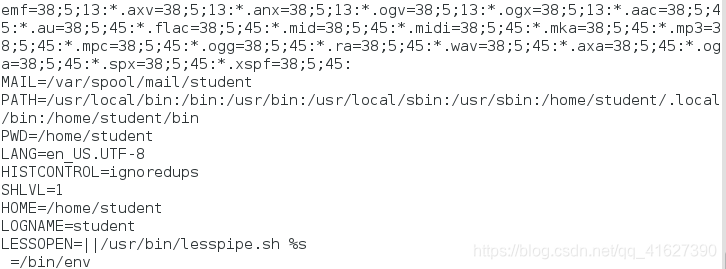
1.先加载系统环境变量怎么查看系统环境变量:env
2.一条一条命令执行,遇到子脚本,先执行子脚本,然后返回父脚本继续执行
五.脚本的执行方法
1.sh script.sh | bash script.sh ##指定使用的shell解释器执行。没有执行权限时,这种执行方式是重新开启一个shell进程进行工作,变量的改变不会影响当前shell的变量。
2.path/script.sh | ./script.sh ##shell脚本需要指定解释器。绝对路径,当前目录下,文件要有执行权限,也是重新开启shell进程工作。
3.source script.sh | . script.sh ##这种方式会使用source或.号来读如指定shell文件,并会把其shell中的变量值或函数返回给父shell继续使用。
实验:
[root@foundation0 ~]# cat test.sh
username=`whoami`
[root@foundation0 ~]# sh test.sh
[root@foundation0 ~]# echo $username
•问题:echo $username命令的输出结果是什么?
a)当前用户
b)root
c)空(无输出)
实验结果:
[root@localhost mnt]# sh test.sh
[root@localhost mnt]# echo $username
[root@localhost mnt]# source test.sh
[root@localhost mnt]# echo $username
root
六.脚本开发规
1.注释:可以命令后,也可以自成一行
2.脚本信息:
#!/bin/bash
#Date:2018-12-14
#Author:westos-wsp
#Connect:wsp439@sina.com
#Desc:This script is for...
#Version:1.0
3.脚本名:最好以.sh结尾


 544
544

 被折叠的 条评论
为什么被折叠?
被折叠的 条评论
为什么被折叠?
 到【灌水乐园】发言


