


 本文介绍了如何在IDEA上利用SSM(Spring、SpringMVC、MyBatis)框架创建一个查询数据库的网站。详细步骤包括配置JDK、Maven环境,设置阿里镜像,创建数据库和表,建立Maven项目,添加依赖,构建项目结构,编写Bean、Mapper、Service、Controller等组件,并最终通过Tomcat部署运行,展示查询结果。
1.使用的工具、环境版本。
(1)idea2018.2.2
(2)jdk1.8
(3)mysql5.5
(4)SQLyog
(5)tomcat7
(6)maven3.6
2.配置jdk以及maven的环境,设置maven的镜像(阿里镜像),mysql中新建数据库“idea”,并添加表userinfo(id,username,pasword).
3.打开idea,点击"File"、“New”、“Project”,选择“manven”
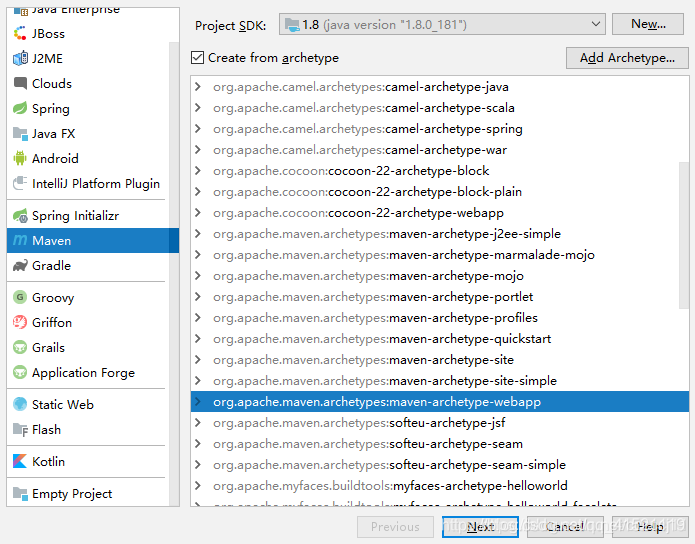
点击"Next",填写项目名和选择项目路径,在pom.xml中添加所需要的jar包,等待下载完成。
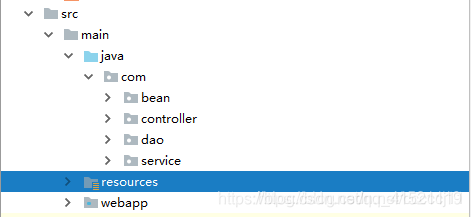
4.在main文件下新建resources资源文件(建立Directory文件然后右键选择“Mark Directory as”->“Resources Root”)java文件,再在其中新建com包,再在其中分别新建bean、controller、dao和service包。
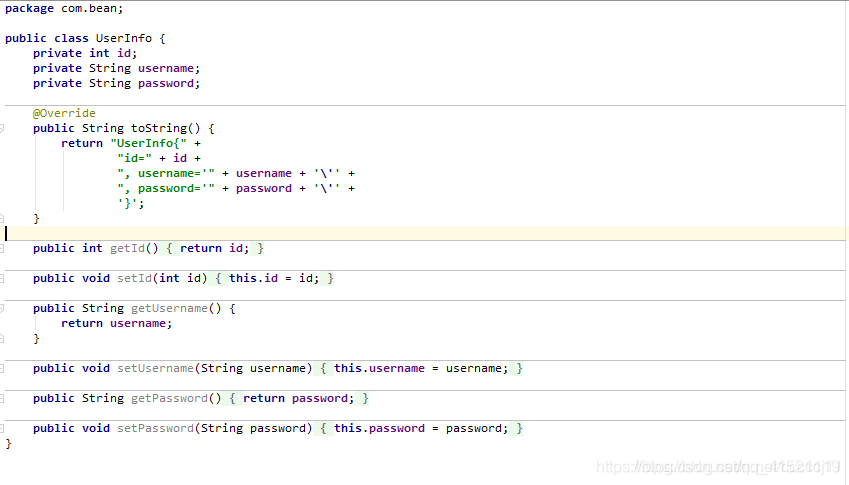
5在bean包下创建UserInfo,设置set和get方法,可以使用generate快捷方式。
6.在Resources中新建Mapper包,添加UserMapperimpl.xml,并向xml中写sql语句。

<?xml version="1.0" encoding="UTF-8" ?>
<!DOCTYPE mapper PUBLIC "-//mybatis.org//DTD Mapper 3.0//EN" "http://mybatis.org/dtd/mybatis-3-mapper.dtd" >
<mapper namespace="com.dao.IUserDao" >

<select id="findAll" resultType="com.bean.UserInfo">
    select *from userinfo
</select>

</mapper>
7在resources中添加applicationContext.xml、db.properties、log4j.properties文件。
(1)applicationContext.xml
<?xml version="1.0" encoding="UTF-8"?>
<beans xmlns="http://www.springframework.org/schema/beans"
       xmlns:xsi="http://www.w3.org/2001/XMLSchema-instance"
       xmlns:context="http://www.springframework.org/schema/context"
       xmlns:aop="http://www.springframework.org/schema/aop"
       xmlns:tx="http://www.springframework.org/schema/tx"
       xsi:schemaLocation="http://www.springframework.org/schema/beans
		http://www.springframework.org/schema/beans/spring-beans-4.3.xsd
		http://www.springframework.org/schema/context
		http://www.springframework.org/schema/context/spring-context-4.3.xsd
		http://www.springframework.org/schema/aop
		http://www.springframework.org/schema/aop/spring-aop-4.3.xsd
		http://www.springframework.org/schema/tx
		http://www.springframework.org/schema/tx/spring-tx-4.3.xsd">
    <!-- 1.配置数据库相关参数properties的属性:${url} -->
    <context:property-placeholder location="classpath:db.properties"/>

    <!-- 2.配置数据源 -->
    <bean id="dataSource" class="com.mchange.v2.c3p0.ComboPooledDataSource">
        <property name="driverClass" value="${jdbc.driver}"/>
        <property name="jdbcUrl" value="${jdbc.url}"/>
        <property name="user" value="${jdbc.username}"/>
        <property name="password" value="${jdbc.password}"/>
        <property name="maxPoolSize" value="30"/>
        <property name="minPoolSize" value="2"/>
    </bean>

    <!-- 3.配置SqlSessionFactory对象 -->
    <bean id="sqlSessionFactory" class="org.mybatis.spring.SqlSessionFactoryBean">
        <!-- 注入数据库连接池 -->
        <property name="dataSource" ref="dataSource"/>
        <!-- 扫描bean包 使用别名 -->
        <property name="typeAliasesPackage" value="com.bean"></property>

        <!--配置加载映射文件 UserMapper.xml-->
        <property name="mapperLocations" value="classpath:mapper/*.xml"/>

    </bean>

    <!-- 自动生成dao,mapper-->
    <!-- 4.配置扫描Dao接口包,动态实现Dao接口,注入到spring容器中 -->
    <bean class="org.mybatis.spring.mapper.MapperScannerConfigurer">
        <!-- 给出需要扫描Dao接口包 -->
        <property name="basePackage" value="com.dao"/>
        <!-- 注入sqlSessionFactory -->
        <property name="sqlSessionFactoryBeanName" value="sqlSessionFactory"/>
    </bean>


    <!--自动扫描-->
    <context:component-scan base-package="com"/>


    <!-- 配置事务-->
    <!-- 5.配置事务管理器 -->
    <bean id="transactionManager" class="org.springframework.jdbc.datasource.DataSourceTransactionManager">
        <property name="dataSource" ref="dataSource"/>
    </bean>
    <!-- 6.开启事务注解-->
    <tx:annotation-driven></tx:annotation-driven>

</beans>
ps:注意检查扫描dao和bean包的路径是否和自己的相同。
(2)db.properties
jdbc.driver=com.mysql.jdbc.Driver
jdbc.url=jdbc:mysql://localhost:3306/idea?useSSL=true&characterEncoding=utf-8
jdbc.username=root
jdbc.password=408
(3)log4j.properties
# Global logging configuration
log4j.rootLogger=DEBUG, stdout
# Console output...
log4j.appender.stdout=org.apache.log4j.ConsoleAppender
log4j.appender.stdout.layout=org.apache.log4j.PatternLayout
log4j.appender.stdout.layout.ConversionPattern=%5p [%t] - %m%n
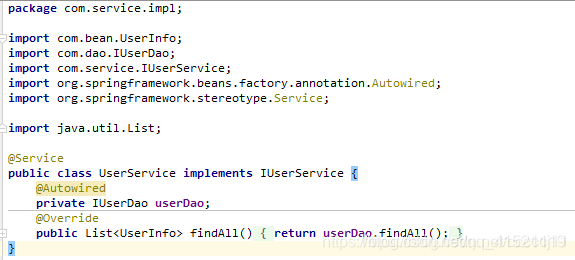
8.在service中添加IUserService接口,添加findAll()函数。

9.在service中添加impl包,在impl包中新建UserService类实现IUserService接口
9.打开webapp下的web.xml,配置SpringMVC。
<!-- 配置加载类路径的配置文件 -->
  <context-param>
    <param-name>contextConfigLocation</param-name>
    <param-value>classpath*:applicationContext.xml</param-value>
  </context-param>

  <!-- 配置监听器 -->
  <listener>
    <listener-class>org.springframework.web.context.ContextLoaderListener</listener-class>
  </listener>
  <listener>
    <listener-class>org.springframework.web.context.request.RequestContextListener</listener-class>
  </listener>

  <!-- 解决中文乱码过滤器 -->
  <filter>
    <filter-name>characterEncodingFilter</filter-name>
    <filter-class>org.springframework.web.filter.CharacterEncodingFilter</filter-class>
    <init-param>
      <param-name>encoding</param-name>
      <param-value>UTF-8</param-value>
    </init-param>
  </filter>
  <filter-mapping>
    <filter-name>characterEncodingFilter</filter-name>
    <url-pattern>/*</url-pattern>
  </filter-mapping>

  <!-- 前端控制器(加载classpath:spring-mvc.xml 服务器启动创建servlet) -->
  <servlet>
    <servlet-name>dispatcherServlet</servlet-name>
    <servlet-class>org.springframework.web.servlet.DispatcherServlet</servlet-class>
    <!-- 配置初始化参数,创建完DispatcherServlet对象,加载springmvc.xml配置文件 -->
    <init-param>
      <param-name>contextConfigLocation</param-name>
      <param-value>classpath:spring/spring-mvc.xml</param-value>
    </init-param>
    <!-- 服务器启动的时候,让DispatcherServlet对象创建 -->
    <load-on-startup>1</load-on-startup>
  </servlet>
  <servlet-mapping>
    <servlet-name>dispatcherServlet</servlet-name>
    <url-pattern>*.do</url-pattern>
  </servlet-mapping>
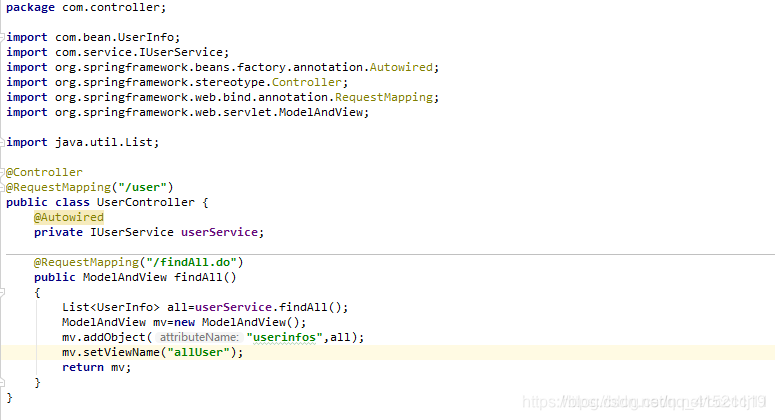
11.在Controller中新建UserController,用作SpringMVC的控制,all保存spring中service的findAll()函数的结果,在ModelAndView中添加all,然后跳转到allUser.jsp,返回mv。
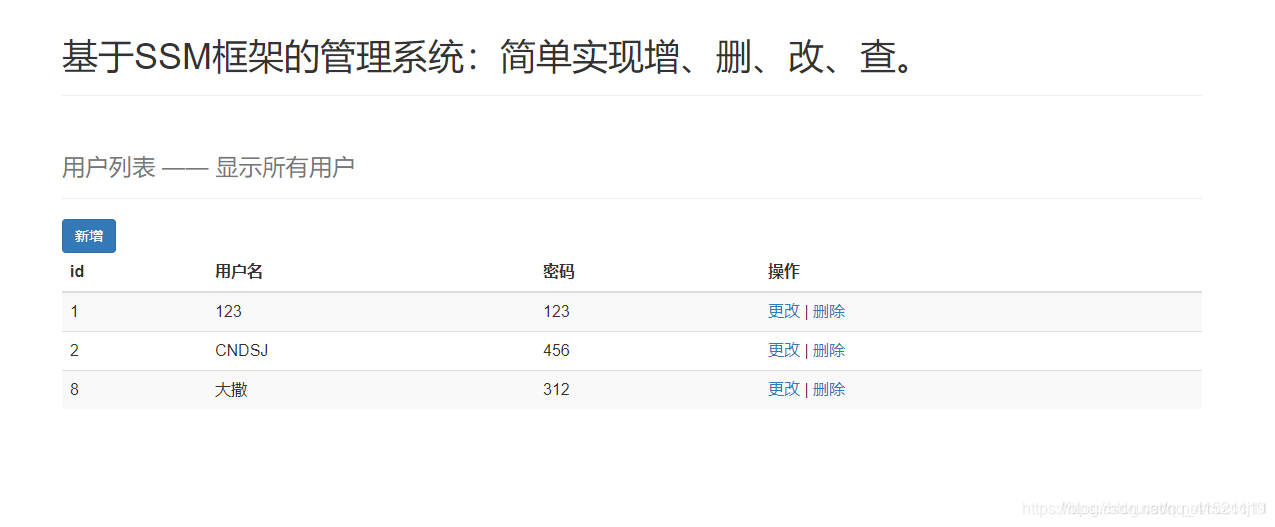
12.在webapp的WEB-INF下新建allUser.jsp用来显示all中的查询结果,在index.jsp中添加a标签, href="${pageContext.request.contextPath}/user/findAll.do",来进行跳转。
<c:forEach items="${userinfos}" var="userInfo">
                    <tr>
                        <td>${userInfo.id}</td>
                        <td>${userInfo.username}</td>
                        <td>${userInfo.password}</td>
                        <td>
                            <a href="${pageContext.request.contextPath}/user/toUpdate.do?id=${userInfo.id}">更改</a> |
                            <a href="${pageContext.request.contextPath}/user/delete.do?id=${userInfo.id}">删除</a>
                        </td>
                    </tr>
</c:forEach>
13在"Deployment"中点击"+“号,选择"war exploded”,选择"OK",完成Tomcat配置。
14.点击index.jsp,右键运行。
15.在网页中点击超链接,显示查询结果。


 被折叠的 条评论
为什么被折叠?
被折叠的 条评论
为什么被折叠?
 到【灌水乐园】发言


