


首先:
我使用的jar包:链接:https://pan.baidu.com/s/1pNoSnkJ 密码:7t5m
附一个android客户端测试APP,点击连接后,发送的数据默认是Date().toString,android这只是客户端哦,服务端的代码全部都在下面。
链接:https://pan.baidu.com/s/1nwwhBwH 密码:2ax6
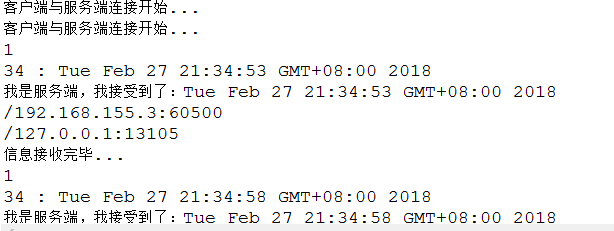
效果图:(我这里用了Android端和电脑,这两个客户端,所以有两个远程地址)
注意:如果你把代码敲好了,却发现始终连不上,特别是android端和后台,那么请检查一下电脑防火墙或者电脑给手机开的热点是否没问题,之前被WiFi共享大师坑了,手机和电脑后台就是连不上,原来是WiFi共享大师挂掉了。
PS:网络拆包,粘包问题解决可查看我的另一篇博客https://blog.youkuaiyun.com/qq_39658819/article/details/80373293
一、编写服务端全局配置类(NettyConfig)
作用:存储每一个连接进来的客户端通道,方便服务端向指定客户端发送信息或者群发信息
贴代码:
/**
 * 存储整个工程的全局配置
 * @author NewBies
 *
 */
public class NettyConfig {

	/**
	 * 存储每一个客户端接入进来时的channel对象
	 */
	public static ChannelGroup group = new DefaultChannelGroup(GlobalEventExecutor.INSTANCE);
}
2019-07-12:自定义编码器和解码器似乎失效了(版本问题?电脑问题?)你们可以试试,但是自带的编码器和解码器还是有效
二、创建协议对象(RequestInfo)
PS:这一步不重要,可以不使用协议对象,直接发送字符串也是可以的,这里只是举个例子。
public class RequestInfo {

    private String info;
    private byte type;

    public void setInfo(String info) {
        this.info = info;
    }

    public void setType(byte type) {
        this.type = type;
    }

    public String getInfo() {
        return info;
    }

    public byte getType() {
        return type;
    }
}
三、编写编码器(MessageEncoder)
PS:编码器其实也可以不用自己定义,Netty给了我们默认以\n结尾的编码器和解码器StringDecoder和StringEncoder
贴代码:
注意:自定义的编码器要继承自MessageToByteEncoder,并重写encode方法,该方法里面的write顺序一定要和解码器保持一次哦,不然接收到的信息会出错。
public class MessageEncoder  extends MessageToByteEncoder<RequestInfo> {


    @Override
    protected void encode(ChannelHandlerContext ctx, RequestInfo msg, ByteBuf out) throws Exception {

        ByteBufOutputStream writer = new ByteBufOutputStream(out);

        writer.writeByte(msg.getType());
        byte[] info = null;

        if (msg != null &&msg.getInfo() != null && msg.getInfo() != "") {
        	info = msg.getInfo().getBytes("utf-8");
        	writer.write(info);
        }
    }

}
四、编写解码器(MessageDecoder)
PS:同理解码器也不定要自己编写,可以使用StringDecoder和StringEncoder
贴代码:
注意:自定义的编码器要继承自ByteToMessageDecoder,并重写decode方法
public class MessageDecoder extends ByteToMessageDecoder {


    @Override
    protected void decode(ChannelHandlerContext ctx, ByteBuf in, List<Object> out) throws Exception {
        //标记开始读取位置
        in.markReaderIndex();
        //判断协议类型
        byte infoType = in.readByte();
        RequestInfo requestInfo = new RequestInfo();
        System.out.println(infoType);
        requestInfo.setType(infoType);
        //in.readableBytes()即为剩下的字节数
        byte[] info = new byte[in.readableBytes()];
        in.readBytes(info);
        requestInfo.setInfo(new String(info, "utf-8"));
        System.out.println(info.length + " : " + requestInfo.getInfo());
        //最后把你想要交由ServerHandler的数据添加进去,就可以了
        out.add(requestInfo);
    }
}
五、编写服务端处理器(ServerHandler)
这个就是服务器来处理消息的类了
里面就使用到了第一步编写的NettyConfig类
贴代码:
public class ServerHandler extends ChannelInboundHandlerAdapter {

	/**
     * 客户端与服务端创建连接的时候调用
     */
    @Override
    public void channelActive(ChannelHandlerContext ctx) throws Exception {
        System.out.println("客户端与服务端连接开始...");
        NettyConfig.group.add(ctx.channel());
    }

    /**
     * 客户端与服务端断开连接时调用
     */
    @Override
    public void channelInactive(ChannelHandlerContext ctx) throws Exception {
        System.out.println("客户端与服务端连接关闭...");
        NettyConfig.group.remove(ctx.channel());
    }

    /**
     * 服务端接收客户端发送过来的数据结束之后调用
     */
    @Override
    public void channelReadComplete(ChannelHandlerContext ctx) throws Exception {
        ctx.flush();
        System.out.println("信息接收完毕...");
    }

    /**
     * 工程出现异常的时候调用
     */
    @Override
    public void exceptionCaught(ChannelHandlerContext ctx, Throwable cause) throws Exception {
        cause.printStackTrace();
        ctx.close();
    }

    /**
     * 服务端处理客户端websocket请求的核心方法,这里接收了客户端发来的信息
     */
    @Override
	public void channelRead(ChannelHandlerContext channelHandlerContext, Object info) throws Exception {
    	System.out.println("我是服务端,我接受到了:" + ((RequestInfo)info).getInfo());
    	//服务端使用这个就能向 每个连接上来的客户端群发消息
    	NettyConfig.group.writeAndFlush(info);
    	Iterator<Channel> iterator = NettyConfig.group.iterator();
    	while(iterator.hasNext()){
    		//打印出所有客户端的远程地址
    		System.out.println((iterator.next()).remoteAddress());
    	}
//    	//单独回复客户端信息
//    	channelHandlerContext.writeAndFlush(info);
    }
}
六、编写服务端(Server)
前面的五个其实都是在为这个打基础,该类配置了编码器,解码器,还有处理器
这个没有什么好解释的,仔细看看注释吧!
public class Server {

	private ServerSocketChannel serverSocketChannel;

	public Server(int serverPort){
		bind(serverPort);
	}

	private void bind(int serverPort) {
		Thread thread = new Thread(new Runnable() {
            @Override
            public void run() {
            	//服务端要建立两个group,一个负责接收客户端的连接,一个负责处理数据传输
				//连接处理group
				EventLoopGroup boss = new NioEventLoopGroup();
				//事件处理group
				EventLoopGroup worker = new NioEventLoopGroup();
				ServerBootstrap bootstrap = new ServerBootstrap();
				// 绑定处理group
				bootstrap.group(boss, worker).channel(NioServerSocketChannel.class)
						//保持连接数
						.option(ChannelOption.SO_BACKLOG, 128)
						//有数据立即发送
						.option(ChannelOption.TCP_NODELAY, true)
						//保持连接
						.childOption(ChannelOption.SO_KEEPALIVE, true)
						//处理新连接
						.childHandler(new ChannelInitializer<SocketChannel>() {
							@Override
							protected void initChannel(SocketChannel sc) throws Exception {
								// 增加任务处理
								ChannelPipeline p = sc.pipeline();
								p.addLast(
//										//使用了netty自带的编码器和解码器
//										new StringDecoder(Charset.forName("utf-8")),
//										new StringEncoder(Charset.forName("utf-8")),
										new MessageDecoder(),
										new MessageEncoder(),
										//自定义的处理器
										new ServerHandler());
							}
						});

				//绑定端口,同步等待成功
				ChannelFuture future;
				try {
					future = bootstrap.bind(serverPort).sync();
					if (future.isSuccess()) {
						serverSocketChannel = (ServerSocketChannel) future.channel();
						System.out.println("服务端开启成功");
					} else {
						System.out.println("服务端开启失败");
					}

					//等待服务监听端口关闭,就是由于这里会将线程阻塞,导致无法发送信息,所以我这里开了线程
					future.channel().closeFuture().sync();
				} catch (Exception e) {
					e.printStackTrace();
				}
				finally {
					//优雅地退出,释放线程池资源
					boss.shutdownGracefully();
					worker.shutdownGracefully();
				}
            }
        });
		thread.start();
	}

	public void sendMessage(Object msg){
		if(serverSocketChannel != null){
			serverSocketChannel.writeAndFlush(msg);
		}
	}
}
七、编写客户端处理器(ClientHandler)
与服务端处理器同理的,其实就是生命周期,在什么时候执行哪个方法。
贴代码:
public class ClientHandler extends ChannelInboundHandlerAdapter {

    @Override
	public void channelRead(ChannelHandlerContext ctx, Object msg) throws Exception {
        System.out.println("我是客户端:" +msg);
    }

    @Override
    public void channelReadComplete(ChannelHandlerContext ctx) throws Exception {
        System.out.println("通道读取完毕!");
    }

    @Override
    public void exceptionCaught(ChannelHandlerContext ctx, Throwable cause) throws Exception {
        if(null != cause) cause.printStackTrace();
        if(null != ctx) ctx.close();
    }

}
八、编写客户端(Client)
与服务端同理
贴代码:
public class Client {
	private int port;
	private String host;
	private SocketChannel socketChannel;

	public Client(int port, String host) {
		this.host = host;
		this.port = port;
		start();
	}

	private void start() {

		 Thread thread = new Thread(new Runnable() {
	            @Override
	            public void run() {
	            	EventLoopGroup eventLoopGroup = new NioEventLoopGroup();
	        		Bootstrap bootstrap = new Bootstrap();
	        		bootstrap.channel(NioSocketChannel.class)
	        				// 保持连接
	        				.option(ChannelOption.SO_KEEPALIVE, true)
	        				// 有数据立即发送
	        				.option(ChannelOption.TCP_NODELAY, true)
	        				// 绑定处理group
	        				.group(eventLoopGroup).remoteAddress(host, port)
	        				.handler(new ChannelInitializer<SocketChannel>() {
	        					@Override
	        					protected void initChannel(SocketChannel socketChannel) throws Exception {
	        						// 初始化编码器,解码器,处理器
	        						socketChannel.pipeline().addLast(
	        								new MessageDecoder(),
	        								new MessageEncoder(),
//	        								new StringDecoder(Charset.forName("utf-8")),
//	        								new StringEncoder(Charset.forName("utf-8")),
	        								new ClientHandler());
	        					}
	        				});
	        		// 进行连接
	        		ChannelFuture future;
	        		try {
	        			future = bootstrap.connect(host, port).sync();
	        			// 判断是否连接成功
	        			if (future.isSuccess()) {
	        				// 得到管道,便于通信
	        				socketChannel = (SocketChannel) future.channel();
	        				System.out.println("客户端开启成功...");
	        			}
	        			else{
	        				System.out.println("客户端开启失败...");
	        			}
	        			// 等待客户端链路关闭,就是由于这里会将线程阻塞,导致无法发送信息,所以我这里开了线程
	        			future.channel().closeFuture().sync();
	        		} catch (InterruptedException e) {
	        			e.printStackTrace();
	        		} finally {
	        			//优雅地退出,释放相关资源
	        			eventLoopGroup.shutdownGracefully();
	        		}
	            }
		 });

		thread.start();
	}

	public void sendMessage(Object msg) {
		if (socketChannel != null) {
			socketChannel.writeAndFlush(msg);
		}
	}
}
最后我们编写启动类运行就行了
服务端启动类(ServerStart)
 public class ServerStart {

	public static void main(String[] args){
		Server server = new Server(8080);
	}
}
客户端启动类(ClientStart)
public class ClientStart {
	public static void main(String[] args){
		Scanner input = new Scanner(System.in);
        Client bootstrap = new Client(8080, "127.0.0.1");

        String infoString = "";
        while (true){
        	infoString = input.nextLine();
        	RequestInfo req = new RequestInfo();
            req.setType((byte) 1);
            req.setInfo(infoString);
            bootstrap.sendMessage(req);

        }
    }
}


 942
942

 被折叠的 条评论
为什么被折叠?
被折叠的 条评论
为什么被折叠?
 到【灌水乐园】发言


