


概述: 使用freemarker动态生成java源代码,然后编译之后引入程序中使用。
webservice的动态发布配置
package me.zhengjie.config;

import me.zhengjie.interceptor.PreCxfInterceptor;
import me.zhengjie.interceptor.PostCxfInterceptor;
import org.apache.cxf.Bus;
import org.apache.cxf.bus.spring.SpringBus;
import org.apache.cxf.jaxws.EndpointImpl;
import org.apache.cxf.transport.servlet.CXFServlet;
import org.springframework.beans.factory.annotation.Autowired;
import org.springframework.boot.web.servlet.ServletRegistrationBean;
import org.springframework.context.annotation.Bean;
import org.springframework.context.annotation.Configuration;

/**
 * @author chenChao
 * @version 1.0
 * @ClassName CxfConfig
 * @Description cxf配置文件
 * @Date 2021/3/31 9:25
 */
@Configuration
public class CxfConfig {

    public static final SpringBus SPRING_BUS = new SpringBus();

    public static PreCxfInterceptor preCxfInterceptor;

    public static PostCxfInterceptor postCxfInterceptor;

    @Autowired
    public void setClientCxfInterceptor(PreCxfInterceptor preCxfInterceptor) {
        CxfConfig.preCxfInterceptor = preCxfInterceptor;
    }

    @Autowired
    public void setServerCxfInterceptor(PostCxfInterceptor postCxfInterceptor) {
        CxfConfig.postCxfInterceptor = postCxfInterceptor;
    }

    /**
     * Spring boot注册 Servlet 三大组件 Servlet、Filter、Listener 的接口分别为
     * ServletRegistrationBean, FilterRegistrationBean 和 ServletListenerRegistrationBean
     * CXFServlet使用springboot内部的tomcat容器
     * @Author chenChao
     * @Description 添加webservice访问的前缀路径,如http://127.0.0.1:8080/cxf/ConsAndMeasureAPI?wsdl中的/cxf/路径
     * @Date 2021/3/31 9:30
     */
    @Bean
    public ServletRegistrationBean<CXFServlet> dispatcherServletName() {
        return new ServletRegistrationBean<>(new CXFServlet(), "/cxf/*");
    }

    @Bean(name = Bus.DEFAULT_BUS_ID)
    public SpringBus springBus() {
        return SPRING_BUS;
    }

    /**
     * @Author chenChao
     * @Description 发布新的webservice接口
     * @Date 2021/3/31 10:51
     * @param path: 发布路径
     * @param obj: 绑定webservice接口实现类, obj由JavaCompile编译成功后并引入实例化
     * @return void
     */
    public static void publish(String path, Object obj) {
        EndpointImpl endpoint = new EndpointImpl(CxfConfig.SPRING_BUS, obj);
        endpoint.publish(path);
        // 添加业务处理之前拦截器
        endpoint.getInInterceptors().add(CxfConfig.preCxfInterceptor);
        // 添加业务调用之后拦截器
        endpoint.getInInterceptors().add(CxfConfig.postCxfInterceptor);
    }

}
动态发布Controller
package me.zhengjie.utils;

import org.springframework.context.ConfigurableApplicationContext;
import org.springframework.util.ClassUtils;
import org.springframework.util.ReflectionUtils;
import org.springframework.web.servlet.mvc.method.RequestMappingInfo;
import org.springframework.web.servlet.mvc.method.annotation.RequestMappingHandlerMapping;

import java.lang.reflect.InvocationTargetException;
import java.lang.reflect.Method;

/**
 * @author chenChao
 * @version 1.0
 * @ClassName BeanUtil
 * @Description spring bean工具
 * @Date 2021/3/31 9:46
 */
public class BeanUtil {
    /**
     * BeanUtil.configContext = SpringApplication.run(AppRun.class, args);
     * springboot启动的时候赋值
     */
    public static ConfigurableApplicationContext configContext;

    /**
     * @Author chenChao
     * @Description 添加bean到spring容器中
     * @Date 2021/3/31 9:54
     * @param name: bean的名称
	 * @param obj: bean实例
     */
    public static void registerSingleton(String name, Object obj) {
        configContext.getBeanFactory().registerSingleton(name, obj);
    }

    /**
     * @Author chenChao
     * @Description 通过实例名获取bean
     * @Date 2021/3/31 10:00
     * @param name: 实例名
     * @return java.lang.Object
     */
    public static Object getBean(String name) {
        return configContext.getBean(name);
    }

    /**
     * @Author chenChao
     * @Description 通过类型获取实例bean
     * @Date 2021/3/31 10:00
     * @param clazz: 实例类型
     * @return java.lang.Object
     */
    public static <T> T getBean(Class<T> clazz) {
        return configContext.getBean(clazz);
    }


    /**
     * @Author chenChao
     * @Description controller实例注册发布
     * @Date 2021/5/8 16:54
     * @param controller: 被注册的controller实例
     * @return void
     */
    public static <T> void  registerController(T controller) throws InvocationTargetException, IllegalAccessException {
        RequestMappingHandlerMapping requestMappingHandlerMapping = configContext.getBean("requestMappingHandlerMapping", RequestMappingHandlerMapping.class);
        Method getMappingForMethod = ReflectionUtils.findMethod(RequestMappingHandlerMapping.class, "getMappingForMethod",Method.class,Class.class);
        if(getMappingForMethod == null){
            return;
        }
        getMappingForMethod.setAccessible(true);
        for (Method method : controller.getClass().getDeclaredMethods()){
            method.setAccessible(true);
            RequestMappingInfo mappingInfo = (RequestMappingInfo) getMappingForMethod.invoke(requestMappingHandlerMapping, method, controller.getClass());
            requestMappingHandlerMapping.registerMapping(mappingInfo, controller, method);
        }
    }

    /**
     * @Author chenChao
     * @Description 将已经注册到springbean容器的controller bean发布为restful接口
     * @Date 2021/5/8 16:46
     * @param beanName: controller bean 名字
     * @return void
     */
    public static void registerController(String beanName) throws NoSuchMethodException, InvocationTargetException, IllegalAccessException {
        RequestMappingHandlerMapping requestMappingHandlerMapping = configContext.getBean("requestMappingHandlerMapping", RequestMappingHandlerMapping.class);
        Object controller = getBean(beanName);
        //注册Controller
        Method method = requestMappingHandlerMapping.getClass().getSuperclass().getSuperclass().getDeclaredMethod("detectHandlerMethods",Object.class);
        //将private改为可使用
        method.setAccessible(true);
        method.invoke(requestMappingHandlerMapping, beanName);
    }

    /**
     * @Author chenChao
     * @Description 去掉Controller的Mapping
     * @Date 2021/5/8 16:48
     * @param controllerBeanName: 已经生效的controller名字
     * @return void
     */
    public static void unregisterController(String controllerBeanName){
        RequestMappingHandlerMapping requestMappingHandlerMapping = configContext.getBean("requestMappingHandlerMapping", RequestMappingHandlerMapping.class);
        Object controller= configContext.getBean(controllerBeanName);
        Class<?> targetClass = controller.getClass();
        ReflectionUtils.doWithMethods(targetClass, method -> {
            Method specificMethod = ClassUtils.getMostSpecificMethod(method, targetClass);
            try {
                Method createMappingMethod = RequestMappingHandlerMapping.class.
                        getDeclaredMethod("getMappingForMethod", Method.class, Class.class);
                createMappingMethod.setAccessible(true);
                RequestMappingInfo requestMappingInfo =(RequestMappingInfo)
                        createMappingMethod.invoke(requestMappingHandlerMapping, specificMethod, targetClass);
                if(requestMappingInfo != null) {
                    requestMappingHandlerMapping.unregisterMapping(requestMappingInfo);
                }
            }catch (Exception e){
                e.printStackTrace();
            }
        }, ReflectionUtils.USER_DECLARED_METHODS);
    }

}
JavaCompile代码
package me.zhengjie.utils.simple_compile;

import lombok.extern.slf4j.Slf4j;
import me.zhengjie.config.ConstantPool;
import me.zhengjie.utils.ExceptionUtil;
import me.zhengjie.utils.ExtAppClassLoaderUtil;
import me.zhengjie.utils.FileExtendUtil;

import javax.tools.*;
import java.io.*;
import java.lang.reflect.InvocationTargetException;
import java.net.MalformedURLException;
import java.net.URL;
import java.util.Arrays;
import java.util.List;
import java.util.StringJoiner;

/**
 * @author chenChao
 * @version 1.0
 * @ClassName SimpleDynamicCompiler
 * @Description 编译class
 * @Date 2021/4/29 16:47
 */
@Slf4j
public class SimpleDynamicCompiler {
    /**
     * 收集编译过程信息
     */
    private static DiagnosticCollector<JavaFileObject> diagnostics = new DiagnosticCollector<>();
    /**
     * 编译参数 编译class文件存放目录,-d 生成的class文件输出路径,一定要指向lib目录
     */
    private static List<String> options = Arrays.asList("-classpath", FileExtendUtil.getJarFiles(ConstantPool.EXTEND_CLASS_PATH + "/lib"), "-d", ConstantPool.EXTEND_CLASS_PATH + "/lib");
    /**
     * 注解处理器的类
     */
    private static List<String> classes = null;

    private static StandardJavaFileManager standardFileManager;


    static {
        try {
            // 将动态编译的class文件路径添加到系统搜索路径中
            URL url = new URL("file:/" + ConstantPool.EXTEND_CLASS_PATH);
            ExtAppClassLoaderUtil.addUrl(url);
            System.out.println("添加资源路径成功: " + url);
        } catch (MalformedURLException | IllegalAccessException | InvocationTargetException e) {
            e.printStackTrace();
            log.error("将动态编译的class文件路径{}添加到系统搜索路径中失败:{}", ConstantPool.EXTEND_CLASS_PATH, ExceptionUtil.getStackTraceInfo(e));
        }
    }

    @SuppressWarnings("rawTypes")
    public static void compile(File ...files){
        JavaCompiler compiler = ToolProvider.getSystemJavaCompiler();
        standardFileManager = compiler.getStandardFileManager(diagnostics, null, null);
        System.out.println("standardFileManager:" + standardFileManager);
        Iterable<? extends JavaFileObject> iterable = standardFileManager.getJavaFileObjects(files);
        // 创建一个编译任务
        JavaCompiler.CompilationTask task = compiler.getTask(null, standardFileManager, diagnostics, options, classes, iterable);
        //JavaCompiler.CompilationTask 实现了 Callable 接口
        Boolean result = task.call();
        System.out.println(result);
        printLog(result,files);
    }

    public static Class<?> compile(String fullName, String sourceCode) throws IOException, ClassNotFoundException {
        System.out.println("options:" + options);

        File file = ClassFileUtil.saveSourceCode(fullName, sourceCode);
        compile(file);

        System.out.println("fullName:" + fullName);
        try {
            return LoadAllClass.loadClass(fullName);
        }catch (Exception e){
            e.printStackTrace();
            return Class.forName(fullName);
        }
    }

    public static void printLog(Boolean result, File ...files){
        if (!result) {
            StringJoiner rs = new StringJoiner(System.getProperty("line.separator"));
            for (Diagnostic diagnostic : diagnostics.getDiagnostics()) {
                rs.add(String.format("%s:%s[line %d column %d]-->%s%n", diagnostic.getKind(), diagnostic.getSource(), diagnostic.getLineNumber(),
                        diagnostic.getColumnNumber(),
                        diagnostic.getMessage(null)));
            }
            System.out.println("编译失败,原因:" + rs.toString());
            log.error("编译失败,原因:{}", rs.toString());
        } else {
            System.out.println("编译成功");
            StringBuilder sb = new StringBuilder();
            Arrays.stream(files).forEach(file -> {
                sb.append(file.getName());
                sb.append(";");
            });
            log.info("编译成功:{}", sb.toString());
        }
    }

    public static Class<?> getCompilerClass(String fullClassName) throws ClassNotFoundException {
        return Class.forName(fullClassName);
    }
}
上面模式中传入的实例是由JavaCompile编译源码,引入编译后的class文件,然后实例化传入,从而动态发布webservice服务和动态发布controller服务,在idea中可以正常使用。
但是打包成jar后就是找不到类,或者NoClassDefFoundError错误,NoClassDefFoundError错误的发生,是因为Java虚拟机在编译时能找到合适的类,而在运行时不能找到合适的类导致的错误。
网上没有教程,全靠自己摸索,累!!!!
我使用的是多模块服务,每一个功能单独生成一个jar包。
1.打包整个项目,用压缩软件将lib包拷到一个目标文件。
2.主模块的pom文件修改如下,仅仅只需要打包主模块即可,此配置打包后,在生成的jar包中不会有lib文件,需要外部指定lib库。
<plugin>
<groupId>org.springframework.boot</groupId>
<artifactId>spring-boot-maven-plugin</artifactId>
<configuration>
<mainClass>me.zhengjie.AppRun</mainClass>
<layout>ZIP</layout>
<includes>
<include>
<groupId>nothing</groupId>
<artifactId>nothing</artifactId>
</include>
</includes>
</configuration>
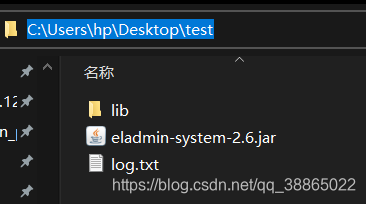
</plugin>3.启动主模块,以下是我的目录结构,java.exe -Dloader.path=C:\\Users\\hp\\Desktop\\test\\lib -jar C:\\Users\\hp\\Desktop\\test\\eladmin-system-2.6.jar >> C:\\Users\\hp\\Desktop\\test\\log.txt
4.最最最最最最最最最最最最最最最最最最最最最最最最核心的是,将你生成的class文件放到lib文件中,其中包名要转化为路径,当编译成功后,可以类加载器直接加载,不需要任何配置。


 3531
3531

 被折叠的 条评论
为什么被折叠?
被折叠的 条评论
为什么被折叠?
 到【灌水乐园】发言


