


1、概述
今天我们来聊聊Java 并发包 java.util.concurrent 中的一些API,学习一下如何高效的处理并发相关的问题。主要内容包括 原子类、Lock、Condition 以及 线程间协作的 CountDownLatch、CyclicBarrier、Semaphore、Exchanger 和 Phaser 等内容,本篇文章主要介绍如何使用,后续我们会进一步分析原理。
2、JUC概览
我们打开JDK的源码包 Java8 以及之前的版本路径是 java.util.concurrent ,但是在Java9之后的版本源码包的结构发生了改边,本文以Java 17 为例,Java17的路径是 :
java.base.java.util.concurrent 如下图所示
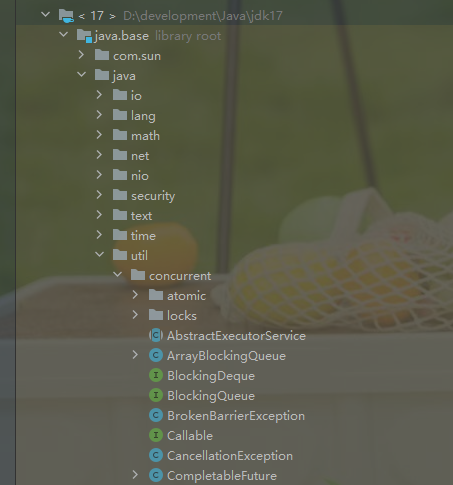
我们可以看到 并发包中主要包含两个子包 atomic 和 locks 其他的都是一些类和接口。其中atomic 包中主要是一些原子类的API。 locks 包下主要是 Java 提供的一种SDK层面上的管程的实现,相比synchorized 功能更加灵活,某些场景下效率更高,剩下的就是一些并发容器 以及线程池相关的工具类了。
3、原子类的使用
首先我们打开atomic这个子包,里面是以下原子类,有Integer类型的也有Long和Boolean 类型,还有 Reference 引用类型的。下面我们就来学习如何使用
3.1、原子数值类的使用
在并发包中数值类的原子类一共有 整型的 AtomicInteger和长整型的AtomicLong,他们的用法是一样的,这里我以 AtomicInteger 为例。我们先来看一个多线程计数器累加的案例,三个线程对一个 Integer 类型的数值对象 做累加,每个线程累加1000次,理论上最后的结果是3000。下面我们使用Java代码实现
public class AtomicDemo {
public static void main(String[] args) throws InterruptedException {
AtomicDemo atomicDemo = new AtomicDemo();
atomicDemo.atomicIntegerTest();
}
private static Integer integer = 0;
public void atomicIntegerTest() throws InterruptedException {
Runnable runnable = () -> {
for (int i = 0; i < 1000; i++) {
integer++;
}
};
Thread threadA = new Thread(runnable, "A");
Thread threadB = new Thread(runnable,"B");
Thread threadC = new Thread(runnable,"C");
threadA.start();
threadB.start();
threadC.start();
threadA.join();
threadB.join();
threadC.join();
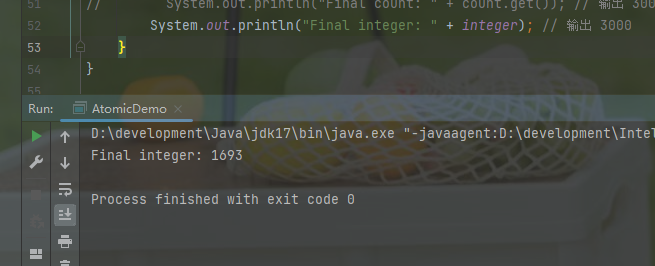
System.out.println("Final integer: " + integer); // 理论上输出 3000
}
}运行上述代码我们会发现,每次结果不一样,并且还不对
这种情况就是多个线程对同一个共享资源修改存在的问题,下来我们再来看看使用原子类会不会有这种情况,我们对上述代码稍作修改
private static AtomicInteger count = new AtomicInteger(0);
private static Integer integer = 0;
public void atomicIntegerTest() throws InterruptedException {
Runnable runnable = () -> {
for (int i = 0; i < 1000; i++) {
count.incrementAndGet();
// integer++;
}
};
Thread threadA = new Thread(runnable, "A");
Thread threadB = new Thread(runnable,"B");
Thread threadC = new Thread(runnable,"C");
threadA.start();
threadB.start();
threadC.start();
threadA.join();
threadB.join();
threadC.join();
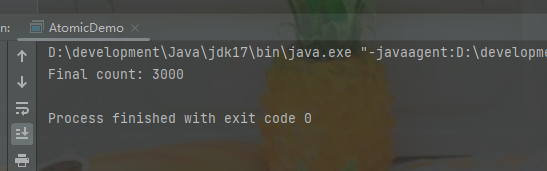
System.out.println("Final count: " + count.get()); // 输出 3000
// System.out.println("Final integer: " + integer); // 正常情况是 输出 3000
}我们多次执行发现结果都是符合预期的,因此原子类 能有效的解决线程安全问题。
3.2、原子数值类数组的使用
故名思意原子数组就是支持原子操作的数组,他的出现也是为了保证多个线程同时操作数组中同一个元素的时候的线程安全,主要也是 AtomicIntegerArray 和 AtomicLongArray 两种,这里我们还是以 AtomicIntegerArray 为例。假设有三个线程同时对 数组 initial 的第一个元素做累加,每个线程累加1000次,预期值是 3001。
public void atomicArrayTest() throws InterruptedException {
        int[] initial = {1, 2, 3};
        AtomicIntegerArray array = new AtomicIntegerArray(initial);
        Runnable runnable = () -> {
            for (int i = 0; i < 1000; i++) {
                array.getAndAdd(0, 1); // 索引0的元素增加1
               // initial[0]++; // 线程不安全
            }
        };

        Thread threadA = new Thread(runnable, "A");
        Thread threadB = new Thread(runnable,"B");
        Thread threadC = new Thread(runnable,"C");

        threadA.start();
        threadB.start();
        threadC.start();

        threadA.join();
        threadB.join();
        threadC.join();
        System.out.println(array.get(0));  // 是输出 3001
//        System.out.println(initial[0]);  // 输出结果不符合预期值
    }
3.3、原子布尔类型的使用
同样的有数值类型的肯定也有布尔类型的,也就是 AtomicBoolean。他们的概念都一样,就不再赘述了。我直接看案例,假设有一个变量 threadCount 初始值是0,现在有3个线程去修改它,如何让 threadCount 值只允许被一个线程修改并且只能修改一次呢。这里我们使用AtomicBoolean 就能实现。相关代码如下:
public static AtomicBoolean atomicBoolean =new AtomicBoolean(false);
    int threadCount = 0;
    public void atomicBooleanTest() throws InterruptedException {

        Runnable runnable = () -> {
            if (atomicBoolean.compareAndSet(false, true)) {
                threadCount++;
            }
        };

        Thread threadA = new Thread(runnable, "A");
        Thread threadB = new Thread(runnable,"B");
        Thread threadC = new Thread(runnable,"C");

        threadA.start();
        threadB.start();
        threadC.start();

        threadA.join();
        threadB.join();
        threadC.join();
        System.out.println(threadCount);
    }
3.4、 引用类型原子类
引用类型的原子类主要有下面这几种,这里列出他们的功能。
AtomicReference | 提供线程安全的引用更新操作 |
AtomicStampedReference | 提供线程安全的引用更新操作,并引入版本戳解决 ABA 问题 |
AtomicMarkableReference | 提供线程安全的引用更新操作,并引入标记位解决状态问题 |
AtomicIntegerFieldUpdater | 原子更新对象的整型字段 |
AtomicLongFieldUpdater | 原子更新对象的长整型字段 |
AtomicReferenceFieldUpdater | 原子更新对象的引用字段 |
下面以 AtomicReference 为例,演示一下引用类型的原子类如何使用,假设有一个User对象,相关代码如下:
public class User {
    private String name;
    private int age;

    public User(String name, int age) {
        this.name = name;
        this.age = age;
    }

    public String getName() {
        return name;
    }

    public void setName(String name) {
        this.name = name;
    }

    public int getAge() {
        return age;
    }

    public void setAge(int age) {
        this.age = age;
    }
}
假设有三个线程去更新 我们程序中某个逻辑里面的 User 对象,我们需要控制当前的User对象只能被一个线程修改,并且只能被修改一次,这个时候我们就可以使用 AtomicReference ,相关代码如下:
public void atomicReferenceTest() throws InterruptedException {
User tom = new User( "Tom",10);
AtomicReference<User> atomicReference = new AtomicReference(tom);
Runnable runnable = () -> {
User threadName = new User( Thread.currentThread().getName(), new Random().nextInt());
if(atomicReference.compareAndSet(tom, threadName)){
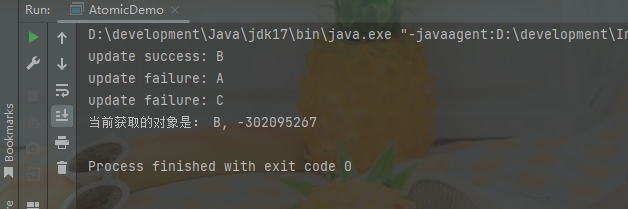
System.out.println("update success: "+ threadName.getName());
}else {
System.out.println("update failure: "+ threadName.getName());
}
};
Thread threadA = new Thread(runnable, "A");
Thread threadB = new Thread(runnable,"B");
Thread threadC = new Thread(runnable,"C");
threadB.start();
threadC.start();
threadA.start();
threadA.join();
threadB.join();
threadC.join();
User user = atomicReference.get();
System.out.println("当前获取的对象是: "+ user.getName() +", "+user.getAge());
}我们运行多次就可以发现,User 对象确实准确的限制住只能被修改一次。
3.5、原子类的场景
前面我们分别介绍了每一种原子类的使用,数值类型的原子类可以被用来设计成高并发的计数器,但是布尔类型的看着像是没啥用丫,我们回忆一下我们的案例。如何让 threadCount 值只允许被一个线程修改并且只能修改一次呢。你可能会有疑问,这么做有什么用呢,业务代码里不会有这种场景啊。其实不然,假设我们需要 实现一个无锁的单例模式呢?是不是就可以使用布尔类型的原子类去实现了。
同样的如果我们在项目中需要加载某个资源,这个资源只需要加载一次就行了,我们是不是就可以使用原子类代替互斥锁去控制了。
4、Lock 的使用
locks 包下主要有 Lock、ReadWriteLock 这两个接口,他们的实现类分别是 ReentrantLock、ReentrantReadWriteLock,接着在Java8 之后又引入了 StampedLock。下面我们就来学习他们的基本使用。
4.1、ReentrantLock 的使用
还是回到之前的计数器的案例,三个线程去修改一个 int 类型的变量,由于线程不安全所有预期值和实际的值有区别,前面我们是通过原子类保证了线程安全,下面这段代码使用 Lock 也能保证线程安全,打印出预期值。
int count = 0;
    public void atomicIntegerTest() throws InterruptedException {
        ReentrantLock reentrantLock = new ReentrantLock();
        Runnable runnable = () -> {
            for (int i = 0; i < 10000; i++) {
                reentrantLock.lock();
                try {
                    count++;
                }finally {
                    reentrantLock.unlock();
                }

            }
        };

        Thread threadA = new Thread(runnable, "A");
        Thread threadB = new Thread(runnable,"B");
        Thread threadC = new Thread(runnable,"C");

        threadA.start();
        threadB.start();
        threadC.start();

        threadA.join();
        threadB.join();
        threadC.join();
        System.out.println("Final count: " + count); // 输出 3000
    }
其中上述案例中使用了 lock方法获取锁,unlock方法释放锁。同样的我们还可以私用 tryLock方法尝试获取锁,以及通过一个 boolean 值指定是公平锁还是非公平锁。相关api 如下
 //默认非公平锁
 ReentrantLock reentrantLock = new ReentrantLock();
 //创建公平锁
 new ReentrantLock(true);
 //尝试获取锁 获取不到直接放弃 返回false
 reentrantLock.tryLock();
 //尝试获取锁,最多等待1000毫秒
 reentrantLock.tryLock(1000, TimeUnit.MILLISECONDS);
 //获取锁,如果获取不到,则一直等待,直到获取到锁
 reentrantLock.lockInterruptibly();
4.2、ReentrantReadWriteLock 的使用
在某些读多写少的场景下 ReentrantReadWriteLock 的性能比 ReentrantLock 更好。下面来实现一个缓存,相关代码如下
package org.wcan.juc.lock;

import java.util.HashMap;
import java.util.Map;
import java.util.concurrent.locks.ReentrantReadWriteLock;

public class CacheDemo<K, V> {
    private final ReentrantReadWriteLock lock = new ReentrantReadWriteLock();
    private final Map<K, V> cache = new HashMap<>();

    /**
    * @Description 获取缓存中的元素
    * @Param [key]
    * @return V
    * @Date 2025/3/29 下午 22:35
    * @Author wcan
    * @Version 1.0
    */
    public V get(K key) {
        lock.readLock().lock();
        try {
            return cache.get(key);
        } finally {
            lock.readLock().unlock();
        }
    }

    /**
    * @Description 更新元素
    * @Param [key, value]
    * @return void
    * @Date 2025/3/29 下午 22:35
    * @Author wcan
    * @Version 1.0
    */
    public void put(K key, V value) {
        lock.writeLock().lock();
        try {
            cache.put(key, value);
        } finally {
            lock.writeLock().unlock();
        }
    }
    /**
    * @Description 清空缓存
    * @Param []
    * @return void
    * @Date 2025/3/29 下午 22:35
    * @Author wcan
    * @Version 1.0
    */
    public void clear() {
        lock.writeLock().lock();
        try {
            cache.clear();
        } finally {
            lock.writeLock().unlock();
        }
    }
    public void print() {
        lock.readLock().lock();
        try {
            cache.forEach((k, v) -> System.out.println(k + ":" + v));
        } finally {
            lock.readLock().unlock();
        }
    }

}
我们可以编写测试类来试试
package org.wcan.juc.lock;

import java.util.concurrent.TimeUnit;

public class ReentrantRwLTest {
    public static void main(String[] args) throws InterruptedException {
        CacheDemo<String, Long> cacheDemo = new CacheDemo<>();

        Runnable writer  = () -> {
            Thread thread = Thread.currentThread();
            cacheDemo.put(thread.getName(), thread.getId());
            cacheDemo.put("key4", thread.getId());
            cacheDemo.put("key3", thread.getId());
            cacheDemo.put("key1", thread.getId());
            cacheDemo.put("key2", thread.getId());
        };

        Runnable reader = () -> {
            try {
                TimeUnit.SECONDS.sleep(1);
            } catch (InterruptedException e) {
                throw new RuntimeException(e);
            }
            System.out.println(Thread.currentThread().getName() + " get key1: " + cacheDemo.get("key1"));
        };

        Runnable print  = () -> {
            try {
                TimeUnit.SECONDS.sleep(1);
            } catch (InterruptedException e) {
                throw new RuntimeException(e);
            }
            cacheDemo.print();
            System.out.println(Thread.currentThread().getName() + " print : ");
        };

        Thread threadA = new Thread(writer, "A");
        Thread threadB = new Thread(reader,"B");
        Thread threadC = new Thread(reader,"C");

        Thread threadD = new Thread(writer, "D");
        Thread threadE = new Thread(reader,"E");
        Thread threadF = new Thread(print,"F");

        threadA.start();
        threadB.start();
        threadC.start();
        threadD.start();
        threadE.start();
        threadF.start();

        threadA.join();
        threadB.join();
        threadC.join();
        threadD.join();
        threadE.join();
        threadF.join();
    }
}
4.3、 StampedLock 的使用
StampedLock是在Java8以后引入的,他在原来的 ReadWriteLock 的基础上做了很多优化,一共有三种模式的锁,
-
写锁:独占锁。
-
悲观读锁:类似读锁,与其他读锁兼容,与写锁互斥。
-
乐观读锁:无锁机制,通过
validate()检查是否被写操作干扰。
下面我们使用 StampedLock 来实现一个缓存,相关代码如下
package org.wcan.juc.lock;

import java.util.concurrent.TimeUnit;
import java.util.concurrent.locks.StampedLock;

public class CachedData {
    private final StampedLock lock = new StampedLock();
    private Object data;

    public void update(String newData) {
        long stamp = lock.writeLock(); // 获取写锁
        try {
            // 模拟数据更新耗时
            TimeUnit.SECONDS.sleep(1);
            data = newData;
        } catch (InterruptedException e) {
            throw new RuntimeException(e);
        } finally {
            lock.unlockWrite(stamp);
        }
    }

    public Object read() {
        long stamp = lock.tryOptimisticRead(); // 尝试乐观读
        Object currentData = data;

        if (!lock.validate(stamp)) { // 验证戳记有效性
            stamp = lock.readLock(); // 升级为悲观读锁
            try {
                currentData = data;
            } finally {
                lock.unlockRead(stamp);
            }
        }
        return currentData;
    }
}
大家可以自行编写测试方法测试。
4.4、Condition的使用
我们打开源码,查看 Condition 接口的注释信息,先来了解一下 Condition 是什么,解决了什么问题
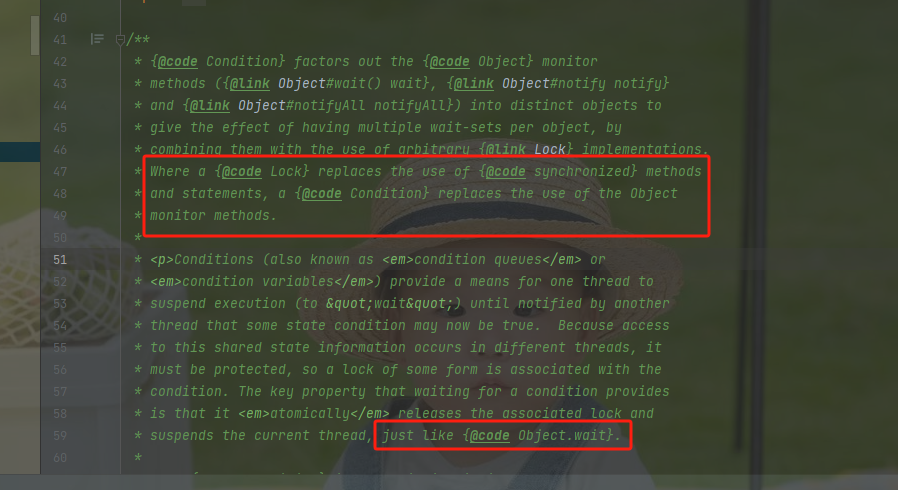
上面大概的意思是 Lock 可以替代 synchronized 方法 或者 声明的代码块,Condition 可以替代监视器对象的方法,也就是 Object 对象中的 wait 、notify、notifyAll这几个方法。好吧 接下来我们就来看则么去使用。
很显然他是一个接口,所以不能单独的使用,那我们怎么去使用呢。我们继续看源码中的注释信息,其中有个简单的示例代价,这里我截取一部分
<p>As an example, suppose we have a bounded buffer which supports
* {@code put} and {@code take} methods. If a
* {@code take} is attempted on an empty buffer, then the thread will block
* until an item becomes available; if a {@code put} is attempted on a
* full buffer, then the thread will block until a space becomes available.
* We would like to keep waiting {@code put} threads and {@code take}
* threads in separate wait-sets so that we can use the optimization of
* only notifying a single thread at a time when items or spaces become
* available in the buffer. This can be achieved using two
* {@link Condition} instances.
* <pre>
* class BoundedBuffer<E> {
* <b>final Lock lock = new ReentrantLock();</b>
* final Condition notFull = <b>lock.newCondition(); </b>
* final Condition notEmpty = <b>lock.newCondition(); </b>
*
* final Object[] items = new Object[100];
* int putptr, takeptr, count;
*
* public void put(E x) throws InterruptedException {
* <b>lock.lock();
* try {</b>
* while (count == items.length)
* <b>notFull.await();</b>
* items[putptr] = x;
* if (++putptr == items.length) putptr = 0;
* ++count;
* <b>notEmpty.signal();</b>
* <b>} finally {
* lock.unlock();
* }</b>
* }
*
* public E take() throws InterruptedException {
* <b>lock.lock();
* try {</b>
* while (count == 0)
* <b>notEmpty.await();</b>
* E x = (E) items[takeptr];
* if (++takeptr == items.length) takeptr = 0;
* --count;
* <b>notFull.signal();</b>
* return x;
* <b>} finally {
* lock.unlock();
* }</b>
* }
* }
* </pre>
*我们可以使用 lock.newCondition() 获取一个 Condition 对象。好吧 那就说明他需要配合Lock 意思使用了。我们回忆一下 Object 的 wait 、notify、notifyAll这几个方法,不也是要和 synchorized 一起使用的嘛。好吧 这里我们已经知道了Condition 是什么以及怎么创建了。
4.5、Lock 和 Condition 搭配
Condition 的出现主要是和 Lock 搭配使用,下面我们就是用他们实现一个生产-消费 模型,相关代码如下:
package org.wcan.juc.lock;

import java.util.LinkedList;
import java.util.Queue;
import java.util.concurrent.locks.Condition;
import java.util.concurrent.locks.Lock;
import java.util.concurrent.locks.ReentrantLock;

public class ConditionQueue {
    private static final Lock lock = new ReentrantLock();
    private static final Condition notFull = lock.newCondition();
    private static final Condition notEmpty = lock.newCondition();
    private static final int CAPACITY = 10;
    private static final Queue<String> queue = new LinkedList<>();

    public static void produce(String value) throws InterruptedException {
        lock.lock();
        try {
            while (queue.size() == CAPACITY) {
                // 等待队列不满
                notFull.await();
            }
            queue.add(value);
            // 通知消费者
            notEmpty.signal();
        } finally {
            lock.unlock();
        }
    }

    public static String consume() throws InterruptedException {
        lock.lock();
        try {
            while (queue.isEmpty()) {
                // 等待队列不空
                notEmpty.await();
            }
            String polled = queue.poll();
            // 通知生产者
            notFull.signal();
            return polled;
        } finally {
            lock.unlock();
        }
    }
}
我们可以创建两个线程 ,一个负责生产一个负责消费
package org.wcan.juc.lock;

import java.util.UUID;
import java.util.concurrent.TimeUnit;
import java.util.concurrent.locks.ReentrantLock;

/**
 * @Description
 * @Author wcan
 * @Date 2025/3/29 下午 23:43
 * @Version 1.0
 */
public class ConditionDemo {
   private static ReentrantLock reentrantLock = new ReentrantLock();
    public static void main(String[] args) throws InterruptedException {

        Runnable producer = () -> {
            try {
                System.out.println("producer: "+ Thread.currentThread().getName());
                TimeUnit.SECONDS.sleep(1);
                ConditionQueue.produce(UUID.randomUUID().toString());
            } catch (InterruptedException e) {
                throw new RuntimeException(e);
            }
        };

        Runnable reader = () -> {
            try {
                System.out.println("reader: "+ Thread.currentThread().getName());
                TimeUnit.SECONDS.sleep(2);
                String consume = ConditionQueue.consume();
                System.out.println("consume: "+ consume);
            } catch (InterruptedException e) {
                throw new RuntimeException(e);
            }
        };

        Thread threadA = new Thread(producer, "A");
        Thread threadB = new Thread(reader,"B");
//        Thread threadC = new Thread(reader,"C");

        threadA.start();
        threadB.start();
//        threadC.start();

        threadA.join();
        threadB.join();
//        threadC.join();
    }


}
5、线程间通信机制
线程间通信作为多线程协同工作的核心机制,通过共享内存、生产-消费 等模式实现资源调度与状态同步,为高并发场景下的数据一致性及任务协作效率提供底层保障。下面我们就来看看并发包中的解决方案。
5.1、CountDownLatch
CountDownLatch 是一个同步辅助工具类,用于让一个或多个线程等待直到其他线程完成某些操作。它适用于需要等待多个线程执行完某些操作后再继续的场景。
下面是一个典型的案例。假设主线程需要等待所有的子线程完成工作后 再继续执行某个特殊的逻辑,我们就可以使用 CountDownLatch 。相关代码如下:
public class CountDownLatchDemo {
    public static void main(String[] args) throws InterruptedException {
        CountDownLatch latch = new CountDownLatch(3);

        for (int i = 0; i < 3; i++) {
            new Thread(() -> {
                System.out.println(Thread.currentThread().getName()
                    + " 初始化完成");
                latch.countDown();
            }).start();
        }

        latch.await();
        System.out.println("所有子线程初始化完成,主线程继续执行");
    }
}
5.2、CyclicBarrier
CyclicBarrier 用于在一组线程执行完某个任务后,等待所有的线程都到达某个同步点再继续执行。并且支持重置,和CountDownLatch 有点类似,但是适用场景不同。
这里也给出一个典型的案例。假设有三个线程,他们必须全部到达某个屏障点后再触发某个任务,下面是实例代码。(大家可以自己细品下 和 CountDownLatch 的区别)
public class CyclicBarrierDemo {
    public static void main(String[] args) {

        Runnable runnable = () ->
                System.out.println("所有线程到达屏障,执行后续任务");

        CyclicBarrier barrier = new CyclicBarrier(3, runnable);

        for (int i = 0; i < 3; i++) {
            new Thread(() -> {
                try {
                    System.out.println(Thread.currentThread().getName() + " 到达屏障");
                    barrier.await();
                } catch (Exception e) {
                    e.printStackTrace();
                }
            }).start();
        }
    }
}
5.3、Semaphore
Semaphore 是Java层面上 对信号量的一种实现,他模拟了操作系统底层的信号量机制,可以用于控制同时访问某个资源的线程数量。适合用于实现限制资源访问的场景。
假设我们需要对某个资源做限制访问,比如只允许三个线程并发访问,这个时候我们就可以使用 信号量了,相关代码如下:
public class SemaphoreDemo {
    public static void main(String[] args) {
        Semaphore semaphore = new Semaphore(3); // 允许3个线程并发

        for (int i = 0; i < 10; i++) {
            new Thread(() -> {
                try {
                    semaphore.acquire();
                    System.out.println(Thread.currentThread().getName() + " 获取资源");
                    Thread.sleep(2000);
                } catch (InterruptedException e) {
                    e.printStackTrace();
                } finally {
                    semaphore.release();
                }
            }).start();
        }
    }
}
5.4、Exchanger
Exchanger 这个工具就很厉害了,在程序运行的时候 它可以提供两个线程数据交换的能力。比如两个线程同时在运行,线程 a 在某个时间点可以调用 exchange 方法将自己的数据传递给线程b ,当线程 b 也同样的调用 exchange 方法将自己的数据 传递出去,需要注意的是 一方先到达数据交换点的话 则阻塞等待另一方。
假设有两个线程 Jerry 和 Tom, 他们再某个时刻需要给对方发送一条消息,相关代码如下:
package org.wcan.juc.util;

import java.util.concurrent.Exchanger;

public class ExchangerDemo {
    public static void main(String[] args) {
        Exchanger<String> exchanger = new Exchanger<>();

        new Thread(() -> {
            try {
                String data = "来自Jerry的问候";
                String received = exchanger.exchange(data);
                System.out.println("线程Jerry收到: " + received);
            } catch (InterruptedException e) {
                e.printStackTrace();
            }
        }).start();

        new Thread(() -> {
            try {
                String data = "来自Tom的问候";
                String received = exchanger.exchange(data);
                System.out.println("线程Tom收到: " + received);
            } catch (InterruptedException e) {
                e.printStackTrace();
            }
        }).start();
    }
}
5.5、Phaser
Phaser 是一个更强大的工具,他提供了一种
package org.wcan.juc.util;

import java.util.concurrent.Phaser;

public class PhaserDemo {
    public static void main(String[] args) {
        // 初始注册3个线程
        Phaser phaser = new Phaser(3);

        for (int i = 0; i < 3; i++) {
            new Thread(() -> {
                System.out.println(Thread.currentThread().getName() + " 完成阶段1");
                // 等待所有线程完成阶段1
                phaser.arriveAndAwaitAdvance();

                System.out.println(Thread.currentThread().getName() + " 完成阶段2");
                // 注销线程
                phaser.arriveAndDeregister();
            }).start();
        }
    }
}
5.6、其他线程协作工具
除了上述的列出的几个工具类之外还有 BlockingQueue 阻塞队列 也具备多线程之间的通信能力,它主要是通过 生产-消费 模型去实现。后续我们会介绍并发容器,这里不再继续展开了。
6、总结
本篇文章我们主要学习了 Java 并发包中的一些工具类的用法以及原子类、Lock 的基本使用。
6.1、线程间通信总结
上一个章节我们介绍了多种线程间通信的工具类,下面我们列出一个清单 总结一下
| 工具类 | 核心用途 | 典型场景 |
|---|---|---|
| BlockingQueue | 生产者-消费者模型 | 任务队列、日志缓冲 |
| CountDownLatch | 主线程等待子线程完成 | 服务启动检查、多任务初始化 |
| CyclicBarrier | 多线程同步到屏障点 | 并行计算后汇总结果 |
| Semaphore | 控制并发资源访问 | 数据库连接池、接口限流 |
| Exchanger | 双线程数据交换 | 流水线生产中的数据配对 |
| Phaser | 多阶段动态同步 | 分布式任务分片处理 |
| CompletableFuture | 异步任务编排 | 聚合多个异步接口调用结果 |
| Condition | 多条件等待队列 | 复杂生产者-消费者模型 |
| LockSupport | 底层线程阻塞与唤醒 | 自定义同步工具实现 |
6.2、Lock 最佳实践
前面我们介绍了 Lock 的基本使用,但是在使用的时候仍然需要主意一些事项,同样的我也总结一下 供大家参考
| 最佳实践 | 关键点 | 适用场景 |
|---|---|---|
| try-finally 释放锁 | 防止锁泄漏 | 所有锁使用场景 |
| tryLock 超时控制 | 避免死锁和长时间阻塞 | 高竞争环境 |
| 读写锁分离 | 提升读多写少场景性能 | 缓存、配置管理 |
| StampedLock 乐观读 | 减少读锁竞争 | 读远多于写的统计场景 |
| Condition 精准唤醒 | 替代 wait/notify,支持多条件 | 生产者-消费者、线程池任务队列 |
| 避免锁滥用 | 优先使用无锁结构 | 计数器、状态标记 |


 2442
2442

 被折叠的 条评论
为什么被折叠?
被折叠的 条评论
为什么被折叠?
 到【灌水乐园】发言


