


1. leaflet 加载本地geoserver 的 WMTS
1.1. 安装wmts插件
原生leaflet不支持 wmts 图层,需要到插件库中选则需要的 wmts 图层插件类型。
1.1.1. 可以到 leaflet 官网上查找需要的插件。
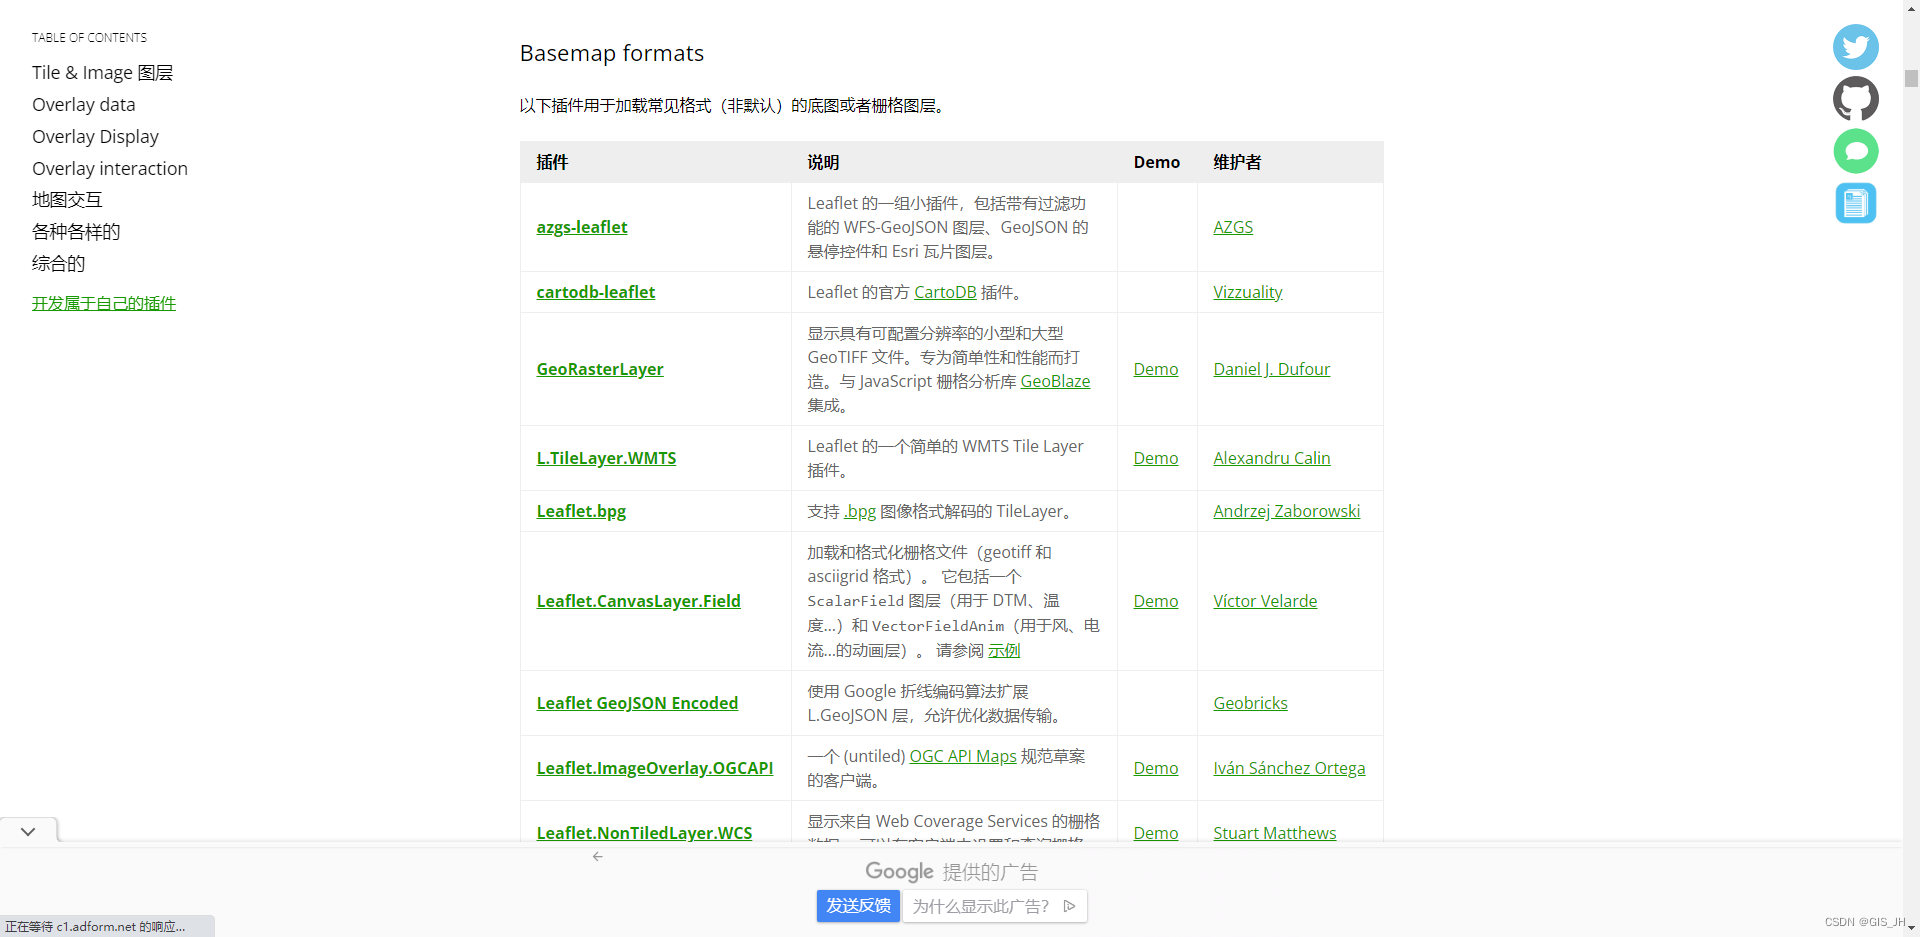
1.1.2. npm 插件搜索
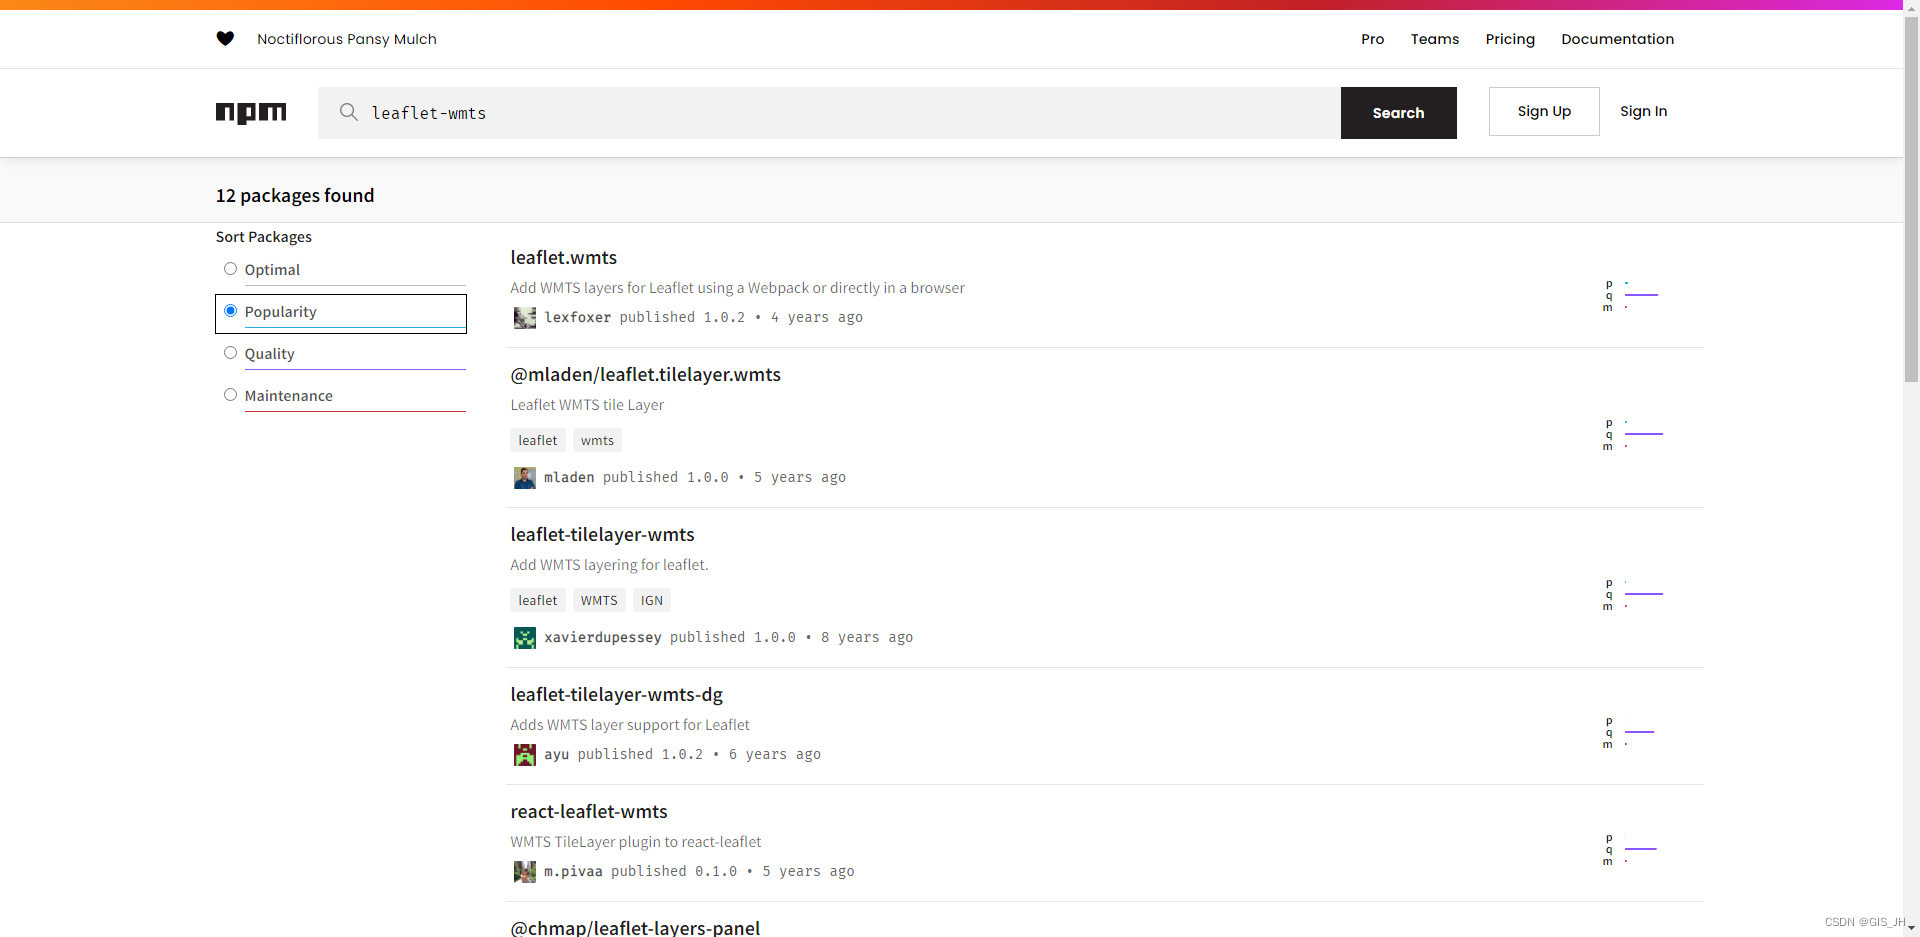
也可以在 npm 官网上搜索关键词 leaflet-wmts , leaflet-wmts 找到相关插件。
npm官网
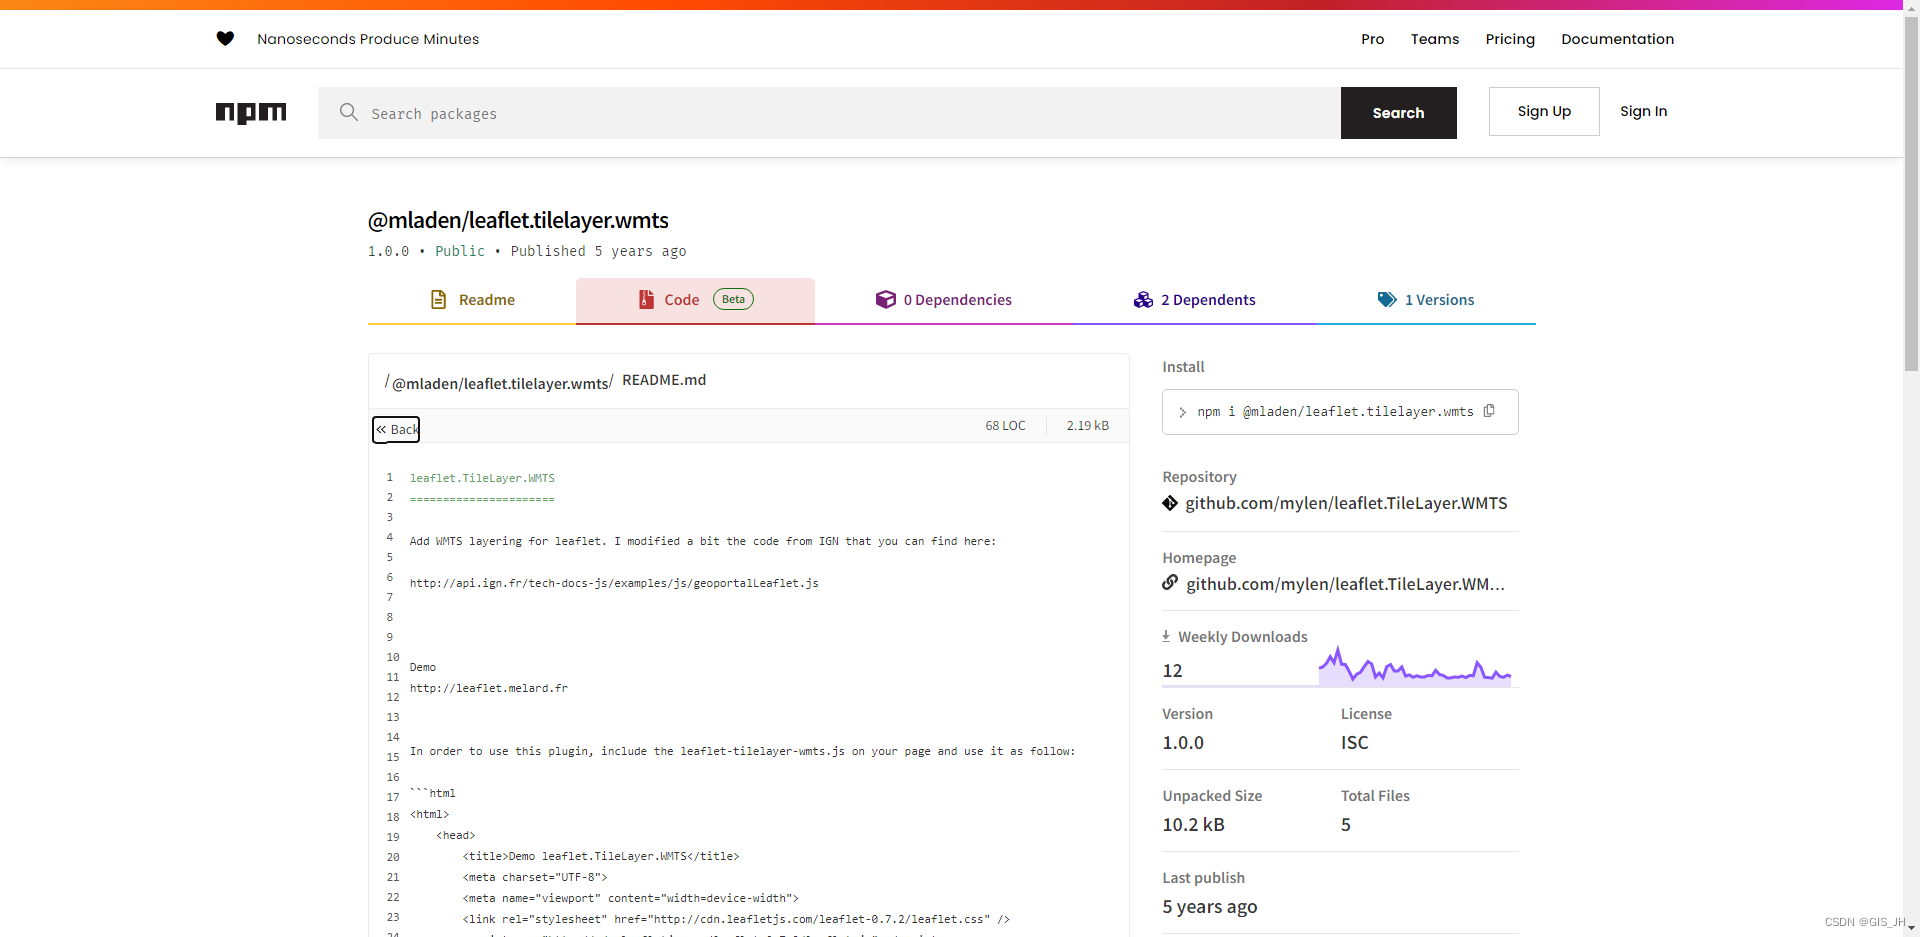
ps: github 上的项目可以在 npm 上找到对应的项目, 可以通过如
npm i leaflet.wmts
安装对应的包。
1.2. Leaflet 访问 Geoserver 的 WMTS
- 我们以 npm 官网上最流行的 leaflet.wmts 为例:
npm i leaflet.wmts
- 代码
import 'leaflet.wmts'

var matrixIds = [];
for (var i=0; i<22; ++i) {
   matrixIds[i] = {
     identifier : "" + i,
     topLeftCorner : new L.LatLng(90, -180)
   };
 }
const mapUrl = "http://localhost:8080/geoserver/nanjingjiaoguanju/gwc/service/wmts"
const ign =new L.TileLayer.WMTS(mapUrl,
    {
         layer: "myworkspace:tuceng1",//图层名称
         tilematrixSet: "EPSG:900913",//GeoServer使用的网格名称
         style: "normal",
         format: 'image/png',
         // maxZoom: 16,
         // minZoom: 10,
         matrixIds: matrixIds,
     }
   );
ign.addTo(leafletMap)
# 2. Openlayers 加载本地 geoserver 的 WMTS
2. Openlayers 访问 Geoserver 的 WMTS
2.1. 在 vue3 中结合 openlayers 访问 wmts
<template>

    <div>
      <div id="mapdiv" class="map" tabindex="0"></div>
      <button @click="loadWMS">加载WMS</button>
      <button @click="loadWMTS">加载WMTS</button>
    </div>
</template>

<script>

import Map from 'ol/Map.js';
import TileLayer from 'ol/layer/Tile.js';
import View from 'ol/View.js';
import { ref,onMounted } from 'vue';
import {FullScreen, defaults as defaultControls} from 'ol/control.js';
import WMTS from 'ol/source/WMTS.js';
import WMTSTileGrid from 'ol/tilegrid/WMTS.js';
import {get as getProjectionByEPSG} from 'ol/proj';
import {getWidth,getTopLeft} from 'ol/extent';

export default {
  name: 'BasicMapContainer',
  props: {
  },
  setup(){
    var gridsetName = 'EPSG:4326';
    const myprojection = getProjectionByEPSG(gridsetName);
    const projectionExtent = myprojection.getExtent();
    const size = getWidth(projectionExtent) / 256;
    const zoomlevelcount = 22
    const resolutions = new Array(zoomlevelcount);
    const matrixIds = new Array(zoomlevelcount);


    // for (let z = 0; z < 19; ++z) {
    //   // generate resolutions and matrixIds arrays for this WMTS
    //   resolutions[z] = size / Math.pow(2, z);
    //   matrixIds[z] = z;
    // }

    for (let z = 1; z < zoomlevelcount+1; ++z) {
      // generate resolutions and matrixIds arrays for this WMTS
      resolutions[z-1] = size / Math.pow(2, z);
      matrixIds[z-1] = myprojection.code_ +":"+ (z-1);
    }

    console.log("resolutions = ",resolutions);
    console.log("matrixIds = ",matrixIds);

    const baseUrl =  'http://localhost:8090/geoserver/myworkspace/gwc/service/wmts';

    const tileGridSet = new WMTSTileGrid({
          tileSize: [256,256],
          extent: [-180.0,-90.0,180.0,90.0],
          origin: [-180.0, 90.0],
          resolutions: resolutions,
          matrixIds: matrixIds
        });


    var source = new WMTS({
	        url: baseUrl,
	        layer: 'CHINA_county_region_2015',
	        matrixSet: gridsetName,
	        format: 'image/png',
	        projection:myprojection,
	        tileGrid: new WMTSTileGrid({
	          origin: getTopLeft(projectionExtent),
	          resolutions: resolutions,
	          matrixIds: matrixIds,
	        }),
          style: '',
	        wrapX: true,
      })

    let mapdiv = ref(null);
    let map  = new Map({
                  controls: defaultControls().extend([new FullScreen()]),
                  layers: [
                    new TileLayer({
                      source: source,
                    }),
                  ],
                  view: new View({
                    center: [0, 0],
                    projection: myprojection,
                    zoom: 2,
                  }),
                })

    onMounted(() => {
      console.log("组件已经挂载了")
      map.setTarget("mapdiv");
    })

    return {
         mapdiv,
    }
  },


}


</script>

<!-- Add "scoped" attribute to limit CSS to this component only -->
<style>
      #mapdiv {
        position: relative;
        width: 100%;
        height: 700px;
      }

      /* 缩放控件的样式设置 */
      .ol-zoom{
        right: 50px;
        position: absolute;
        top: 80px;
      }


      /* 缩放控件的样式设置 */
      .ol-rotate{
        right: 50px;
        position: absolute;
        top: 120px;
      }

      /* 全屏控件的样式设置 */
      .ol-full-screen {
        right: 50px;
        position: absolute;
        top: 50px;
      }

</style>
3. WMTS 相关参数
3.1. tileGrid
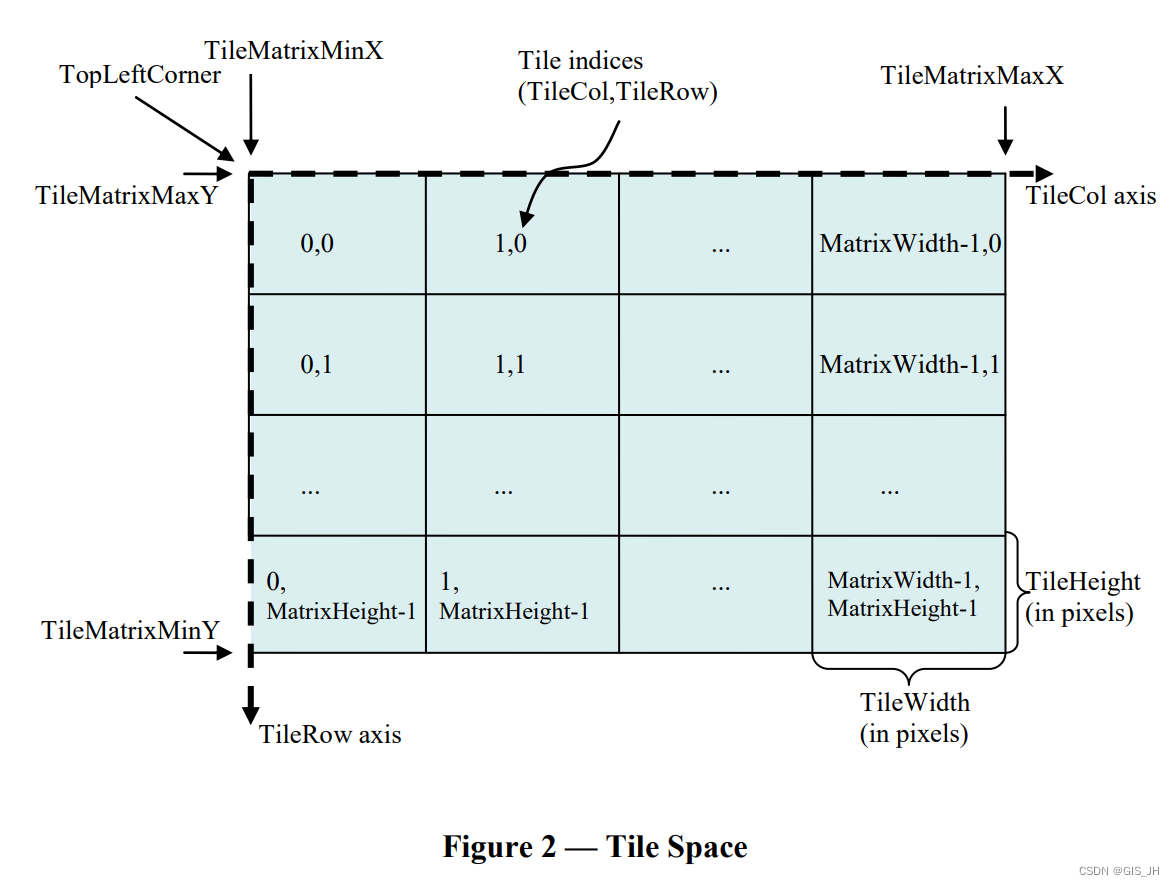
Tile Matrix Set,瓦片所在空间的几何结构。在平铺的地图图层中,空间的表示被约束在一组离散的参数中。Tile Matrix Set定义了这些参数。每个 Tile Matrix Set 包含一个或多个Tile Matrix,用于定义该坐标参考系统的Tile。
3.1.1. Tile Matrix 相关参数
每个Tile Matrix由以下几个参数定义:
- Scale Denominator
Scale Denominato = 像素代表的地表实际距离 / 像素尺寸 - TileHeight, TileWidth
以像素个数计量的 Tile 的高, 宽。 - TileMatrixMinX, TileMatrixMaxY
TileMatrix 最大的y轴坐标 TileMatrixMaxY,最小的x轴坐标 TileMatrixMinX。(TileMatrixMinX,TileMatrixMaxY)表示 TileMatrix 左上角点 (TopLeftCorner) 的坐标。 - MatrixWidth,MatrixHeight
MatrixWidth,MatrixHeight分别为 TileMatrix 在X轴,Y轴上瓦片的个数。
3.1.2. tileGrid 模型结构
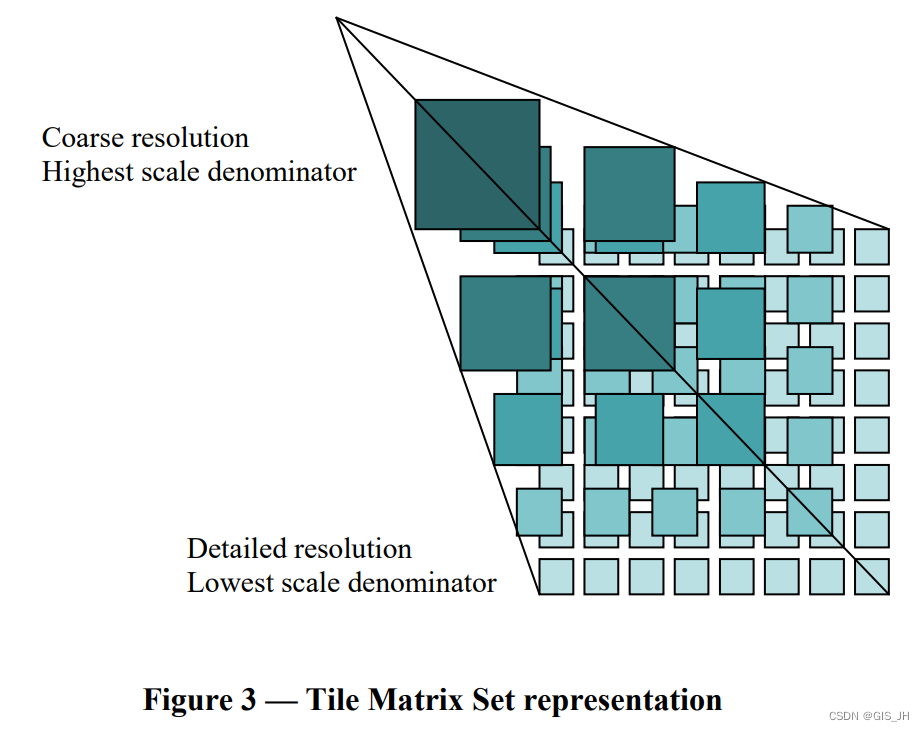
每个 Tile Matrix Set 根据自己包含的 Tile Matrix 定义了一组缩放级别(如下图)。每个地图图层可以应用一种或多种 Tile Matrix Set ,尽管如此,服务器似乎喜欢为 不同的地图图层提供相同的 Tile Matrix Set 。Tile Matrix 针对某一缩放级别进行了优化并对这个Tile Matrix 进行标识。由于 pixel alignment 问题,不同尺度下的Tile matrix 的边界框会有轻微的差别。
3.1.3. 计算 Tile Matrix 右下角点的坐标 (tileMatrixMaxX,tileMatrixMinY)
pixelSpan = scaleDenominator × 0.00028 / metersPerUnit(crs);
tileSpanX = tileWidth × pixelSpan;
tileSpanY = tileHeight × pixelSpan;
tileMatrixMaxX = tileMatrixMinX + tileSpanX × matrixWidth;
tileMatrixMinY = tileMatrixMaxY - tileSpanY × matrixHeight;
3.1.4. openlayers 中 WMTSTileGrid 对象的使用
const projection = getProjection('EPSG:3857');
const projectionExtent = projection.getExtent();
const size = getWidth(projectionExtent) / 256;
const resolutions = new Array(19);
const matrixIds = new Array(19);

for (let z = 1; z < zoomlevelcount+1; ++z) {
      // generate resolutions and matrixIds arrays for this WMTS
      resolutions[z-1] = size / Math.pow(2, z);
      matrixIds[z-1] = myprojection.code_ +":"+ (z-1);
    }

const tileGridSet = new WMTSTileGrid({
          tileSize: [256,256],
          extent: [-180.0,-90.0,180.0,90.0],
          origin: [-180.0, 90.0],
          resolutions: resolutions,
          matrixIds: matrixIds
        });
3.1.5. GeoServer源码中GridSetFactory.java中创建GridSet的方法:
public static GridSet createGridSet(String name, SRS srs, BoundingBox extent, boolean alignTopLeft, int levels,
 Double metersPerUnit, double pixelSize, int tileWidth, int tileHeight, boolean yCoordinateFirst) {
    double extentWidth = extent.getWidth();
    double extentHeight = extent.getHeight();
    double resX = extentWidth / (double)tileWidth;//48.37030696171132
    double resY = extentHeight / (double)tileHeight;//42.398664126933
    int tilesWide;
    int tilesHigh;
    if (resX <= resY) {
        tilesWide = 1;
        tilesHigh = (int)Math.round(resY / resX);
        resY /= (double)tilesHigh;
    } else {
        tilesHigh = 1;
        tilesWide = (int)Math.round(resX / resY); //1
        resX /= (double)tilesWide;//48.37030696171132
    }

    //取这两个方向上的像素最大值为当前比例尺下的像素尺寸
    double res = Math.max(resX, resY);//48.37030696171132

    //根据开始的边界bounds的左上角(切图原点),重新确定边界
    double adjustedExtentWidth = (double)(tilesWide * tileWidth) * res;
    double adjustedExtentHeight = (double)(tilesHigh * tileHeight) * res;
    BoundingBox adjExtent = new BoundingBox(extent);
    adjExtent.setMaxX(adjExtent.getMinX() + adjustedExtentWidth);
    if (alignTopLeft) {
        adjExtent.setMinY(adjExtent.getMaxY() - adjustedExtentHeight);
    } else {
        adjExtent.setMaxY(adjExtent.getMinY() + adjustedExtentHeight);
    }

    double[] resolutions = new double[levels];
    resolutions[0] = res;

    for(int i = 1; i < levels; ++i) {
        resolutions[i] = resolutions[i - 1] / 2.0D;
    }

    return createGridSet(name, srs, adjExtent, alignTopLeft, resolutions, (double[])null, metersPerUnit, pixelSize, (String[])null, tileWidth, tileHeight, yCoordinateFirst);
}


 1536
1536

 被折叠的 条评论
为什么被折叠?
被折叠的 条评论
为什么被折叠?
 到【灌水乐园】发言


