


请先看【专栏介绍文章】:
订阅专栏即可免费查看全部文章内容,不会错过更新,进交流群免费答疑,更有红包福利哦!
本文亮点:
- Pytorch复现RetinexNet 详细教程,跑通全流程,包括数据集、模型实现,训练和测试,代码逐行注释,无论是科研还是应用,新手小白都能看懂,学习阅读毫无压力,Low-light入门必看;
- RetinexNet的理论架构和源码结合,进一步加深理解算法原理、明确训练和测试流程;
- 更换路径和相关参数即可训练自己的图像数据集;
文章目录
前言
论文题目:Deep Retinex Decomposition for Low-Light Enhancement —— 用于微光增强的深度Retinex分解
论文地址:Deep Retinex Decomposition for Low-Light Enhancement
论文源码:https://github.com/weichen582/RetinexNet(Tensorflow)
Pytorch实现:https://github.com/aasharma90/RetinexNet_PyTorch
对应的论文精读:【图像增强】论文精读:Deep Retinex Decomposition for Low-Light Enhancement(RetinexNet)
本文复现Pytorch版本的RetinexNet。
一、跑通代码 (Quick Start)
按上述Pytorch代码链接下载项目后,先查看代码结构,根据文件名称对每个文件有个大概的了解:

然后阅读readme,了解Requirements(环境、设备、所需内存等):

最后,按readme的步骤一步一步执行,接下来分别准备数据集、测试和训练。
1.1 数据集准备
下载数据集:
-
LOw Light paired dataset (LOL):Google Drive,Baidu Pan (Code:acp3)
500对真实图像,485训练,15评估。将训练集文件夹our485放到data文件夹下,验证集的low放到./data/eval/low/中。
-
Synthetic Image Pairs from Raw Images: Google Drive,Baidu Pan
1000对合成图像。将BrighteningTrain重命名为sys放到data文件夹下
-
Testing Images: Google Drive,Baidu Pan
LIME,MEF,DICM,VV等测试集(无GT,用于评估模型的泛化性能),将想要推理的图像放到./data/test/low/中。
数据集结构如下:

Low-light数据集的具体信息见文章:
1.2 推理
Linux下直接执行如下命令即可推理./data/test/low/中的暗光图像:
python predict.py
Windows下由于路径问题,需要将路径分隔符“\”转为“/”,predict.py低26行后添加:
	# 测试图像路径
    test_low_data_names = glob(args.data_dir + '/' + '*.*')

    # Windows下添加:
    test_low_data_names = [path.replace('\\', '/') for path in test_low_data_names]
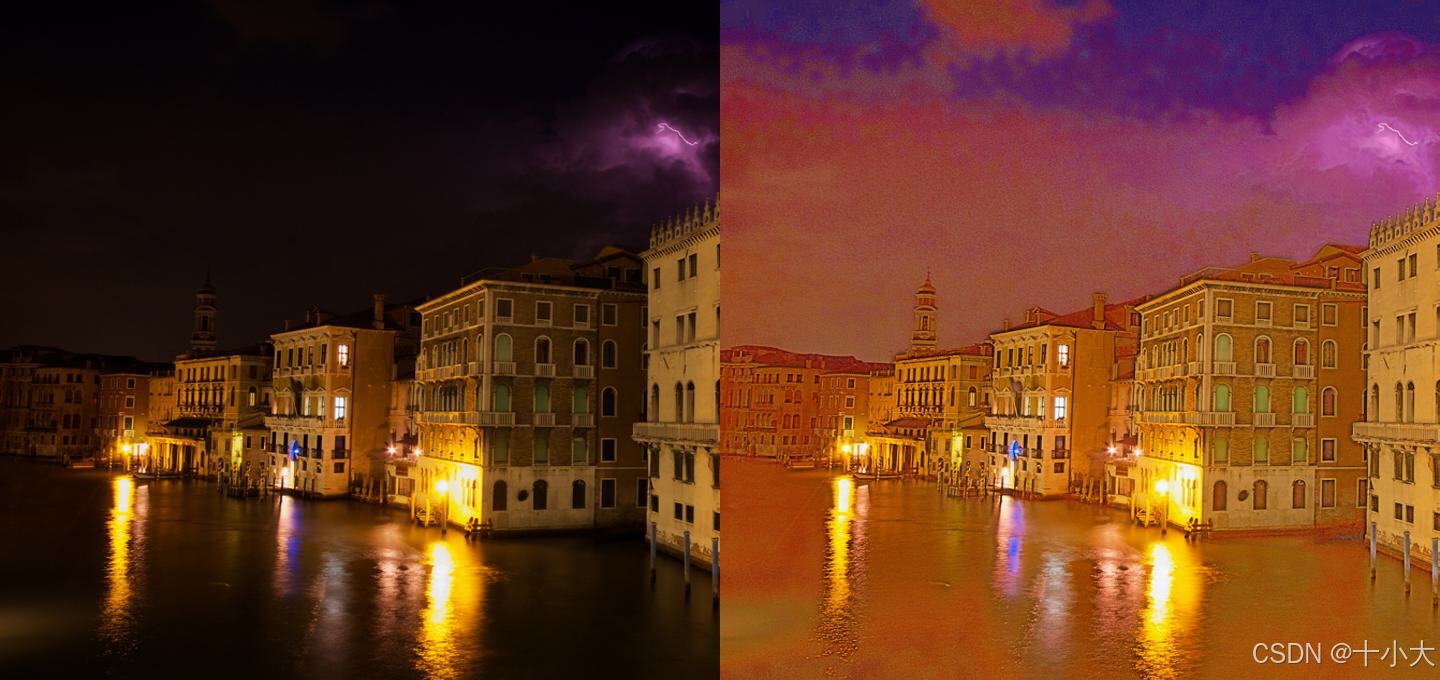
推理结果保存在./results/test/low/ 中(左侧为输入的暗光图像,右侧为增强后的结果):
1.3 训练
删除原有的模型权重,Linux下执行命令(data_dir是data的上级路径,可以直接设置为./):
python train.py --data_dir <PATH-TO-TRAIN-DIR>
Windows下训练需改train.py中的数据集路径:
    train_low_data_names = glob(args.data_dir + '/data/our485/low/*.png') + \
                           glob(args.data_dir + '/data/syn/low/*.png')
    # Windows:
    train_low_data_names = [path.replace('\\', '/') for path in train_low_data_names]
    train_low_data_names.sort()

    train_high_data_names= glob(args.data_dir + '/data/our485/high/*.png') + \
                           glob(args.data_dir + '/data/syn/high/*.png')
    # Windows:
    train_high_data_names = [path.replace('\\', '/') for path in train_high_data_names]
    train_high_data_names.sort()

    eval_low_data_names = glob(args.data_dir + '/data/eval/low/*.*')
    # Windows:
    eval_low_data_names = [path.replace('\\', '/') for path in eval_low_data_names]
模型先训练分解网络,再训练增强网络,等待训练完成,控制台输出信息,训练过程产生的文件保存在ckpts文件夹中(模型权重,如果有验证则visuals文件夹中保存验证图像,eval_Decom从左至右分别是输入、反射分量R、光照分量I,eval_Relight右侧再加上增强网络的输出和最终的重建输出)
eval_Decom:

eval_Relight:

二、代码解析
2.1 RetinexNet架构实现
本节对应model.py。
RetinexNet网络结构回顾:分解、调整、重建三部分。
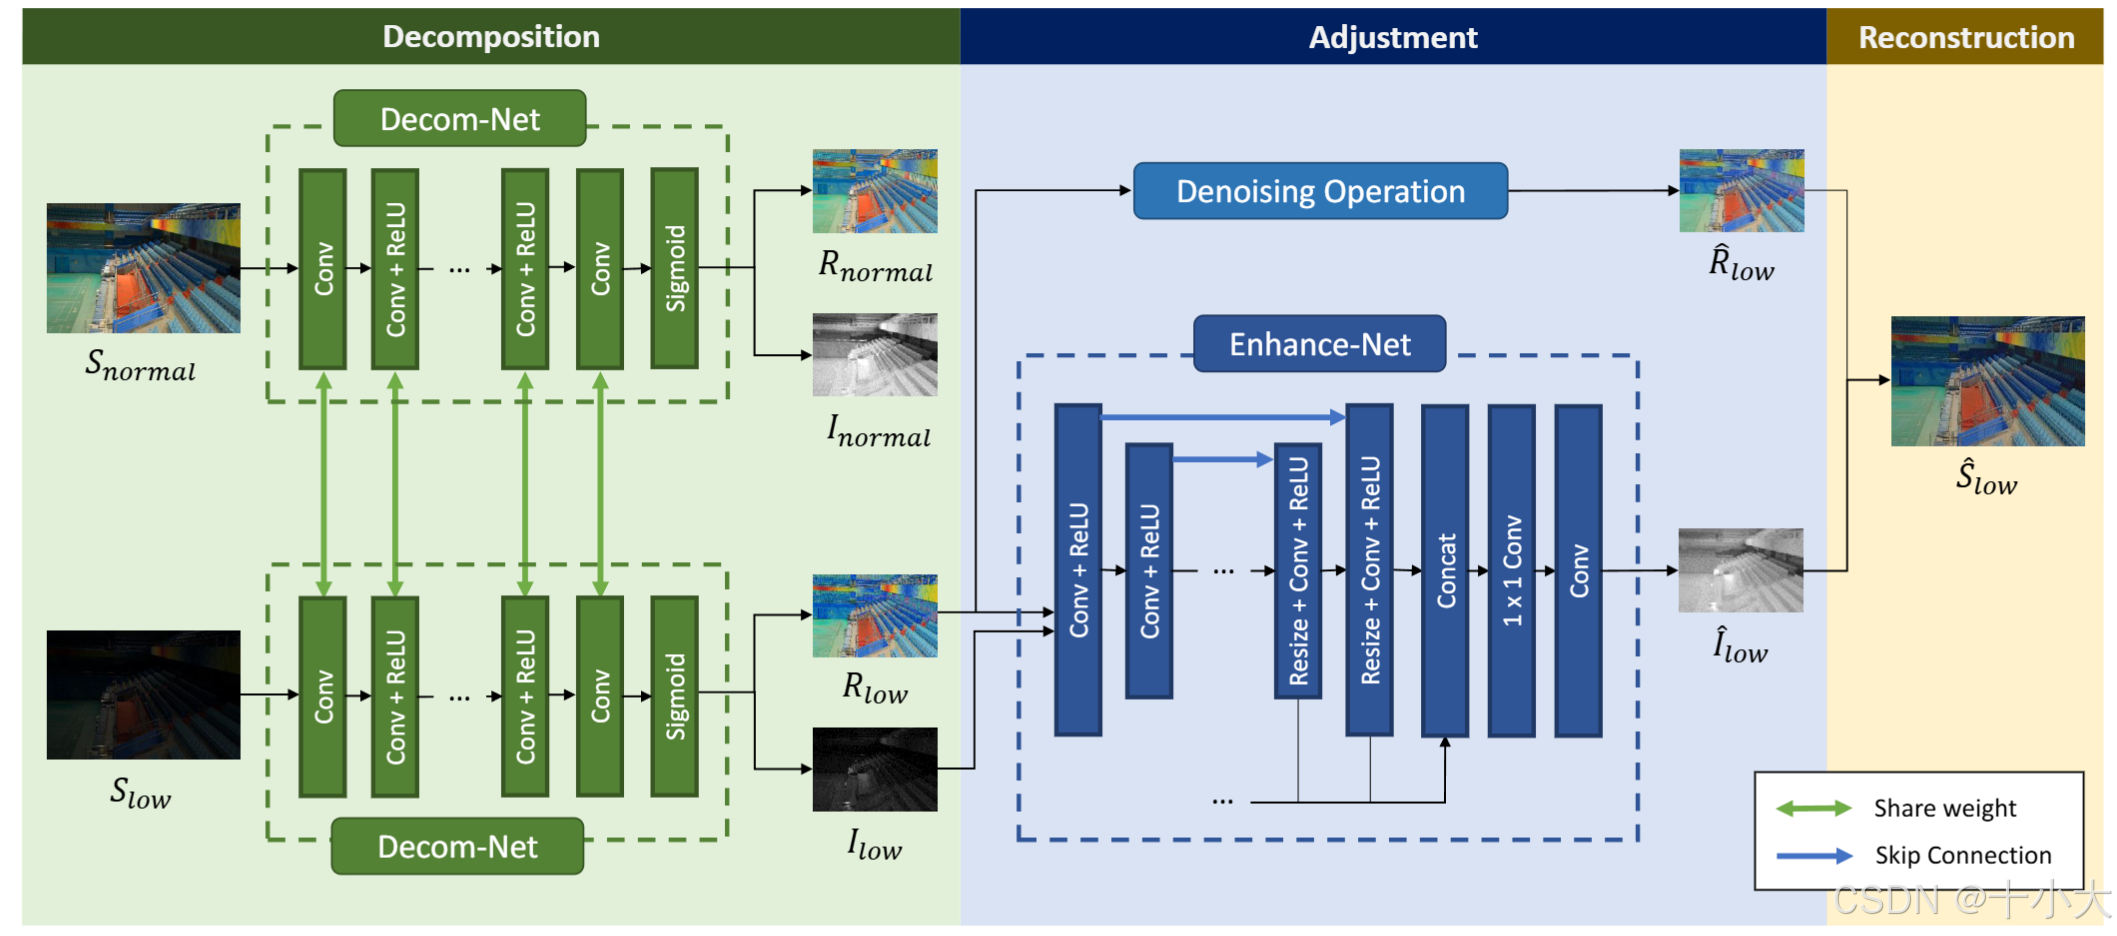
分解阶段损失函数三项,调整阶段损失函数没有反射损失ir:
根据论文4.1节所述,Decom-Net 有 5 个卷积层,在 2 个没有 ReLU 的 conv 层之间激活 ReLU。Enhance-Net 由 3 个下采样块和 3 个上采样块组成。
2.1.1 Decom-Net
DecomNet(分解网络):将图像分解为反射分量(R,物体固有属性)和光照分量(L,环境光照),使用卷积神经网络提取特征并重建分解结果。
class DecomNet(nn.Module):
    """分解网络:将图像分解为反射分量(R)和光照分量(L)"""
    def __init__(self, channel=64, kernel_size=3):
        super(DecomNet, self).__init__()
        # 浅层特征提取层:输入4通道(原图像3通道+最大值通道),输出64通道
        self.net1_conv0 = nn.Conv2d(4, channel, kernel_size * 3,
                                    padding=4, padding_mode='replicate')  # 复制填充模式
        # 激活层序列:多个卷积+ReLU组合
        self.net1_convs = nn.Sequential(
            nn.Conv2d(channel, channel, kernel_size, padding=1, padding_mode='replicate'),
            nn.ReLU(),
            nn.Conv2d(channel, channel, kernel_size, padding=1, padding_mode='replicate'),
            nn.ReLU(),
            nn.Conv2d(channel, channel, kernel_size, padding=1, padding_mode='replicate'),
            nn.ReLU(),
            nn.Conv2d(channel, channel, kernel_size, padding=1, padding_mode='replicate'),
            nn.ReLU(),
            nn.Conv2d(channel, channel, kernel_size, padding=1, padding_mode='replicate'),
            nn.ReLU()
        )
        # 最终重建层:输出4通道(3通道反射+1通道光照)
        self.net1_recon = nn.Conv2d(channel, 4, kernel_size,
                                    padding=1, padding_mode='replicate')

    def forward(self, input_im):
        # 计算输入图像的最大值通道(用于增强特征)
        input_max = torch.max(input_im, dim=1, keepdim=True)[0]
        # 拼接最大值通道和原图像(形成4通道输入)
        input_img = torch.cat((input_max, input_im), dim=1)
        # 浅层特征提取
        feats0 = self.net1_conv0(input_img)
        # 深层特征提取
        featss = self.net1_convs(feats0)
        # 重建输出
        outs = self.net1_recon(featss)
        # 反射分量(R):前3通道,sigmoid归一化到[0,1]
        R = torch.sigmoid(outs[:, 0:3, :, :])
        # 光照分量(L):第4通道,sigmoid归一化到[0,1]
        L = torch.sigmoid(outs[:, 3:4, :, :])
        return R, L
2.1.2 Enhance-Net
RelightNet(重光照网络):以分解得到的反射分量和光照分量为输入,预测光照调整量,实现对低光照图像的亮度增强,采用编码器 - 解码器结构(含下采样和上采样)。
class RelightNet(nn.Module):
    """重光照网络:调整光照分量"""
    def __init__(self, channel=64, kernel_size=3):
        super(RelightNet, self).__init__()

        self.relu = nn.ReLU()  # ReLU激活函数
        # 初始卷积层:输入4通道(反射3通道+光照1通道)
        self.net2_conv0_1 = nn.Conv2d(4, channel, kernel_size,
                                      padding=1, padding_mode='replicate')

        # 下采样卷积层(步长为2实现降采样)
        self.net2_conv1_1 = nn.Conv2d(channel, channel, kernel_size, stride=2,
                                      padding=1, padding_mode='replicate')
        self.net2_conv1_2 = nn.Conv2d(channel, channel, kernel_size, stride=2,
                                      padding=1, padding_mode='replicate')
        self.net2_conv1_3 = nn.Conv2d(channel, channel, kernel_size, stride=2,
                                      padding=1, padding_mode='replicate')

        # 上采样反卷积层(与下采样特征拼接)
        self.net2_deconv1_1 = nn.Conv2d(channel*2, channel, kernel_size,
                                       padding=1, padding_mode='replicate')
        self.net2_deconv1_2 = nn.Conv2d(channel*2, channel, kernel_size,
                                       padding=1, padding_mode='replicate')
        self.net2_deconv1_3 = nn.Conv2d(channel*2, channel, kernel_size,
                                       padding=1, padding_mode='replicate')

        # 特征融合层(1x1卷积压缩通道)
        self.net2_fusion = nn.Conv2d(channel*3, channel, kernel_size=1,
                                     padding=1, padding_mode='replicate')  # 注意:1x1卷积+padding=1可能是笔误
        # 输出层:输出1通道光照调整量
        self.net2_output = nn.Conv2d(channel, 1, kernel_size=3, padding=0)

    def forward(self, input_L, input_R):
        # 拼接反射分量和光照分量(4通道输入)
        input_img = torch.cat((input_R, input_L), dim=1)
        # 初始特征提取
        out0 = self.net2_conv0_1(input_img)
        # 下采样过程(模拟编码器)
        out1 = self.relu(self.net2_conv1_1(out0))  # 第一次下采样
        out2 = self.relu(self.net2_conv1_2(out1))  # 第二次下采样
        out3 = self.relu(self.net2_conv1_3(out2))  # 第三次下采样

        # 上采样过程(模拟解码器)
        out3_up = F.interpolate(out3, size=(out2.size()[2], out2.size()[3]))  # 上采样到out2尺寸
        deconv1 = self.relu(self.net2_deconv1_1(torch.cat((out3_up, out2), dim=1)))  # 与out2拼接
        deconv1_up = F.interpolate(deconv1, size=(out1.size()[2], out1.size()[3]))  # 上采样到out1尺寸
        deconv2 = self.relu(self.net2_deconv1_2(torch.cat((deconv1_up, out1), dim=1)))  # 与out1拼接
        deconv2_up = F.interpolate(deconv2, size=(out0.size()[2], out0.size()[3]))  # 上采样到out0尺寸
        deconv3 = self.relu(self.net2_deconv1_3(torch.cat((deconv2_up, out0), dim=1)))  # 与out0拼接

        # 多尺度特征融合
        deconv1_rs = F.interpolate(deconv1, size=(input_R.size()[2], input_R.size()[3]))  # 恢复到输入尺寸
        deconv2_rs = F.interpolate(deconv2, size=(input_R.size()[2], input_R.size()[3]))
        feats_all = torch.cat((deconv1_rs, deconv2_rs, deconv3), dim=1)  # 拼接多尺度特征
        feats_fus = self.net2_fusion(feats_all)  # 特征融合
        output = self.net2_output(feats_fus)  # 输出光照调整量
        return output
2.1.3 RetinexNet
RetinexNet(主网络):整合上述两个子网络,实现端到端的低光照增强。
class RetinexNet(nn.Module):
"""Retinex网络:整合分解网络和重光照网络"""
def __init__(self):
super(RetinexNet, self).__init__()
self.DecomNet = DecomNet() # 实例化分解网络
self.RelightNet = RelightNet() # 实例化重光照网络
def forward(self, input_low, input_high):
# 将输入转为GPU上的Variable
input_low = Variable(torch.FloatTensor(torch.from_numpy(input_low))).cuda()
input_high = Variable(torch.FloatTensor(torch.from_numpy(input_high))).cuda()
# 分解低光照和高光照图像
R_low, I_low = self.DecomNet(input_low)
R_high, I_high = self.DecomNet(input_high)
# 计算光照调整量
I_delta = self.RelightNet(I_low, R_low)
# 将单通道光照分量扩展为3通道(与反射分量匹配)
I_low_3 = torch.cat((I_low, I_low, I_low), dim=1)
I_high_3 = torch.cat((I_high, I_high, I_high), dim=1)
I_delta_3 = torch.cat((I_delta, I_delta, I_delta), dim=1)
# 计算损失函数
# 重建损失:分解结果应重建原始图像
self.recon_loss_low = F.l1_loss(R_low * I_low_3, input_low)
self.recon_loss_high = F.l1_loss(R_high * I_high_3, input_high)
# 互重建损失:交叉验证分解的一致性
self.recon_loss_mutal_low = F.l1_loss(R_high * I_low_3, input_low)
self.recon_loss_mutal_high = F.l1_loss(R_low * I_high_3, input_high)
# 反射分量一致性损失:高低光照图像的反射分量应相近
self.equal_R_loss = F.l1_loss(R_low, R_high.detach()) # detach()固定R_high不参与梯度计算
# 重光照损失:调整后的光照应使低光照图像接近高光照图像
self.relight_loss = F.l1_loss(R_low * I_delta_3, input_high)
# 光照平滑损失:光照变化应与反射分量的边缘对齐
self.Ismooth_loss_low = self.smooth(I_low, R_low)
self.Ismooth_loss_high = self.smooth(I_high, R_high)
self.Ismooth_loss_delta = self.smooth(I_delta, R_low)
# 分解阶段总损失
self.loss_Decom = self.recon_loss_low + \
self.recon_loss_high + \
0.001 * self.recon_loss_mutal_low + \
0.001 * self.recon_loss_mutal_high + \
0.1 * self.Ismooth_loss_low + \
0.1 * self.Ismooth_loss_high + \
0.01 * self.equal_R_loss
# 重光照阶段总损失
self.loss_Relight = self.relight_loss + \
3 * self.Ismooth_loss_delta
# 保存输出结果( detach()脱离计算图,cpu()转移到CPU )
self.output_R_low = R_low.detach().cpu()
self.output_I_low = I_low_3.detach().cpu()
self.output_I_delta = I_delta_3.detach().cpu()
self.output_S = R_low.detach().cpu() * I_delta_3.detach().cpu()
def gradient(self, input_tensor, direction):
"""计算输入张量在x或y方向的梯度"""
# 定义x方向平滑核(用于计算梯度)
self.smooth_kernel_x = torch.FloatTensor([[0, 0], [-1, 1]]).view((1, 1, 2, 2)).cuda()
# y方向平滑核(转置x方向核)
self.smooth_kernel_y = torch.transpose(self.smooth_kernel_x, 2, 3)
if direction == "x":
kernel = self.smooth_kernel_x
elif direction == "y":
kernel = self.smooth_kernel_y
# 卷积计算梯度并取绝对值
grad_out = torch.abs(F.conv2d(input_tensor, kernel, stride=1, padding=1))
return grad_out
def ave_gradient(self, input_tensor, direction):
"""计算梯度的平均值(用于平滑损失)"""
return F.avg_pool2d(self.gradient(input_tensor, direction),
kernel_size=3, stride=1, padding=1)
def smooth(self, input_I, input_R):
"""计算光照平滑损失:光照梯度应与反射分量的梯度负相关"""
# 将反射分量转为灰度图
input_R = 0.299 * input_R[:, 0, :, :] + 0.587 * input_R[:, 1, :, :] + 0.114 * input_R[:, 2, :, :]
input_R = torch.unsqueeze(input_R, dim=1) # 增加通道维度
# 光照梯度 * exp(-10*反射梯度):反射边缘处光照变化应较小
return torch.mean(input_I, "x") * torch.exp(-10 * self.ave_gradient(input_R, "x")) +
self.gradient(input_I, "y") * torch.exp(-10 * self.ave_gradient(input_R, "y"))).mean()
def evaluate(self, epoch_num, eval_low_data_names, vis_dir, train_phase):
"""评估模型并可视化结果"""
print("Evaluating for phase %s / epoch %d..." % (train_phase, epoch_num))
for idx in range(len(eval_low_data_names)):
# 加载评估图像
eval_low_img = Image.open(eval_low_data_names[idx])
eval_low_img = np.array(eval_low_img, dtype="float32") / 255.0 # 归一化到[0,1]
eval_low_img = np.transpose(eval_low_img, (2, 0, 1)) # 转为(通道, 高, 宽)
input_low_eval = np.expand_dims(eval_low_img, axis=0) # 增加批次维度
if train_phase == "Decom":
# 分解阶段:输出反射和光照分量
self.forward(input_low_eval, input_low_eval)
result_1 = self.output_R_low # 反射分量
result_2 = self.output_I_low # 光照分量
input = np.squeeze(input_low_eval)
result_1 = np.squeeze(result_1)
result_2 = np.squeeze(result_2)
cat_image = np.concatenate([input, result_1, result_2], axis=2) # 拼接可视化
if train_phase == "Relight":
# 重光照阶段:输出更多中间结果
self.forward(input_low_eval, input_low_eval)
result_1 = self.output_R_low
result_2 = self.output_I_low
result_3 = self.output_I_delta
result_4 = self.output_S # 最终增强结果
input = np.squeeze(input_low_eval)
result_1 = np.squeeze(result_1)
result_2 = np.squeeze(result_2)
result_3 = np.squeeze(result_3)
result_4 = np.squeeze(result_4)
cat_image = np.concatenate([input, result_1, result_2, result_3, result_4], axis=2)
# 保存可视化结果
cat_image = np.transpose(cat_image, (1, 2, 0)) # 转为(高, 宽, 通道)
im = Image.fromarray(np.clip(cat_image * 255.0, 0, 255.0).astype('uint8')) # 转回0-255
filepath = os.path.join(vis_dir, 'eval_%s_%d_%d.png' % (train_phase, idx + 1, epoch_num))
im.save(filepath[:-4] + '.jpg') # 保存为jpg
def save(self, iter_num, ckpt_dir):
"""保存模型权重"""
save_dir = ckpt_dir + '/' + self.train_phase + '/'
save_name = save_dir + '/' + str(iter_num) + '.tar'
if not os.path.exists(save_dir):
os.makedirs(save_dir) # 创建保存目录
if self.train_phase == 'Decom':
torch.save(self.DecomNet.state_dict(), save_name) # 保存分解网络
elif self.train_phase == 'Relight':
torch.save(self.RelightNet.state_dict(), save_name) # 保存重光照网络
def load(self, ckpt_dir):
"""加载模型权重"""
load_dir = ckpt_dir + '/' + self.train_phase + '/'
if os.path.exists(load_dir):
load_ckpts = os.listdir(load_dir)
load_ckpts.sort()
load_ckpts = sorted(load_ckpts, key=len) # 按文件名长度排序(处理数字命名)
if len(load_ckpts) > 0:
load_ckpt = load_ckpts[-1] # 取最新的权重文件
global_step = int(load_ckpt[:-4]) # 提取迭代次数
ckpt_dict = torch.load(load_dir + load_ckpt)
if self.train_phase == 'Decom':
self.DecomNet.load_state_dict(ckpt_dict)
elif self.train_phase == 'Relight':
self.RelightNet.load_state_dict(ckpt_dict)
return True, global_step
else:
return False, 0
else:
return False, 0
def train(self,
train_low_data_names,
train_high_data_names,
eval_low_data_names,
batch_size,
patch_size, epoch,
lr,
vis_dir,
ckpt_dir,
eval_every_epoch,
train_phase):
"""训练模型"""
assert len(train_low_data_names) == len(train_high_data_names) # 确保高低光照图像数量一致
numBatch = len(train_low_data_names) // int(batch_size) # 计算批次数量
# 创建优化器
self.train_op_Decom = optim.Adam(self.DecomNet.parameters(),
lr=lr[0], betas=(0.9, 0.999))
self.train_op_Relight = optim.Adam(self.RelightNet.parameters(),
lr=lr[0], betas=(0.9, 0.999))
# 加载预训练模型(如果存在)
self.train_phase = train_phase
load_model_status, global_step = self.load(ckpt_dir)
if load_model_status:
iter_num = global_step
start_epoch = global_step // numBatch
start_step = global_step % numBatch
print("Model restore success!")
else:
iter_num = 0
start_epoch = 0
start_step = 0
print("No pretrained model to restore!")
print("Start training for phase %s, with start epoch %d start iter %d : " %
(self.train_phase, start_epoch, iter_num))
start_time = time.time()
image_id = 0 # 图像索引
for epoch in range(start_epoch, epoch):
self.lr = lr[epoch] # 更新学习率
# 调整优化器学习率
for param_group in self.train_op_Decom.param_groups:
param_group['lr'] = self.lr
for param_group in self.train_op_Relight.param_groups:
param_group['lr'] = self.lr
for batch_id in range(start_step, numBatch):
# 初始化批次数据
batch_input_low = np.zeros((batch_size, 3, patch_size, patch_size), dtype="float32")
batch_input_high = np.zeros((batch_size, 3, patch_size, patch_size), dtype="float32")
for patch_id in range(batch_size):
# 加载图像
train_low_img = Image.open(train_low_data_names[image_id])
train_low_img = np.array(train_low_img, dtype='float32') / 255.0 # 归一化
train_high_img = Image.open(train_high_data_names[image_id])
train_high_img = np.array(train_high_img, dtype='float32') / 255.0
# 随机裁剪补丁
h, w, _ = train_low_img.shape
x = random.randint(0, h - patch_size)
y = random.randint(0, w - patch_size)
train_low_img = train_low_img[x: x + patch_size, y: y + patch_size, :]
train_high_img = train_high_img[x: x + patch_size, y: y + patch_size, :]
# 数据增强
if random.random() < 0.5: # 上下翻转
train_low_img = np.flipud(train_low_img)
train_high_img = np.flipud(train_high_img)
if random.random() < 0.5: # 左右翻转
train_low_img = np.fliplr(train_low_img)
train_high_img = np.fliplr(train_high_img)
rot_type = random.randint(1, 4) # 随机旋转
if random.random() < 0.5:
train_low_img = np.rot90(train_low_img, rot_type)
train_high_img = np.rot90(train_high_img, rot_type)
# 转为张量格式(通道优先)
train_low_img = np.transpose(train_low_img, (2, 0, 1))
train_high_img = np.transpose(train_high_img, (2, 0, 1))
# 填充批次数据
batch_input_low[patch_id, :, :, :] = train_low_img
batch_input_high[patch_id, :, :, :] = train_high_img
self.input_low = batch_input_low
self.input_high = batch_input_high
# 更新图像索引(循环)
image_id = (image_id + 1) % len(train_low_data_names)
if image_id == 0: # 每轮结束打乱数据
tmp = list(zip(train_low_data_names, train_high_data_names))
random.shuffle(list(tmp))
train_low_data_names, train_high_data_names = zip(*tmp)
# 前向传播计算损失
self.forward(self.input_low, self.input_high)
if self.train_phase == "Decom": # 训练分解网络
self.train_op_Decom.zero_grad() # 清零梯度
self.loss_Decom.backward() # 反向传播
self.train_op_Decom.step() # 更新参数
loss = self.loss_Decom.item()
elif self.train_phase == "Relight": # 训练重光照网络
self.train_op_Relight.zero_grad()
self.loss_Relight.backward()
self.train_op_Relight.step()
loss = self.loss_Relight.item()
# 打印训练信息
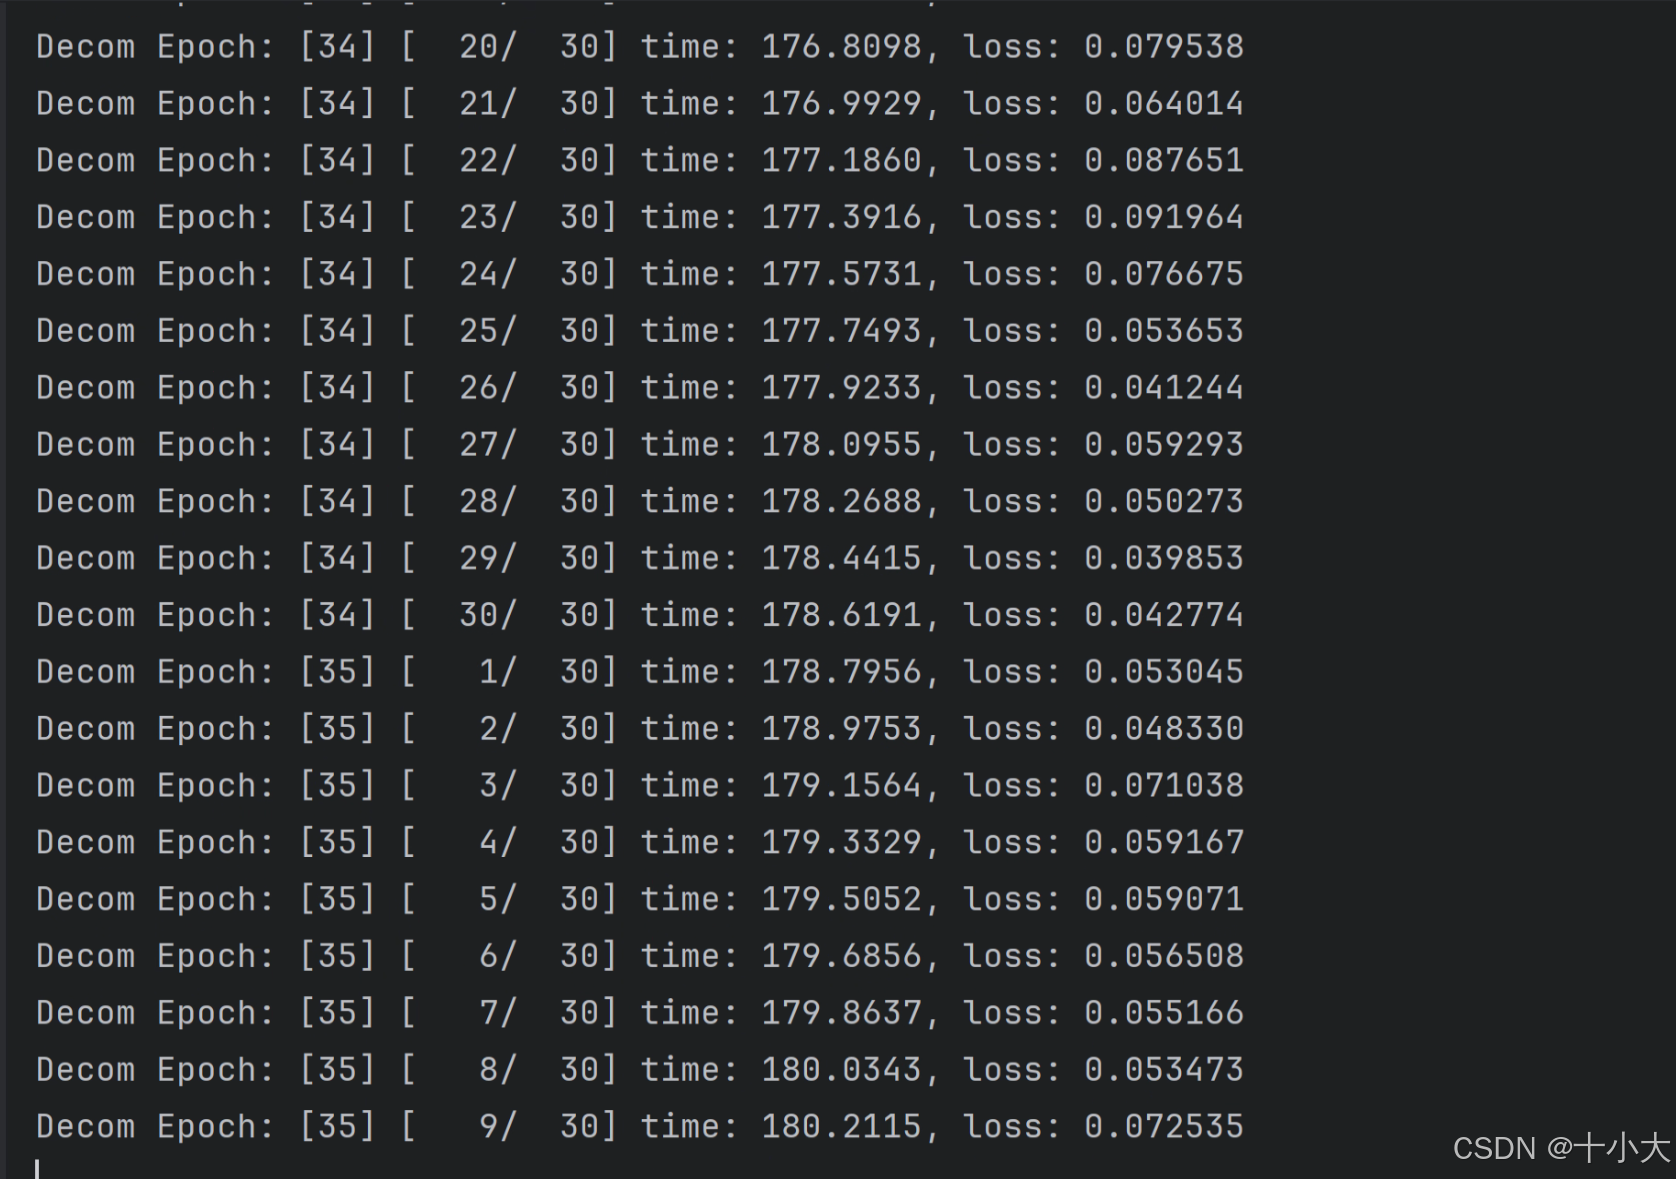
print("%s Epoch: [%2d] [%4d/%4d] time: %4.4f, loss: %.6f" \
% (train_phase, epoch + 1, batch_id + 1, numBatch, time.time() - start_time, loss))
iter_num += 1
# 定期评估和保存模型
if (epoch + 1) % eval_every_epoch == 0:
self.evaluate(epoch + 1, eval_low_data_names, vis_dir=vis_dir, train_phase=train_phase)
self.save(iter_num, ckpt_dir)
print("Finished training for phase %s." % train_phase)
def predict(self,
test_low_data_names,
res_dir,
ckpt_dir):
"""使用训练好的模型进行预测"""
# 加载分解网络权重
self.train_phase = 'Decom'
load_model_status, _ = self.load(ckpt_dir)
if load_model_status:
print(self.train_phase, " : Model restore success!")
else:
print("No pretrained model to restore!")
raise Exception
# 加载重光照网络权重
self.train_phase = 'Relight'
load_model_status, _ = self.load(ckpt_dir)
if load_model_status:
print(self.train_phase, ": Model restore success!")
else:
print("No pretrained model to restore!")
raise Exception
# 是否保存反射和光照分量
save_R_L = False
# 处理测试图像
for idx in range(len(test_low_data_names)):
test_img_path = test_low_data_names[idx]
test_img_name = test_img_path.split('/')[-1]
print('Processing ', test_img_name)
# 加载并预处理图像
test_low_img = Image.open(test_img_path)
test_low_img = np.array(test_low_img, dtype="float32") / 255.0
test_low_img = np.transpose(test_low_img, (2, 0, 1))
input_low_test = np.expand_dims(test_low_img, axis=0)
# 前向传播获取结果
self.forward(input_low_test, input_low_test)
result_1 = self.output_R_low # 反射分量
result_2 = self.output_I_low # 原始光照
result_3 = self.output_I_delta # 调整后的光照
result_4 = self.output_S # 最终增强图像
# 去除批次维度
input = np.squeeze(input_low_test)
result_1 = np.squeeze(result_1)
result_2 = np.squeeze(result_2)
result_3 = np.squeeze(result_3)
result_4 = np.squeeze(result_4)
# 拼接结果(根据是否保存中间结果)
if save_R_L:
cat_image = np.concatenate([input, result_1, result_2, result_3, result_4], axis=2)
else:
cat_image = np.concatenate([input, result_4], axis=2) # 仅输入和输出
# 保存结果
cat_image = np.transpose(cat_image, (1, 2, 0))
im = Image.fromarray(np.clip(cat_image * 255.0, 0, 255.0).astype('uint8'))
filepath = res_dir + '/' + test_img_name
im.save(filepath[:-4] + '.jpg')
2.2 训练
本节对应train.py。
# 导入必要的库
import os  # 用于文件和目录操作
import argparse  # 用于解析命令行参数
from glob import glob  # 用于查找符合特定模式的文件路径
import numpy as np  # 用于数值计算
from model import RetinexNet  # 导入自定义的RetinexNet模型

# 创建命令行参数解析器
parser = argparse.ArgumentParser(description='')

# 添加命令行参数:GPU ID(-1表示使用CPU)
parser.add_argument('--gpu_id', dest='gpu_id', default="0",
                    help='GPU ID (-1 for CPU)')
# 添加命令行参数:训练轮数
parser.add_argument('--epochs', dest='epochs', type=int, default=100,
                    help='number of total epochs')
# 添加命令行参数:批处理大小
parser.add_argument('--batch_size', dest='batch_size', type=int, default=16,
                    help='number of samples in one batch')
# 添加命令行参数:图像块大小
parser.add_argument('--patch_size', dest='patch_size', type=int, default=96,
                    help='patch size')
# 添加命令行参数:初始学习率
parser.add_argument('--lr', dest='lr', type=float, default=0.001,
                    help='initial learning rate')
# 添加命令行参数:训练数据目录
parser.add_argument('--data_dir', dest='data_dir',
                    default='/disk1/aashishsharma/Datasets/RetinexNet_Dataset/',
                    help='directory storing the training data')
# 添加命令行参数:检查点保存目录
parser.add_argument('--ckpt_dir', dest='ckpt_dir', default='./ckpts/',
                    help='directory for checkpoints')

# 解析命令行参数
args = parser.parse_args()

# 定义训练函数,接收模型作为参数
def train(model):
    # 设置学习率调度:前20个epoch使用初始学习率,之后变为初始学习率的1/10
    lr = args.lr * np.ones([args.epochs])
    lr[20:] = lr[0] / 10.0

    # 获取训练低光图像路径列表(包含our485和syn两个数据集的低光图像)
    train_low_data_names = glob(args.data_dir + '/data/our485/low/*.png') + \
                           glob(args.data_dir + '/data/syn/low/*.png')
    train_low_data_names.sort()  # 排序路径列表
    # 获取训练高光图像路径列表(与低光图像一一对应)
    train_high_data_names= glob(args.data_dir + '/data/our485/high/*.png') + \
                           glob(args.data_dir + '/data/syn/high/*.png')
    train_high_data_names.sort()
    # 获取验证低光图像路径列表
    eval_low_data_names  = glob(args.data_dir + '/eval/low/*.*')
    eval_low_data_names.sort()
    # 确保低光和高光训练图像数量一致
    assert len(train_low_data_names) == len(train_high_data_names)
    # 打印训练数据数量
    print('Number of training data: %d' % len(train_low_data_names))

    # 第一阶段训练:分解(Decom)
    model.train(train_low_data_names,
                train_high_data_names,
                eval_low_data_names,
                batch_size=args.batch_size,
                patch_size=args.patch_size,
                epoch=args.epochs,
                lr=lr,
                vis_dir=args.vis_dir,  # 可视化结果保存目录
                ckpt_dir=args.ckpt_dir,  # 检查点保存目录
                eval_every_epoch=10,  # 每10个epoch进行一次验证
                train_phase="Decom")  # 训练阶段:分解

    # 第二阶段训练:重光照(Relight)
    model.train(train_low_data_names,
                train_high_data_names,
                eval_low_data_names,
                batch_size=args.batch_size,
                patch_size=args.patch_size,
                epoch=args.epochs,
                lr=lr,
                vis_dir=args.vis_dir,
                ckpt_dir=args.ckpt_dir,
                eval_every_epoch=10,
                train_phase="Relight")  # 训练阶段:重光照


# 主函数入口
if __name__ == '__main__':
    if args.gpu_id != "-1":  # 如果使用GPU
        # 创建检查点和可视化结果的保存目录
        args.vis_dir = args.ckpt_dir + '/visuals/'  # 可视化目录路径
        if not os.path.exists(args.ckpt_dir):  # 若检查点目录不存在则创建
            os.makedirs(args.ckpt_dir)
        if not os.path.exists(args.vis_dir):  # 若可视化目录不存在则创建
            os.makedirs(args.vis_dir)
        # 设置CUDA可见设备(指定使用的GPU)
        os.environ["CUDA_VISIBLE_DEVICES"] = args.gpu_id
        # 创建模型并移动到GPU
        model = RetinexNet().cuda()
        # 调用训练函数
        train(model)
    else:  # 如果指定使用CPU
        # 目前不支持CPU模式
        raise NotImplementedError
2.3 推理
本节对应predict.py。
import os  # 用于文件和目录操作
import argparse  # 用于解析命令行参数
from glob import glob  # 用于查找符合特定模式的文件路径
import numpy as np  # 用于数值计算
from model import RetinexNet  # 导入自定义的RetinexNet模型

# 创建命令行参数解析器
parser = argparse.ArgumentParser(description='')

# 添加命令行参数:GPU ID(-1表示使用CPU)
parser.add_argument('--gpu_id', dest='gpu_id',
                    default="0",
                    help='GPU ID (-1 for CPU)')
# 添加命令行参数:测试数据目录
parser.add_argument('--data_dir', dest='data_dir',
                    default='./data/test/low/',
                    help='directory storing the test data')
# 添加命令行参数:检查点目录(用于加载模型权重)
parser.add_argument('--ckpt_dir', dest='ckpt_dir',
                    default='./ckpts/',
                    help='directory for checkpoints')
# 添加命令行参数:结果保存目录
parser.add_argument('--res_dir', dest='res_dir',
                    default='./results/test/low/',
                    help='directory for saving the results')

# 解析命令行参数
args = parser.parse_args()

# 定义预测函数,接收模型作为参数
def predict(model):
    # 获取测试低光图像路径列表
    test_low_data_names  = glob(args.data_dir + '/' + '*.*')
    test_low_data_names.sort()  # 排序路径列表
    # 打印测试图像数量
    print('Number of evaluation images: %d' % len(test_low_data_names))

    # 调用模型的预测方法
    model.predict(test_low_data_names,
                res_dir=args.res_dir,  # 结果保存目录
                ckpt_dir=args.ckpt_dir)  # 检查点目录(加载模型)


# 主函数入口
if __name__ == '__main__':
    if args.gpu_id != "-1":  # 如果使用GPU
        # 创建结果保存目录(若不存在)
        if not os.path.exists(args.res_dir):
            os.makedirs(args.res_dir)
        # 设置CUDA可见设备
        os.environ["CUDA_VISIBLE_DEVICES"] = args.gpu_id
        # 创建模型并移动到GPU
        model = RetinexNet().cuda()
        # 调用预测函数
        predict(model)
    else:  # 如果指定使用CPU
        # 目前不支持CPU模式
        raise NotImplementedError
三、总结与思考
- Retinex 理论基础:理解 “图像 = 反射分量 × 光照分量” 的分解思想,这是模型设计的核心依据。
- 由于是早期的增强网络,那么改进思路显然是替换更有效地网络架构,加入注意力机制等。
参考文献BibTeX
@inproceedings{Chen2018Retinex,
 title={Deep Retinex Decomposition for Low-Light Enhancement},
 author={Chen Wei, Wenjing Wang, Wenhan Yang, Jiaying Liu},
 booktitle={British Machine Vision Conference},
 year={2018},
 organization={British Machine Vision Association}
}
至此本文结束。
如果本文对你有所帮助,请点赞收藏,并订阅专栏,这样就不会错过更新,创作不易,感谢您的支持!
点击下方👇公众号区域,扫码关注,可免费领取一份200+即插即用模块资料!


 2082
2082

 被折叠的 条评论
为什么被折叠?
被折叠的 条评论
为什么被折叠?
 到【灌水乐园】发言


