


 本文详细介绍了如何从头开始配置SpringBoot项目,包括框架搭建、端口号更改、数据库配置和驱动添加,最终实现成功运行并连接数据库。
目录
(2).maven配置,将涉及到的数据库配置到pom.xml文件中
(3)转换成maven项目,这里我的项目已经转换了,所以没有。(IDEA好像不用转)
一、目的
创建简单的springboot项目。
前提:安装好maven,配置好maven库,参考:https://blog.youkuaiyun.com/qq_36411874/article/details/93487896
二、框架搭建
这个是spring boot脚手架网站:https://start.spring.io/
在这里可以直接下载用,点击generate时就打包了一个项目。一个框框就出来了。相当于你就基于这个框框进行开发。
(1)网站主页,输入自己需要的包名称、组名称。


三、解压文档,完成下载。

四、安装自动拉取jar包
(1)使用命令行打开,shift+鼠标右键

(2)输入命令,拉取jar包
输入:mvn eclipse:eclipse 刚刚这个命令是将项目构造成eclipse能打开的项目。实际上这块也不用构造。你直接导入也是可以的。 (正常应该不需要。 )


五、拉取成功后,到eclipse导入项目
导入项目到eclipse,可以直接开发使用。


六、更改端口号
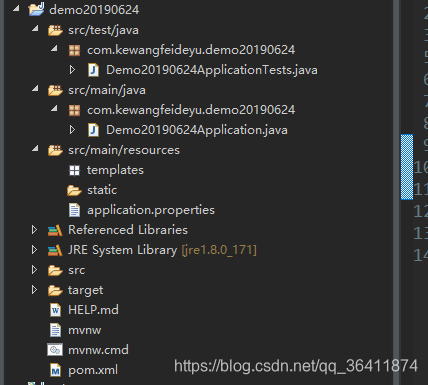
(1)查看目录结构
(2)更改端口号,避免冲突
打开application.properties,输入端口号。
代码如下:
server.port=8082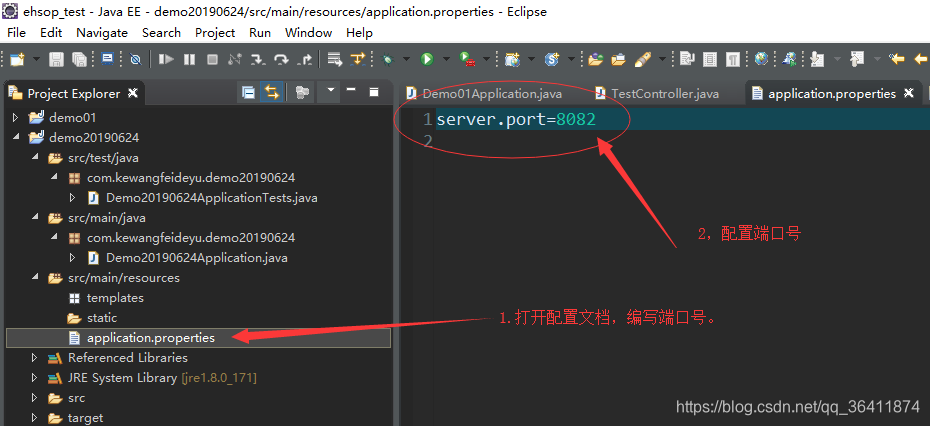
七、添加controller和修改驱动
注意添加包的位置。如果位置出现问题,则会报错。
解决方法查看:https://blog.youkuaiyun.com/qq_36411874/article/details/93486993
我这里是直接创建了controller,没有在驱动的子包下边,因此,需要更改Demo20190624Application
TestController:
package controller;

import org.springframework.web.bind.annotation.GetMapping;
import org.springframework.web.bind.annotation.RestController;

@RestController
public class TestController {
	//@getMapping = @requestMapping(method = RequestMethod.GET)。
	//@postMapping = @requestMapping(method = RequestMethod.POST)。

	@GetMapping(value="test")
	public String sayHello(){
		return "hi, 这是第一个spring boot,端口号为:8021";
	}
}
Demo20190624Application:
package com.kewangfeideyu.demo20190624;

import org.springframework.boot.SpringApplication;
import org.springframework.boot.autoconfigure.SpringBootApplication;

@SpringBootApplication(scanBasePackages="controller")
public class Demo20190624Application {

	public static void main(String[] args) {
		SpringApplication.run(Demo20190624Application.class, args);
	}

}
八、数据库配置:
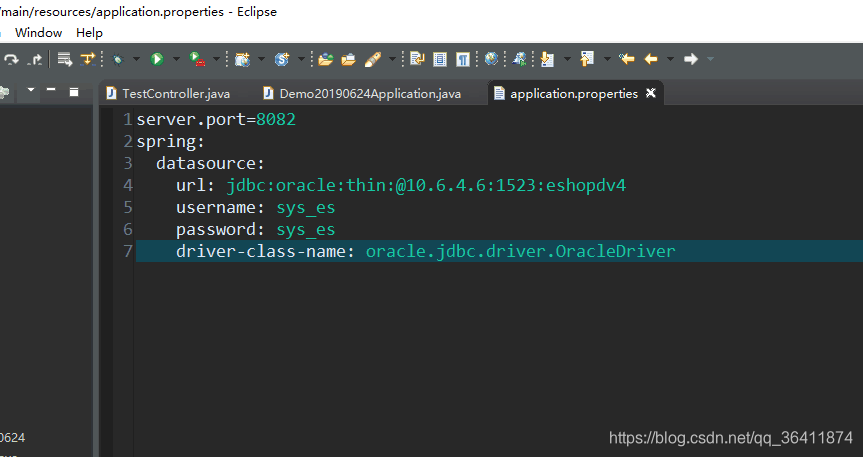
打开application.properties
(1)错误的:
如果是下边这样写,还是会报错Failed to configure a DataSource: 'url' attribute is not specified and no embedded datasource could be configured.,原因是这个是yaml的语法,不允许。
(2)正确的写法:
.properties的写法是:spring.datasource.url = xxx
spring.datasource.username = xxx
spring.datasource.password=xxx
Oracle:
server.port=8082
spring.datasource.url=jdbc:oracle:thin:@xxxxx:xxxx:数据库名称
spring.datasource.username=你的数据库名
spring.datasource.password= 数据库密码
spring.datasource.driver-class-name=oracle.jdbc.driver.OracleDriver
mysql:
mysql以及汇总版本
server.port=8082
spring.datasource.url=jdbc:mysql://localhost:3306/read_data?useUnicode=true&characterEncoding=UTF-8&useSSL=false
spring.datasource.username=你的数据库名
spring.datasource.password= 数据库密码
spring.datasource.driver-class-name=com.mysql.jdbc.Driver
#MySQL

spring.datasource.url=jdbc:mysql://localhost:3306/test?useUnicode=true&characterEncoding=utf8&zeroDateTimeBehavior=convertToNull

spring.datasource.username=xxx
spring.datasource.password=xxx
spring.datasource.driver-class-name=com.mysql.jdbc.Driver

#oracle
oracle.datasource.url=jdbc:oracle:thin:@xxx.xxx.xxx:11521/ORCL
oracle.datasource.username=xxx
oracle.datasource.password=xxx
oracle.datasource.driverClassName=oracle.jdbc.OracleDriver

#SqlServer
sqlserver.datasource.url=jdbc:sqlserver://xxx.xxx.xxx:1433;DatabaseName=test
sqlserver.datasource.username=xxx
sqlserver.datasource.password=xxx
sqlserver.datasource.driverClassName=com.microsoft.sqlserver.jdbc.SQLServerDriver
九、添加数据库驱动
你数据库驱动类要添加一下。但是oracle在maven仓库里面没有驱动类的jar。
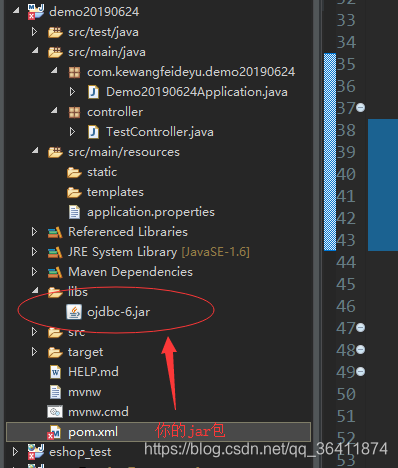
(1)导入jar包。你的jar。
创建文件夹——复制你的oracle的jar包进去——配置,首先将要添加的jar包复制到项目中的libs文件夹下。
(2).maven配置,将涉及到的数据库配置到pom.xml文件中
这里是oracle的,其他的mysql也同上,写好路径。在pom.xml中添加如下代码:
	<!--oracle-->
<dependency>
			<groupId>com.oracle</groupId>
			<artifactId>ojdbc7</artifactId>
			<version>12.1.0.2</version>
			<scope>system</scope>
			<systemPath>${project.basedir}/libs/ojdbc-6.jar</systemPath>
		</dependency>
注意scope元素和systemPath元素,其中systemPath元素指定的就是jar包在项目中的路径。因为scope的原因。system指的是在本机物理路径下导入jar,systempath可以指向c://xxx/xxx.jar。
${project.basedir} 也就是本项目下的意思嘛
注意libs文件夹下的这个jar包不需要Add to Build Path。
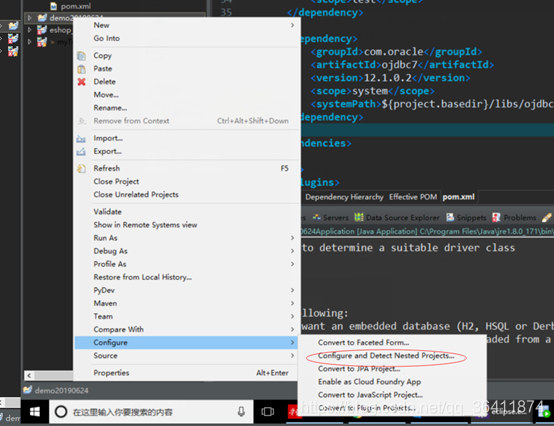
(3)转换成maven项目,这里我的项目已经转换了,所以没有。(IDEA好像不用转)
十、启动项目,成功运行

打开页面,成功啦。 可以安心的撸代码了。
本地地址:http://localhost:8082/test 或者 http://127.0.0.1:8082/test

Failed to configure a DataSource: 'url' attribute is not specified and no embe 报错查看:https://www.jianshu.com/p/836d455663da


 4732
4732

 被折叠的 条评论
为什么被折叠?
被折叠的 条评论
为什么被折叠?
 到【灌水乐园】发言


