


概述
本篇主要介绍,怎么使用STM32CubeMx工具,添加RT-Thread操作系统组件,码代码的IDE是keil。快速移植RT-Thread实时操作系统。本篇主要是面对入门人士,大神请绕道,谢谢!也可以自行去官网 RT-Thread 学习。
一、STM32CubeMx 添加RT-Thread操作系统组件
- 首先要获取 RT-Thread NANO软件包,链接
二、打开STM32CubeMx
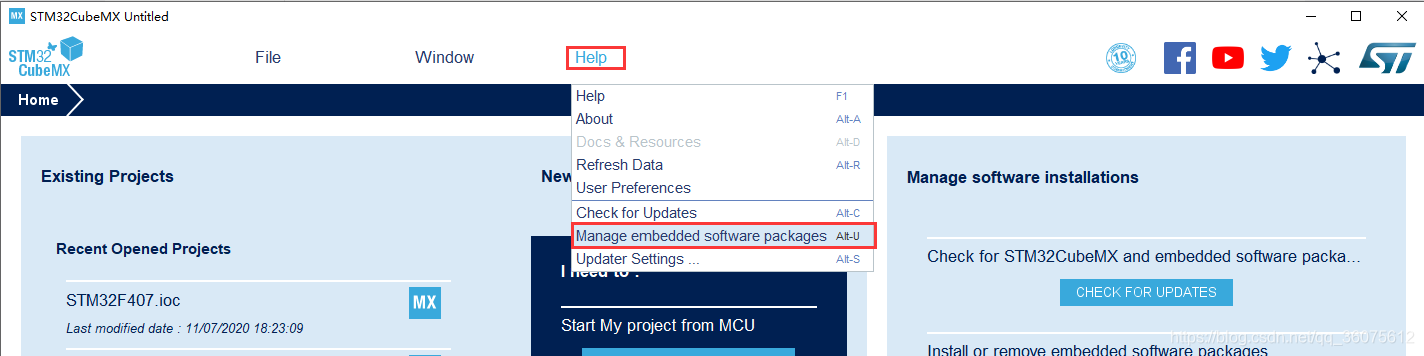
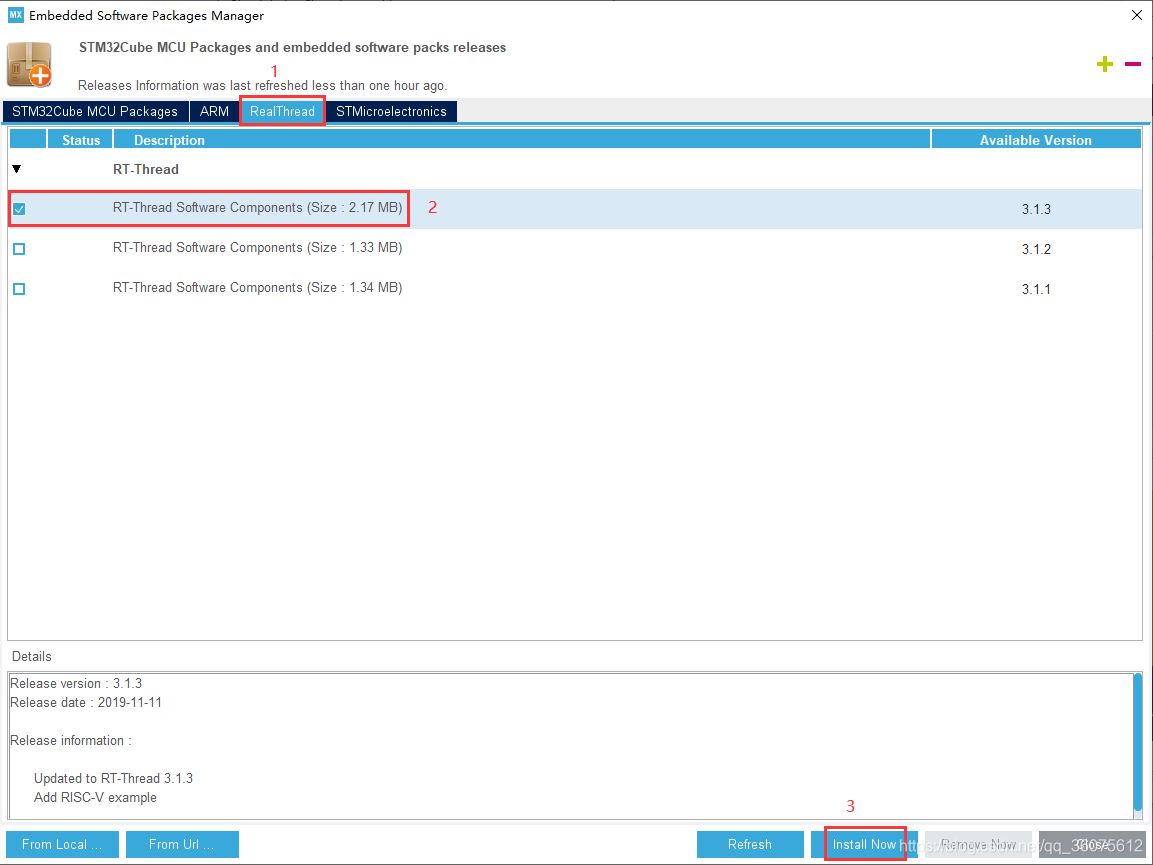
- 操作步骤 (Help -> Manage embedded software packages)
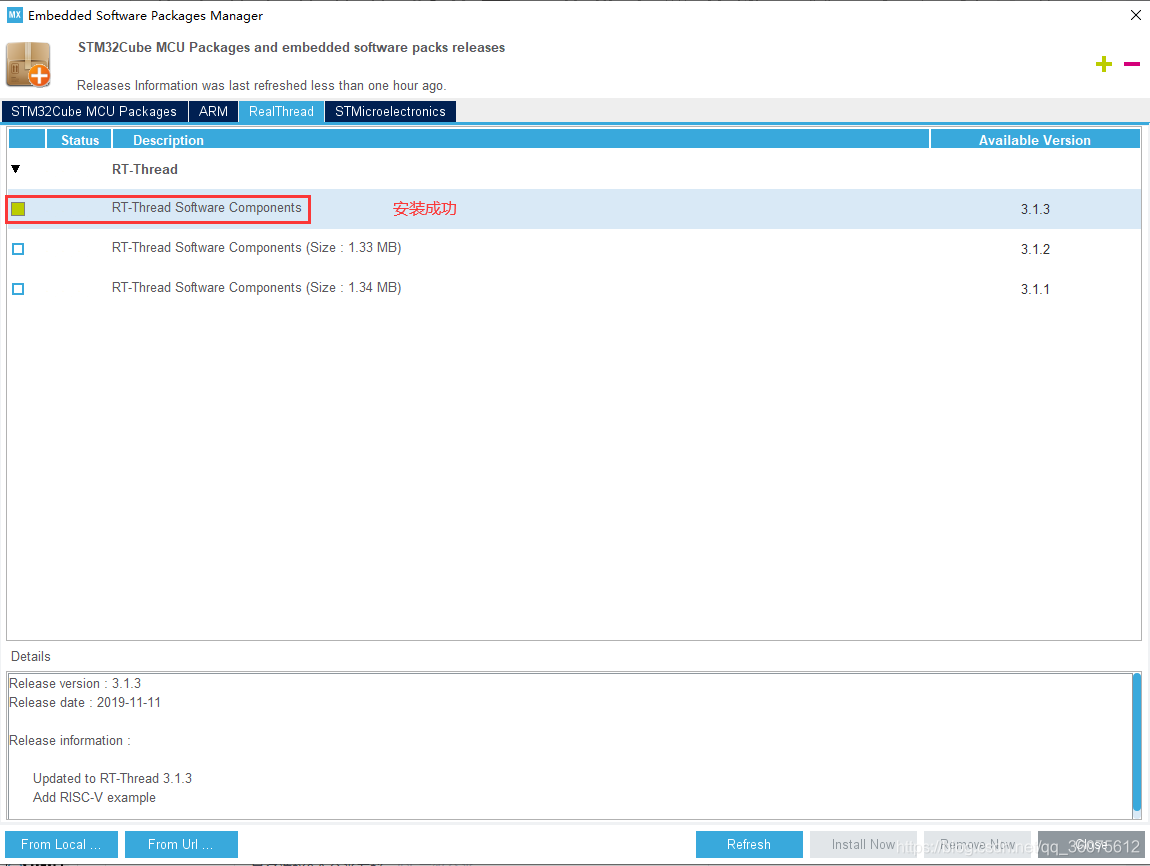
- 添加NANO软件包
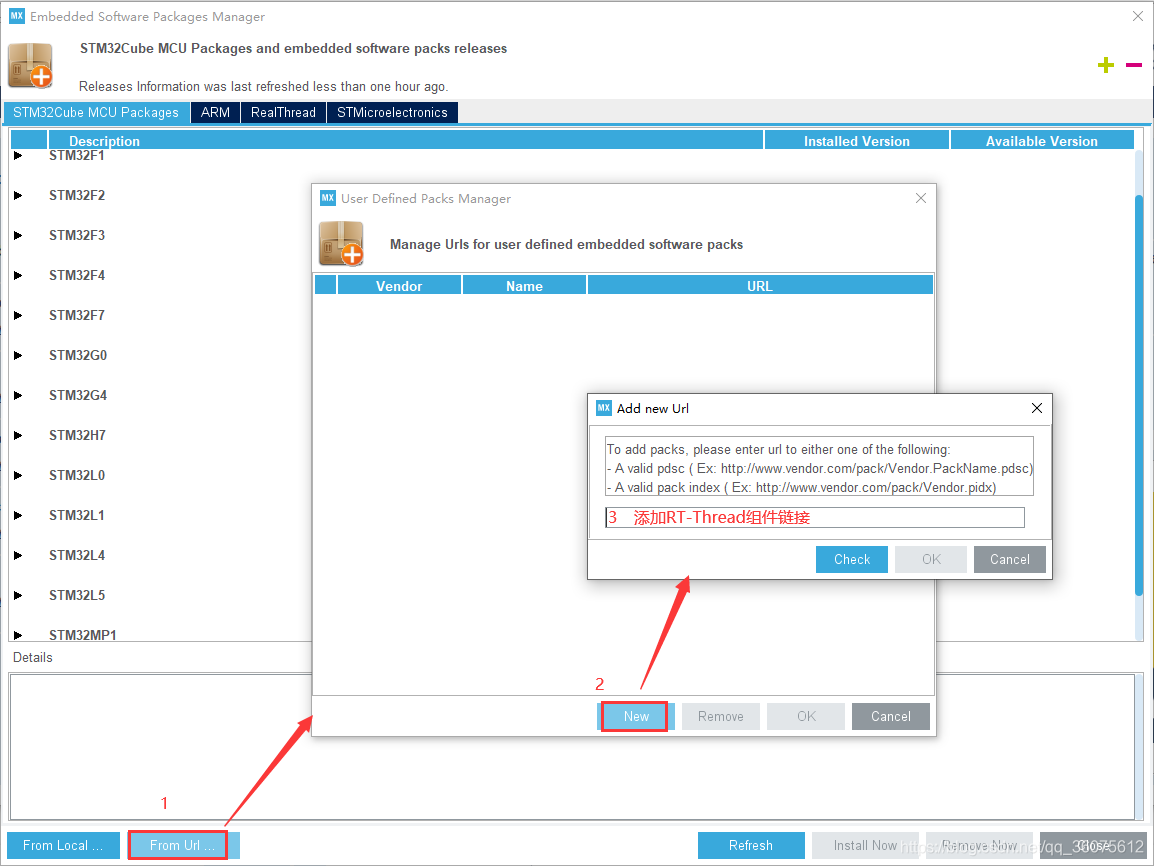
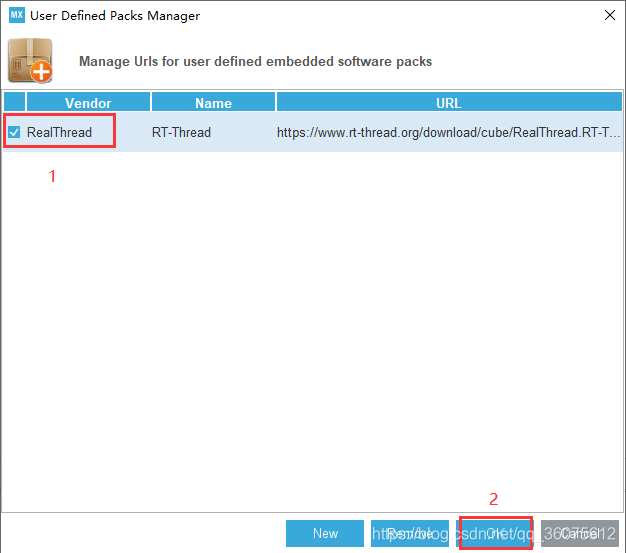
- 添加NANO软件包链接

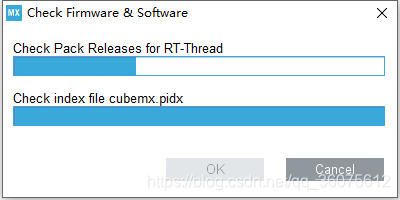
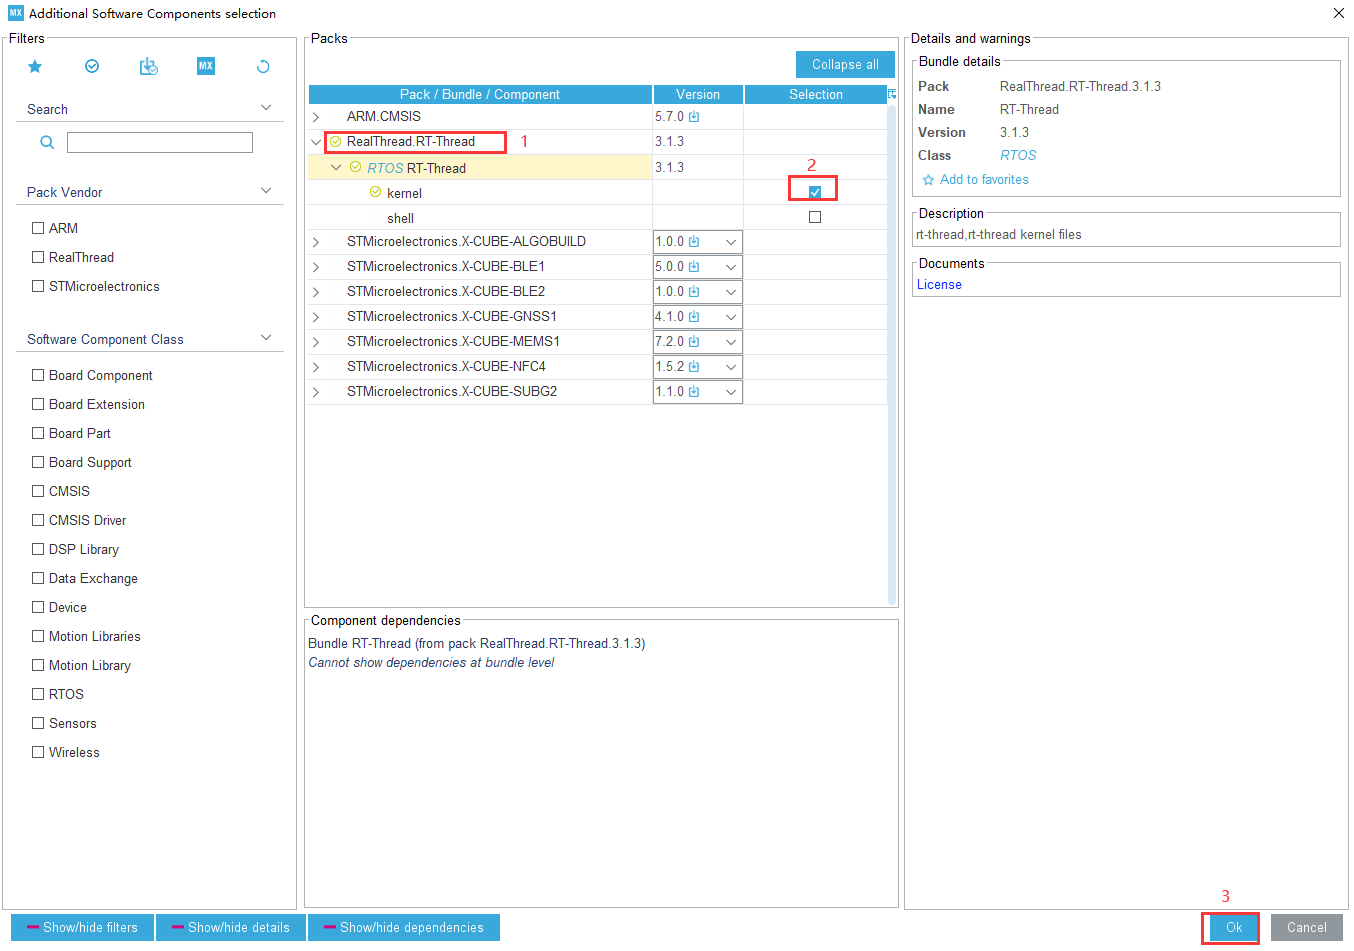
- 添加software packs
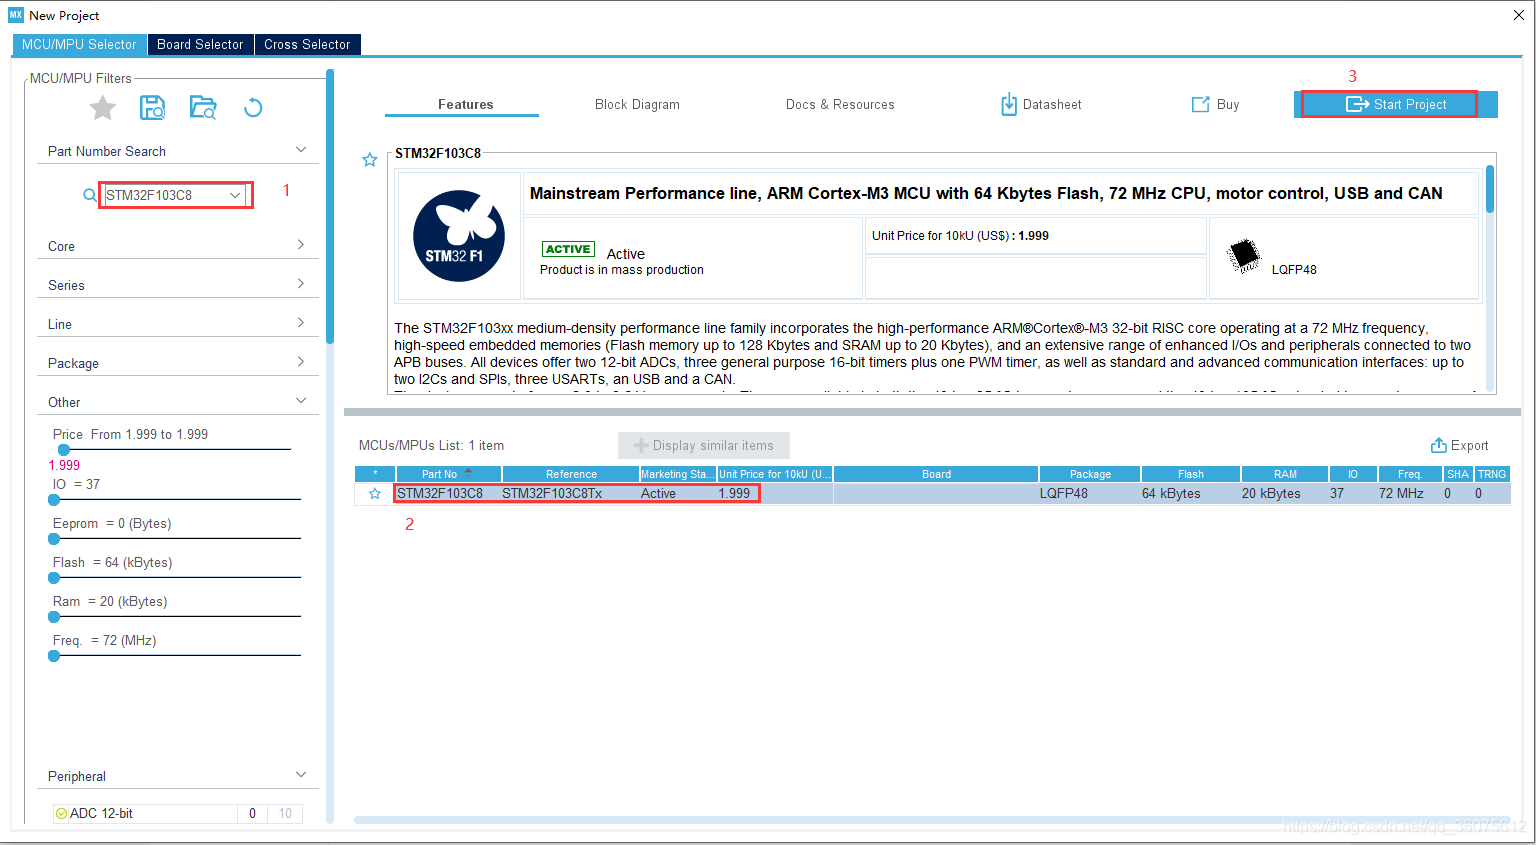
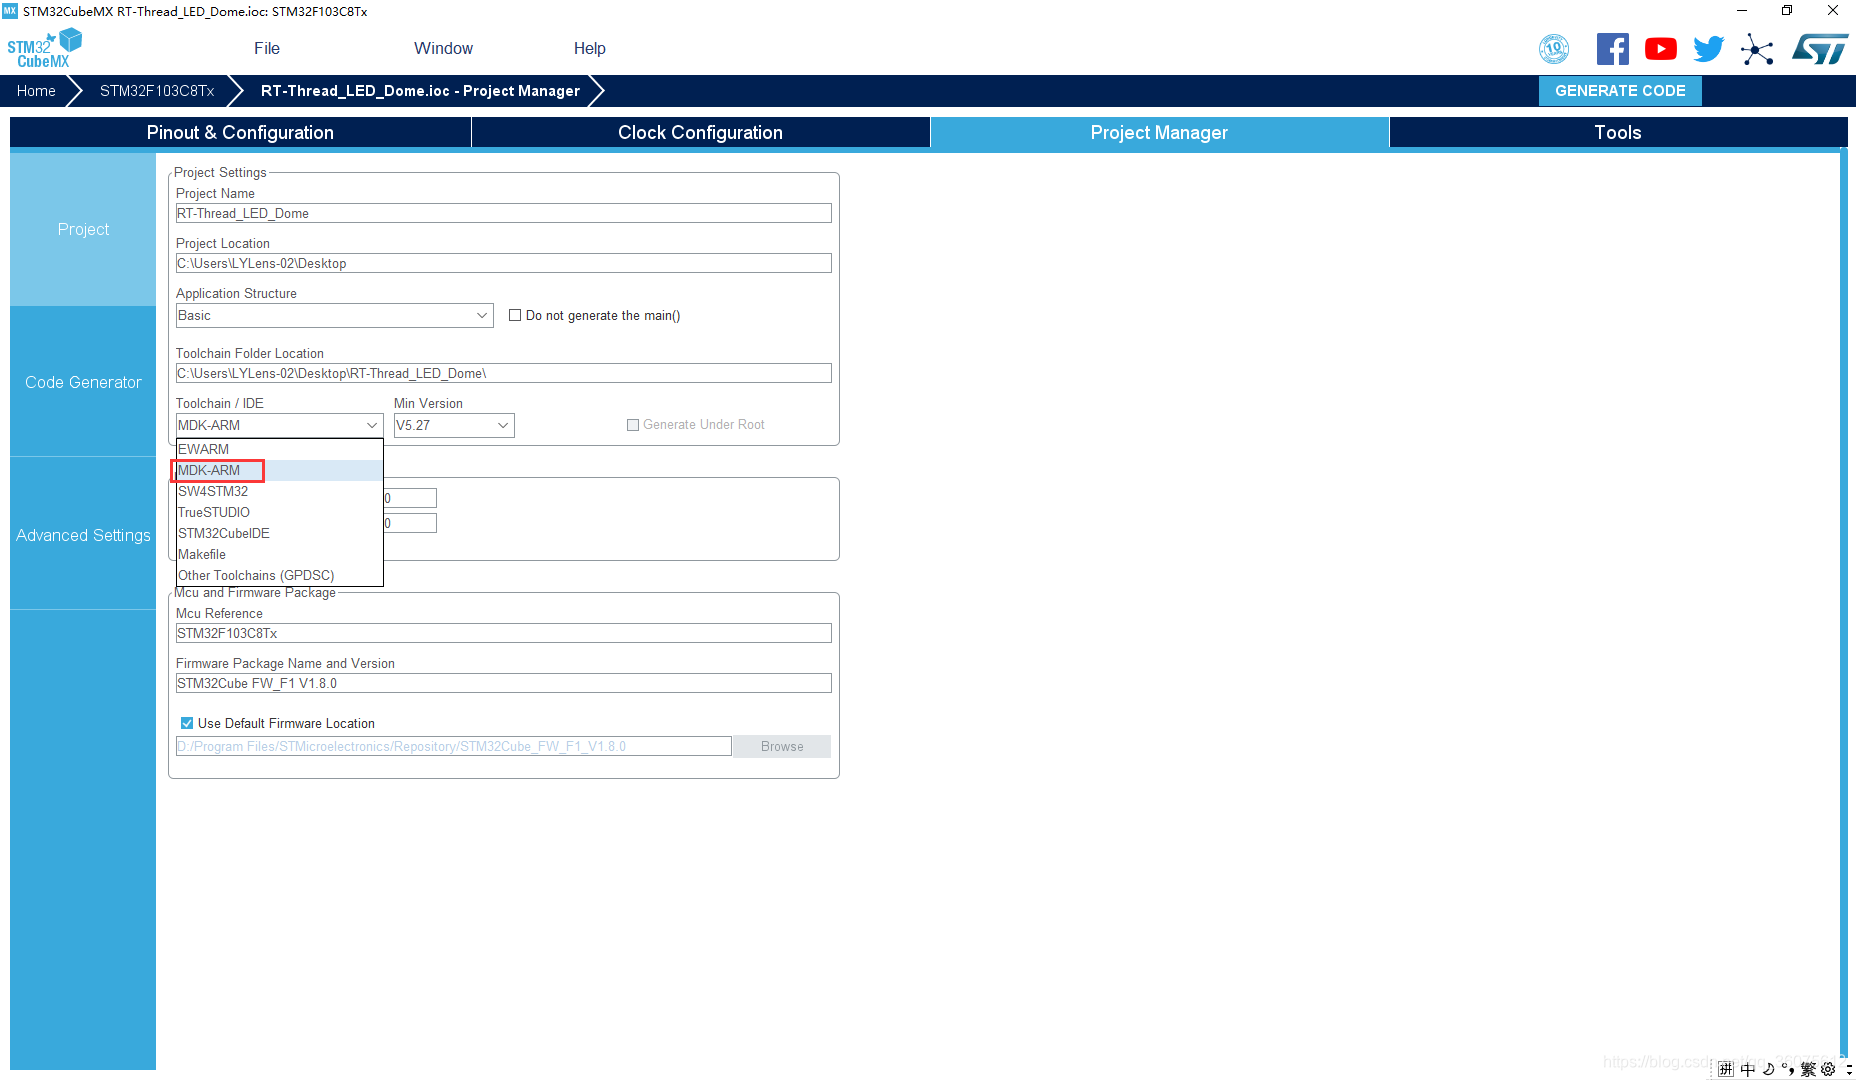
- 创建工程
- 以上步骤操作完成,接下来就是借助STM32CubeMx工具生成工程代码。见以下介绍 ^_^
- 先实现点亮一盏灯功能。
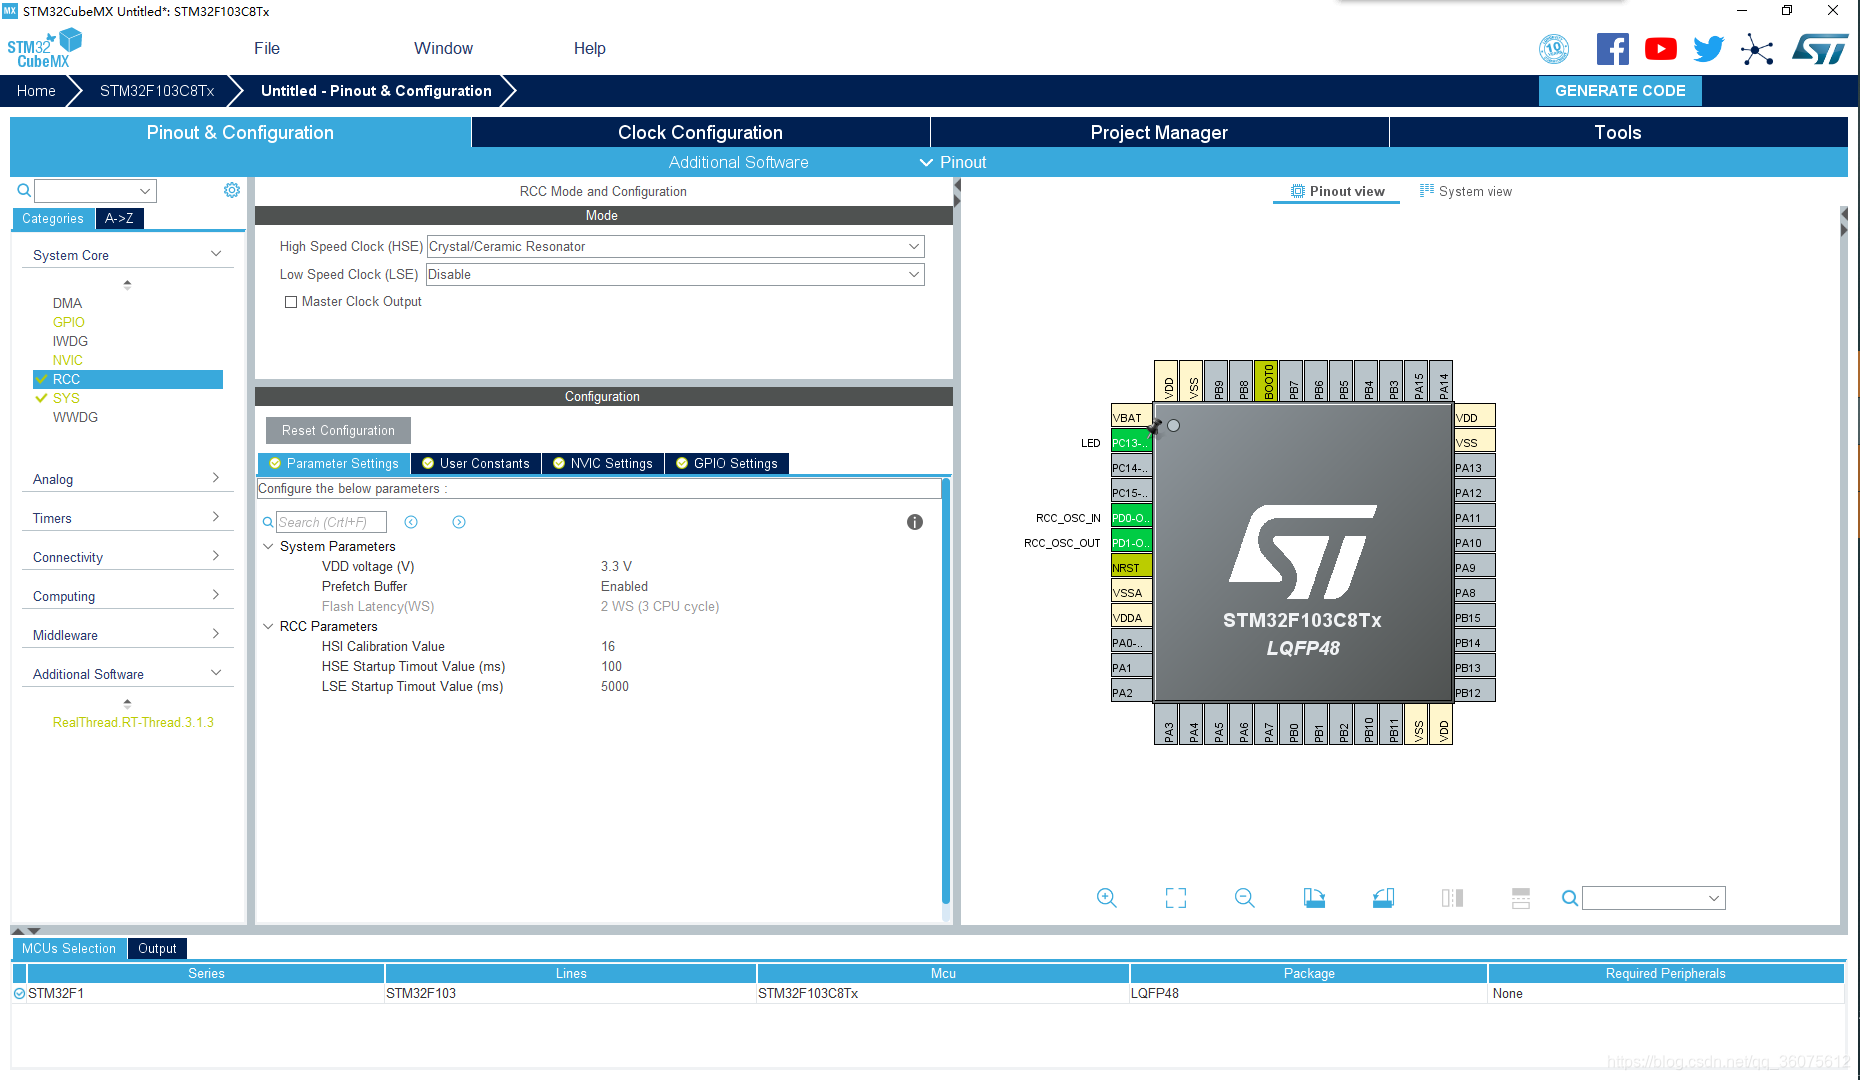
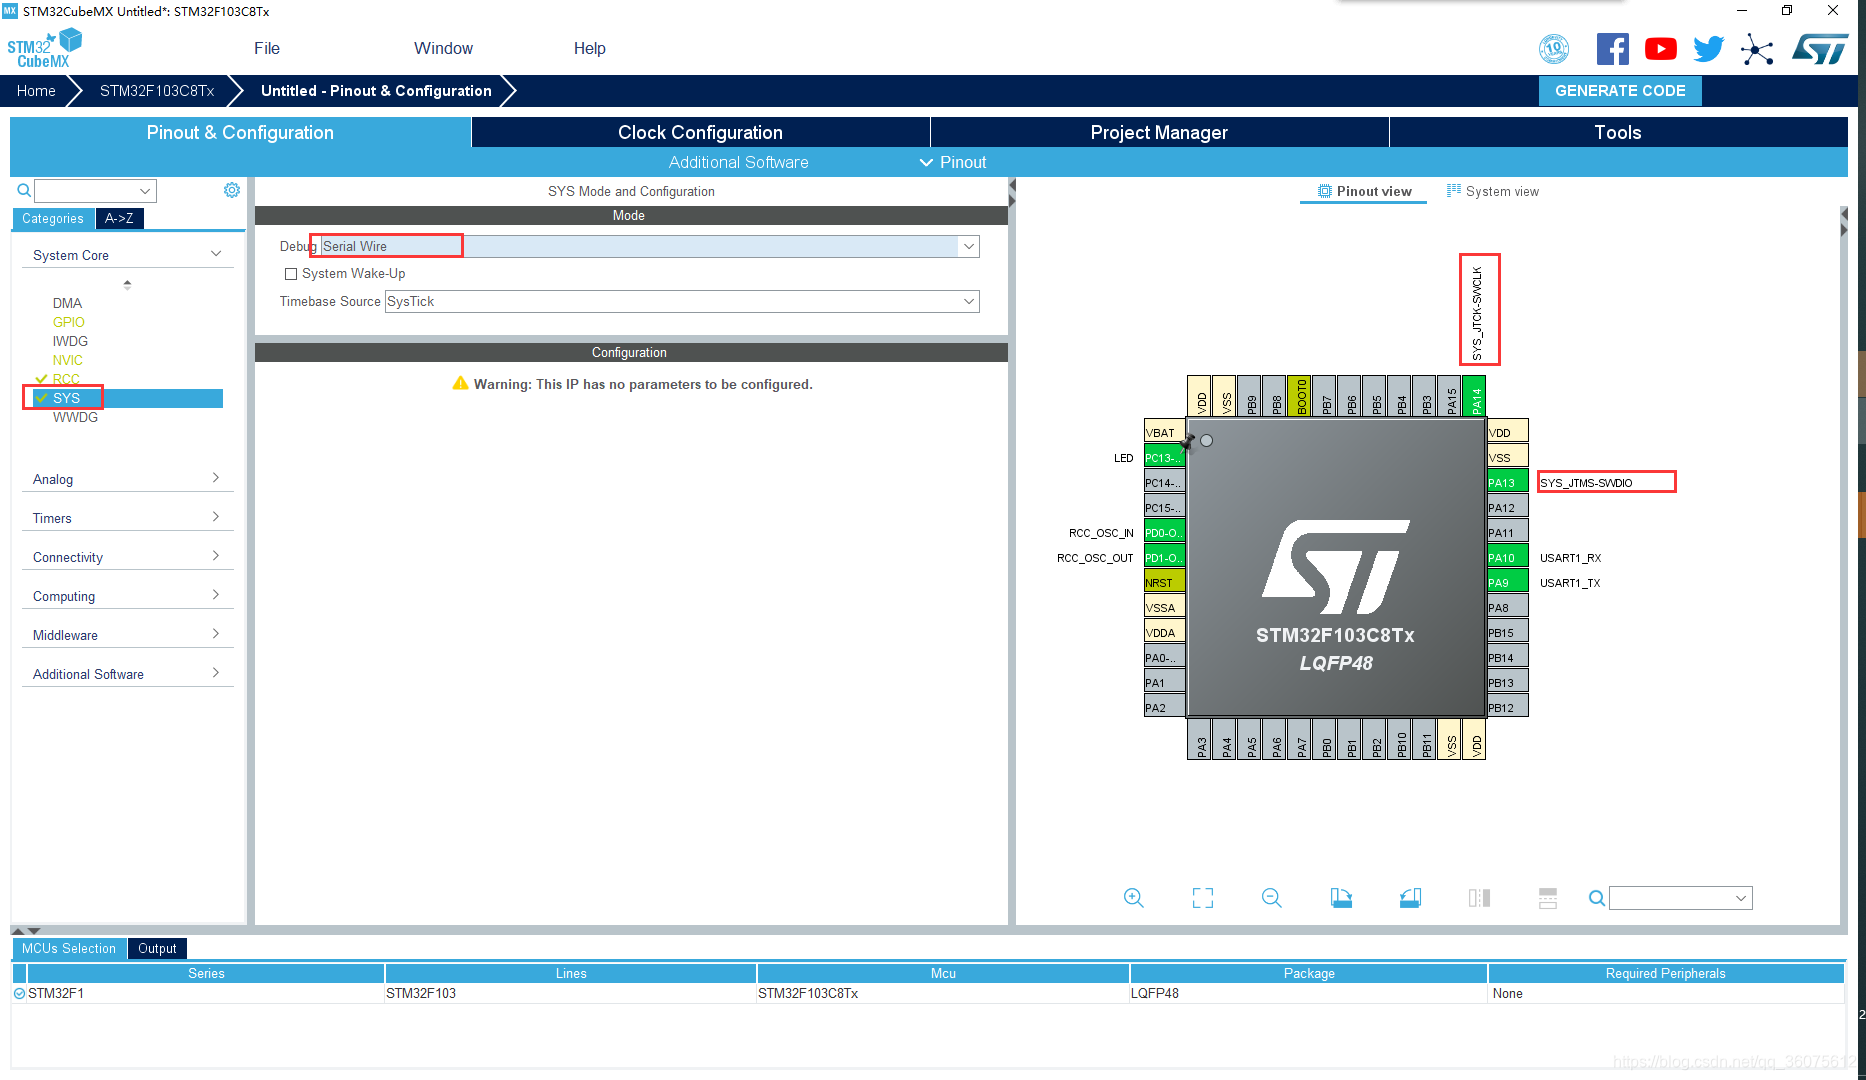
配置串口调试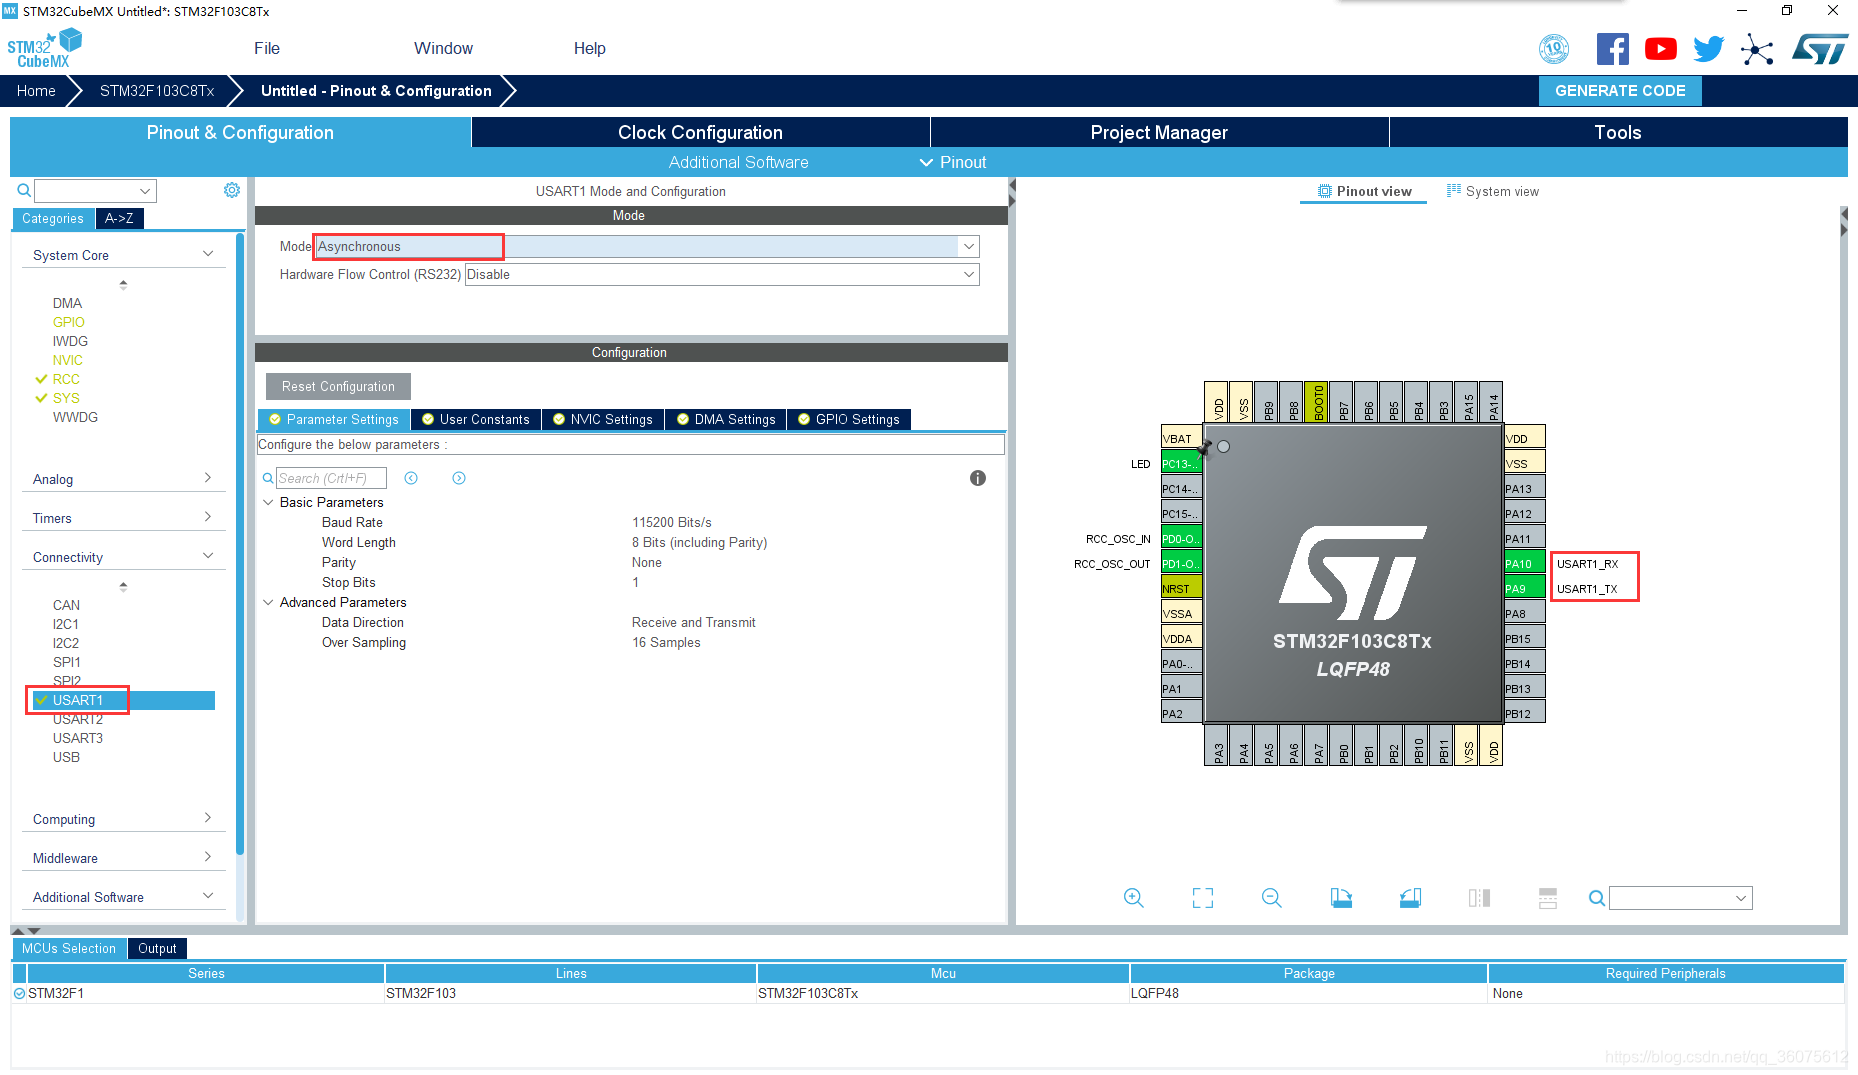
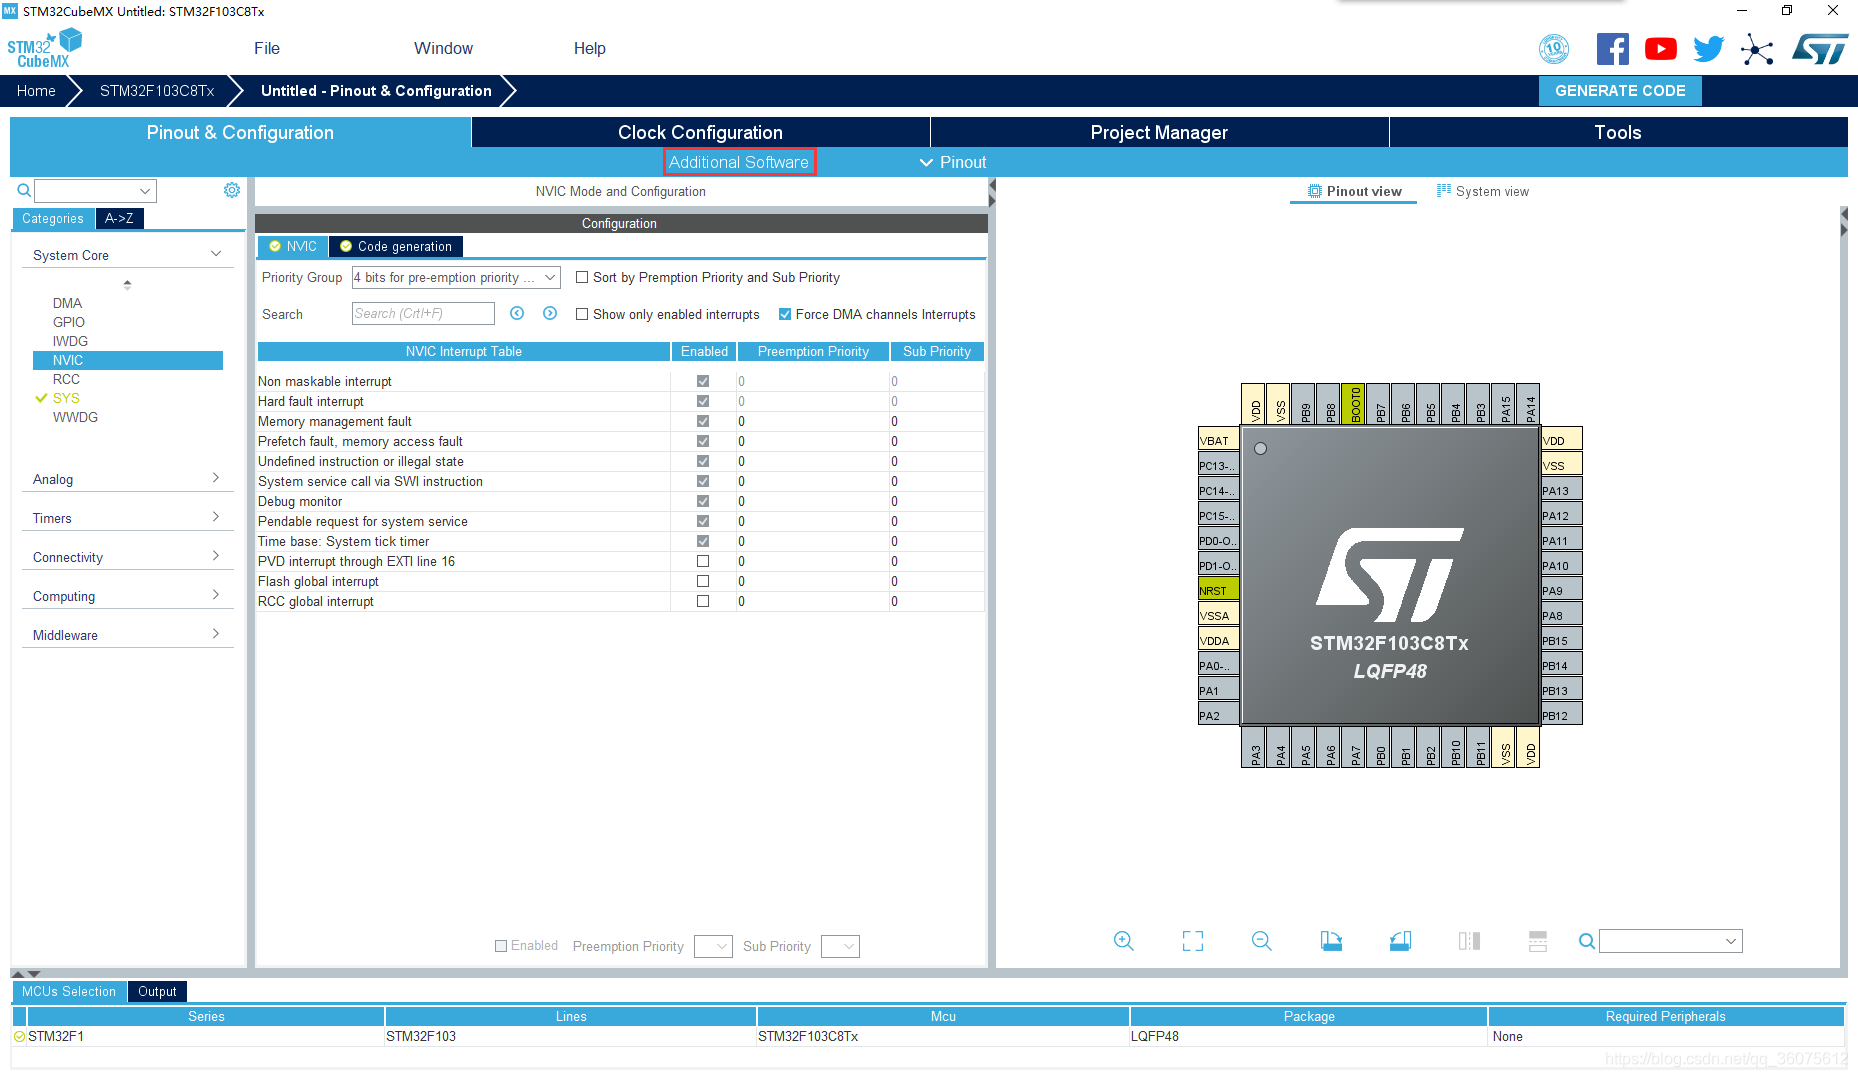
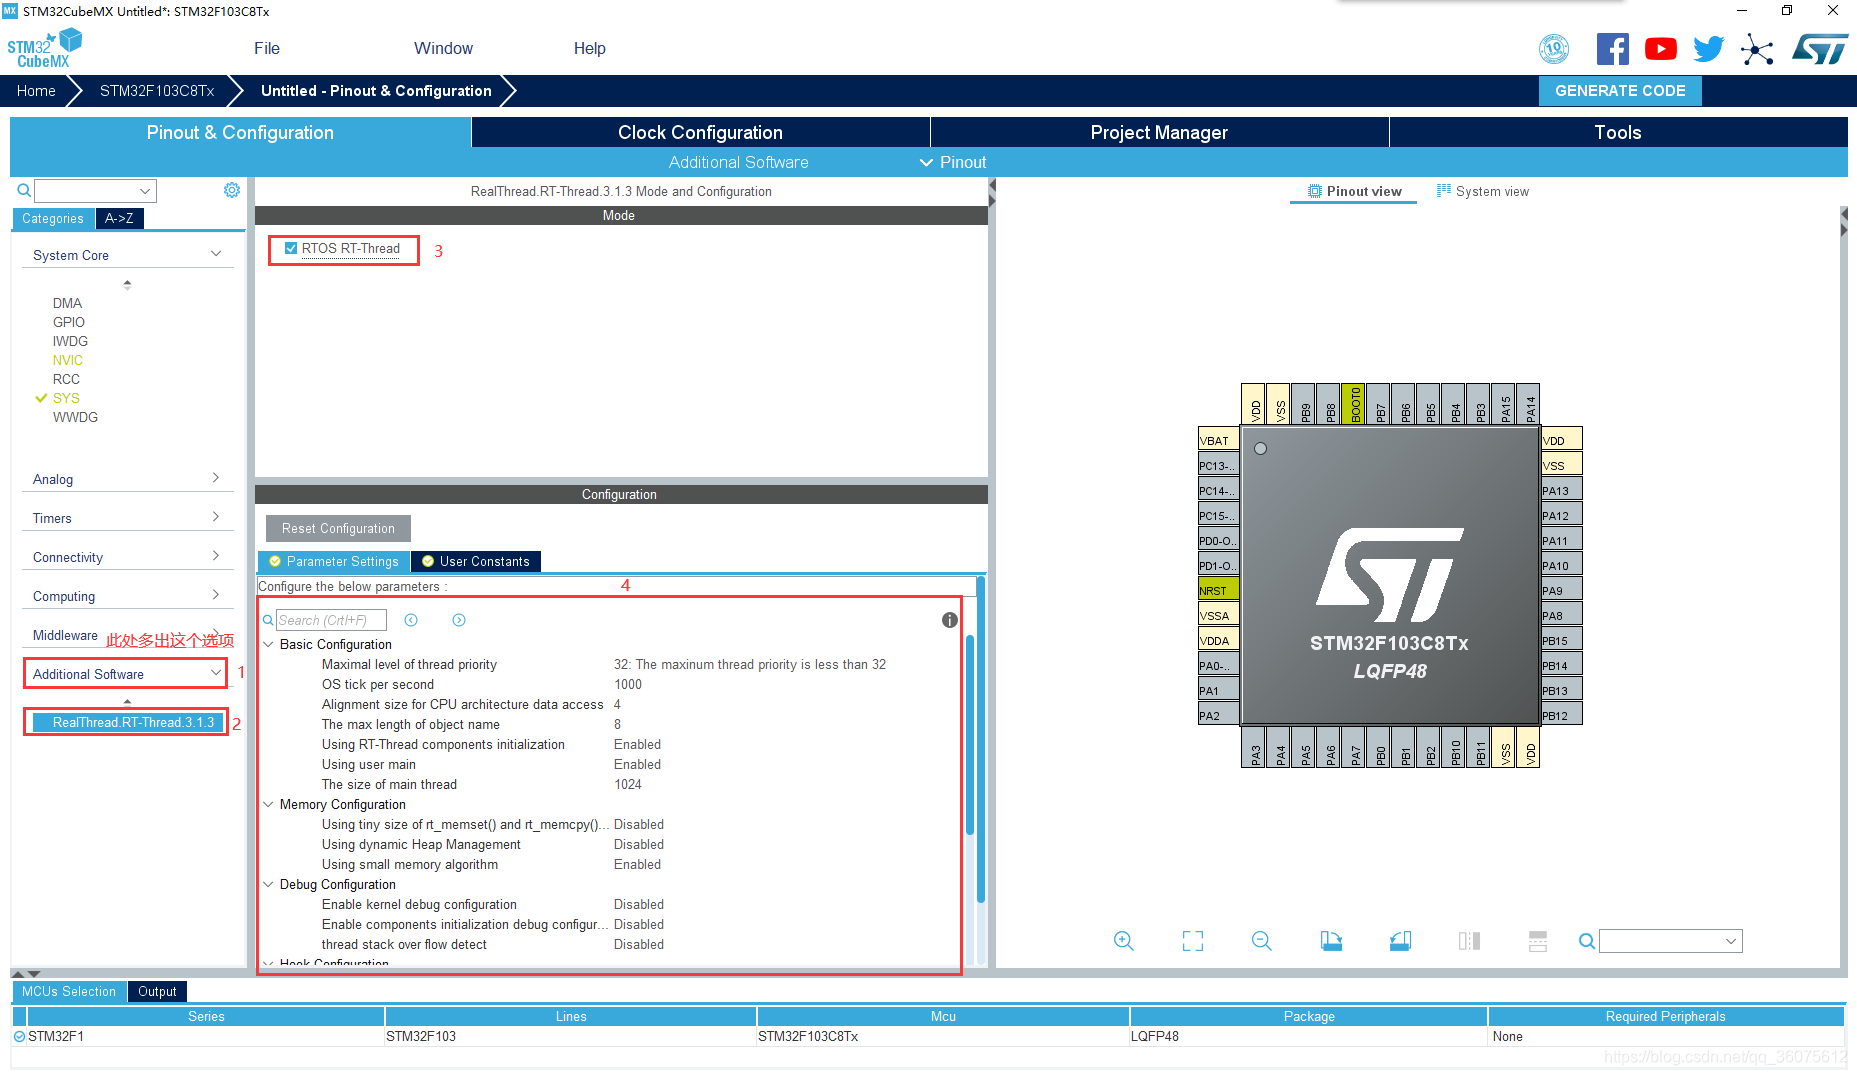
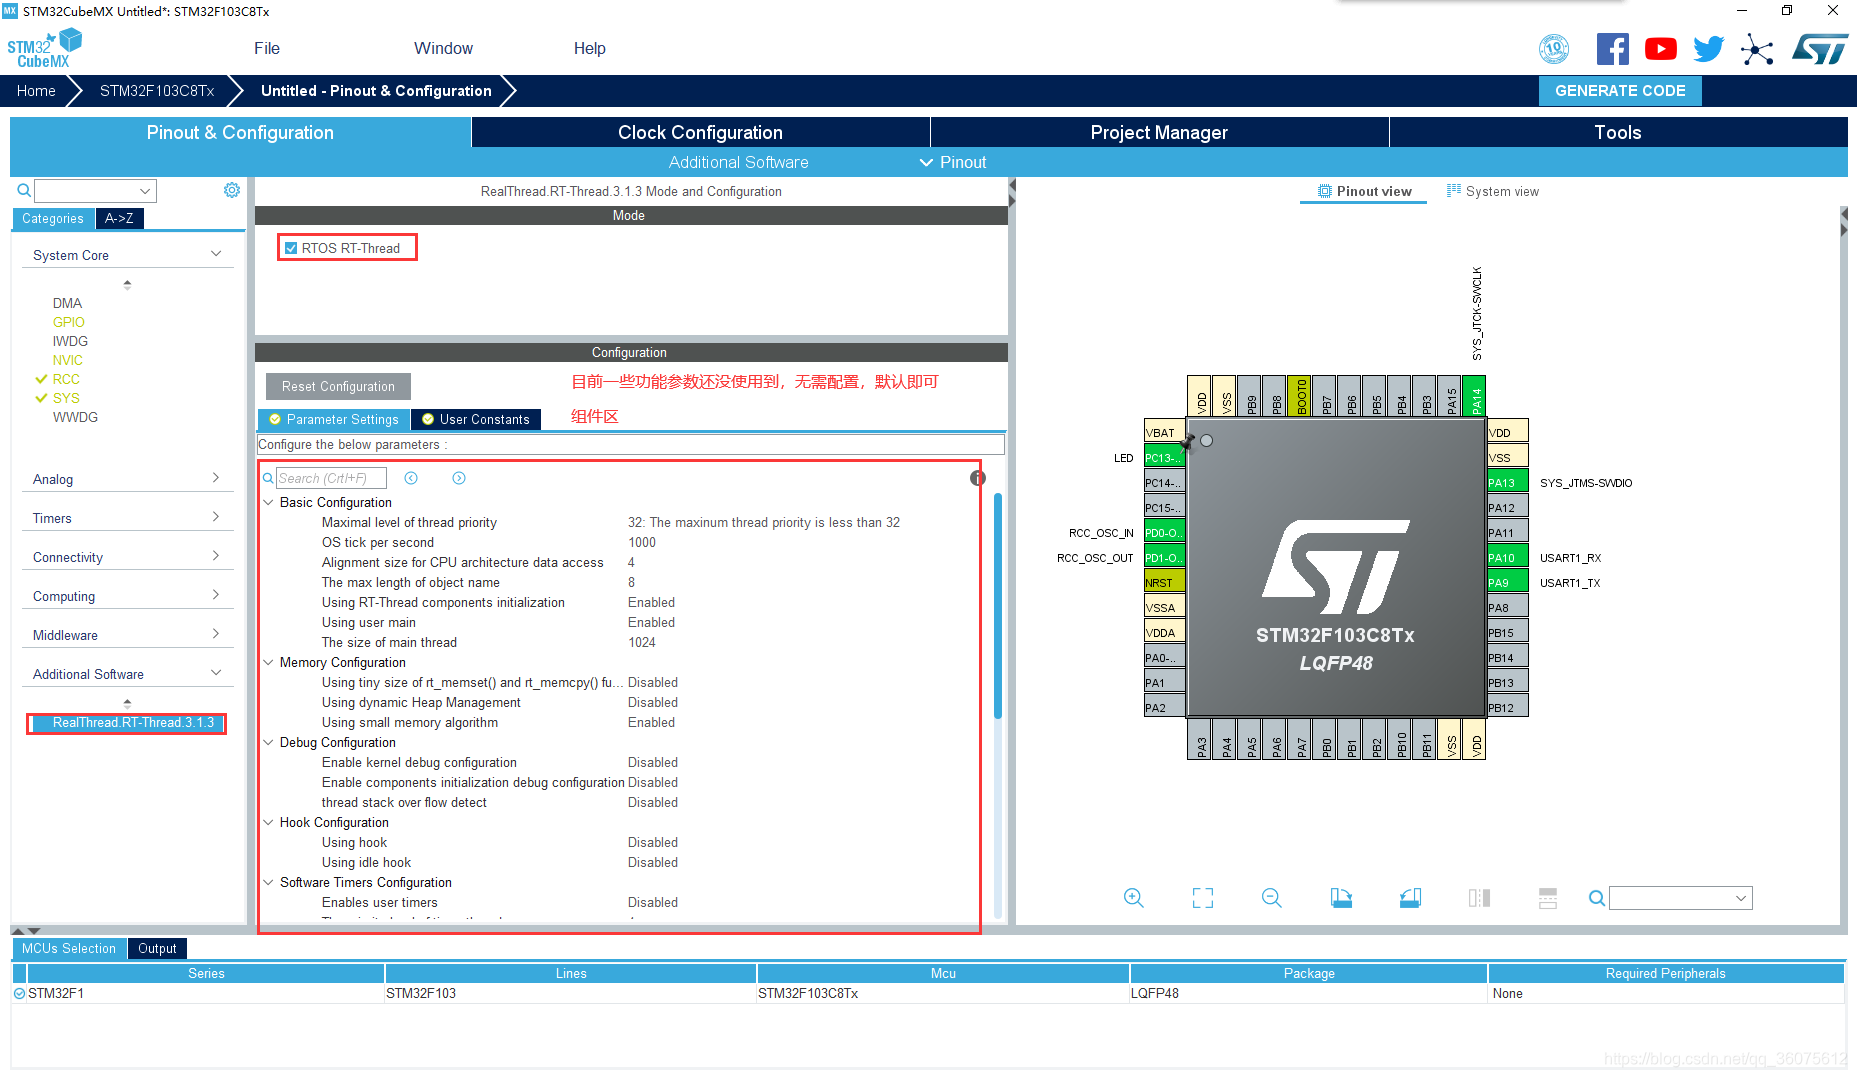
- 配置RT-Thread组件
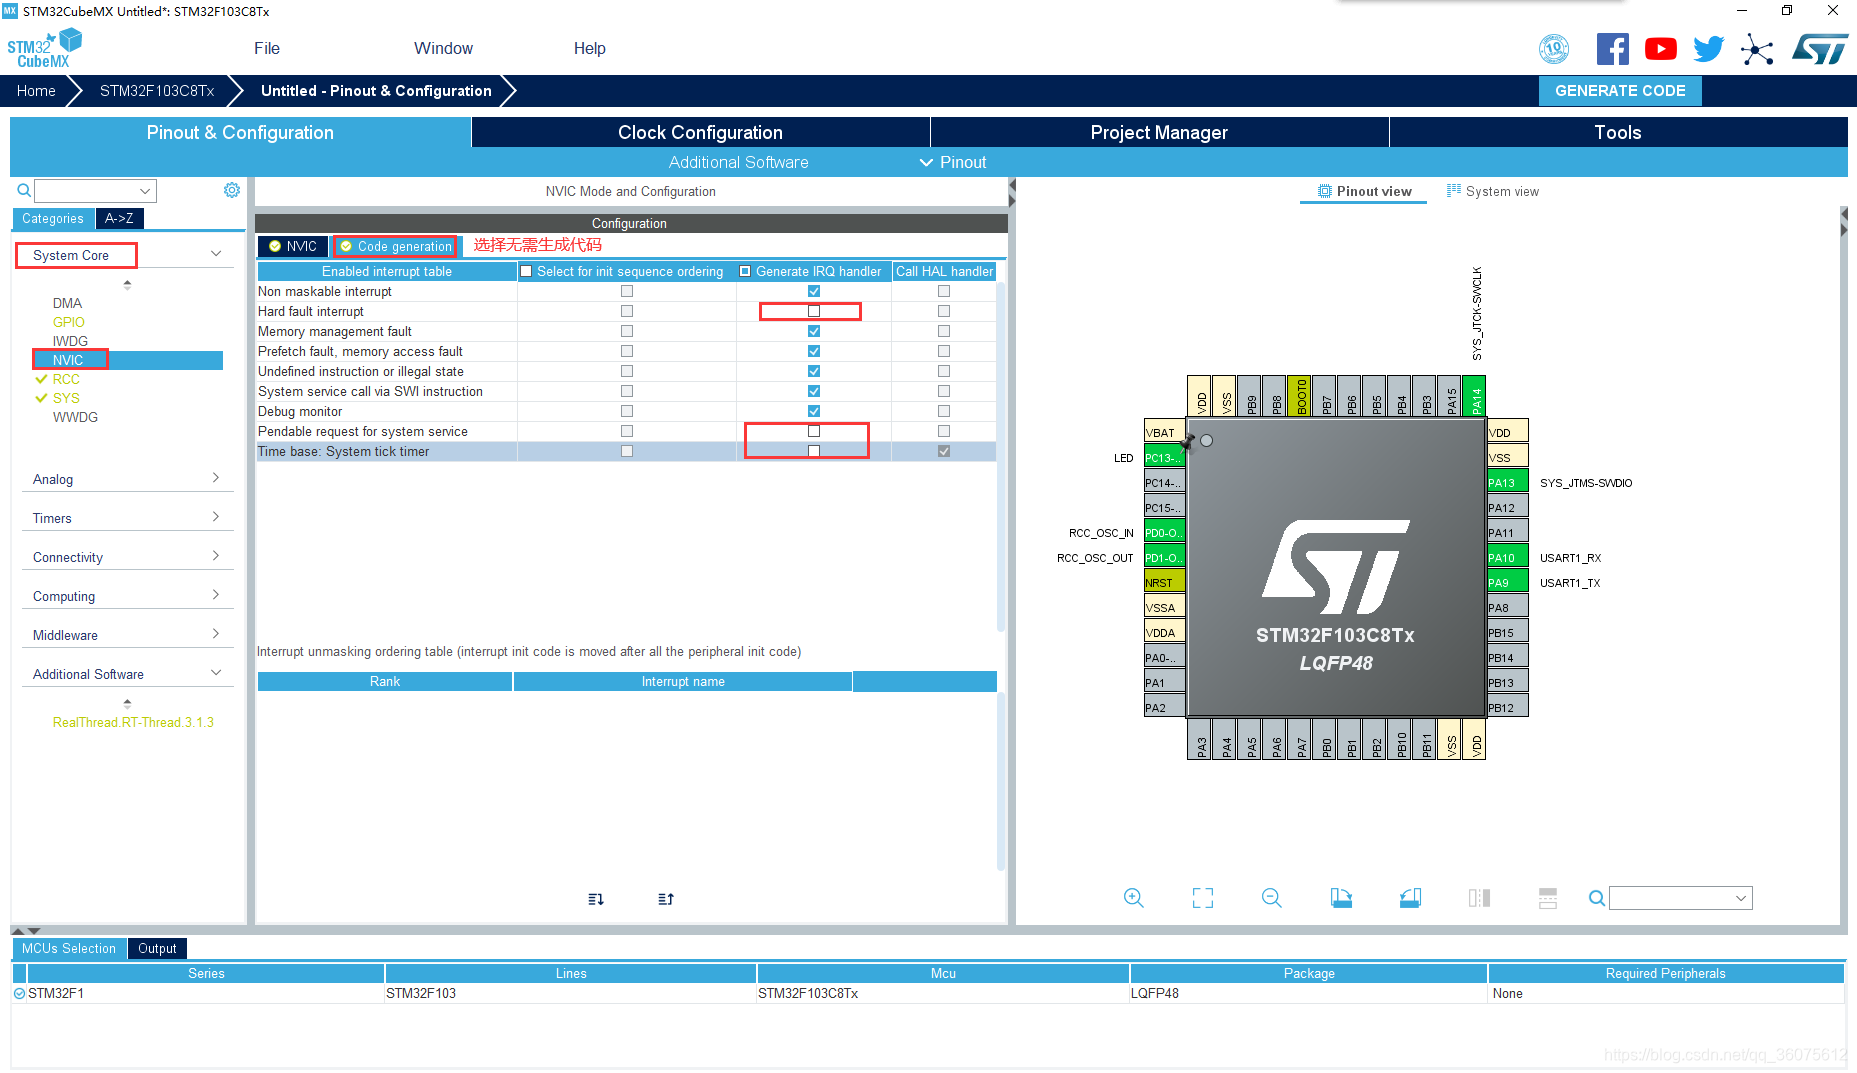
- 找到System Core ->NIVC (取消HardFault_Handler、PendSV_Handler、SysTick_Handler中断函数(因为RTT已经定义了,需要取消))
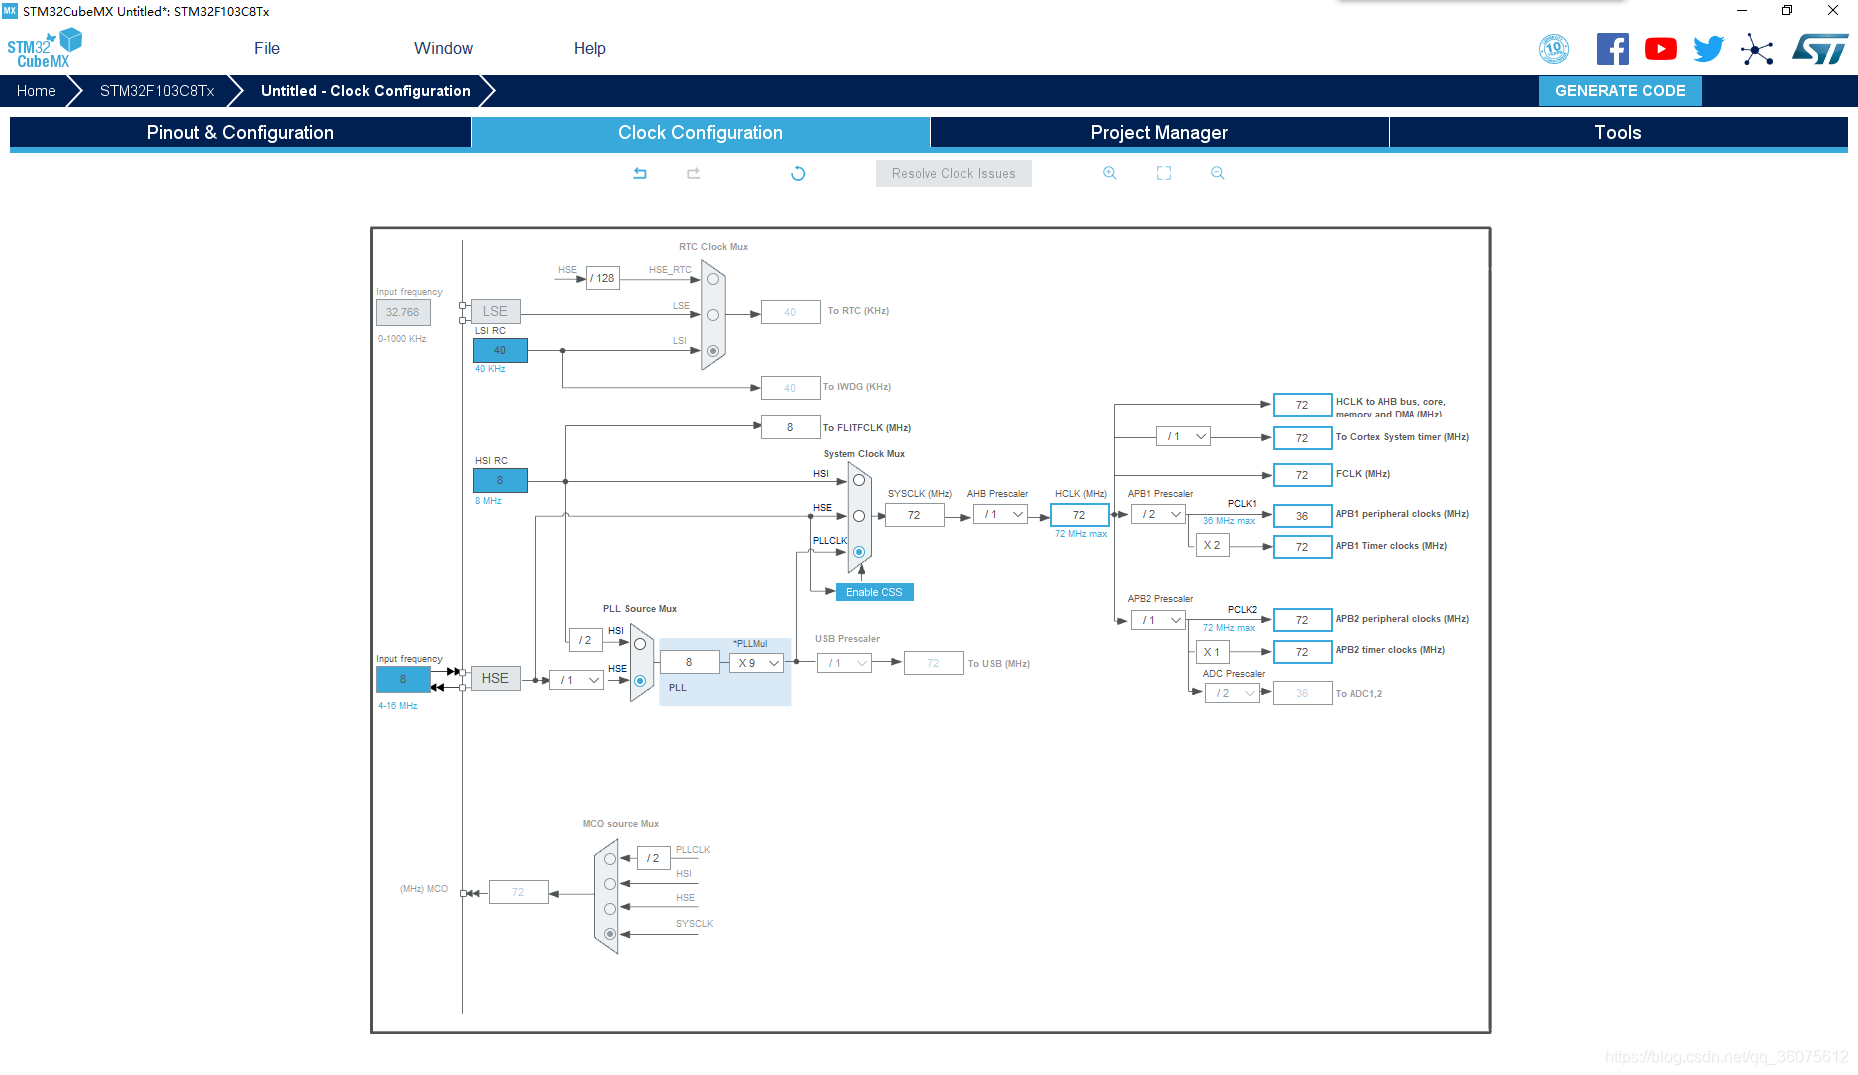
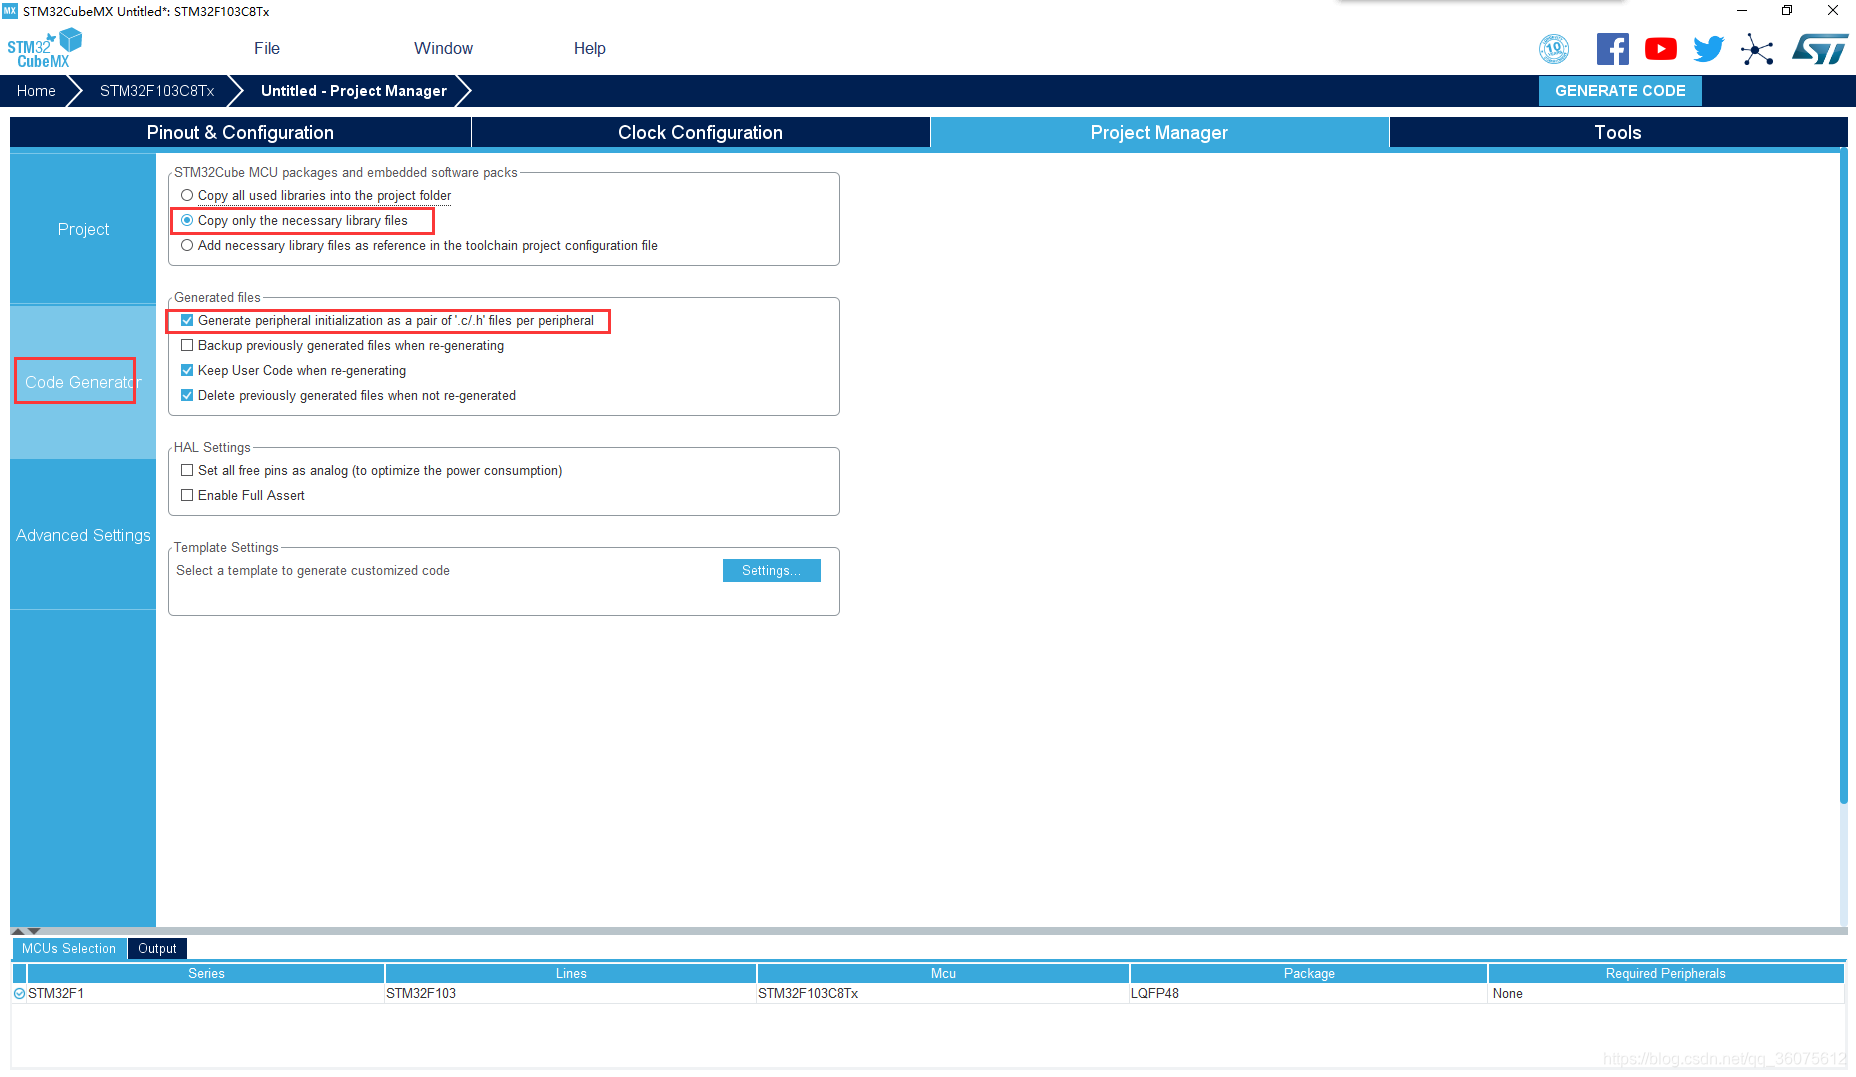
- 生成代码配置
- 打开keil IDE,创建STM32开发环境。
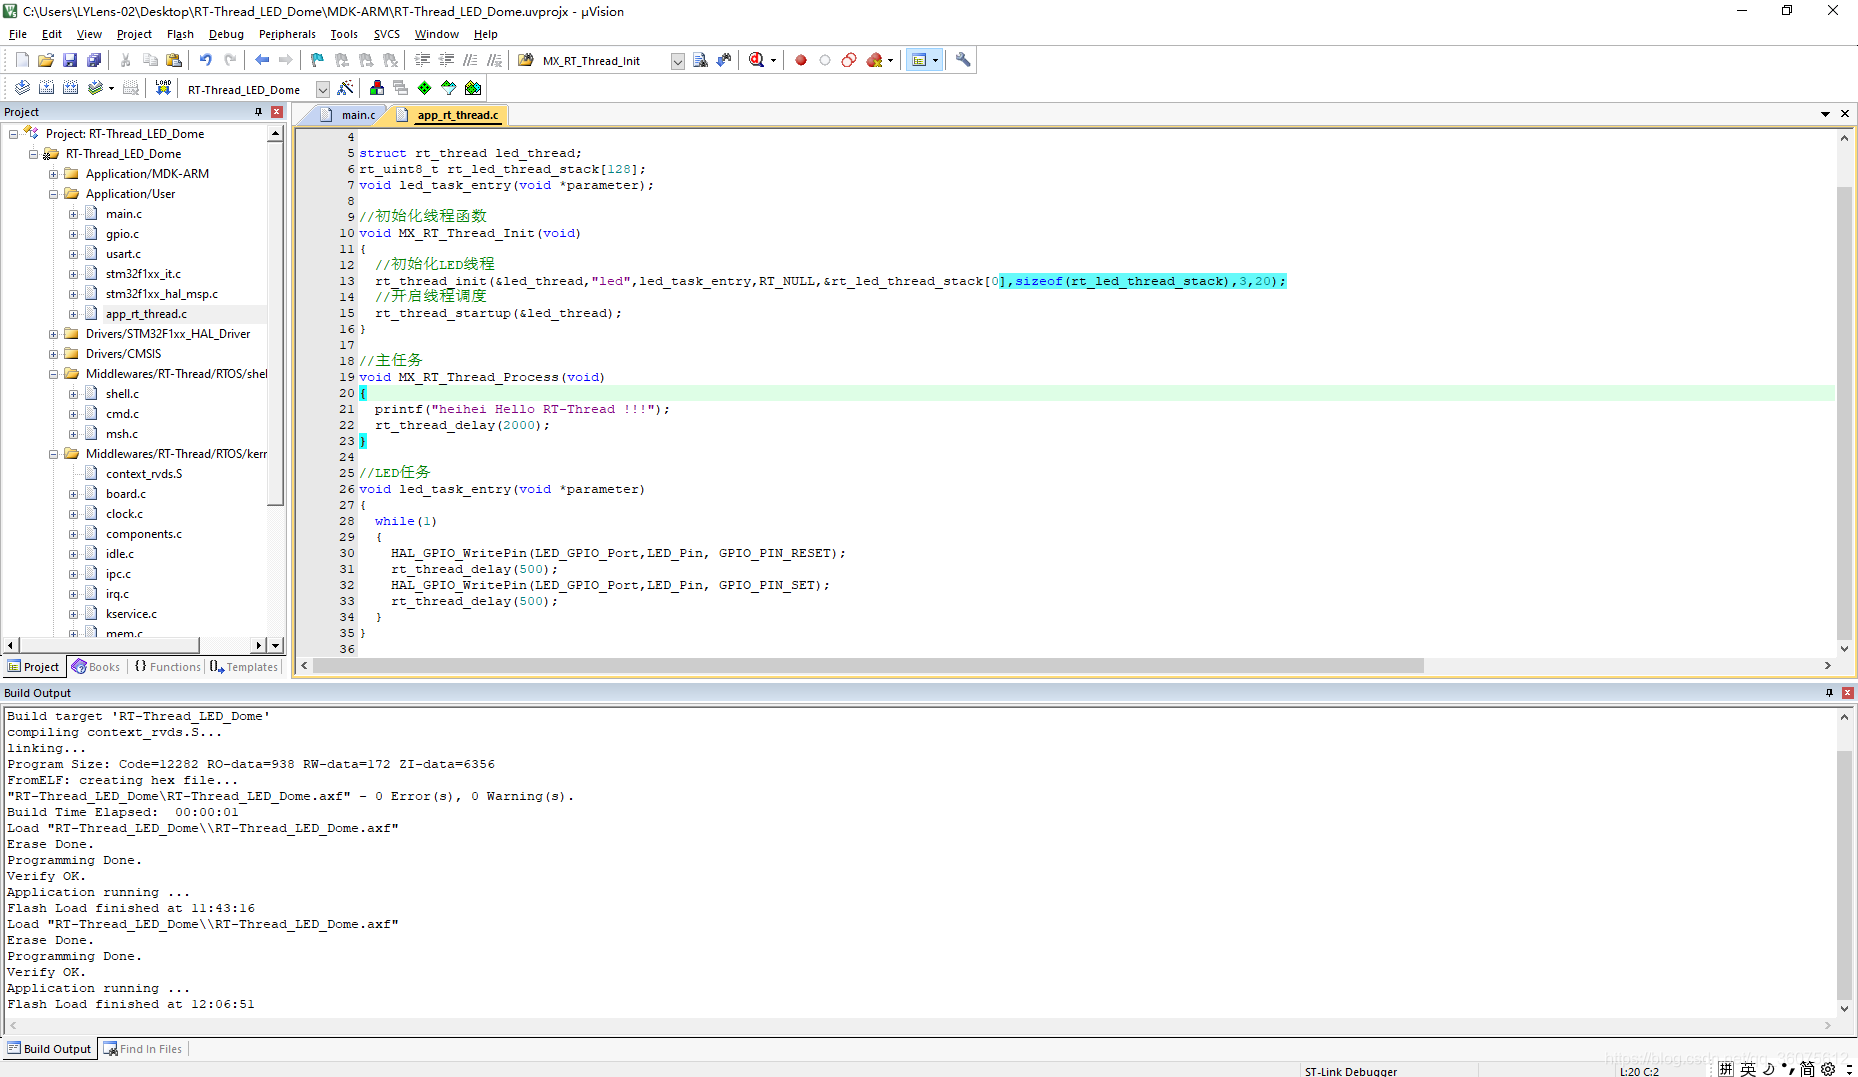
- 开始编写代码
在Application/User文件夹,新建app_rt_thread.c文件,并添加如下代码#include "rtthread.h" #include "main.h" #include "stdio.h" struct rt_thread led_thread; rt_uint8_t rt_led_thread_stack[128]; void led_task_entry(void *parameter); //初始化线程函数 void MX_RT_Thread_Init(void) { //初始化LED线程 rt_thread_init(&led_thread,"led",led_task_entry,RT_NULL,&rt_led_thread_stack[0],sizeof(rt_led_thread_stack),3,20); //开启线程调度 rt_thread_startup(&led_thread); } //主任务 void MX_RT_Thread_Process(void) { printf("Hello RT_Thread!!!"); rt_thread_delay(2000); } //LED任务 void led_task_entry(void *parameter) { while(1) { HAL_GPIO_WritePin(LED_GPIO_Port,LED_Pin, GPIO_PIN_RESET); rt_thread_delay(500); HAL_GPIO_WritePin(LED_GPIO_Port,LED_Pin, GPIO_PIN_SET); rt_thread_delay(500); } } - 在usart.c文件添加如下代码:
/* USER CODE BEGIN 0 */ #include "stdio.h" /* USER CODE END 0 */ . . . /* USER CODE BEGIN 1 */ #ifdef __GNUC__ /* With GCC/RAISONANCE, small printf (option LD Linker->Libraries->Small printf set to 'Yes') calls __io_putchar() */ #define PUTCHAR_PROTOTYPE int __io_putchar(int ch) #else #define PUTCHAR_PROTOTYPE int fputc(int ch, FILE *f) #endif /* __GNUC__ */ /** * @brief Retargets the C library printf function to the USART. * @param None * @retval None */ PUTCHAR_PROTOTYPE { /* Place your implementation of fputc here */ /* e.g. write a character to the EVAL_COM1 and Loop until the end of transmission */ HAL_UART_Transmit(&huart1, (uint8_t *)&ch, 1, 0xFFFF); return ch; } /* USER CODE END 1 */ - 在main.c文件添加如下代码:
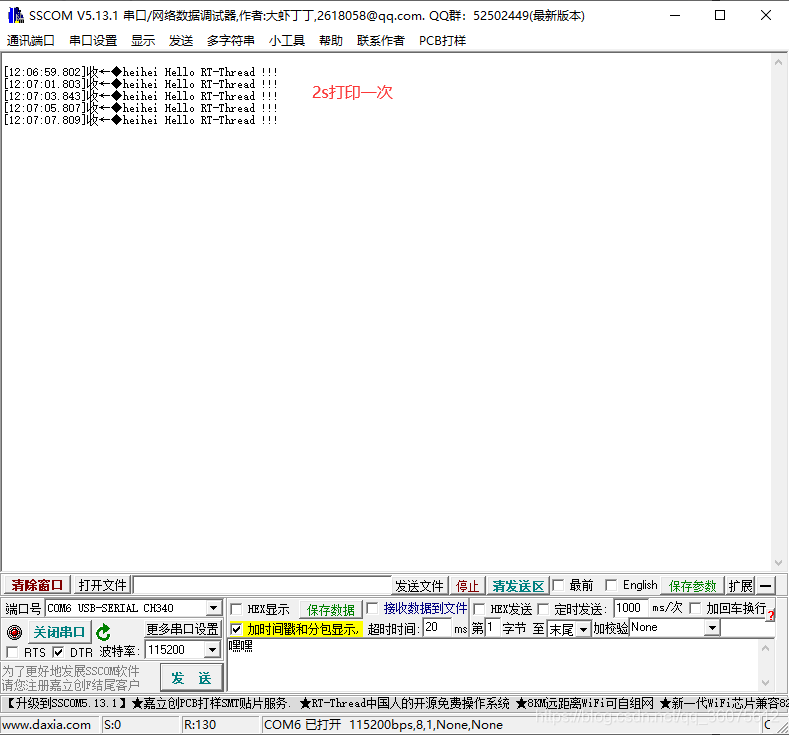
/* USER CODE END Header */ /* Includes ------------------------------------------------------------------*/ #include "main.h" #include "usart.h" #include "gpio.h" /* Private includes ----------------------------------------------------------*/ /* USER CODE BEGIN Includes */ /* USER CODE END Includes */ /* Private typedef -----------------------------------------------------------*/ /* USER CODE BEGIN PTD */ extern void MX_RT_Thread_Init(void); extern void MX_RT_Thread_Process(void); /* USER CODE END PTD */ . . . int main(void) { /* USER CODE BEGIN 1 */ /* USER CODE END 1 */ /* MCU Configuration--------------------------------------------------------*/ /* Reset of all peripherals, Initializes the Flash interface and the Systick. */ HAL_Init(); /* USER CODE BEGIN Init */ /* USER CODE END Init */ /* Configure the system clock */ SystemClock_Config(); /* USER CODE BEGIN SysInit */ /* USER CODE END SysInit */ /* Initialize all configured peripherals */ MX_GPIO_Init(); MX_USART1_UART_Init(); /* USER CODE BEGIN 2 */ MX_RT_Thread_Init(); /* USER CODE END 2 */ /* Infinite loop */ /* USER CODE BEGIN WHILE */ while (1) { MX_RT_Thread_Process(); /* USER CODE END WHILE */ /* USER CODE BEGIN 3 */ } /* USER CODE END 3 */ } - 运行效果如下所示:
参考文章来自RT-Thread官网:RT-Thread 文档中心
源码:git


 7952
7952

 被折叠的 条评论
为什么被折叠?
被折叠的 条评论
为什么被折叠?
 到【灌水乐园】发言


