


学习样本过少就会导致过拟合问题的产生,如果有足够的样本数量的支持,那么模型就能够观察到所有的分布情况,就永远不会导致过拟合。,数据增强是从现有的训练样本中生成更多的训练数据,其方法是利用多种能够生成可信图像的随机变换来增加样本。其目标是,模型在训练时不会查看到完全相同的图像。折就能让模型观察到数据的更多内容。
#接着上一篇博客
#rotation_range:表示图像随机旋转的角度范围
#width_shift,height_shift是图像在水平或垂直方向上平移的范围
#shear_range为随机错切变换的角度
#zoom_range是图像随机缩放的角度
#horizontal_flip是随机将一半图像水平翻转
#fill_mode是用于填充新创建像素的方法,这些像素可能来自于旋转或宽度/高度平移,即进行变换后,超出边界的点将根据参数给出的方法进行处理
datagen = ImageDataGenerator(
      rotation_range=40,
      width_shift_range=0.2,
      height_shift_range=0.2,
      shear_range=0.2,
      zoom_range=0.2,
      horizontal_flip=True,
      fill_mode='nearest')
增强后的图像
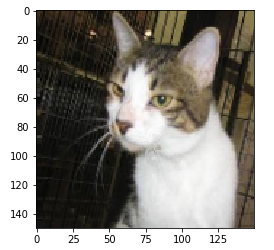
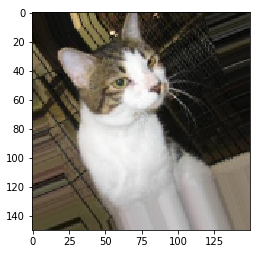
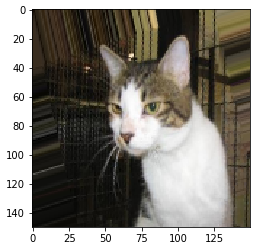
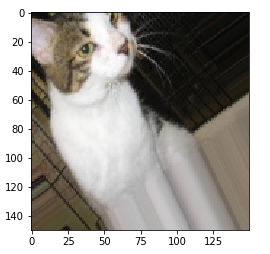
显示随机增强的训练图像
from keras.preprocessing import image
import matplotlib.pyplot as plt
fnames = [os.path.join(train_cats_dir, fname) for fname in os.listdir(train_cats_dir)]

#选择其中一张图像进行增强
img_path = fnames[3]

#读取并调整图像大小
img = image.load_img(img_path, target_size=(150, 150))

#将其装换为形状为(150,150,3)的Numpy数组
x = image.img_to_array(img)

x = x.reshape((1,) + x.shape)

#生成随机变换后的批量图像,循环是无限的,所以需要终止条件
i = 0
for batch in datagen.flow(x, batch_size=1):
    plt.figure(i)
    imgplot = plt.imshow(image.array_to_img(batch[0]))
    i += 1
    #生成的图像是大批量的,所以需要给定一个结束的条件
    if i % 4 == 0:
        break

plt.show()
虽然使用了数据增强,但是这种方法并不能完全消除过拟合,所以为了进一步降低过拟合,向模型中添加一个dropout层。
model = models.Sequential()
model.add(layers.Conv2D(32, (3, 3), activation='relu',
                        input_shape=(150, 150, 3)))
model.add(layers.MaxPooling2D((2, 2)))
model.add(layers.Conv2D(64, (3, 3), activation='relu'))
model.add(layers.MaxPooling2D((2, 2)))
model.add(layers.Conv2D(128, (3, 3), activation='relu'))
model.add(layers.MaxPooling2D((2, 2)))
model.add(layers.Conv2D(128, (3, 3), activation='relu'))
model.add(layers.MaxPooling2D((2, 2)))
model.add(layers.Flatten())

model.add(layers.Dropout(0.5))
model.add(layers.Dense(512, activation='relu'))
model.add(layers.Dense(1, activation='sigmoid'))

model.compile(loss='binary_crossentropy',
              optimizer=optimizers.RMSprop(lr=1e-4),
              metrics=['acc'])
#数据增强
train_datagen = ImageDataGenerator(
    rescale=1./255,
    rotation_range=40,
    width_shift_range=0.2,
    height_shift_range=0.2,
    shear_range=0.2,
    zoom_range=0.2,
    horizontal_flip=True,)

#还有,验证数据是无法增强的
test_datagen = ImageDataGenerator(rescale=1./255)

train_generator = train_datagen.flow_from_directory(

        train_dir,

        target_size=(150, 150),
        batch_size=32,

        class_mode='binary')

validation_generator = test_datagen.flow_from_directory(
        validation_dir,
        target_size=(150, 150),
        batch_size=32,
        class_mode='binary')

history = model.fit_generator(
      train_generator,
      steps_per_epoch=100,
      epochs=100,
      validation_data=validation_generator,
      validation_steps=50)
再次绘图
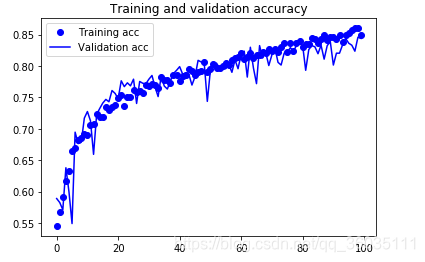

现在的精度较之前高了不少,大约为85%,若再调整相关参数,最终的精度可能会提高到88-90%,这精度基本就是此框架的极限了。


 1693
1693

 被折叠的 条评论
为什么被折叠?
被折叠的 条评论
为什么被折叠?
 到【灌水乐园】发言


