


该博客主要参考这个工程提供的代码
我们在他们代码的基础之上进行魔改
当然了,既然要魔改人家的数据,肯定要先把人家的思路看明白。
对于3D神经网络来讲,好多小伙伴最关心的肯定还是数据的喂入方法和数据集的格式喽。
下第一个部分就是详细第一个部分就是
1. 输入数据–数据预处理
1.1 输入数据的格式
C3D时直接处理视频数据的,但是这并不意味着C3D模型的输入数据就是视频。实际上,C3D模型的输入也是一系列的图像,这里面图像的格式是: [ c , l , h , w ] [c,l,h,w] [c,l,h,w],其中, c c c是图像通道数,一般是3。 l l l是模型需要处理的帧数,也就是一次输入多少张图像。在C3D模型中, l = 16 l=16 l=16。h和w是每帧图像的高和宽。
1.2 分析dataset.py函数的流程
主体函数大家感兴趣可以根据上面的链接下载下来看,在这里我是挨个函数分析
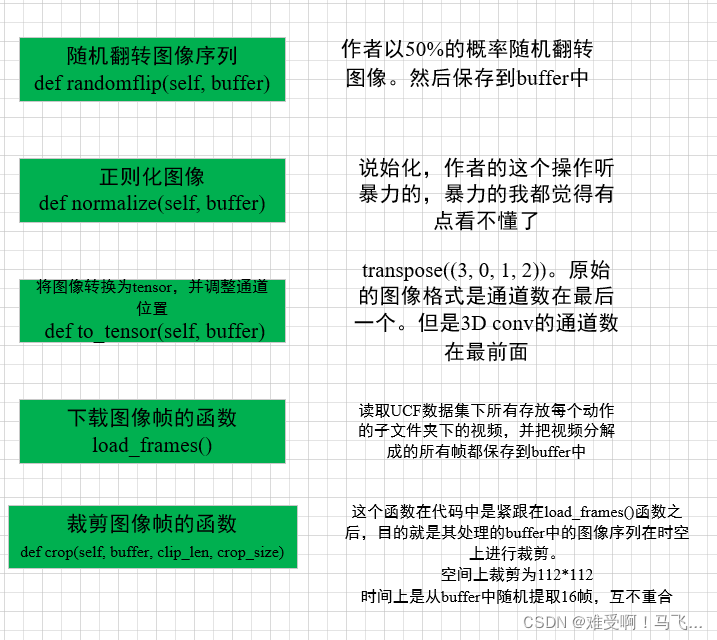
随机翻转图像函数:randomflip():
这个函数作用就是以0.5的概率让图像翻转。这个函数中的一个很关键的变量是buffer,想知道它是什么,还需要看后面的load_frames()函数
说实话,中间的连续两个水平翻转是什么意思,搞不懂,这不就是回到原来的状态了么,不信可以自己试试。
    def randomflip(self, buffer):
        """随机水平翻转给定图像和地面真相,概率为0.5."""
        if np.random.random() < 0.5:
            #enumerate() 函数用于将一个可遍历的数据对象(如列表、元组或字符串)组合为一个索引序列,同时列出数据和数据下标,一般用在 for 循环当中。
            #这个buffer参考前面。这个enumerate()就是把buffer中的图像按组合为一个索引序列
            for i, frame in enumerate(buffer):
                frame = cv2.flip(buffer[i], flipCode=1)
                #cv2.flip翻转操作,flipCode=1水平,flipCode=0垂直翻转,flipCode=-1水平和垂直同时翻转
                buffer[i] = cv2.flip(frame, flipCode=1)
        return buffer
正则化图像函数normalize()
说实话,这个正则化方法也是够暴力的,暴力到我都不知道到底有没有作用
    def normalize(self, buffer):
        #正则化
        for i, frame in enumerate(buffer):
            frame -= np.array([[[90.0, 98.0, 102.0]]])
            buffer[i] = frame
        return buffer
转换图像为张量格式,并调整通道的函数to_tensor()
    def to_tensor(self, buffer):
        #转换成张量,并让其适应于torch的格式
        return buffer.transpose((3, 0, 1, 2))
这个没啥说的了,就是把最后一个维度调整到了最前面,变成
[
c
,
l
,
h
,
w
]
[c,l,h,w]
[c,l,h,w]
下载图像帧的函数load_frames()
这个函数的输入是文件路径file_dir,
    def load_frames(self, file_dir):
        frames = sorted([os.path.join(file_dir, img) for img in os.listdir(file_dir)])
        frame_count = len(frames)
        buffer = np.empty((frame_count, self.resize_height, self.resize_width, 3), np.dtype('float32'))
        for i, frame_name in enumerate(frames):
            frame = np.array(cv2.imread(frame_name)).astype(np.float64)
            buffer[i] = frame
        return buffer
裁剪函数crop()
这个函数的作用就是在时间上和空间上同时裁剪图像。首先,在空间上就是随机裁剪112*112的图像。在时间上就是随机选择16张图像。
    def crop(self, buffer, clip_len, crop_size):
        # 随机选择时间索引进行时间抖动+
        time_index = np.random.randint(buffer.shape[0] - clip_len)
        # 随机选择开始索引以裁剪视频
        height_index = np.random.randint(buffer.shape[1] - crop_size)
        width_index = np.random.randint(buffer.shape[2] - crop_size)
        # 使用索引对视频进行裁剪和抖动。空间裁剪是在整个阵列上执行的,因此每个帧都在同一位置进行裁剪。时间抖动通过连续帧的选择发生
        buffer = buffer[time_index:time_index + clip_len,
                 height_index:height_index + crop_size,
                 width_index:width_index + crop_size, :]
        return buffer
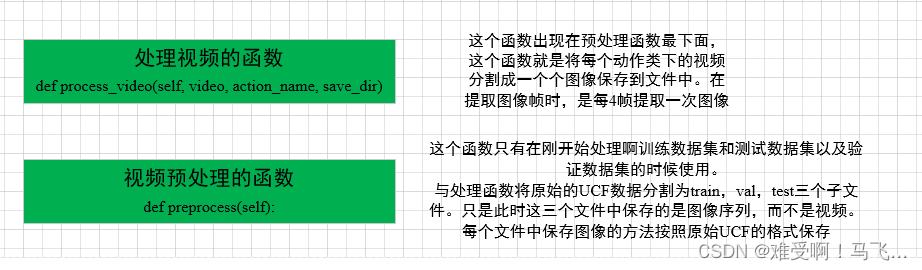
视频处理函数process_video()
这个函数应该是算这个Class的主要函数了,就是将视频分割成图像
函数的输入是video:待处理的视频, action_name:动作名,也就是类名, save_dir:保存图片的路径
    def process_video(self, video, action_name, save_dir):
        # Initialize a VideoCapture object to read video data into a numpy array
        #这个video时存储所有视频的总的文件夹。
        video_filename = video.split('.')[0]#提取每个视频文件的名字
        if not os.path.exists(os.path.join(save_dir, video_filename)):#判断保存视频的文件夹是存在
            os.mkdir(os.path.join(save_dir, video_filename))#如果不存在则需要生成相应文件夹
        capture = cv2.VideoCapture(os.path.join(self.root_dir, action_name, video))#读取本地图像(video中的)
        frame_count = int(capture.get(cv2.CAP_PROP_FRAME_COUNT))#计算这个视频一共有多少帧。
        frame_width = int(capture.get(cv2.CAP_PROP_FRAME_WIDTH))#计算帧的宽度
        frame_height = int(capture.get(cv2.CAP_PROP_FRAME_HEIGHT))#计算帧的高度
        # 确保分割的视频至少有16帧
        ##############################
        #下面这部分很重要,
        ################################3
        EXTRACT_FREQUENCY = 4#提取频率。也就是每四帧提取一帧。这个也很好理解,其实就是如果连续提取的话,每帧之间没有太大的变化,这个可能会影响训练。
        if frame_count // EXTRACT_FREQUENCY <= 16:
            EXTRACT_FREQUENCY -= 1
            if frame_count // EXTRACT_FREQUENCY <= 16:
                EXTRACT_FREQUENCY -= 1
                if frame_count // EXTRACT_FREQUENCY <= 16:
                    EXTRACT_FREQUENCY -= 1

        count = 0#计数器,计算这个视频中的帧的个数,读取的帧达到这个视频的帧的总数时,就停止循环
        i = 0#这个是用来命名图像时用的
        retaining = True
        while (count < frame_count and retaining):#当count < frame_count也就是说,
            retaining, frame = capture.read()#读取视频帧,retaining表示是否还存在帧, frame表示视频帧
            if frame is None:
                continue
            if count % EXTRACT_FREQUENCY == 0:#取模 - 返回除法的余数。也就是总数与EXTRACT_FREQUENCY成倍数时,则执行下面的操作
                if (frame_height != self.resize_height) or (frame_width != self.resize_width):#判断图像尺寸是否满足要求
                    frame = cv2.resize(frame, (self.resize_width, self.resize_height))#如果不满足要求,则再resize一下
                cv2.imwrite(filename=os.path.join(save_dir, video_filename, '0000{}.jpg'.format(str(i))), img=frame)#把图像保存下来
                #把图像一个个的保存到图像中
                i += 1
            count += 1
        # Release the VideoCapture once it is no longer needed
        capture.release()#释放内存
预处理函数preprocess()函数的,这个函数主要是穿件一些文件夹,用于保存已经处理好的train val test数据
    #os.path.join()函数:连接两个或更多的路径名组件,使用'\'
    #os.listdir()返回指定文件中所有文件名。
    def preprocess(self):
         if not os.path.exists(self.output_dir):#判断是否存在这个路径文件,如果不存在则创建相应的文件。
            os.mkdir(self.output_dir)
            os.mkdir(os.path.join(self.output_dir, 'train'))
            os.mkdir(os.path.join(self.output_dir, 'val'))
            os.mkdir(os.path.join(self.output_dir, 'test'))

        # Split train/val/test sets
         for file in os.listdir(self.root_dir):#读取UCF视频文件中所有动作类的文件名,即标签。
            file_path = os.path.join(self.root_dir, file)#生成每个动作类的文件路径
            video_files = [name for name in os.listdir(file_path)]#读取每个视频的名字,也就是动作名

            train_and_valid, test = train_test_split(video_files, test_size=0.2, random_state=42)#按照8:2分割训练集和测试集
            train, val = train_test_split(train_and_valid, test_size=0.2, random_state=42)#按照8:2分割训练集和验证
            #注意,上面两行分割的还是路径名,不是实际的图像

            train_dir = os.path.join(self.output_dir, 'train', file)#在train下面再生成每个动作的文件
            val_dir = os.path.join(self.output_dir, 'val', file)#在val下面再生成每个动作的文件
            test_dir = os.path.join(self.output_dir, 'test', file)#在test下面再生成每个动作的文件

            if not os.path.exists(train_dir):#判断是否创建完成
                train_dir = train_dir.replace("\\ ", "/")  # 在windows下使用这行代码,我是在win10下训练,所以使用这个
                #train_dir = train_dir.replace("\ ", "\\")  # 在Linux下使用这行代码
                print("train " + train_dir)
                os.mkdir(train_dir)#如果上面的文件不存在则需要创建一个文件
            if not os.path.exists(val_dir):
                val_dir = val_dir.replace("\\ ", "/")
                #val_dir = val_dir.replace("\ ", "\\")
                os.mkdir(val_dir)
            if not os.path.exists(test_dir):
                test_dir = test_dir.replace("\\ ", "/")
                #test_dir = test_dir.replace("\ ", "\\ ")
                os.mkdir(test_dir)

            for video in train:
                self.process_video(video, file, train_dir)

            for video in val:
                self.process_video(video, file, val_dir)

            for video in test:
                self.process_video(video, file, test_dir)

         print('Preprocessing finished.')
小函数讲完了,开始从同开始梳理dataset()函数的
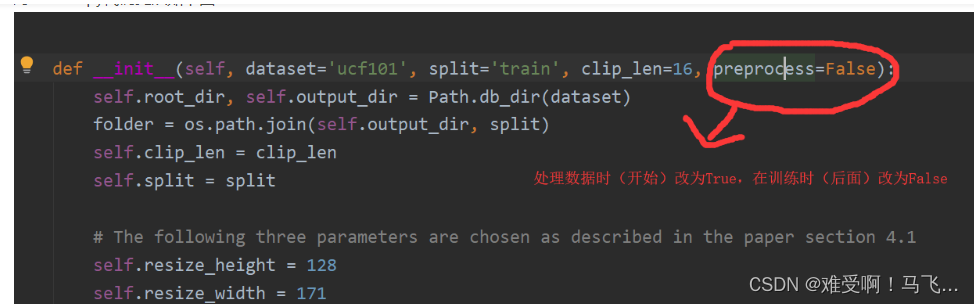
    def __init__(self, dataset='ucf101', split='train', clip_len=16, preprocess=False):
        #clip_len 需要根据要求修改大小
        #preprocess 在运行将视频分割成图像时,这个参数设置为True。训练的时候设置为False
        #这个Path.db_dir是我们自己写的函数,在pypath.py函数中。这个函数的作用就是输出ucf101视频数据
        #的路径,和处理好的图像序列的保存位置
        self.root_dir, self.output_dir = Path.db_dir(dataset)
        folder = os.path.join(self.output_dir, split)#组合路径,这个路径就是视频数据的文件
        self.clip_len = clip_len#C3D模型每次处理的视频的长度是16,可以自己根据自己的需求和你的模型的特性设置
        self.split = split

        # 以下三个参数的选择如第4.1节所述
        self.resize_height = 128#图像resize后的高
        self.resize_width = 171#图像resize后的宽
        self.crop_size = 112#图像被裁剪后的尺寸112*112

        if not self.check_integrity():
            raise RuntimeError('Dataset not found or corrupted.' +
                               ' You need to download it from official website.')

        if (not self.check_preprocess()) or preprocess:
            print('Preprocessing of {} dataset, this will take long, but it will be done only once.'.format(dataset))
            self.preprocess()
        # 获取所有类文件夹中文件的所有文件名
        # 一次浏览一个类文件夹
        #os.path.join()函数:连接两个或更多的路径名组件,使用'\'
        #os.listdir()返回指定文件中所有文件名。
        self.fnames, labels = [], []#读取视频图像帧和对应的标签
        for label in sorted(os.listdir(folder)):#读取folder文件夹下的标签名,ucf将每个动作的视频放在一个文件夹中,因此文件夹名即是标签
            for fname in os.listdir(os.path.join(folder, label)):#读取指定文件下的图像的名字并合并成路径,然后读取每个子文件夹下面的视频
                self.fnames.append(os.path.join(folder, label, fname))#将读取子文件夹下面的视频,并添加到列表fnames
                labels.append(label)#把每个视频的标签添加到列表labels
        assert len(labels) == len(self.fnames)#判断视频数量和标签数量是否一样,如果不一样则触发异常
        print('Number of {} videos: {:d}'.format(split, len(self.fnames)))

        # 准备标签名称(字符串)和索引(整数)之间的映射
        self.label2index = {label: index for index, label in enumerate(sorted(set(labels)))}
        # 将标签名称列表转换为标签索引数组
        self.label_array = np.array([self.label2index[label] for label in labels], dtype=int)

        if dataset == "ucf101":
            if not os.path.exists('dataloaders/ucf_labels.txt'):
                with open('dataloaders/ucf_labels.txt', 'w') as f:
                    for id, label in enumerate(sorted(self.label2index)):
                        f.writelines(str(id+1) + ' ' + label + '\n')#writelines() 方法用于向文件中写入一序列的字符串。
                        #其实是将标签id和标签名按行一次写在一个txt文件中
        elif dataset == 'hmdb51':
            if not os.path.exists('dataloaders/hmdb_labels.txt'):
                with open('dataloaders/hmdb_labels.txt', 'w') as f:
                    for id, label in enumerate(sorted(self.label2index)):
                        f.writelines(str(id+1) + ' ' + label + '\n')
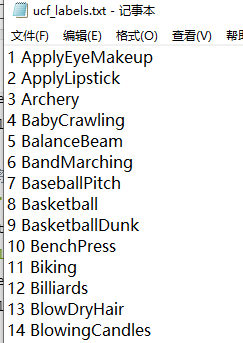
最后处理好的UCF的类别txt文件是这样的:
获取fnames视频的个数
    def __len__(self):
        #读取视频的个数
        return len(self.fnames)
这个__getitem__()在python的Class中很有意思,一般来讲,它决定这个类最终的返回值
    def __getitem__(self, index):
        # 加载和预处理。
        buffer = self.load_frames(self.fnames[index])#读取fnames中的图像
        buffer = self.crop(buffer, self.clip_len, self.crop_size)
        labels = np.array(self.label_array[index])

        if self.split == 'test':
            # Perform data augmentation
            buffer = self.randomflip(buffer)
        buffer = self.normalize(buffer)
        buffer = self.to_tensor(buffer)
        return torch.from_numpy(buffer), torch.from_numpy(labels)
dataset.py这块一开始看着挺乱的,其实主要思想无非就是:在第一次运行时,将processes=True
这个过程就是把所有视频按照每4帧提取一帧的频率将视频分割,然后按照8:1:1的比例分割成train,val,test三个数据集。
处理好之后考试训练,训练的时候,在train中随机抽取16帧作为训练数据。
就是这么简单。
1.3 C3D模型的处理数据的流程
第一步:从本地读取视频
    video = 'data/UCF-101/Punch/v_Punch_g01_c04.avi'#存放视频的路径,根据自己情况修改
    cap = cv2.VideoCapture(video)#读取本地视频
    retaining = True#用于判断是否读取图像
第二步,创建一个帧用于存放图像序列
clip = []#创建一个容器用于存储帧,这个是列表
第三步,从视频cap中读取图像
retaining, frame = cap.read()
#retaining 为True 或者False,代表有没有读取到图片,第二个参数frame表示截取到一帧的图片
第四步,设置图像尺寸,裁剪需要的区域,并添加到容器clip中
        tmp_ = center_crop(cv2.resize(frame, (171, 128)))
        #作者先使用cv2.resize把图像
        #通过center_crop函数截取图像期望的部分,这边可以根据自己的需求修改
        tmp = tmp_ - np.array([[[90.0, 98.0, 102.0]]])#这个据说是正则化
        clip.append(tmp)#把处理好的图像存储到clip容器中,后面再逐帧提取。
第五步,将列表转换成适合pytorch的计算图
if len(clip) == 16:
            #因为每次要吃里16帧图像,所以要求时16,如果你想处理不同的帧,则可以设置不同的大小。修改了这个16.后面的都要修稿
            inputs = np.array(clip).astype(np.float32)
            inputs = np.expand_dims(inputs, axis=0)
            inputs = np.transpose(inputs, (0, 4, 1, 2, 3))#把图像存储格式修改成正常的合适
            inputs = torch.from_numpy(inputs)#转换为张量
            inputs = torch.autograd.Variable(inputs, requires_grad=False).to(device)
            #构建神经网络的计算图时,需用orch.autograd.Variable将Tensor包装起来,形成计算图中的节点。
            #backward()自动计算出所有需要的梯度。来针对某个变量执行grad获得想要的梯度值。
            with torch.no_grad():
                outputs = model.forward(inputs)
            probs = torch.nn.Softmax(dim=1)(outputs)
            label = torch.max(probs, 1)[1].detach().cpu().numpy()[0]

            cv2.putText(frame, class_names[label].split(' ')[-1].strip(), (20, 20),cv2.FONT_HERSHEY_SIMPLEX, 0.6,(0, 0, 255), 1)
            cv2.putText(frame, "prob: %.4f" % probs[0][label], (20, 40),cv2.FONT_HERSHEY_SIMPLEX, 0.6,(0, 0, 255), 1)
            #在图像上显示文字
            clip.pop(0)
        cv2.imshow('result', frame)
        cv2.waitKey(30)
裁剪函数:center_crop()
def center_crop(frame):
    #图像切片,得到112*112的图像,这边可以根据自己的需求修改图像的修剪范围
    frame = frame[8:120, 30:142, :]
    return np.array(frame).astype(np.uint8)
这个函数很简单,就是裁剪函数。这里是固定模式裁剪了112*112的区域。当然,为了
2. C3D模型搭建
我觉得这个没啥讲的,就是儿童搭建积木。
import torch
import torch.nn as nn
from mypath import Path

class C3D(nn.Module):
    """
    The C3D network.
    """

    def __init__(self, num_classes, pretrained=False):
        super(C3D, self).__init__()

        self.conv1 = nn.Conv3d(3, 64, kernel_size=(3, 3, 3), padding=(1, 1, 1))
        self.pool1 = nn.MaxPool3d(kernel_size=(1, 2, 2), stride=(1, 2, 2))

        self.conv2 = nn.Conv3d(64, 128, kernel_size=(3, 3, 3), padding=(1, 1, 1))
        self.pool2 = nn.MaxPool3d(kernel_size=(2, 2, 2), stride=(2, 2, 2))

        self.conv3a = nn.Conv3d(128, 256, kernel_size=(3, 3, 3), padding=(1, 1, 1))
        self.conv3b = nn.Conv3d(256, 256, kernel_size=(3, 3, 3), padding=(1, 1, 1))
        self.pool3 = nn.MaxPool3d(kernel_size=(2, 2, 2), stride=(2, 2, 2))

        self.conv4a = nn.Conv3d(256, 512, kernel_size=(3, 3, 3), padding=(1, 1, 1))
        self.conv4b = nn.Conv3d(512, 512, kernel_size=(3, 3, 3), padding=(1, 1, 1))
        self.pool4 = nn.MaxPool3d(kernel_size=(2, 2, 2), stride=(2, 2, 2))

        self.conv5a = nn.Conv3d(512, 512, kernel_size=(3, 3, 3), padding=(1, 1, 1))
        self.conv5b = nn.Conv3d(512, 512, kernel_size=(3, 3, 3), padding=(1, 1, 1))
        self.pool5 = nn.MaxPool3d(kernel_size=(2, 2, 2), stride=(2, 2, 2), padding=(0, 1, 1))

        self.fc6 = nn.Linear(8192, 4096)
        self.fc7 = nn.Linear(4096, 4096)
        self.fc8 = nn.Linear(4096, num_classes)

        self.dropout = nn.Dropout(p=0.5)

        self.relu = nn.ReLU()

        self.__init_weight()

        if pretrained:
            self.__load_pretrained_weights()

    def forward(self, x):

        x = self.relu(self.conv1(x))
        x = self.pool1(x)

        x = self.relu(self.conv2(x))
        x = self.pool2(x)

        x = self.relu(self.conv3a(x))
        x = self.relu(self.conv3b(x))
        x = self.pool3(x)

        x = self.relu(self.conv4a(x))
        x = self.relu(self.conv4b(x))
        x = self.pool4(x)

        x = self.relu(self.conv5a(x))
        x = self.relu(self.conv5b(x))
        x = self.pool5(x)

        x = x.view(-1, 8192)
        x = self.relu(self.fc6(x))
        x = self.dropout(x)
        x = self.relu(self.fc7(x))
        x = self.dropout(x)

        logits = self.fc8(x)

        return logits

    def __load_pretrained_weights(self):
        """Initialiaze network."""
        corresp_name = {
                        # Conv1
                        "features.0.weight": "conv1.weight",
                        "features.0.bias": "conv1.bias",
                        # Conv2
                        "features.3.weight": "conv2.weight",
                        "features.3.bias": "conv2.bias",
                        # Conv3a
                        "features.6.weight": "conv3a.weight",
                        "features.6.bias": "conv3a.bias",
                        # Conv3b
                        "features.8.weight": "conv3b.weight",
                        "features.8.bias": "conv3b.bias",
                        # Conv4a
                        "features.11.weight": "conv4a.weight",
                        "features.11.bias": "conv4a.bias",
                        # Conv4b
                        "features.13.weight": "conv4b.weight",
                        "features.13.bias": "conv4b.bias",
                        # Conv5a
                        "features.16.weight": "conv5a.weight",
                        "features.16.bias": "conv5a.bias",
                         # Conv5b
                        "features.18.weight": "conv5b.weight",
                        "features.18.bias": "conv5b.bias",
                        # fc6
                        "classifier.0.weight": "fc6.weight",
                        "classifier.0.bias": "fc6.bias",
                        # fc7
                        "classifier.3.weight": "fc7.weight",
                        "classifier.3.bias": "fc7.bias",
                        }

        p_dict = torch.load(Path.model_dir())
        s_dict = self.state_dict()
        for name in p_dict:
            if name not in corresp_name:
                continue
            s_dict[corresp_name[name]] = p_dict[name]
        self.load_state_dict(s_dict)

    def __init_weight(self):
        for m in self.modules():
            if isinstance(m, nn.Conv3d):
                # n = m.kernel_size[0] * m.kernel_size[1] * m.out_channels
                # m.weight.data.normal_(0, math.sqrt(2. / n))
                torch.nn.init.kaiming_normal_(m.weight)
            elif isinstance(m, nn.BatchNorm3d):
                m.weight.data.fill_(1)
                m.bias.data.zero_()

def get_1x_lr_params(model):
    """
    This generator returns all the parameters for conv and two fc layers of the net.
    """
    b = [model.conv1, model.conv2, model.conv3a, model.conv3b, model.conv4a, model.conv4b,
         model.conv5a, model.conv5b, model.fc6, model.fc7]
    for i in range(len(b)):
        for k in b[i].parameters():
            if k.requires_grad:
                yield k

def get_10x_lr_params(model):
    """
    This generator returns all the parameters for the last fc layer of the net.
    """
    b = [model.fc8]
    for j in range(len(b)):
        for k in b[j].parameters():
            if k.requires_grad:
                yield k

if __name__ == "__main__":
    inputs = torch.rand(1, 3, 16, 112, 112)
    net = C3D(num_classes=101, pretrained=True)

    outputs = net.forward(inputs)
    print(outputs.size())


 1万+
1万+

 被折叠的 条评论
为什么被折叠?
被折叠的 条评论
为什么被折叠?
 到【灌水乐园】发言


