


1 spring boot需要继承spring-boot-starter-parent springboot导入依赖
<?xml version="1.0" encoding="UTF-8"?>
<project xmlns="http://maven.apache.org/POM/4.0.0"
         xmlns:xsi="http://www.w3.org/2001/XMLSchema-instance"
         xsi:schemaLocation="http://maven.apache.org/POM/4.0.0 http://maven.apache.org/xsd/maven-4.0.0.xsd">
    <modelVersion>4.0.0</modelVersion>

    <groupId>com.kylin</groupId>
    <artifactId>heima-springboot</artifactId>
    <version>1.0-SNAPSHOT</version>

    <parent>
        <groupId>org.springframework.boot</groupId>
        <artifactId>spring-boot-starter-parent</artifactId>
        <version>2.1.5.RELEASE</version>
    </parent>

    <dependencies>
        <dependency>
            <groupId>org.springframework.boot</groupId>
            <artifactId>spring-boot-starter-web</artifactId>
        </dependency>
    </dependencies>

    <properties>
        <java.version>1.8</java.version>
    </properties>


</project>
2 spring boot的引导类
package com.kylin;


import org.springframework.boot.SpringApplication;
import org.springframework.boot.autoconfigure.SpringBootApplication;
//该注解用来标注这个类是spring的启动类
@SpringBootApplication
public class Application {

    public static void main(String[] args) {
        //运行spring boot的启动类,参数为启动类的字节码对象
        SpringApplication.run(Application.class);
    }
4 编写controller
package com.kylin.controller;

import org.springframework.web.bind.annotation.GetMapping;
import org.springframework.web.bind.annotation.RestController;

@RestController
public class HelloController {

    @GetMapping("/hello")
    public String hello(){
        return "hello,spring boot";
    }
}
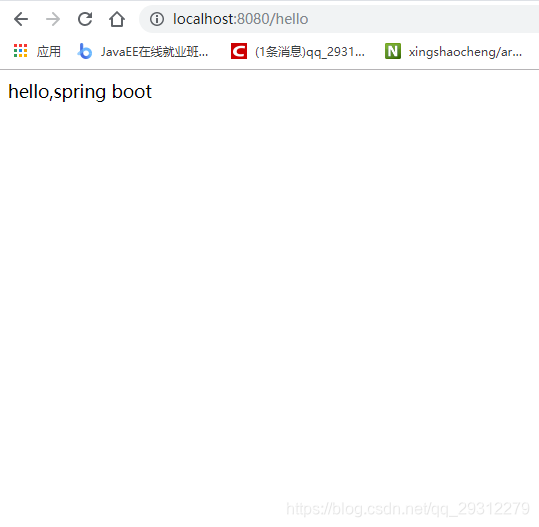
运行Application的main方法,结果如下:
-------------------------------------------------------------------------------------------------------------------------------------------------
问题 :spring boot 如何实现spring 和 spring mvc 功能呢?比如我要配置数据源
问题 :getMapping 和requestMapping的区别
问题 :controller的注解使用的是restcontroller
问题 : spring boot是如何实现的呢
----------------------------------------------------------------------------------------------------------------------------------------------------
配置数据源
1 导入数据源相关jar包
        <dependency>
            <groupId>com.alibaba</groupId>
            <artifactId>druid</artifactId>
            <version>1.1.6</version>
        </dependency>
2 编写数据源配置类
package com.kylin.config;

import com.alibaba.druid.pool.DruidDataSource;
import org.springframework.beans.factory.annotation.Value;
import org.springframework.context.annotation.Bean;
import org.springframework.context.annotation.Configuration;
import org.springframework.context.annotation.PropertySource;

import javax.sql.DataSource;

//标注这个是一个配置类
@Configuration
//加载配置文件
@PropertySource("classpath:jdbc.properties")
public class JdbcConfig {

    //获取配置文件中的值并且注入
    @Value("${jdbc.url}")
    String url;
    @Value("${jdbc.driverClassName}")
    String driverClassName;
    @Value("${jdbc.username}")
    String username;
    @Value("${jdbc.password}")
    String password;

    //返回bean,并且放入spring容器中
    @Bean
    public DataSource dataSource(){
        DruidDataSource druidDataSource = new DruidDataSource();
        DruidDataSource dataSource = new DruidDataSource();
        dataSource.setDriverClassName(driverClassName);
        dataSource.setUrl(url);
        dataSource.setUsername(username);
        dataSource.setPassword(password);
        return dataSource;

    }


}
3 测试
package com.kylin.controller;

import org.springframework.beans.factory.annotation.Autowired;
import org.springframework.web.bind.annotation.GetMapping;
import org.springframework.web.bind.annotation.RestController;

import javax.sql.DataSource;


@RestController
public class HelloController {

    @Autowired
    private DataSource dataSource;

    @GetMapping("/hello")
    public String hello(){
        System.out.println(dataSource);
        return "hello,spring boot";
    }
}
不过,这个只是用了spring的那一套注解。有没有sping mvc独有的呢,当然; 下面是数据源填充的第二种方法
1 先声明一个配置类
package com.kylin.config;

import org.springframework.boot.context.properties.ConfigurationProperties;

//在properties中配置文件中,key的前缀是jdbc
@ConfigurationProperties(prefix = "jdbc")
public class Config {

    private String url;
    private String driverClassName;
    private String username;
    private String password;

    public String getUrl() {
        return url;
    }

    public void setUrl(String url) {
        this.url = url;
    }

    public String getDriverClassName() {
        return driverClassName;
    }

    public void setDriverClassName(String driverClassName) {
        this.driverClassName = driverClassName;
    }

    public String getUsername() {
        return username;
    }

    public void setUsername(String username) {
        this.username = username;
    }

    public String getPassword() {
        return password;
    }

    public void setPassword(String password) {
        this.password = password;
    }
}
2 然后在jdbcconfig中从这个类中获取数据
package com.kylin.config;

import com.alibaba.druid.pool.DruidDataSource;

import org.springframework.boot.context.properties.EnableConfigurationProperties;
import org.springframework.context.annotation.Bean;
import org.springframework.context.annotation.Configuration;
import org.springframework.context.annotation.PropertySource;

import javax.sql.DataSource;

//标注这个是一个配置类
@Configuration
//加载文件
@PropertySource("classpath:jdbc.properties")
//配置需要填充的类
@EnableConfigurationProperties(Config.class)
public class JdbcConfig {


    //返回bean,并且放入spring容器中
    @Bean
    public DataSource dataSource(Config jdbc){
        DruidDataSource druidDataSource = new DruidDataSource();
        DruidDataSource dataSource = new DruidDataSource();
        dataSource.setDriverClassName(jdbc.getDriverClassName());
        dataSource.setUrl(jdbc.getUrl());
        dataSource.setUsername(jdbc.getUsername());
        dataSource.setPassword(jdbc.getPassword());
        System.out.println(jdbc.getUsername());
        return dataSource;

    }


}
填充完成。不过这种方法感觉更麻烦了,要需要一个类用于接收数据,有没有更简单的点的呢 ?不需要接收类,直接可以进行填充。下面是第三种方法:
package com.kylin.config;

import com.alibaba.druid.pool.DruidDataSource;

import org.springframework.boot.context.properties.ConfigurationProperties;
import org.springframework.boot.context.properties.EnableConfigurationProperties;
import org.springframework.context.annotation.Bean;
import org.springframework.context.annotation.Configuration;
import org.springframework.context.annotation.PropertySource;

import javax.sql.DataSource;

//标注这个是一个配置类
@Configuration
//加载文件
@PropertySource("classpath:jdbc.properties")
//配置需要填充的类
@EnableConfigurationProperties(Config.class)
public class JdbcConfig {


    //返回bean,并且放入spring容器中
    @Bean
    @ConfigurationProperties("jdbc")
    public DataSource dataSource(Config jdbc){
        return new DruidDataSource();

    }


}
直接注入,不需要任何中间类
在此spring boot引入了一种新的配置文件 yml
格式如下 :
application.yml spring boot会自动加载的
jdbc:
  driverClassName: com.mysql.jdbc.Driver
  url: jdbc:mysql://127.0.0.1:3306/test
  username: root
  password: root
jdbc:后面换行
driverClassName前面空两空格
:后面空一空格
下面来了解下spring boot如何实现这些功能的,spring boot 有两个地方 第一个注解SpringBootApplication ,第二个SpringApplication.run()
1 注解SpringBootApplication
/**
 * Indicates a {@link Configuration configuration} class that declares one or more
 * {@link Bean @Bean} methods and also triggers {@link EnableAutoConfiguration
 * auto-configuration} and {@link ComponentScan component scanning}. This is a convenience
 * annotation that is equivalent to declaring {@code @Configuration},
 * {@code @EnableAutoConfiguration} and {@code @ComponentScan}.
 *
 * @author Phillip Webb
 * @author Stephane Nicoll
 * @since 1.2.0
 */
/* 使用了这个注解表明使用了Bean注解,EnableAutoConfiguration注解,ComponentScan注解,这个注解是一种方便性的配置。这个注解和使用Configuration注解,EnableAutoConfiguration注解,ComponentScan注解三个一起是等价的
* */
@Target(ElementType.TYPE) //基本注解,表明该注解作用于接口、类、枚举
@Retention(RetentionPolicy.RUNTIME) //基本注解,表明注解注解不仅被保存到class文件中,jvm加载class文件之后,仍然存在;
@Documented//基本注解,表明会生成在文档中
@Inherited//基本注解,表名该注解会被自动继承
@SpringBootConfiguration
@EnableAutoConfiguration //是否自动配置
@ComponentScan(excludeFilters = { //注解扫描
        @Filter(type = FilterType.CUSTOM, classes = TypeExcludeFilter.class),
        @Filter(type = FilterType.CUSTOM,
                classes = AutoConfigurationExcludeFilter.class) })
public @interface SpringBootApplication {
/**
 * Indicates that a class provides Spring Boot application
 * {@link Configuration @Configuration}. Can be used as an alternative to the Spring's
 * standard {@code @Configuration} annotation so that configuration can be found
 * automatically (for example in tests).
 * <p>
 * Application should only ever include <em>one</em> {@code @SpringBootConfiguration} and
 * most idiomatic Spring Boot applications will inherit it from
 * {@code @SpringBootApplication}.
 *
 * @author Phillip Webb
 * @since 1.4.0
 */
 /**
 表明这个类提供spring boot的服务
 这个注解被用来替代spring的code和Configuration注解
 表示这个类是注解类


 */

@Target(ElementType.TYPE)
@Retention(RetentionPolicy.RUNTIME)
@Documented
@Configuration
public @interface SpringBootConfiguration {

}
@Repeatable注解表示可以重复使用
@import注解 导入注解配置类
spring boot为什么不需要我们自己配置,是因为很多东西他已经帮我们配置了。但是我们想要覆盖,怎么办呢
1 先找到F:org\springframework\boot\spring-boot-autoconfigure\2.1.5.RELEASE\spring-boot-autoconfigure-2.1.5.RELEASE.jar!\META-INF\spring.factories
这个文件这个文件中有对应的键和配置类,我们只要把键名和新的配置类声明在application.yml中即可。也可以在application.properties中对其进行覆盖
spring boot中添加日志logging:
level:
com.itheima: debug
org.springframework: infospring boot中如何访问静态资源呢,它可是没有webapp目录的。但是spring boot是定义了静态资源路径的,静态资源路径为:
classpath:/META-INF/resources/
classpath:/resources/
classpath:/static/
classpath:/public
其中的任何一个都可以。
spring boot中添加拦截器
spring boot的官方文档:\
如果你想要保持Spring Boot 的一些默认MVC特征,同时又想自定义一些MVC配置(包括:拦截器,格式化器,
视图控制器、消息转换器 等等),你应该让一个类实现WebMvcConfigurer ,并且添加@Configuration 注
解,但是千万不要加@EnableWebMvc 注解。如果你想要自定义HandlerMapping 、HandlerAdapter 、
ExceptionResolver 等组件,你可以创建一个WebMvcRegistrationsAdapter 实例 来提供以上组件。
如果你想要完全自定义SpringMVC,不保留SpringBoot提供的一切特征,你可以自己定义类并且添加
@Configuration 注解和@EnableWebMvc 注解
详细代码:
1 编写一个拦截器,实现拦截器类
package com.kylin.Interceptor;

import lombok.extern.slf4j.Slf4j;
import org.springframework.web.servlet.HandlerInterceptor;
import org.springframework.web.servlet.ModelAndView;

import javax.servlet.http.HttpServletRequest;
import javax.servlet.http.HttpServletResponse;

//实现拦截器
@Slf4j
public class MyInterceptor implements HandlerInterceptor {

    @Override
    //访问资源,先访问该方法,返回false则不能访问资源
    public boolean preHandle(HttpServletRequest request, HttpServletResponse response, Object handler) throws Exception {
        System.out.println("这是MyInterceptor拦截器的preHandle方法");
        log.debug("这是MyInterceptor拦截器的preHandle方法");
        return true;
    }

    @Override
    //访问资源后访问该方法
    public void postHandle(HttpServletRequest request, HttpServletResponse response, Object handler, ModelAndView modelAndView) throws Exception {
        System.out.println("这是MyInterceptor拦截器的preHandle方法");
        log.debug("这是MyInterceptor拦截器的postHandle方法");
    }

    @Override
    //最后一个拦截器往回执行所有拦截器的afterCompletion方法
    public void afterCompletion(HttpServletRequest request, HttpServletResponse response, Object handler, Exception ex) throws Exception {
        System.out.println("这是MyInterceptor拦截器的postHandle方法");
        log.debug("这是MyInterceptor拦截器的postHandle方法");
    }
}
2 spring框架有一个拦截器栈,我们做的需要把拦截器加入拦截器栈,详细代码
package com.kylin.config;

import com.kylin.Interceptor.MyInterceptor;
import org.springframework.context.annotation.Bean;
import org.springframework.context.annotation.Configuration;
import org.springframework.web.servlet.config.annotation.InterceptorRegistry;
import org.springframework.web.servlet.config.annotation.WebMvcConfigurer;

@Configuration
public class MvcConfig implements WebMvcConfigurer {

    /**
     * 将拦截器注册到spring ioc容器
     * @return myInterceptor
     */
    @Bean
    public MyInterceptor myInterceptor(){
        return new MyInterceptor();
    }

    /**
     * 重写该方法;往拦截器链添加自定义拦截器
     * @param registry 拦截器链
     */
    @Override
    public void addInterceptors(InterceptorRegistry registry) {
        registry.addInterceptor(myInterceptor()).addPathPatterns("/*");

    }
}
整合jdbc事务
spring boot 相对于spring 大大简化了spring的配置,只需要在pom.xml加入spring-boot-starter-jdbc
代码如下
<dependency>
<groupId>org.springframework.boot</groupId>
<artifactId>spring-boot-starter-jdbc</artifactId>
</dependency>
<dependency>
<groupId>mysql</groupId>
<artifactId>mysql-connector-java</artifactId>
<version>5.1.46</version>
</dependency>2 在service中加入注解@Transactional
整合连接池
在启动的时候,spring已经帮我们整合了一个连接池,HikariCP。HikariCP号称最快的连接池。
我们只需要要指定连接池配置的参数即可:
spring:
datasource:
driver-class-name: com.mysql.jdbc.Driver
url: jdbc:mysql://localhost:3306/springboot_test
username: root
password: root


 9万+
9万+

 被折叠的 条评论
为什么被折叠?
被折叠的 条评论
为什么被折叠?
 到【灌水乐园】发言


