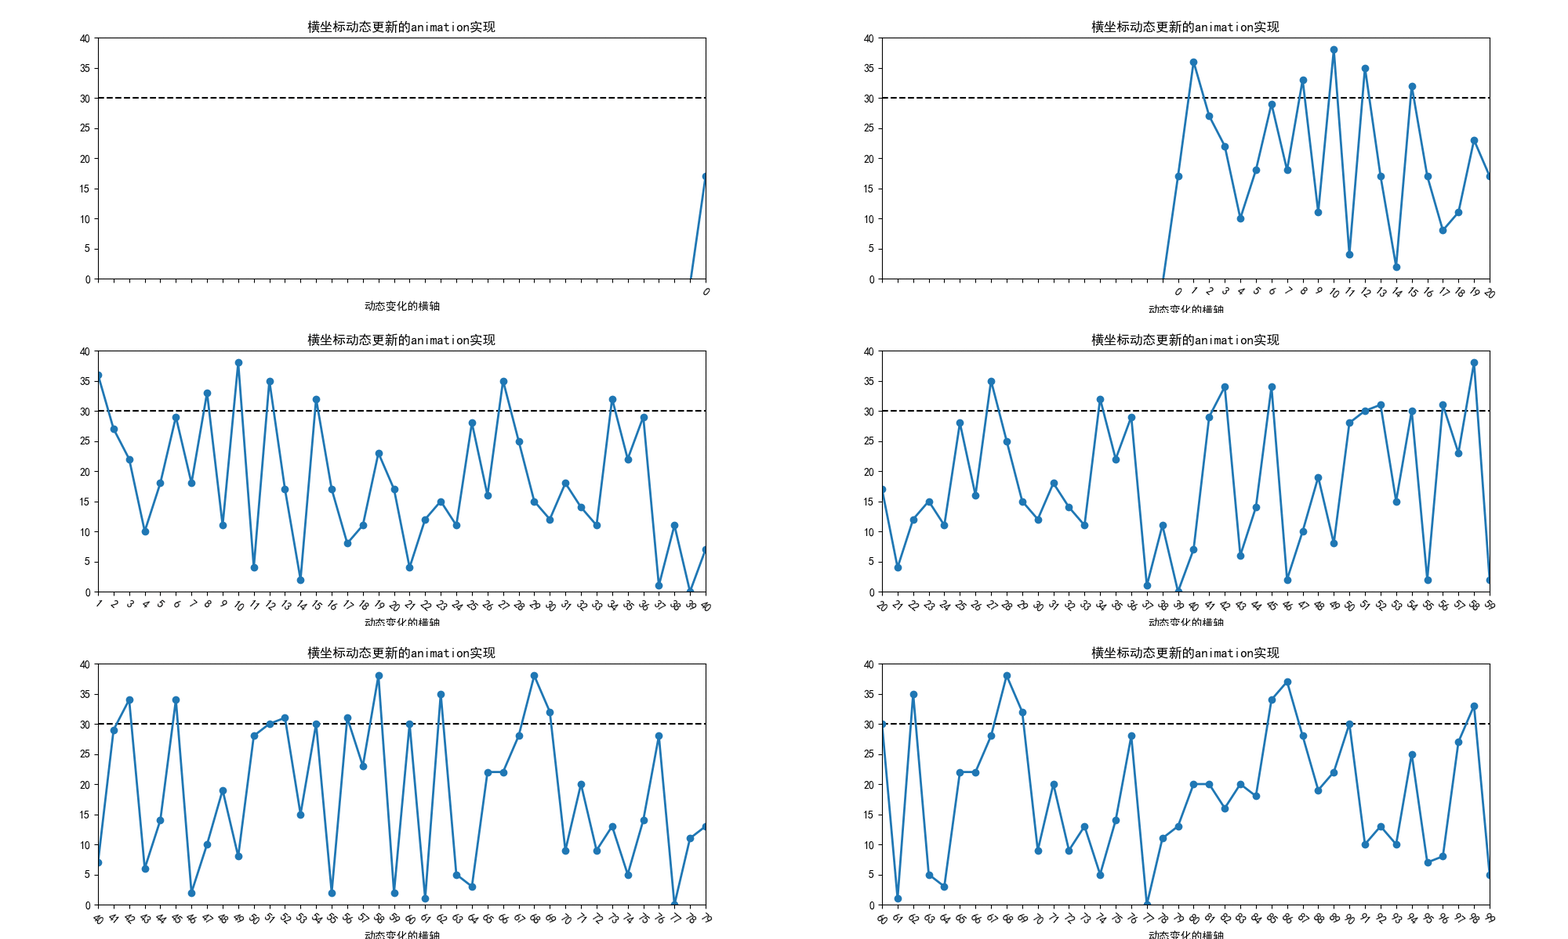
流数据动态监控原型的内容概述
开发环境:Python3.6
代码行数:不到40行代码
代码风格:详细注解
代码特点:一定能跑起来
附加资料:带详细注释的九个animation实例
- Decay
- The Bayes update
- The double pendulum problem
- Animated histogram
- Rain simulation
- Animated 3D random walk
- Animated line plot
- Oscilloscope
- MATPLOTLIB UNCHAINED
最后的效果:

这方面的资料网上很少,以下是网上三个较为相关的博客:
《使用Matplotlib实现实时数据流可视化(animation模块)》
原文:https://blog.youkuaiyun.com/weixin_43323092/article/details/82929556
该博主只介绍了常用函数的几个参数;给了一个官网的实例,这个实例没有注解;博主自己的实现没有给出完整代码,不能跑起来。
《可视化篇:流式数据监控(python)》
原文:https://blog.youkuaiyun.com/yc_1993/article/details/54933751
该博主提供了python 2.X的实现,并提供了一些流数据监控实现的思路,并对相关的函数做了一定的介绍。该博主给了两种相关的实现(代码注释不是很清楚,代码量有点大),而且两种实现没有给相应的数据集,不能顺利的跑起来。
《Matplotlib 画动态图: animation模块的使用》
原文:https://blog.youkuaiyun.com/u013180339/article/details/77002254
该博主只是简单的搬运了官网的四个例子,没有做详细的注释和分析。
本博主提供的资料特点:
- 代码简洁且有详细注释
- 附带官网示例(带注释)
- 提供jupyter notebook使用教程,方便理解代码以及提高开发效率
- 使用Python3.6实现
- 工程一定能够运行起来,并且易于后期修改
- 学完提供的jupyter notebook使用教程、官网示例、目标代码,相关技能将得到很大的提升
流数据动态监控原型源码
from numpy import sin, cos
import numpy as np
import matplotlib.pyplot as plt
import scipy.integrate as integrate
import matplotlib.animation as animation
%matplotlib notebook

#用来正常显示中文标签
plt.rcParams['font.sans-serif'] = ['SimHei']
#用来正常显示负号
plt.rcParams['axes.unicode_minus'] = False

fig = plt.figure(figsize=(10, 4))
ax = fig.add_subplot(111, autoscale_on=False, xlim=(0, 40), ylim=(0, 40))
ax.set_aspect('auto')  # 控制长宽比
# ax.grid() # 是否要格子背景
ax.axhline(30, linestyle='--', color='black')
# 设置图片标题
ax.set_title('横坐标动态更新的animation实现')
# 设置横坐标名称
ax.set_xlabel('动态变化的横轴')
line, = ax.plot([], [], 'o-', lw=2)

# 由于animation必须先有指定的数据或者指定的数据大小,但是我们的数据是一个一个显示的,初期是么有数据的
# 我们又必须提前填充指定个数的数据,这里我们填充x、y刻度以外的数据,然后想办法不显示
# 我们如何不显示呢?由于这些数据本质上还是要输出的,只是不让我们看见,数据既然要输出我们就要正确的设置这些数据对应的刻度
# 既然刻度不能做出改变,我们只能在刻度标签做手脚,我们让数据中x轴标签对应的刻度小于0时,标签显示空字符串
thisx = [i for i in range(-40, 0)]
thisy = (np.zeros(40, dtype=int) - 1).tolist()


def init():
    line.set_data([], [])
    return line


def animate(*args):
    # 这种操作之前一定要确保len(thisy) = len(thisx)
    del thisx[0]
    del thisy[0]
    thisx.append(max(thisx) + 1)
    thisy.append(np.random.randint(0, 40, 1))
    # 设置x轴的范围
    ax.set_xlim(min(thisx), max(thisx))

    # 更新刻度,刻度只要早x轴的范围内就可以
    ax.set_xticks([i for i in range(min(thisx), max(thisx) + 1, 1)])
    # 设置刻度标签
    ax.set_xticklabels(
        [i if i >= 0 else '' for i in range(min(thisx),
                                            max(thisx) + 1, 1)],
        rotation=320)
    # 重新渲染子图
    ax.figure.canvas.draw()
    line.set_data(thisx, thisy)
    return line


# blit选择更新所有点,还是仅更新产生变化的点。应选择True
ani = animation.FuncAnimation(fig,
                              animate,
                              interval=600,
                              blit=False,
                              init_func=init)
# ani.save('jieky_animation.gif',writer='imagemagick')
plt.show()
感觉博主的帖子对你有帮助,记得点赞哦!!!
带详细注释的九个animation实例请加
QQ群:615578708


 818
818

 被折叠的 条评论
为什么被折叠?


