


 本文介绍 Flume 的功能与架构,演示如何通过 Flume 实时收集、监控日志数据并存储到 HDFS 中,包括配置文件编写、Agent 应用编写等实践步骤。
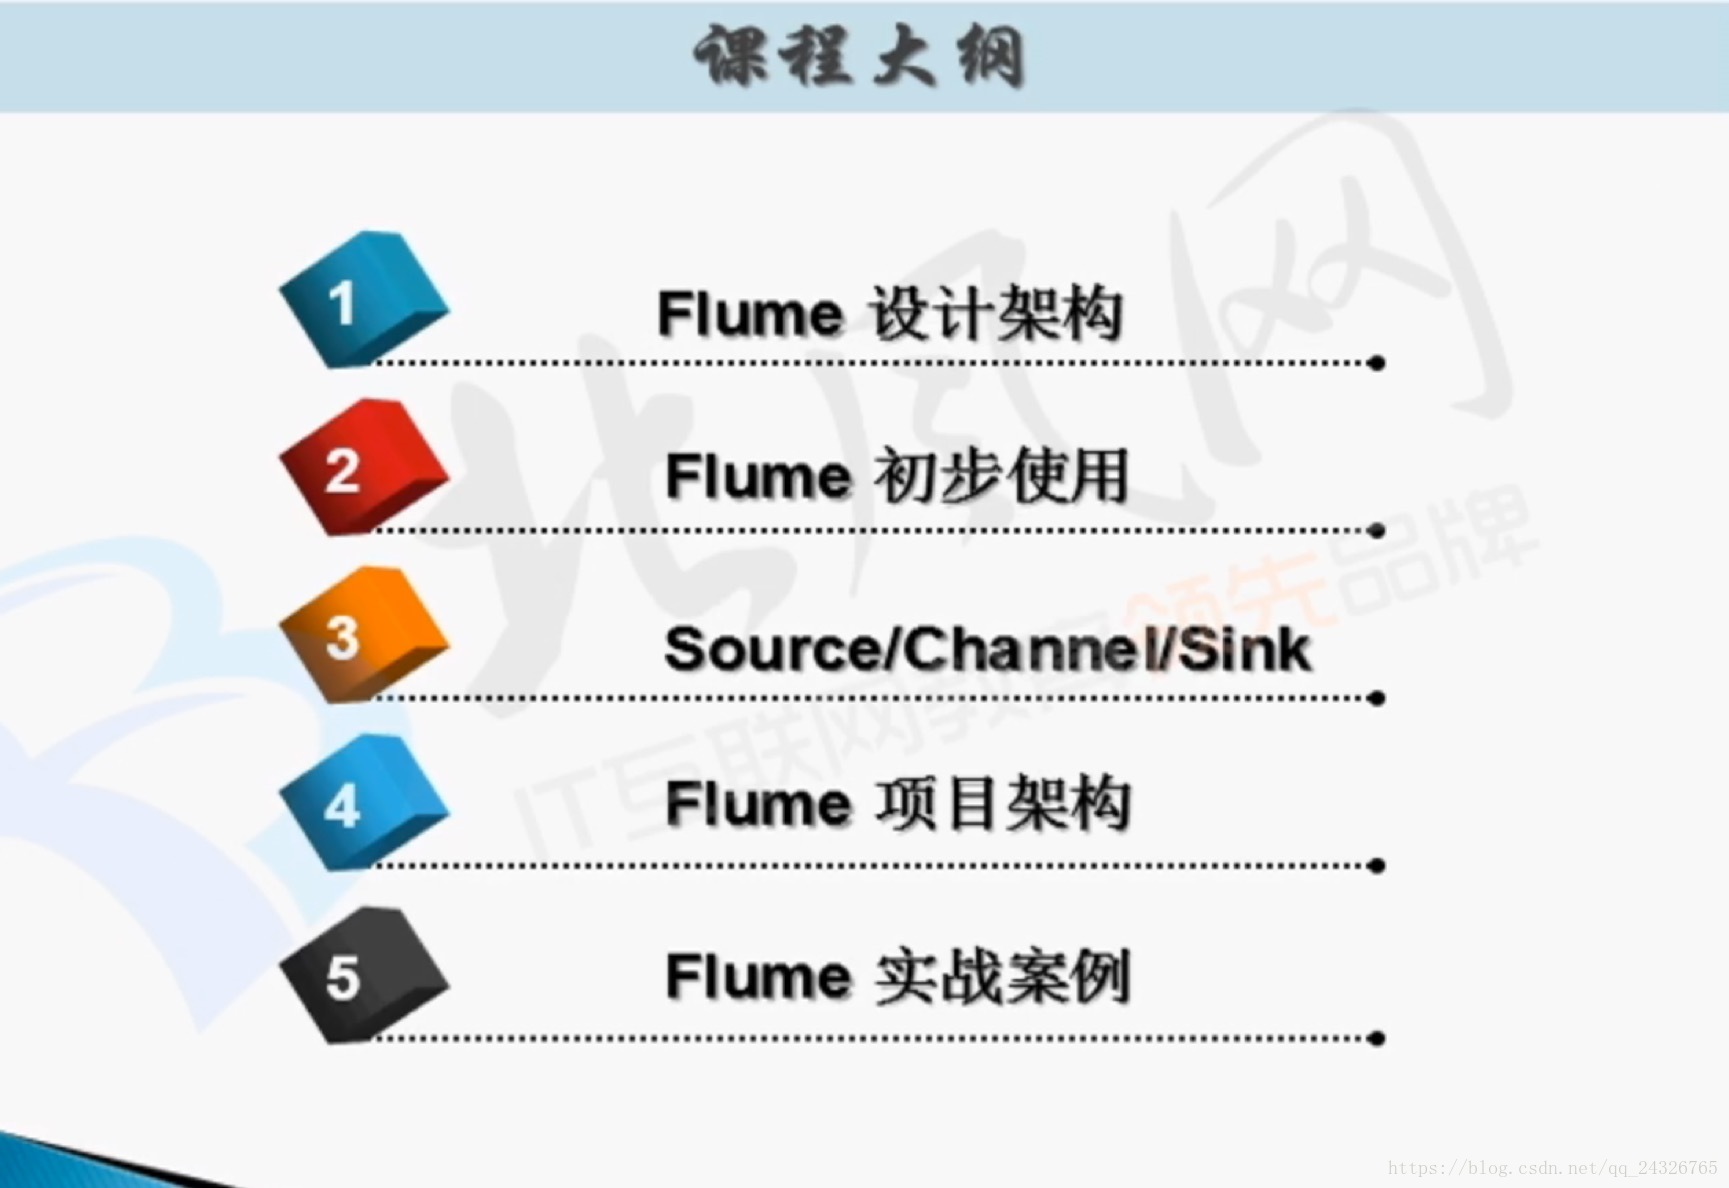
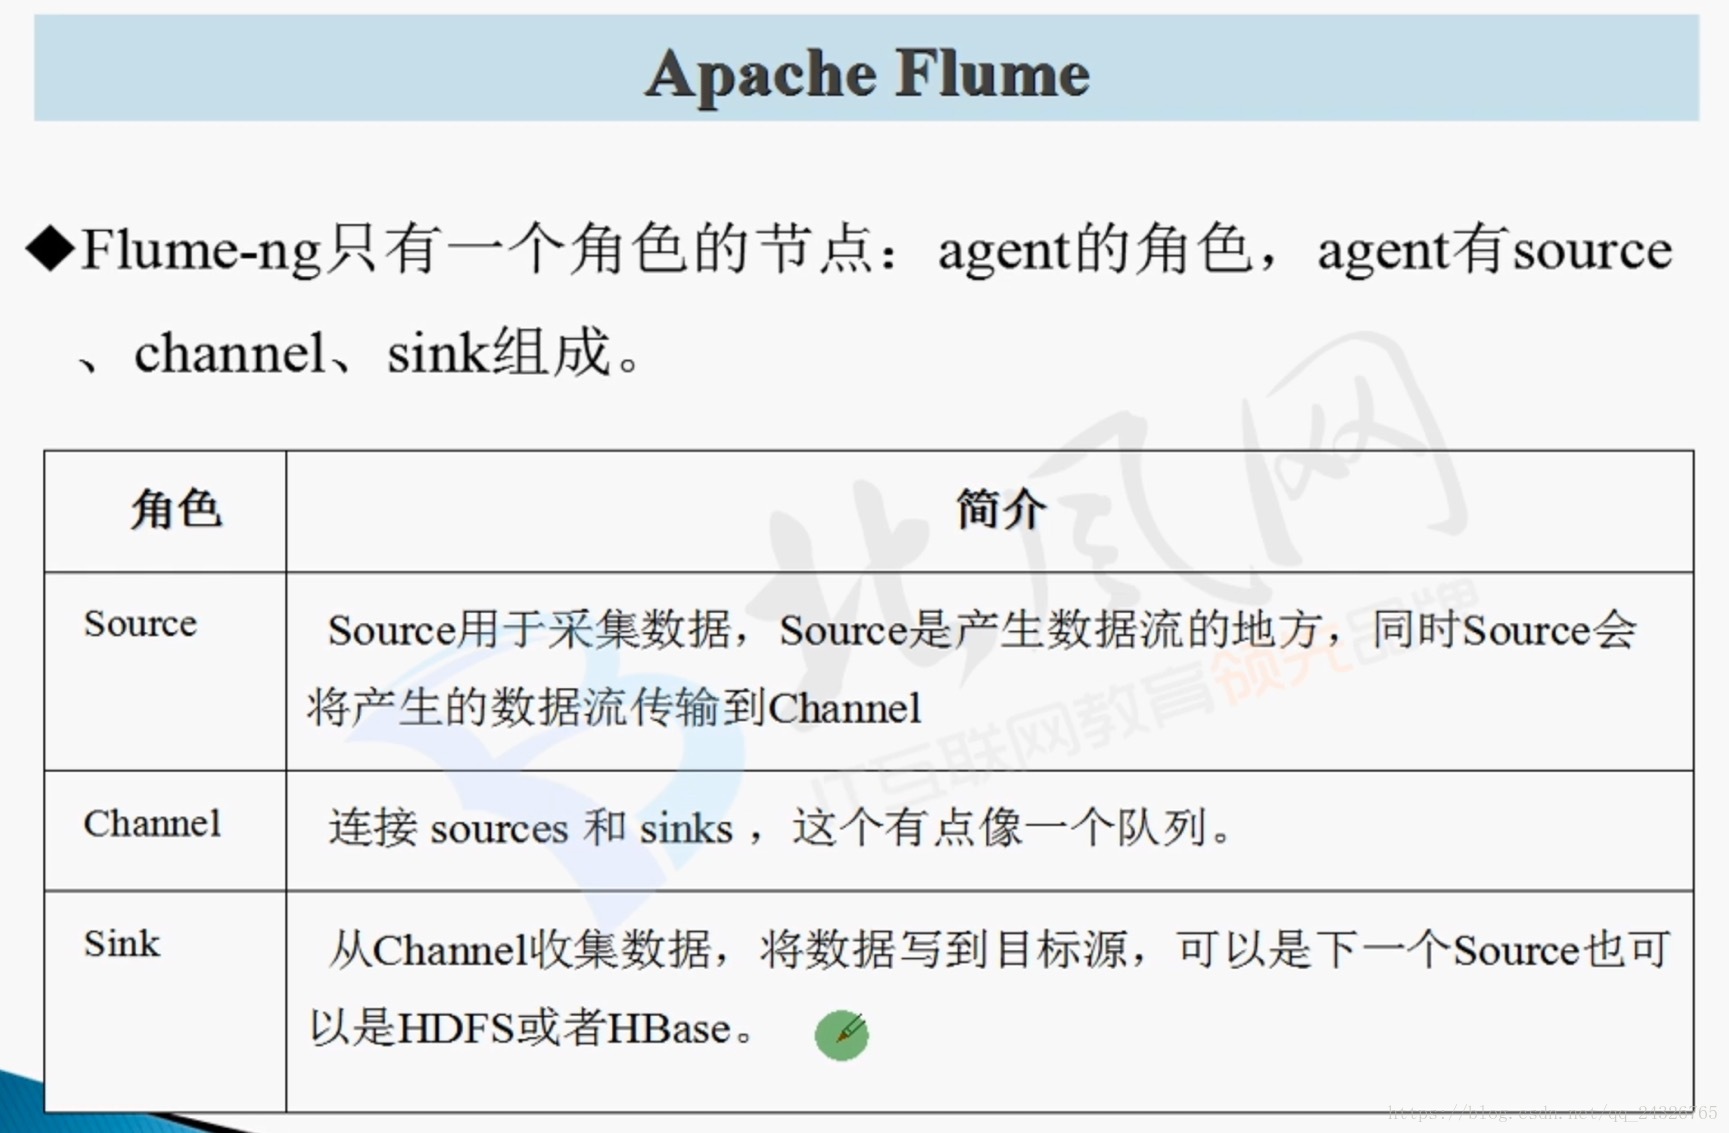
1.Flume功能概述
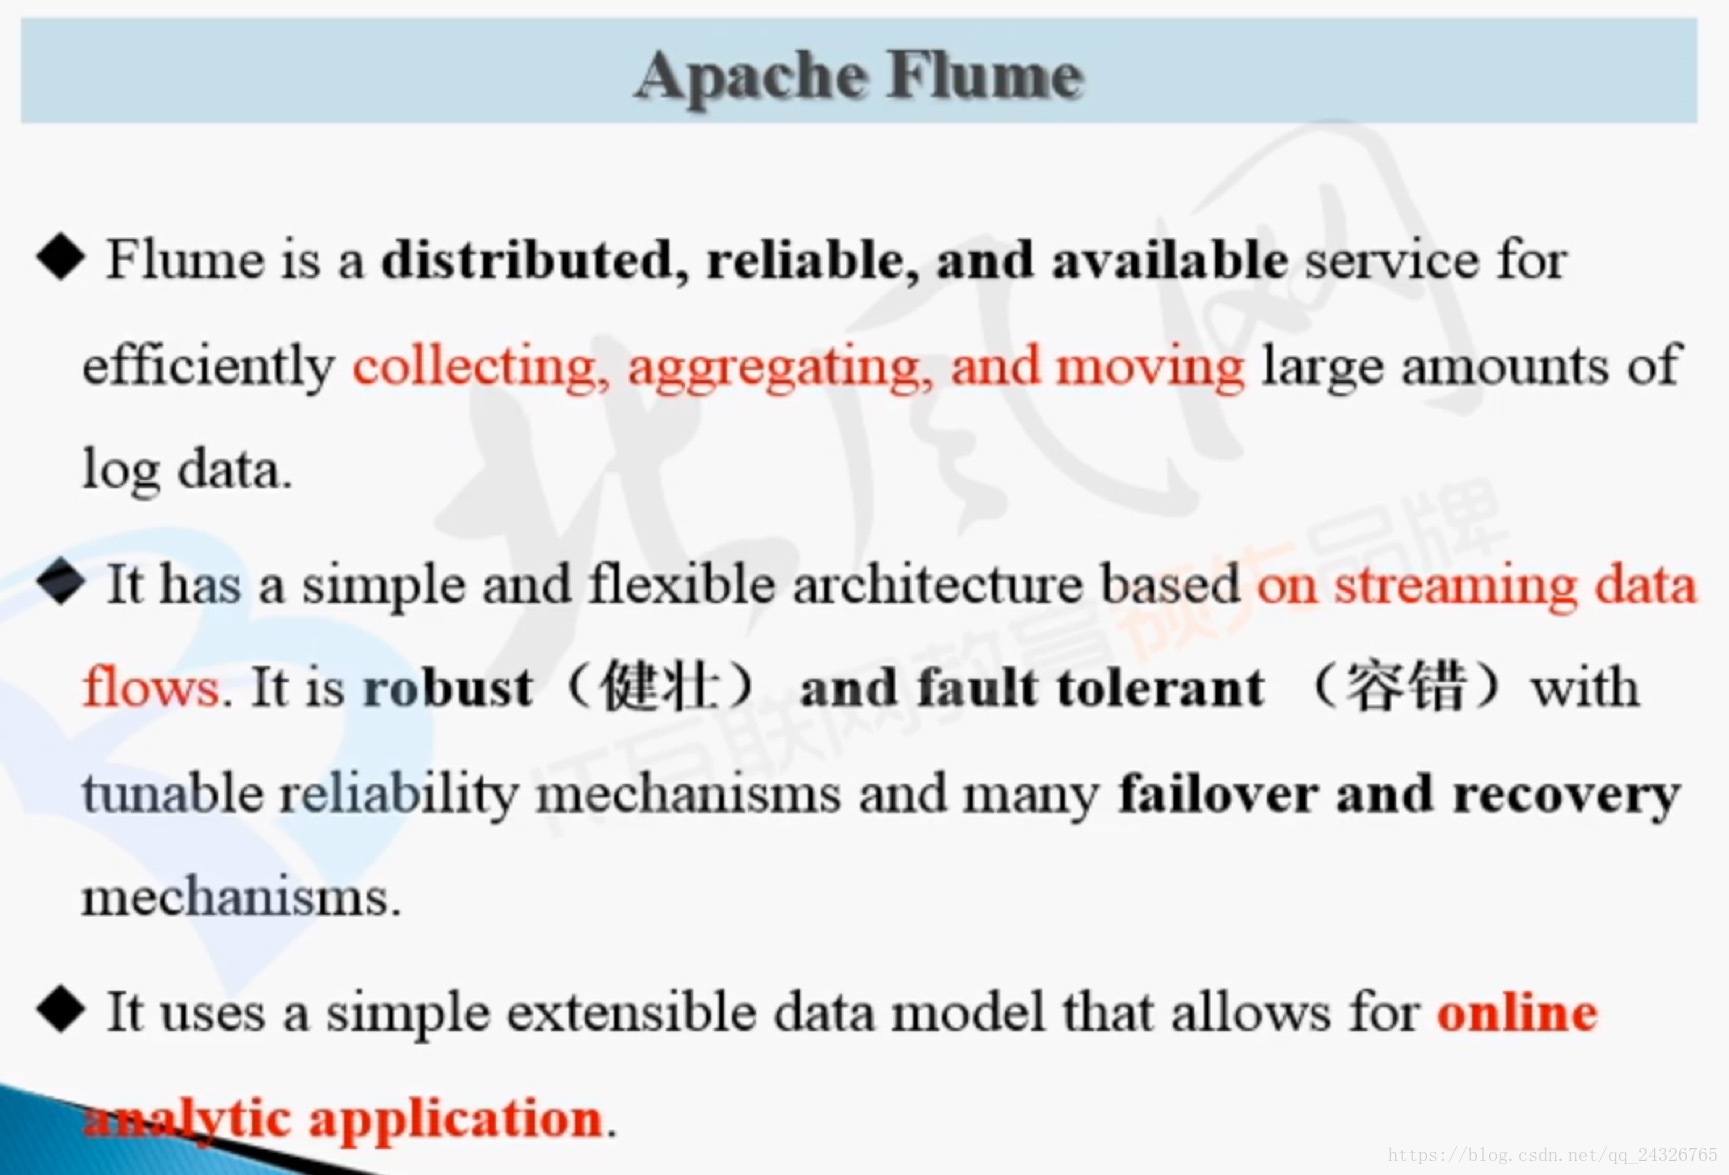
Flume是一个分布式的,可靠的,可用的服务,用于高效地收集,汇总和移动大量的日志数据。它具有基于流式数据流的简单而灵活的架构。它具有可靠的可靠性机制和许多故障转移和恢复机制,具有强大的容错能力。它使用一个简单的可扩展的数据模型,允许在线分析应用程序。
flume的分布式如下图:
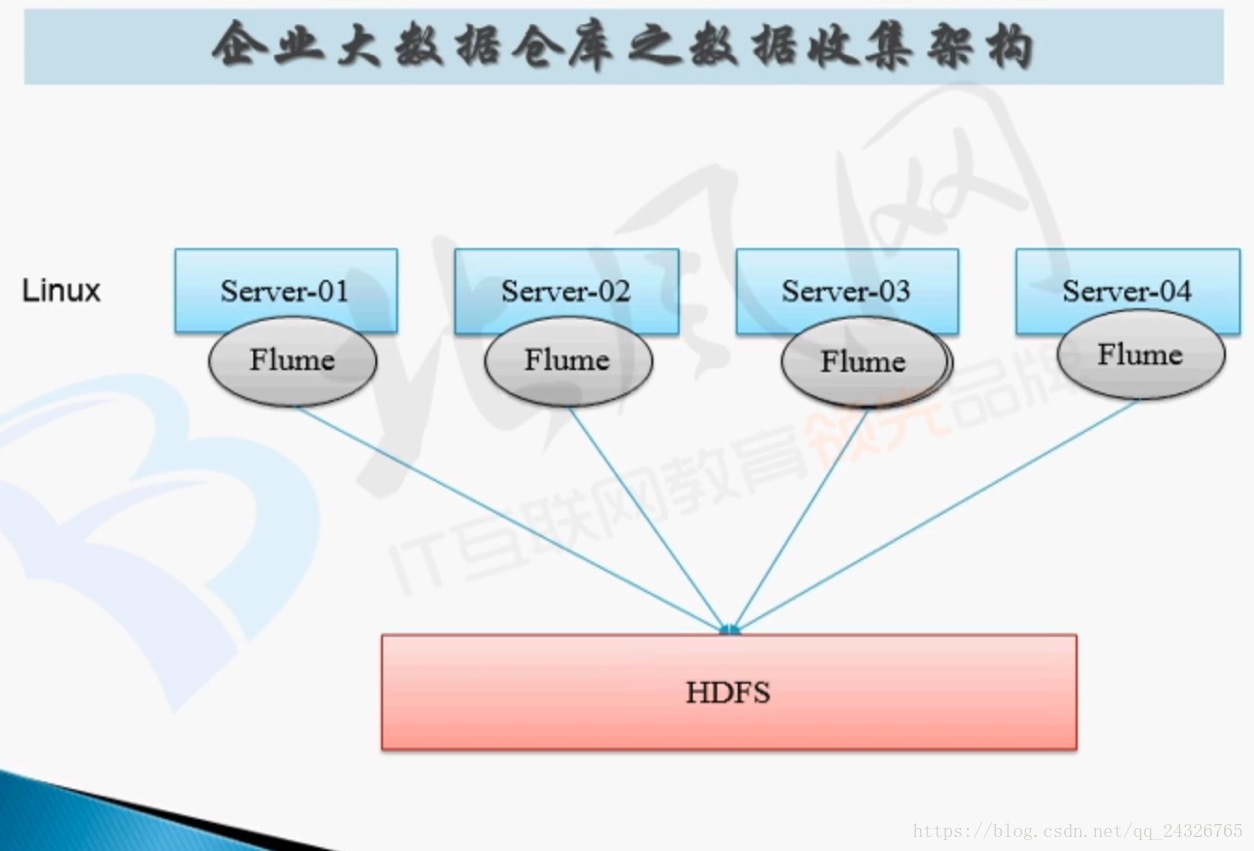
企业中的应用:
2. Flume架构设计
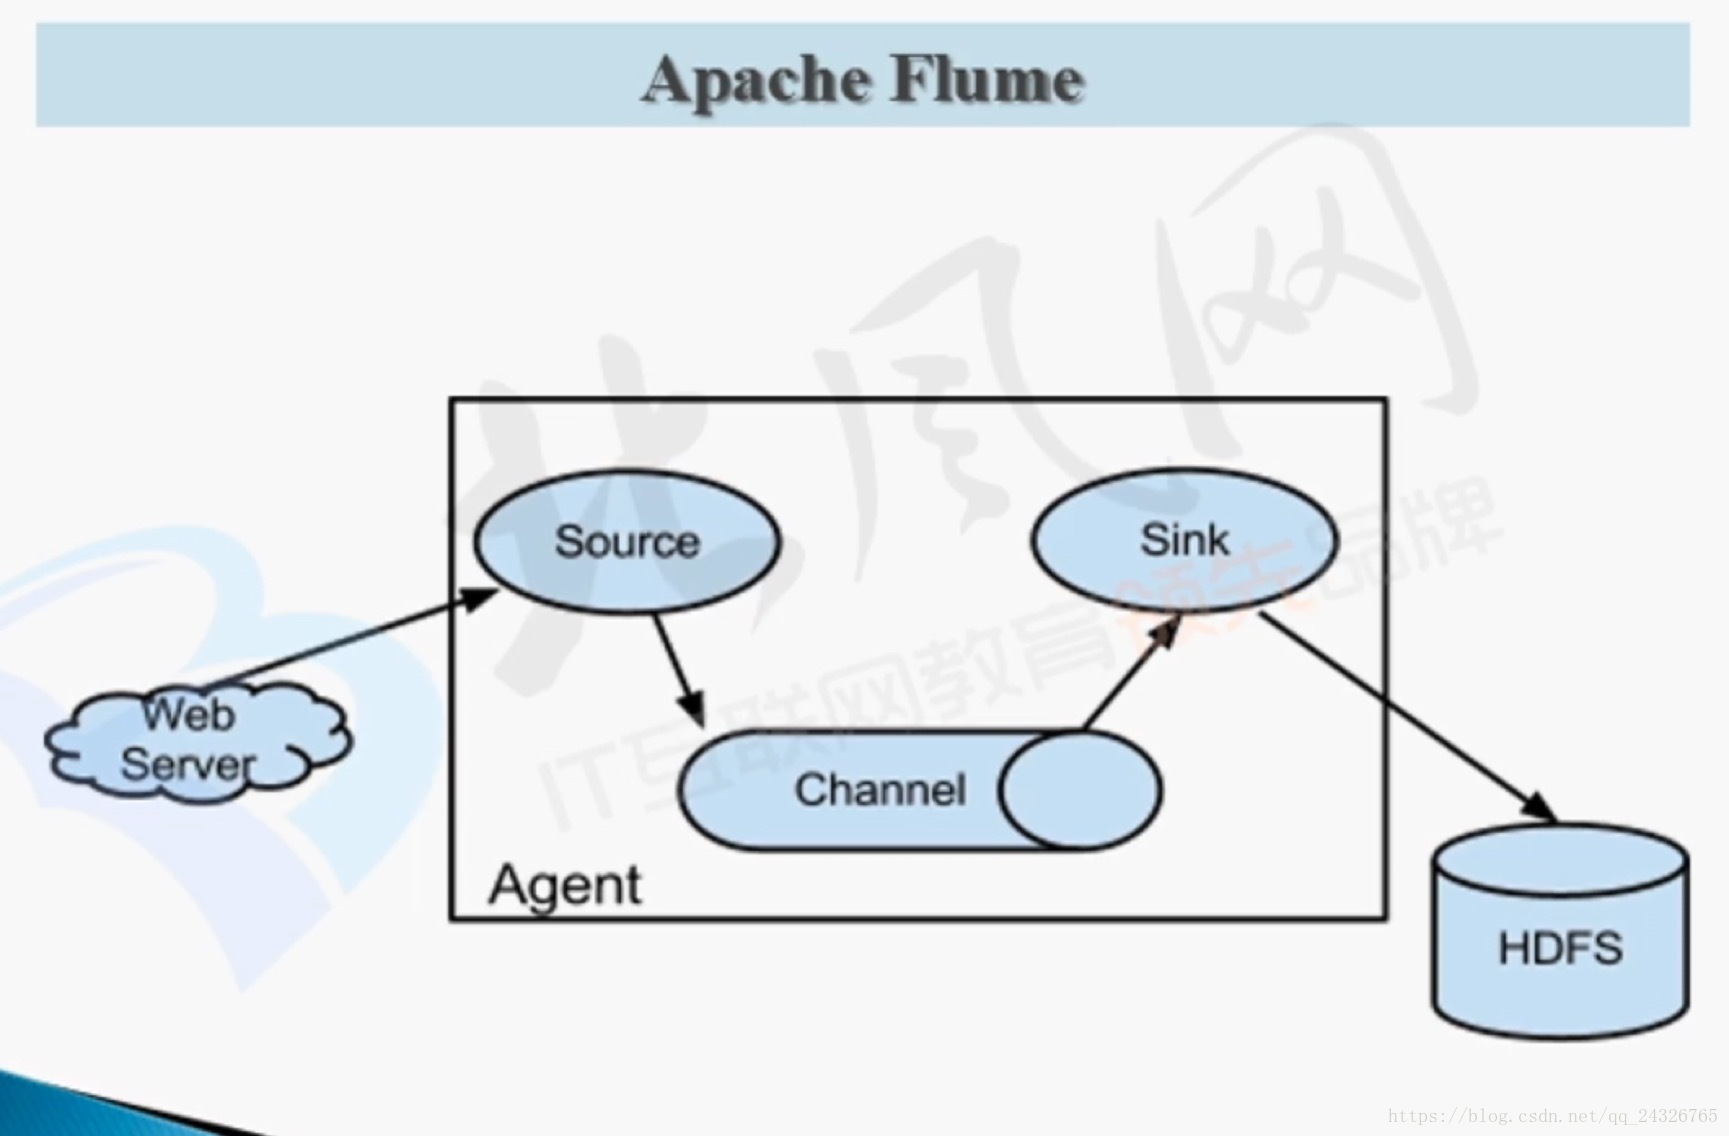
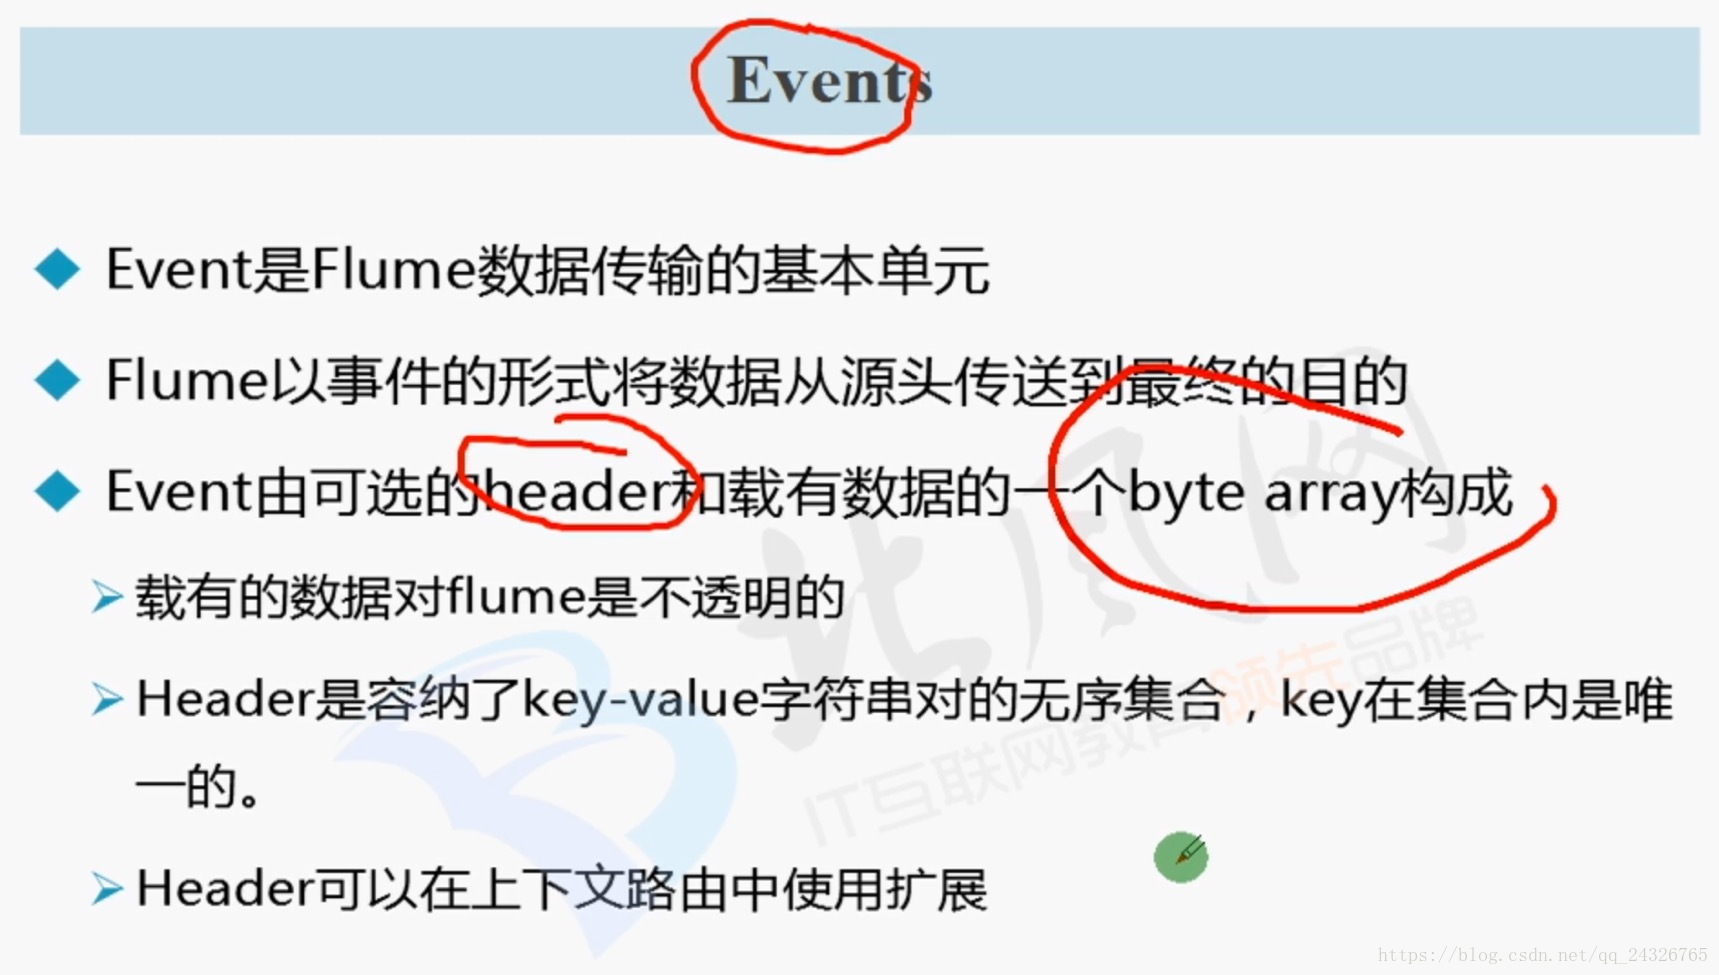
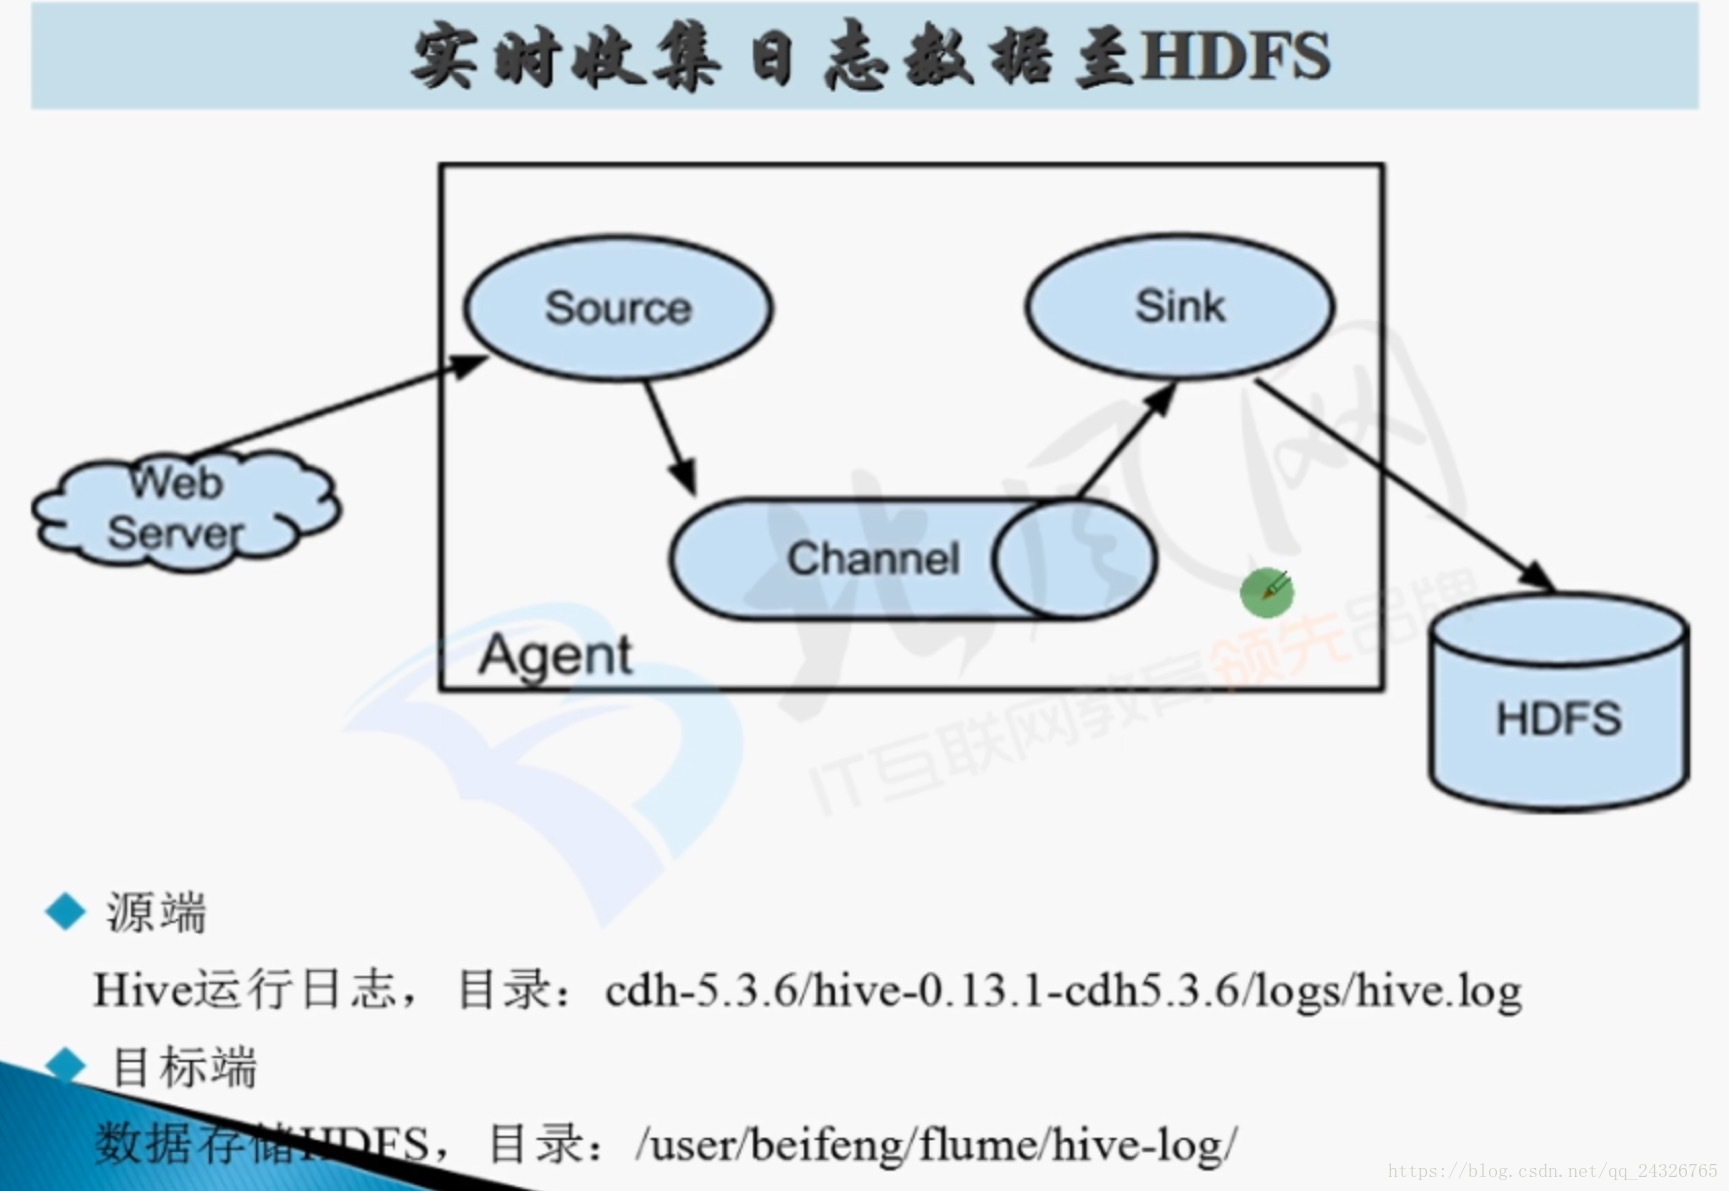
工作流程:source从服务器拿到数据封装成event,event放到channel(缓冲作用,起到了数据的安全性、容灾和恢复)管道中,sink从管道中拿数据写到hdfs上。
(数据流的形式以event封装)
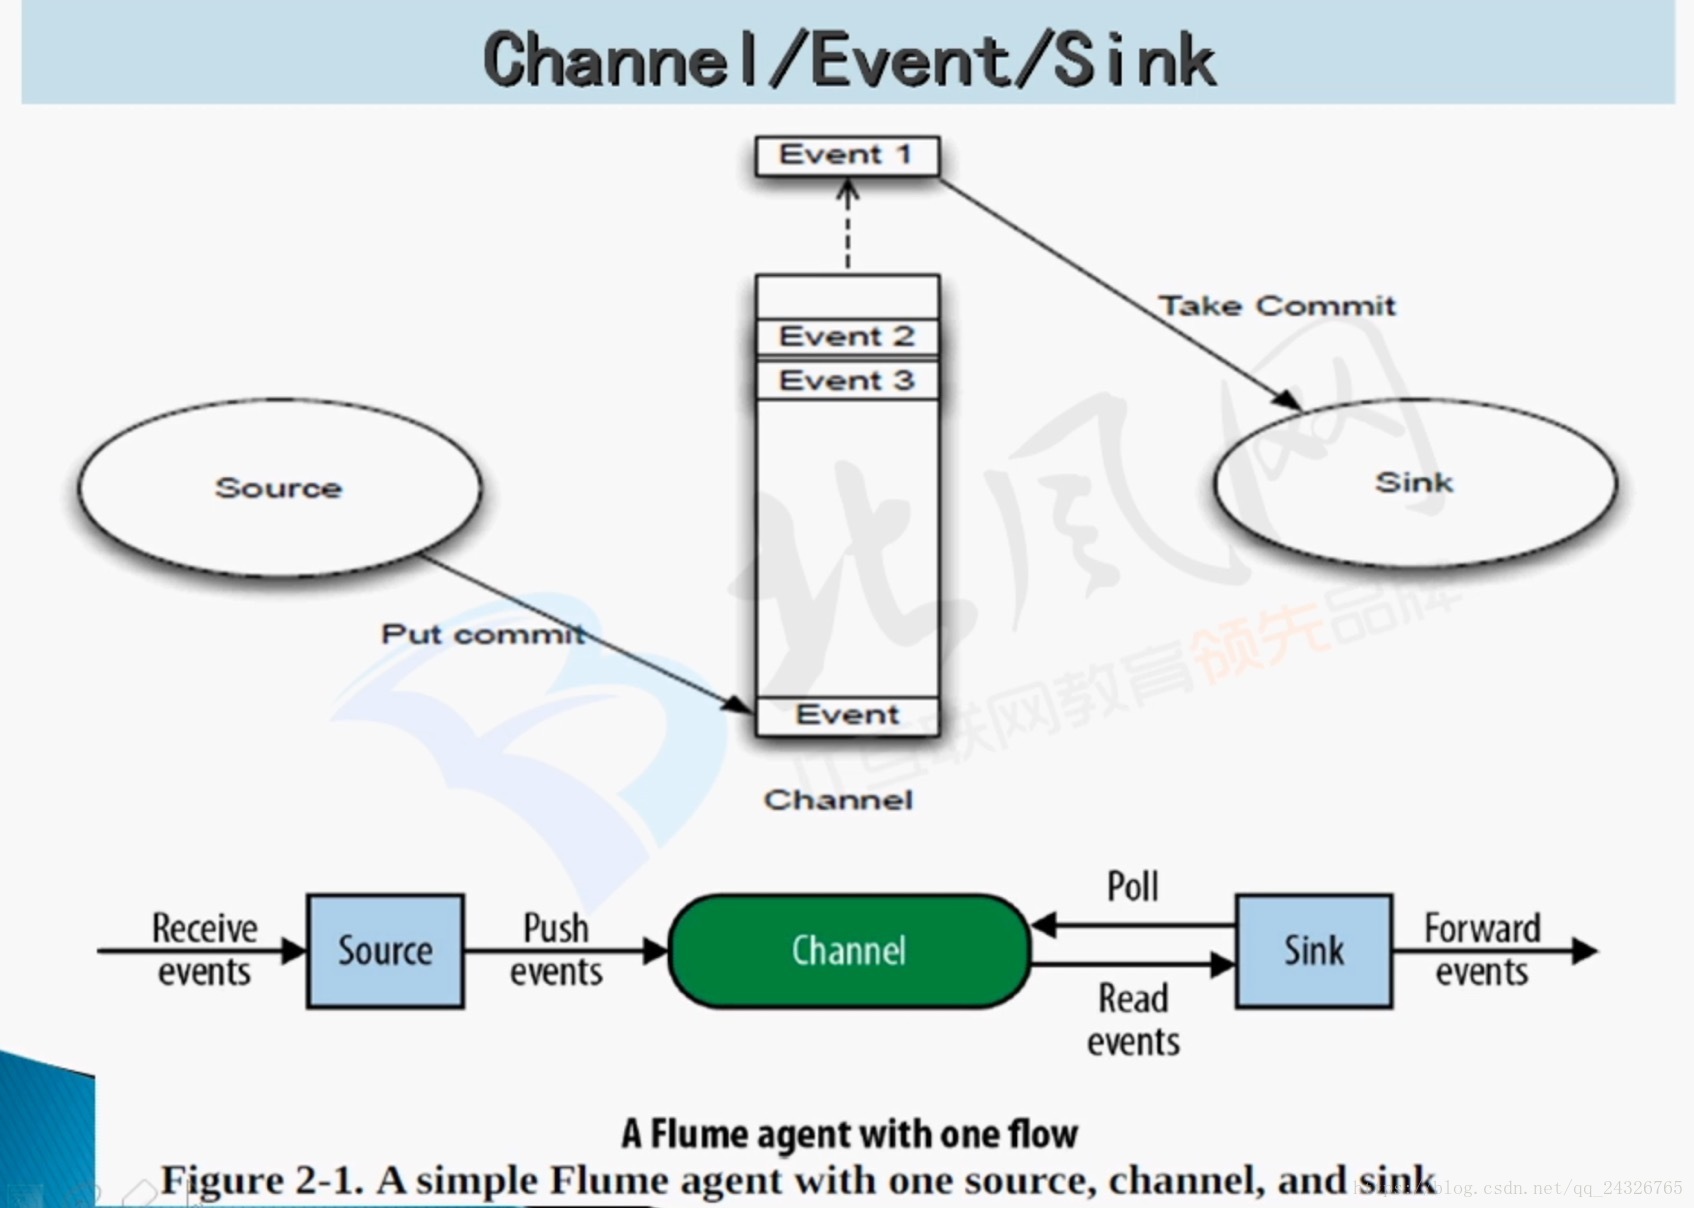
(Poll:sink从channel中拿数据)
flume可起到数据清洗的作用:
可在 source → channel 和 channel → sink 的过程中添加过滤条件。能用flume清洗最好用,如果在flume将数据收集到hdfs上再进行清洗就比较麻烦了。
3.Flume Agent编程及flume-ng命令使用
安装:
① 解压
[root@hadoop-senior software]# tar-xzvf flume-ng-1.6.0-cdh5.13.0.tar.gz -C /opt/cdh5.13.0/
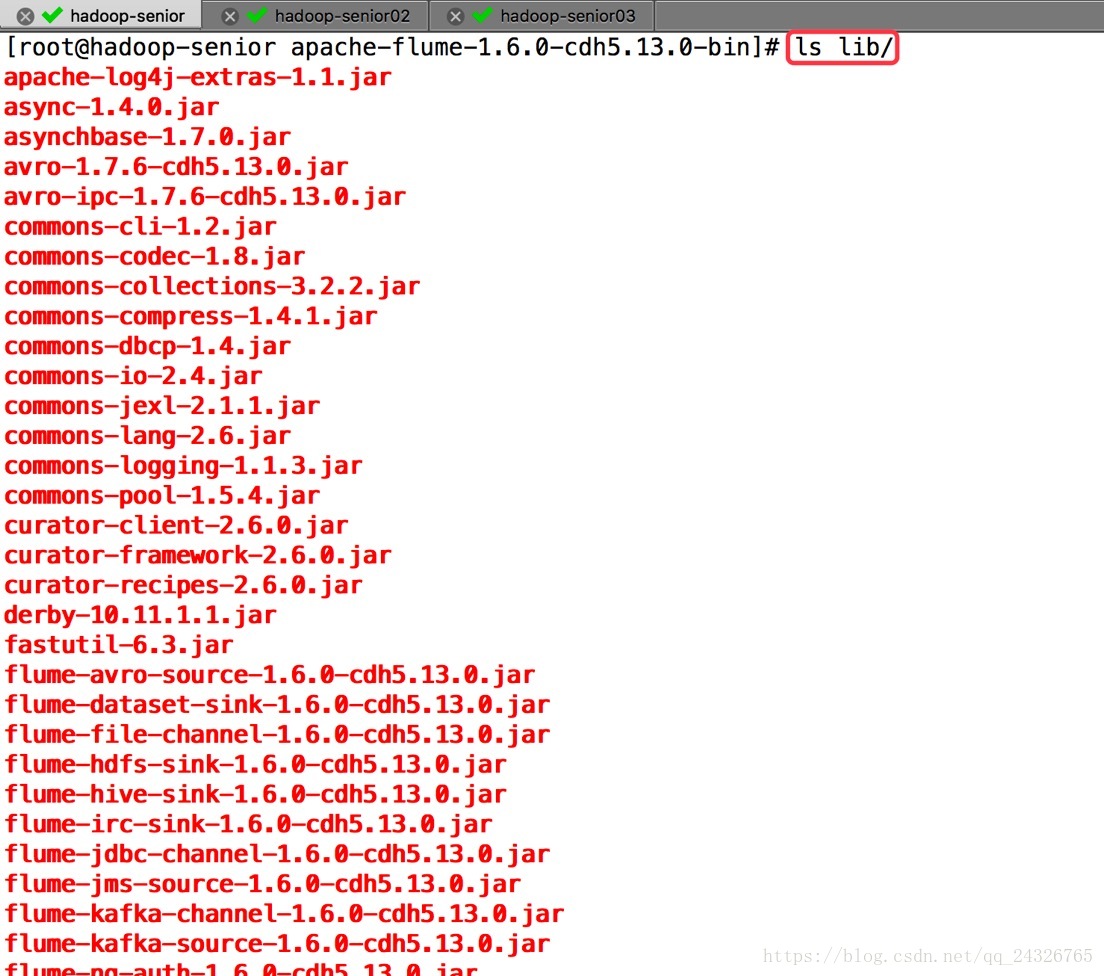
lib目录下放的是flume支持的组件:
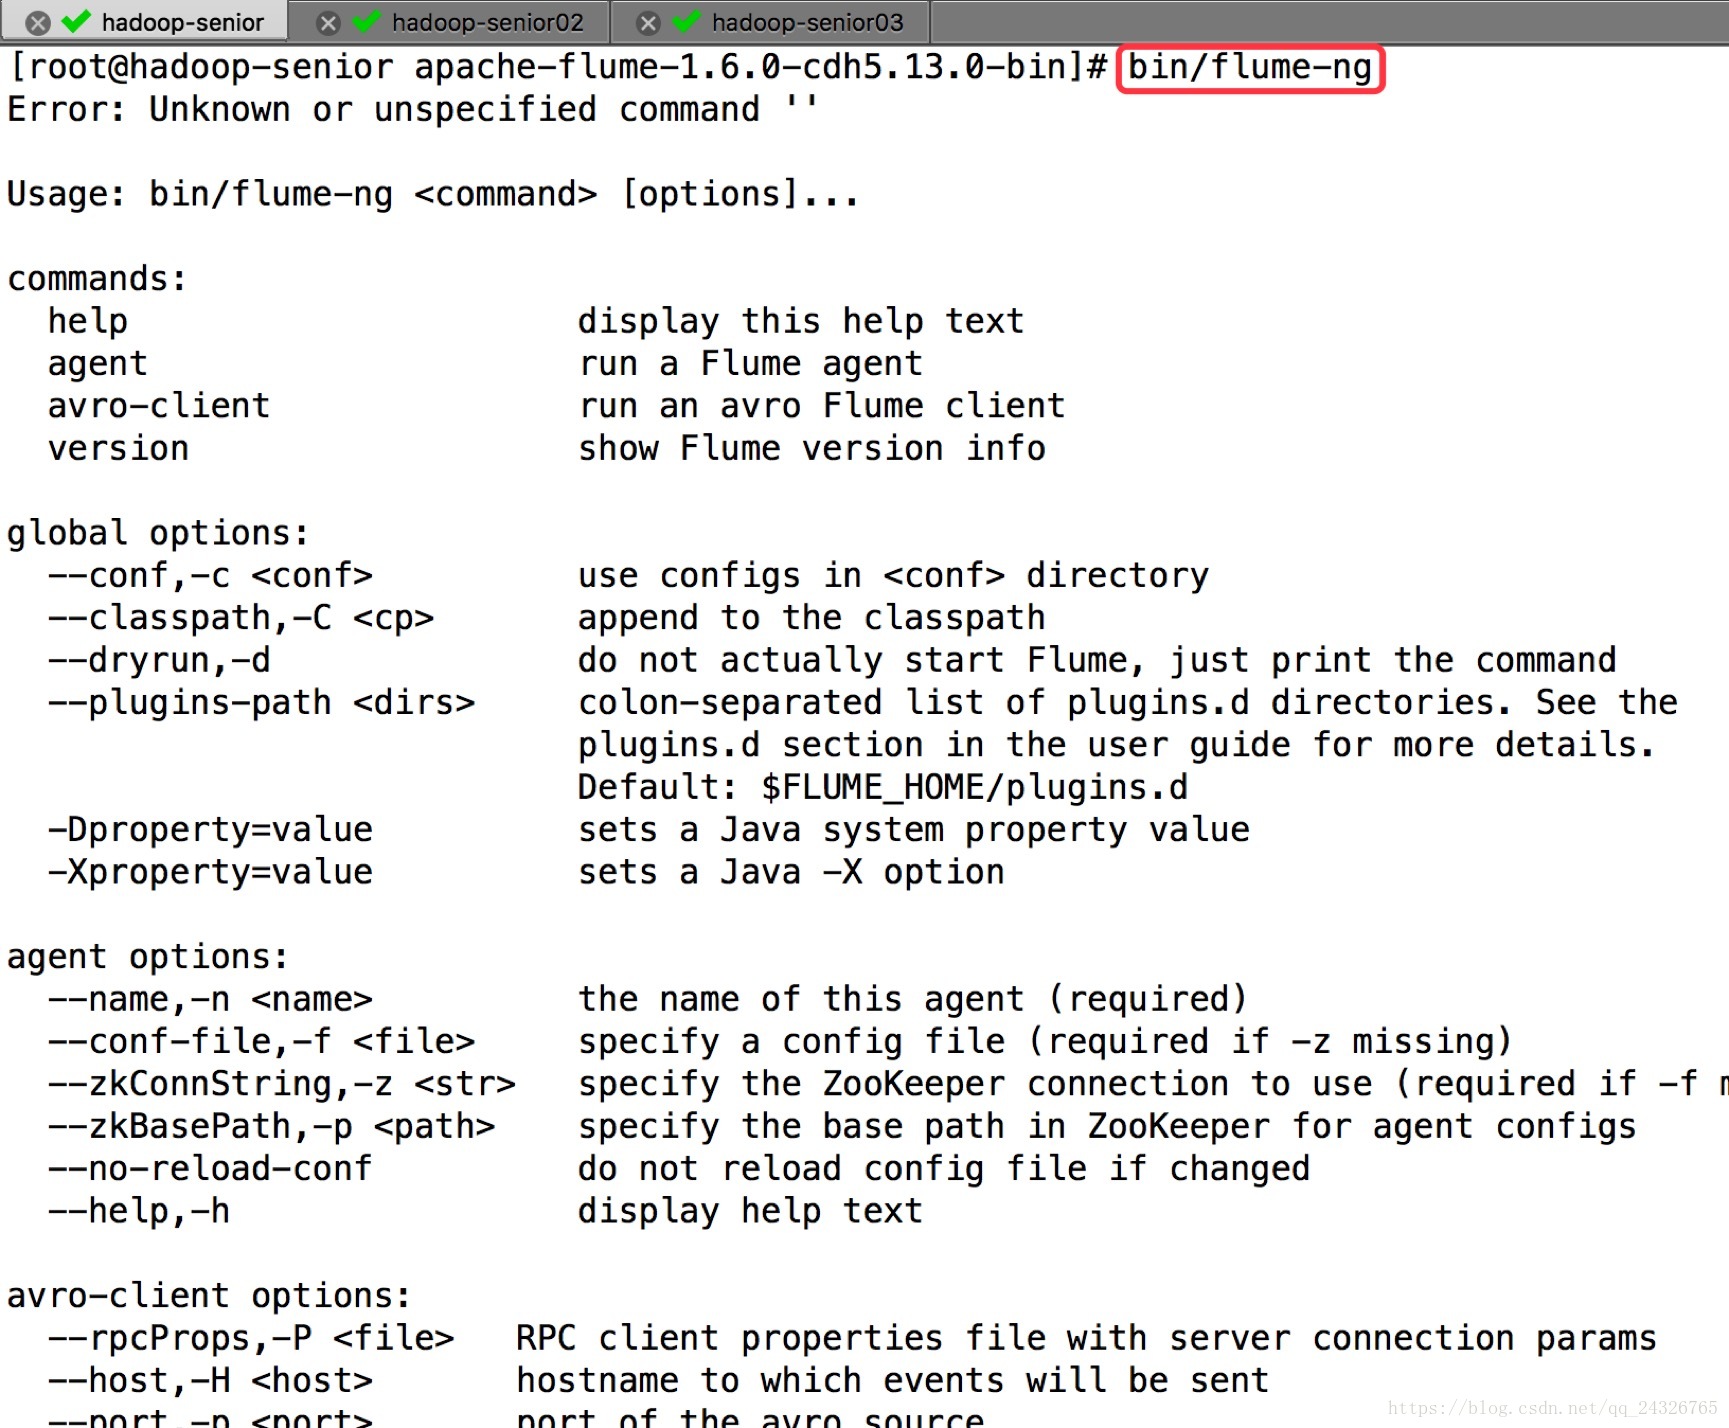
可执行命令:

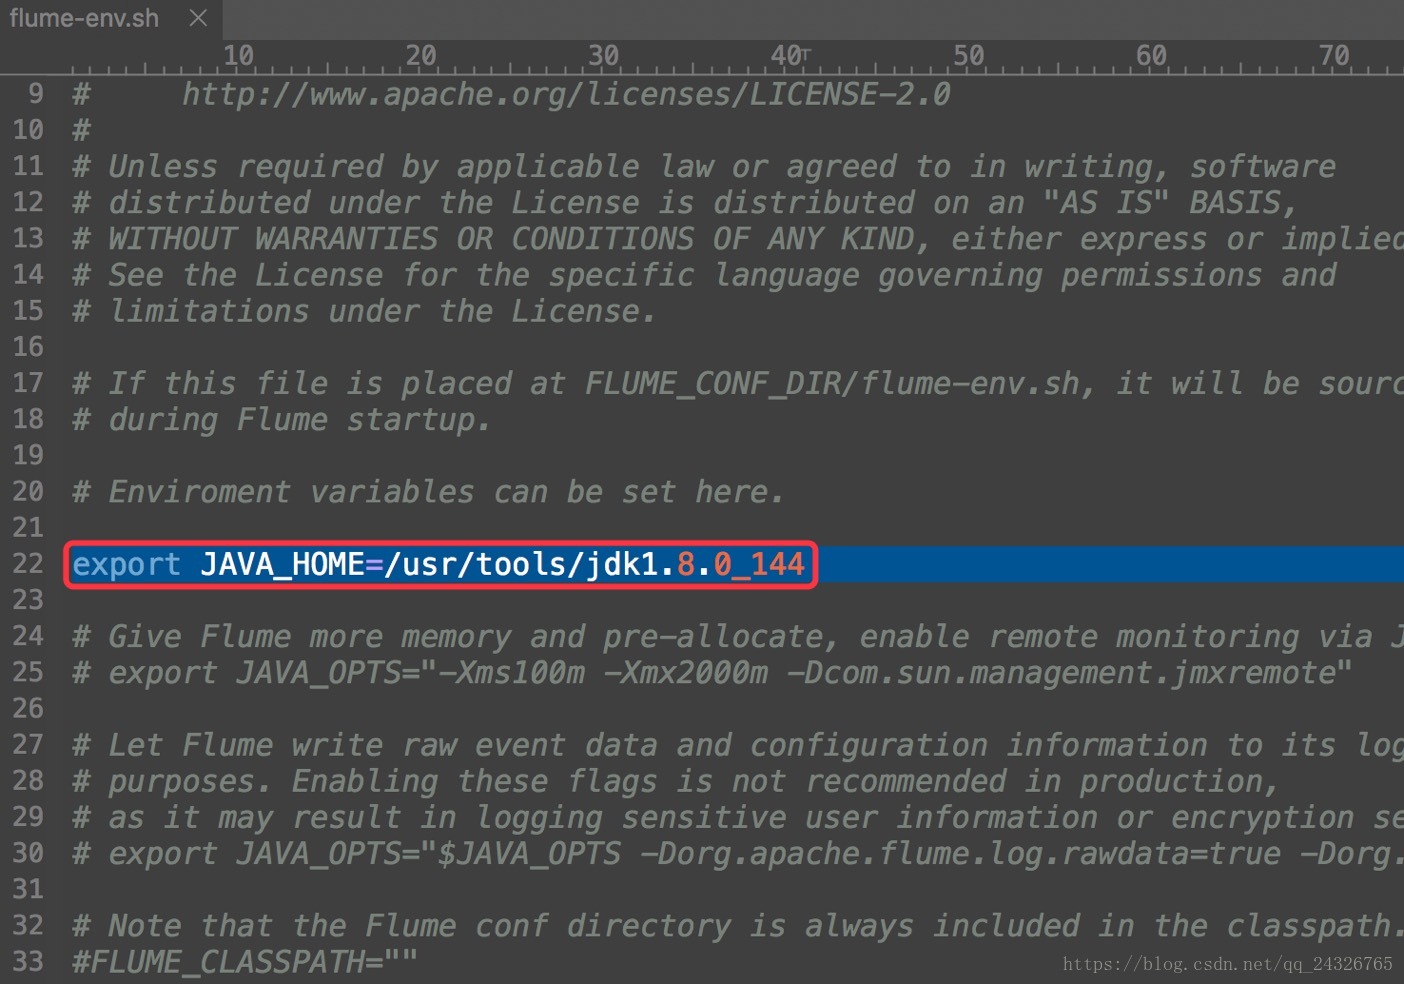
② 修改flume-env.sh
4. Flume第一个Agent应用编写(实时读取数据)
① 编写conf文件

a1.sources=r1
a1.channels=c1
a1.sinks=k1

### define sources
a1.sources.r1.type=netcat
a1.sources.r1.bind=hadoop-senior
a1.sources.r1.port=6666

### define channel
a1.channels.c1.type=memory
a1.channels.c1.capacity=1000
a1.channels.c1.transactionCapacity=100

#define sink
a1.sinks.k1.type=logger
a1.sinks.k1.maxBytesToLog=1024

### bind the sources and sink to the channel
a1.sources.r1.channels=c1
a1.sinks.k1.channel=c1
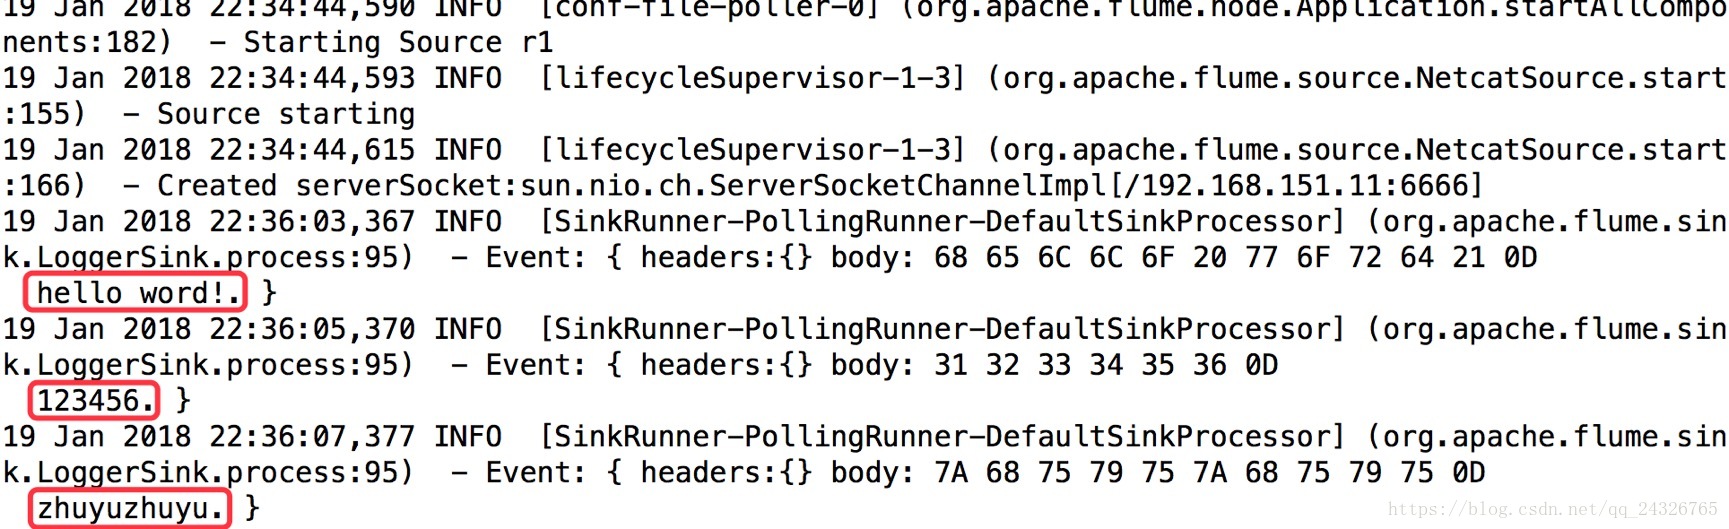
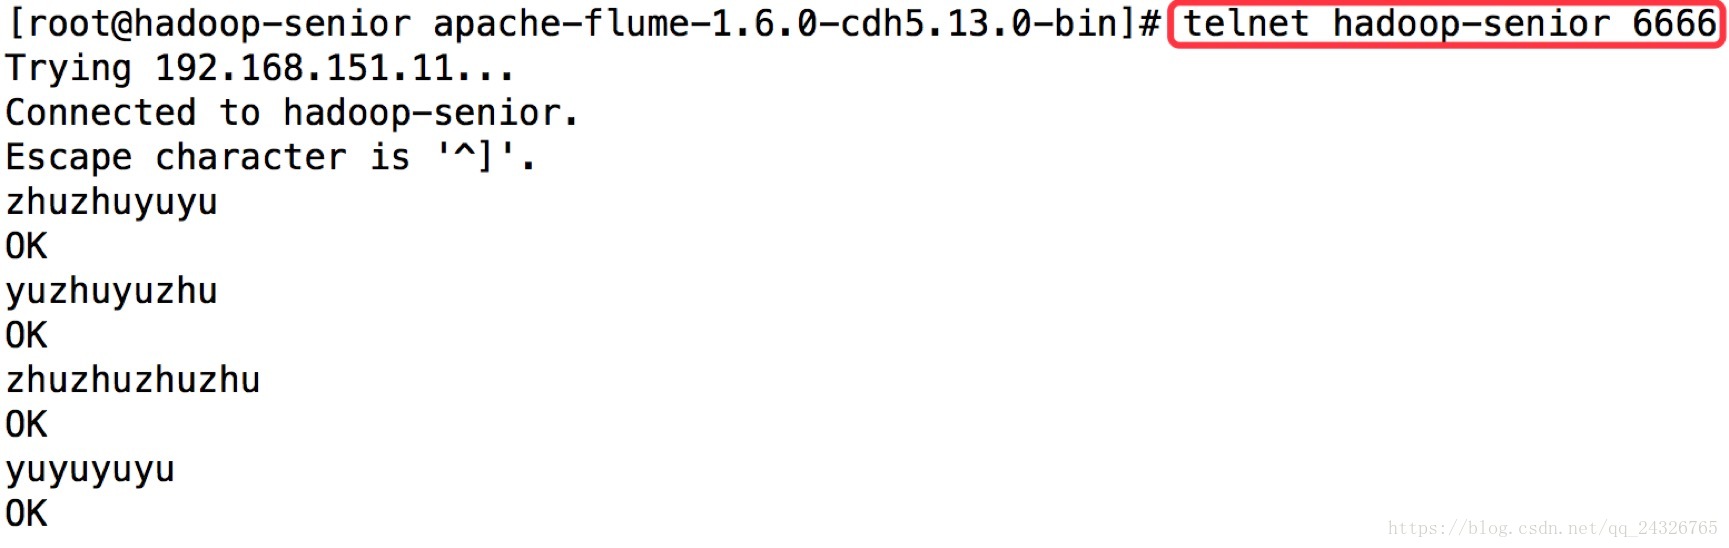
② 第一个终端开启flume,第二个终端开启telnet
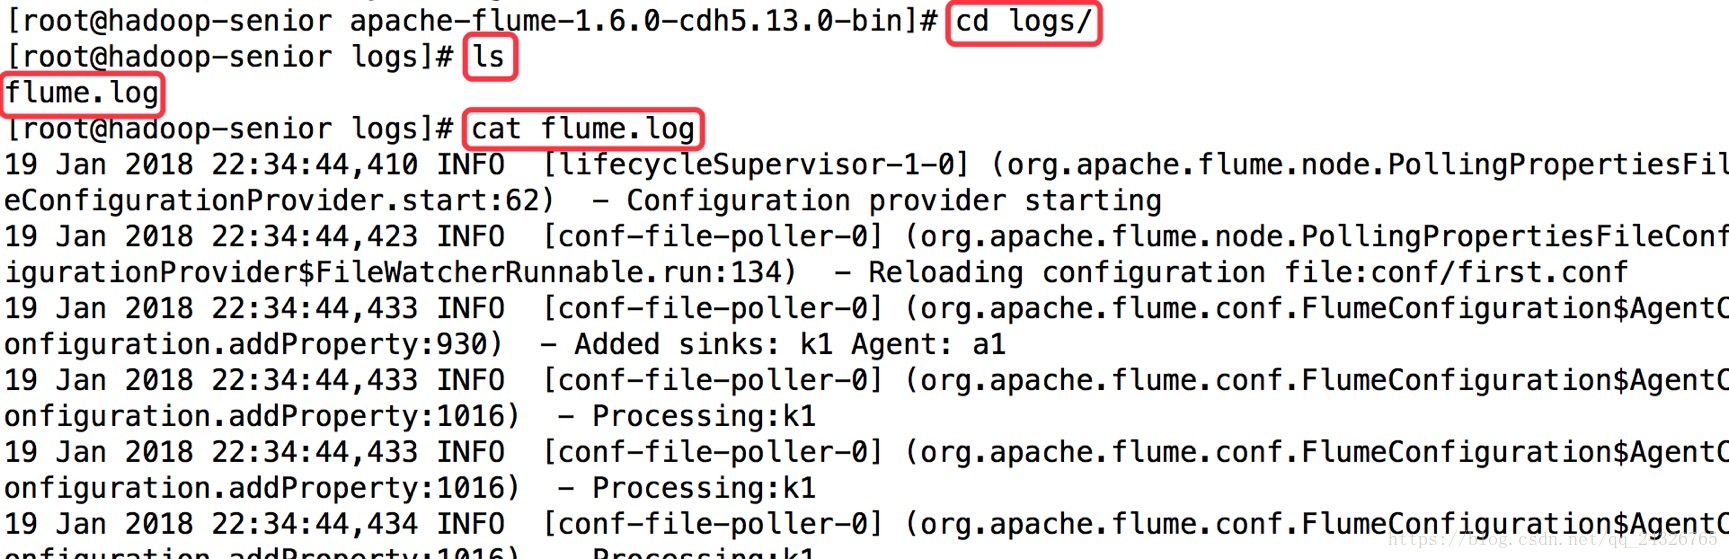
将日志信息sink到日志文件
第一个终端:
bin/flume-ng agent -c conf/ -name a1-f conf/a1.properties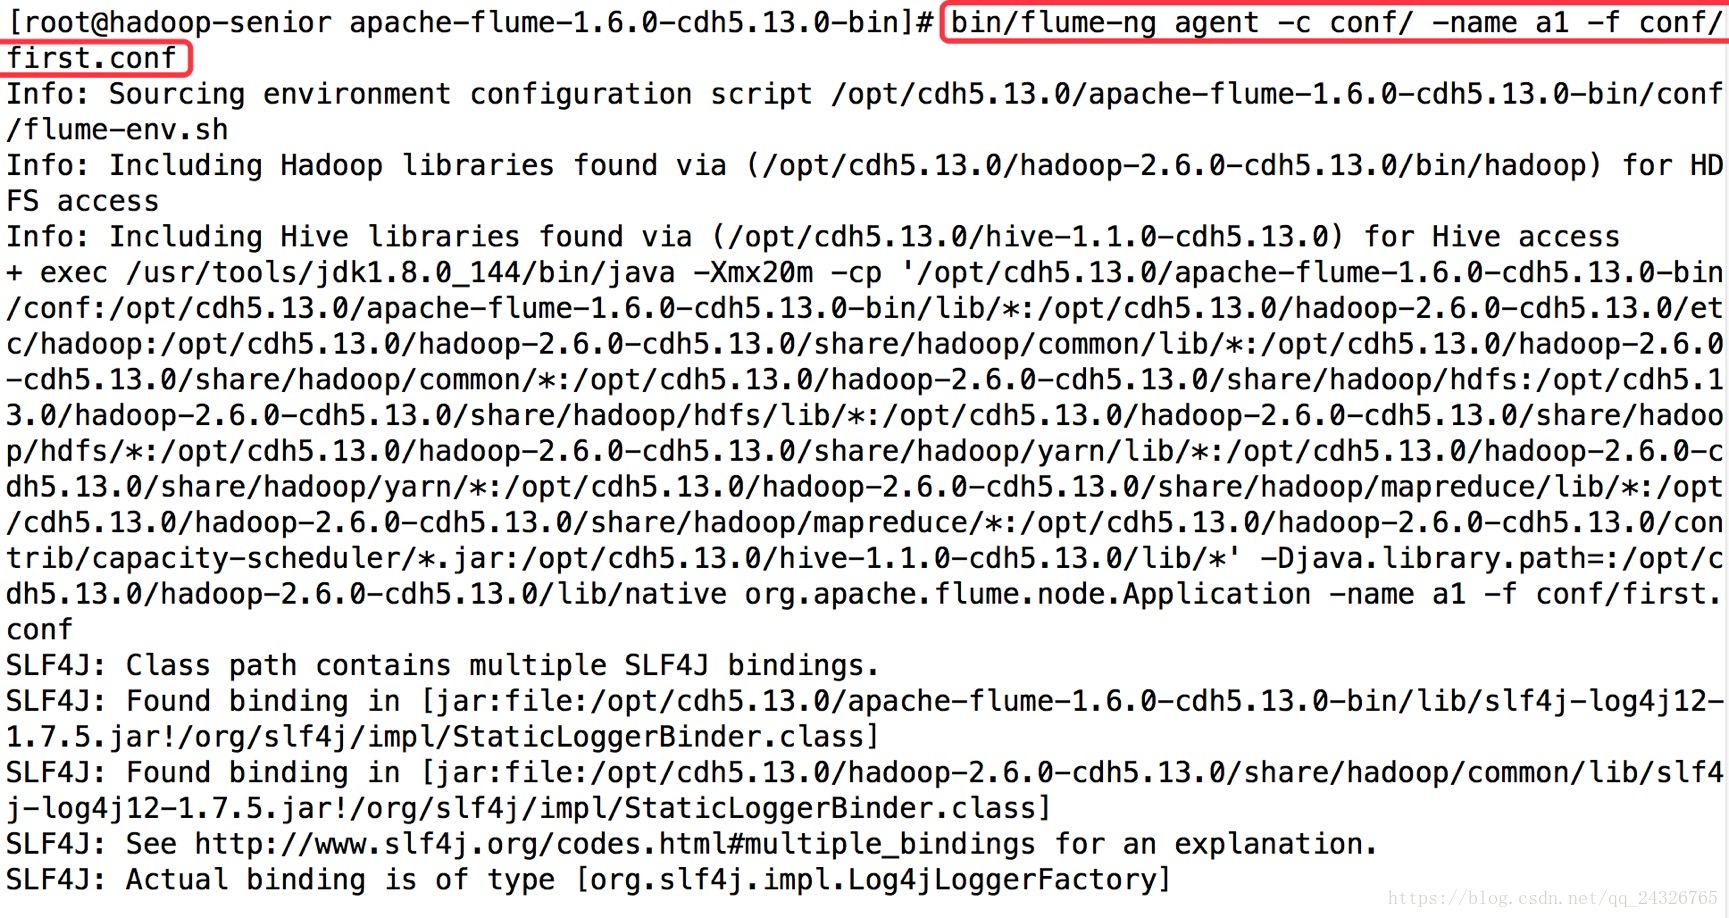
第二个终端:
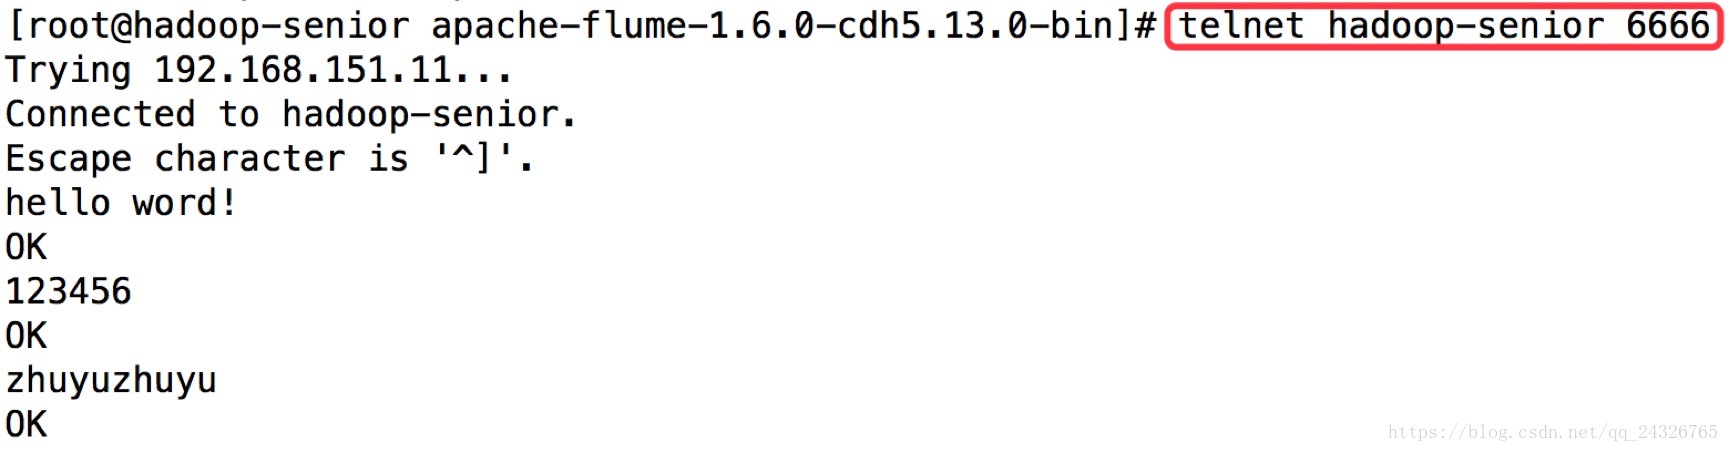
查看:
将日志信息sink到控制台
第一个终端:
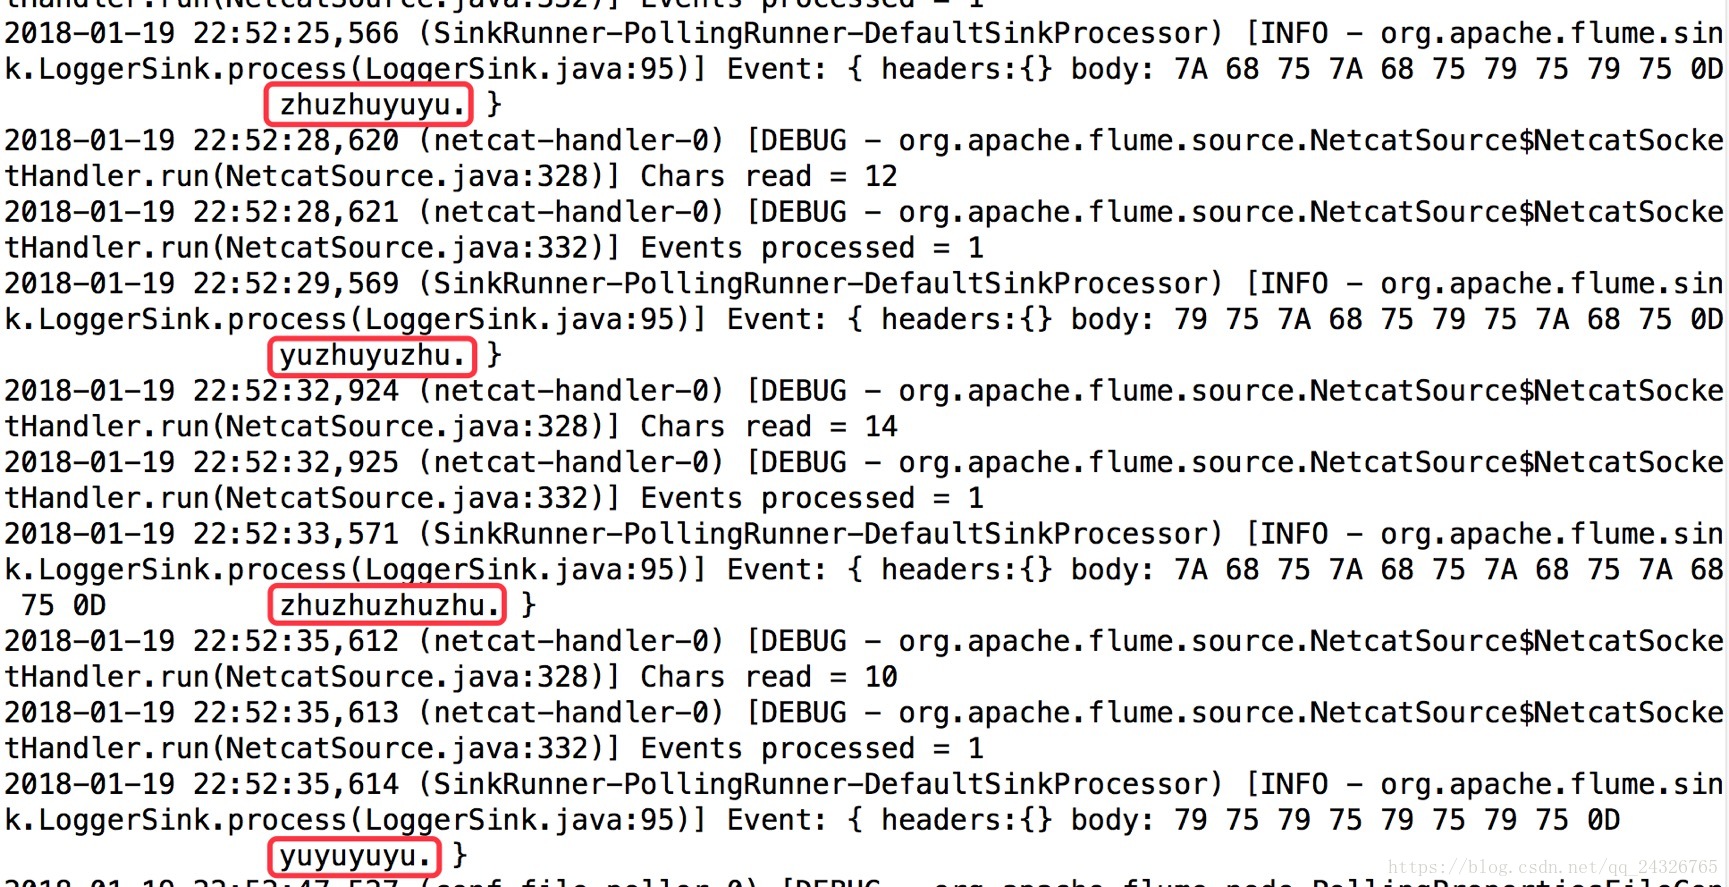
bin/flume-ng agent -c conf/ -name a1-f conf/a1.properties -Dflume.root.logger=DEBUG,console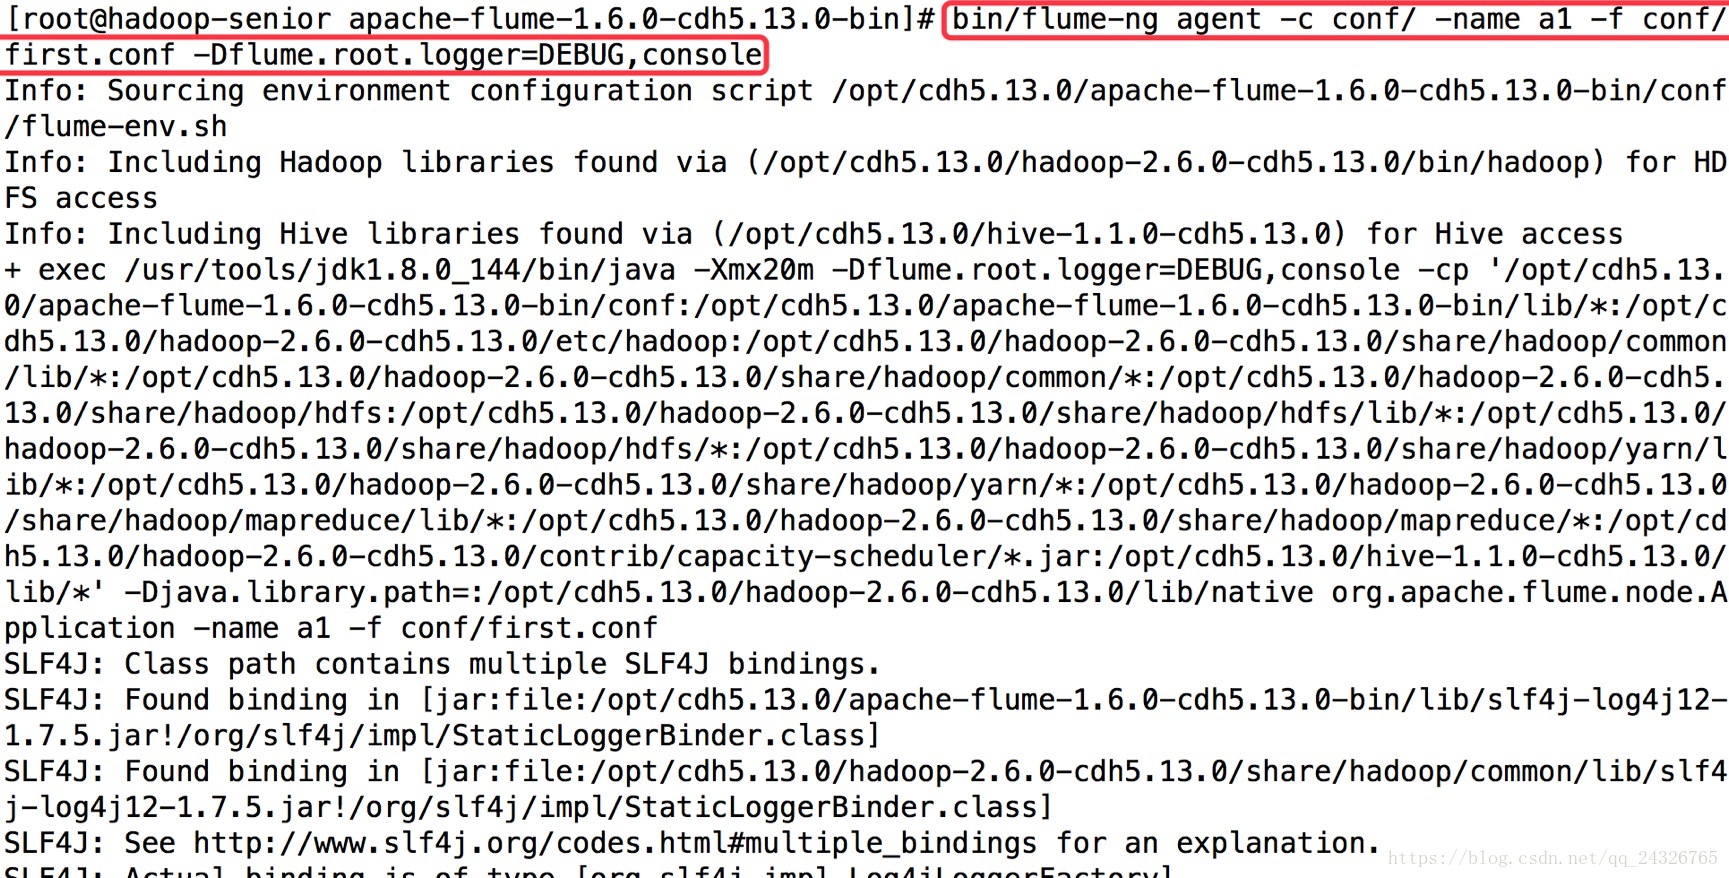
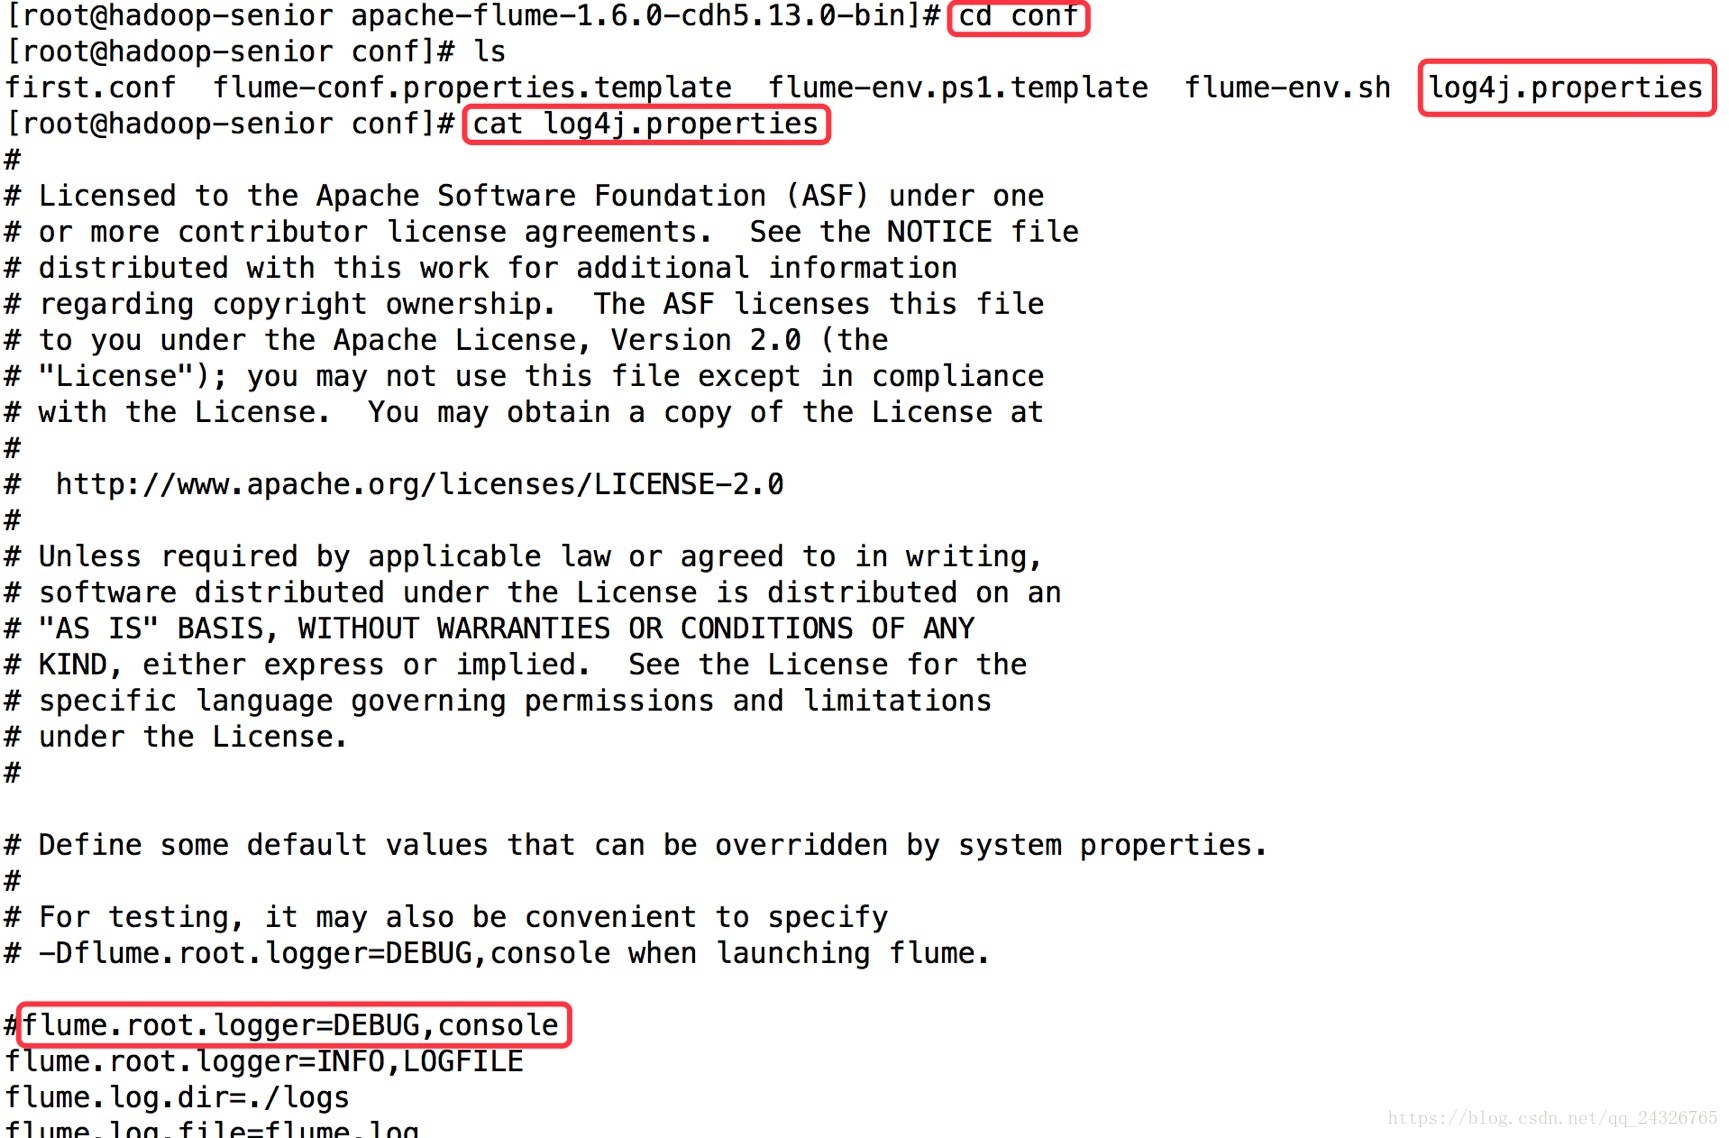
flume.root.logger=DEBUG,console可从log4j.properties中获取,如下图:
第二个终端:
再看第一个终端:
5.Flume第二个Agent应用讲解(实时监控读取日志数据,存储hdfs
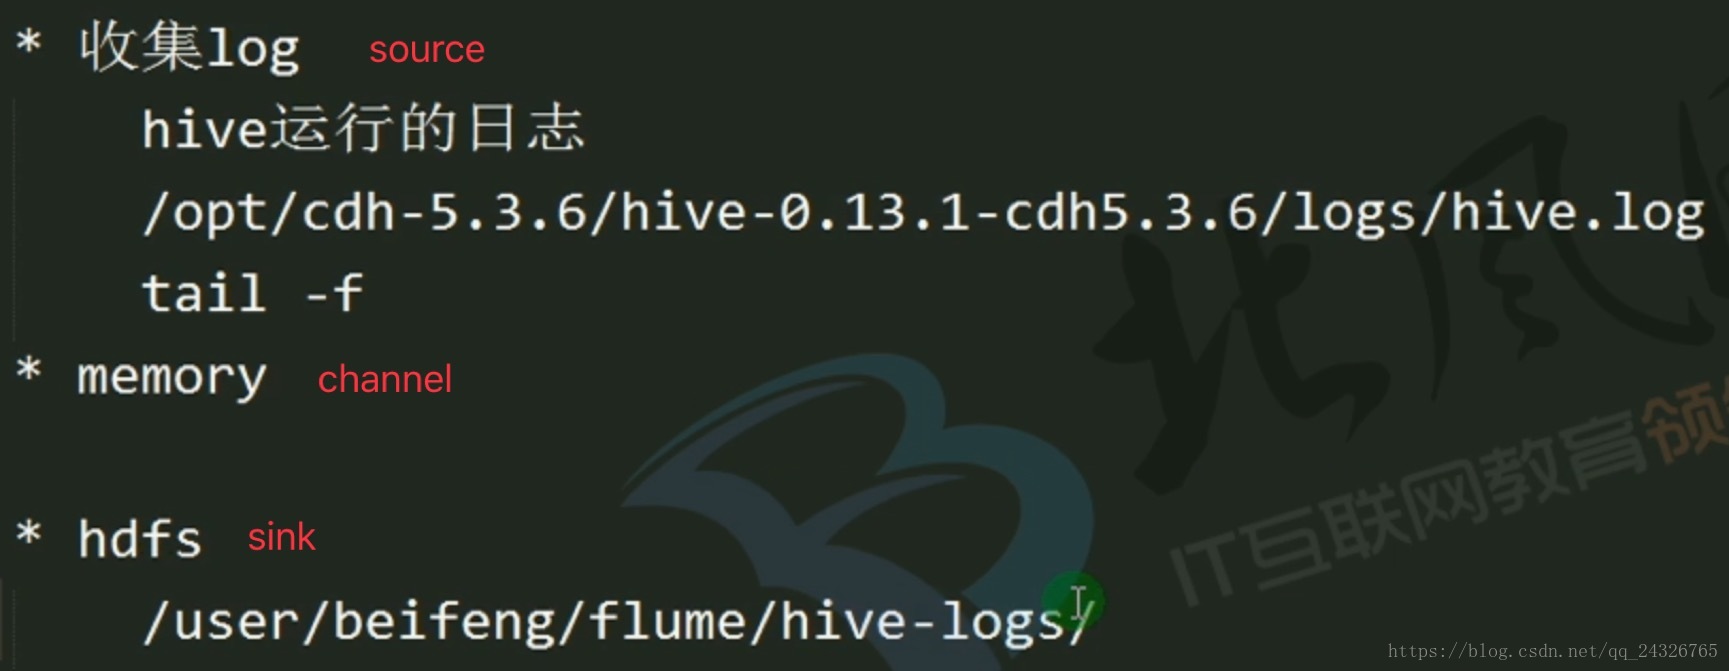
① 写conf文件

## Name the components on this agent
a2.sources.r2.type=exec
a2.sources.r2.command=tail -f /opt/cdh5.13.0/hive-1.1.0-cdh5.13.0/logs/hive.log
a2.sources.r2.shell = /bin/bash -c
### define channel
a2.channels.c2.type=memory
a2.channels.c2.capacity=1000
a2.channels.c2.transactionCapacity=100
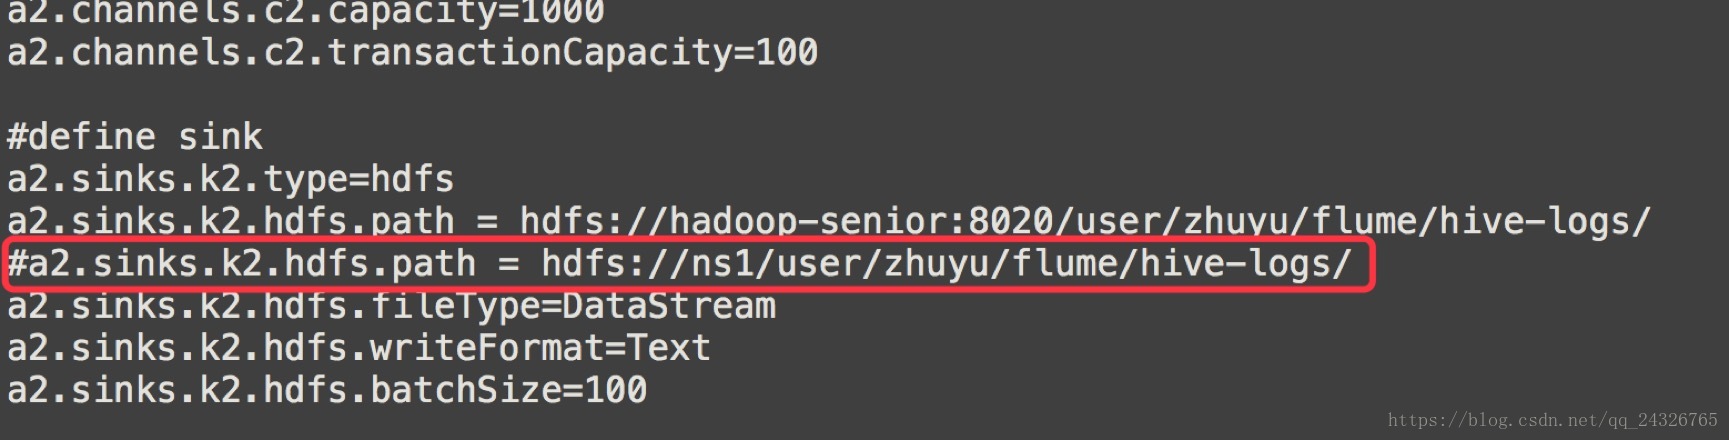
#define sink
a2.sinks.k2.type=hdfs
a2.sinks.k2.hdfs.path = hdfs://hadoop-senior:8020/user/zhuyu/flume/hive-logs/
a2.sinks.k2.hdfs.fileType=DataStream
a2.sinks.k2.hdfs.writeFormat=Text
a2.sinks.k2.hdfs.batchSize=10
### bind the sources and sink to the channel
a2.sources.r2.channels=c2
a2.sinks.k2.channel=c2② 执行flume客户端agent
bin/flume-ng agent \
-c conf \
-n a2 \
-f conf/flume-tail.conf \
-D -Dflume.root.logger=DEBUG,console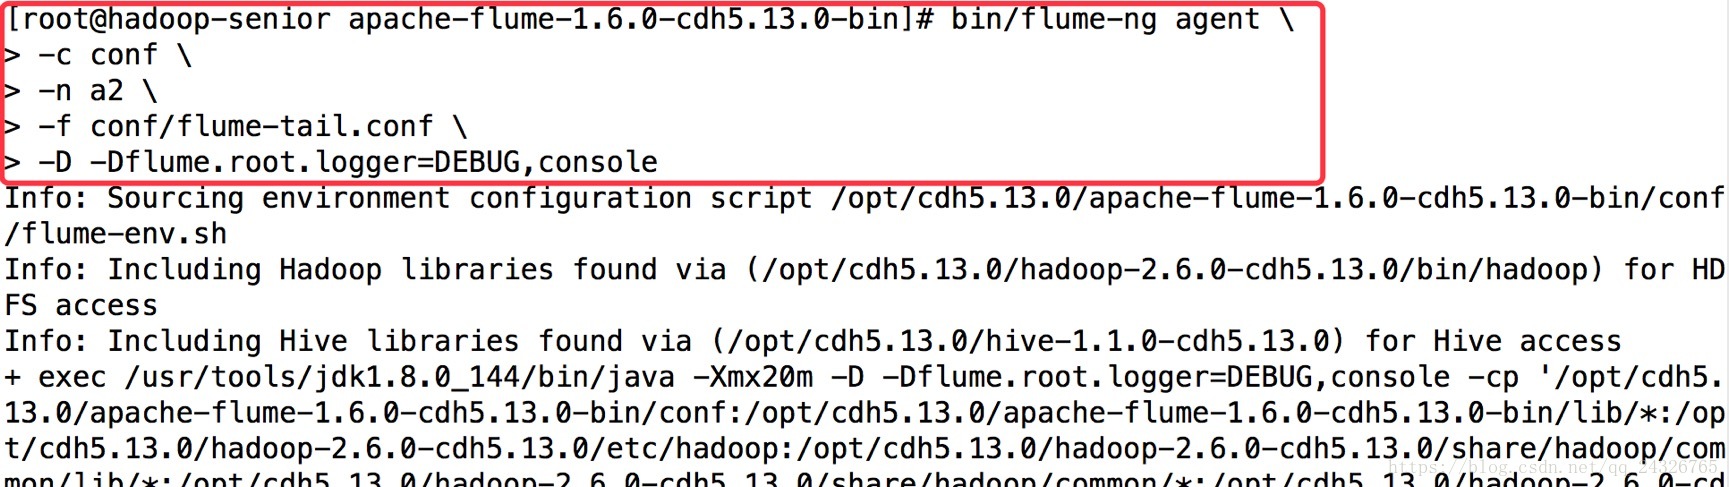
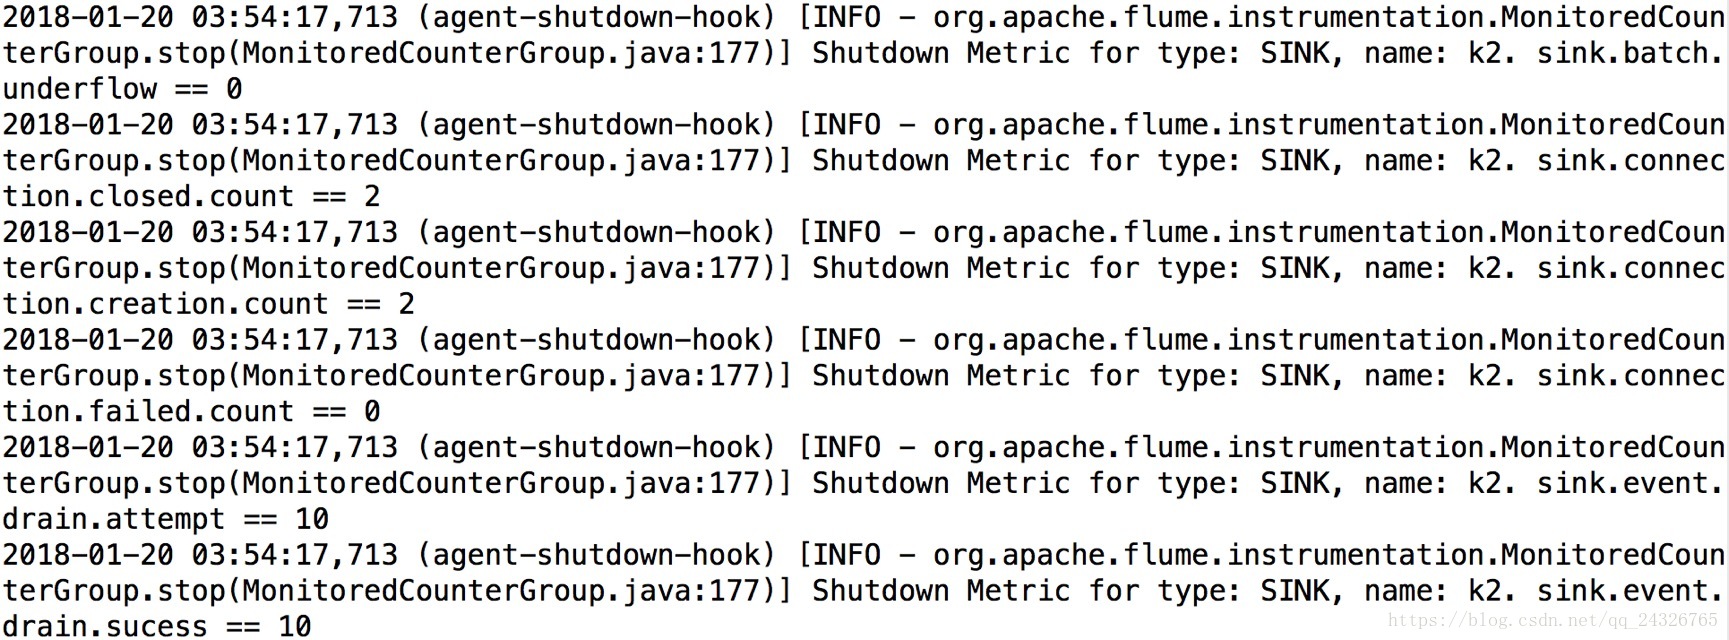
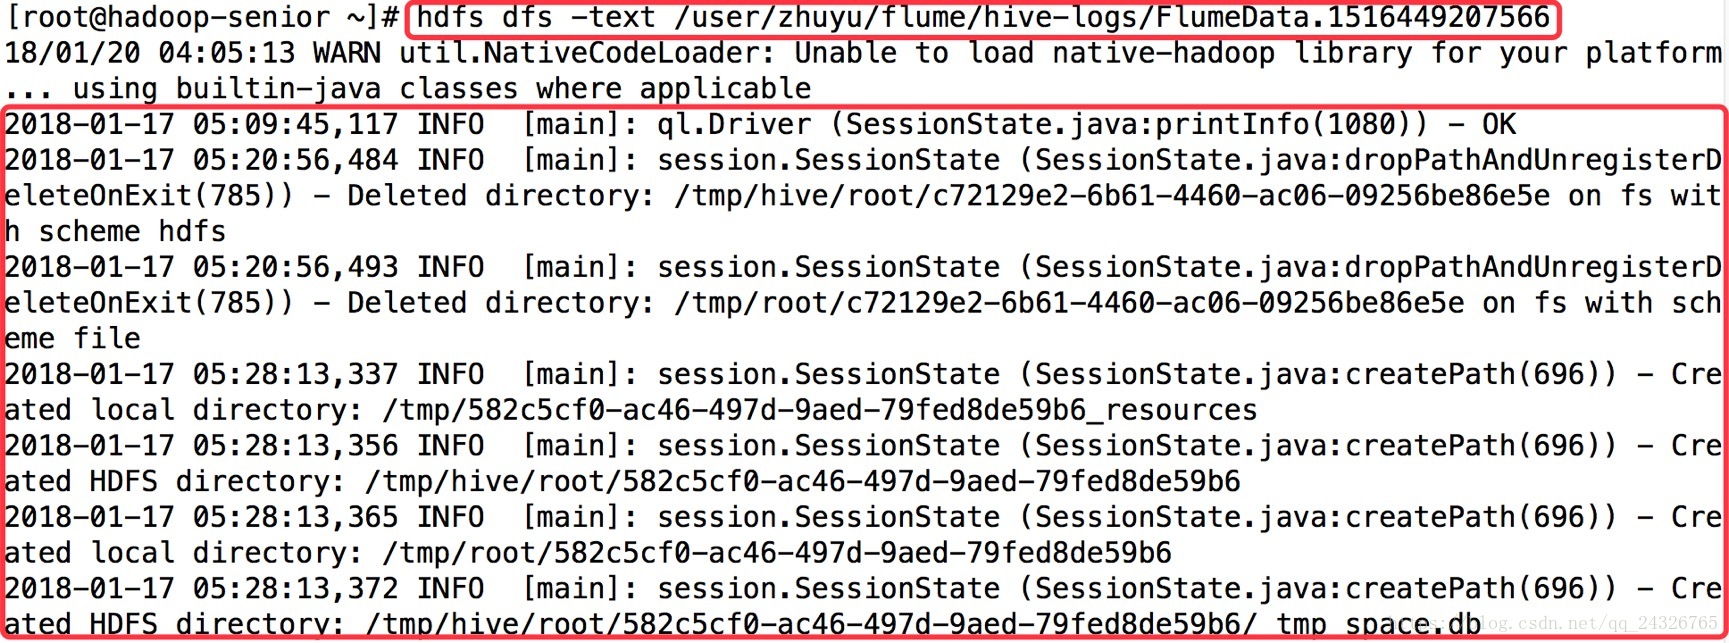
③ 查看
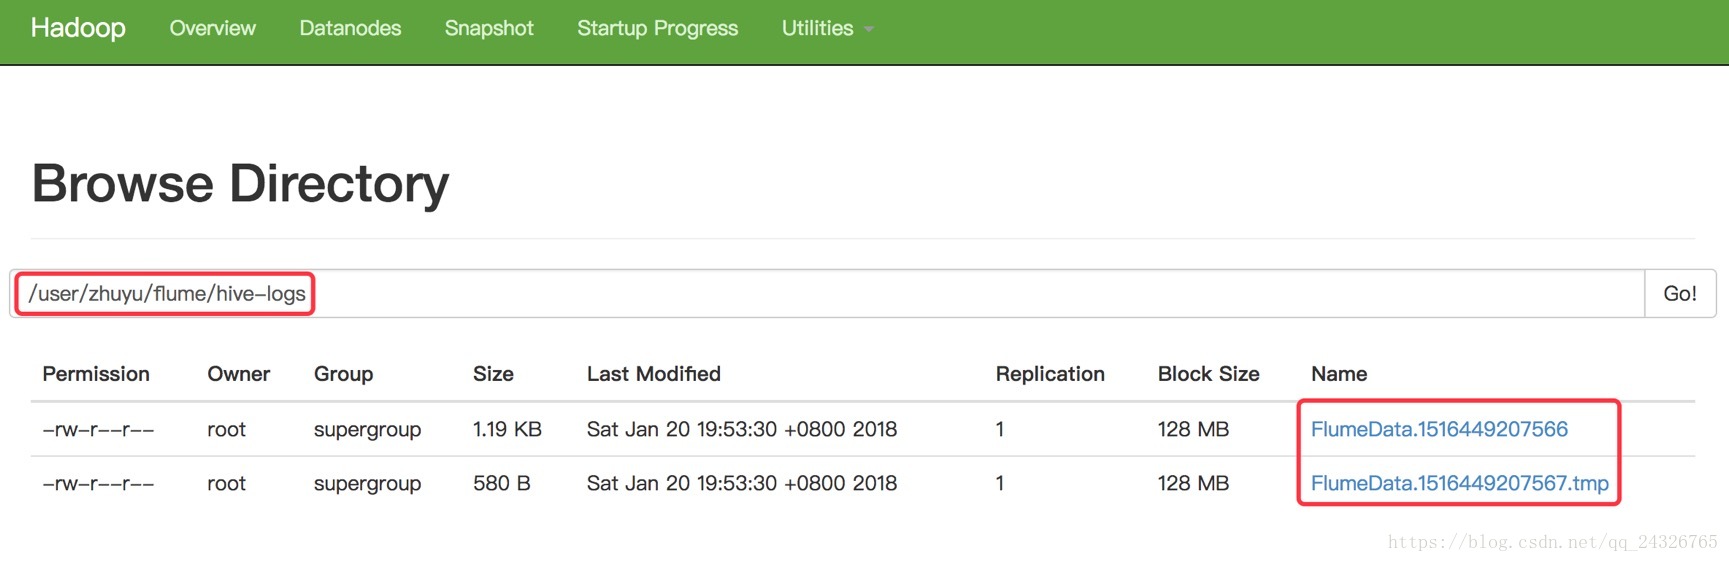
(tmp后缀的是暂时还没有收集完的)
技巧:cp之前写过的conf文件,然后使用查找功能替换

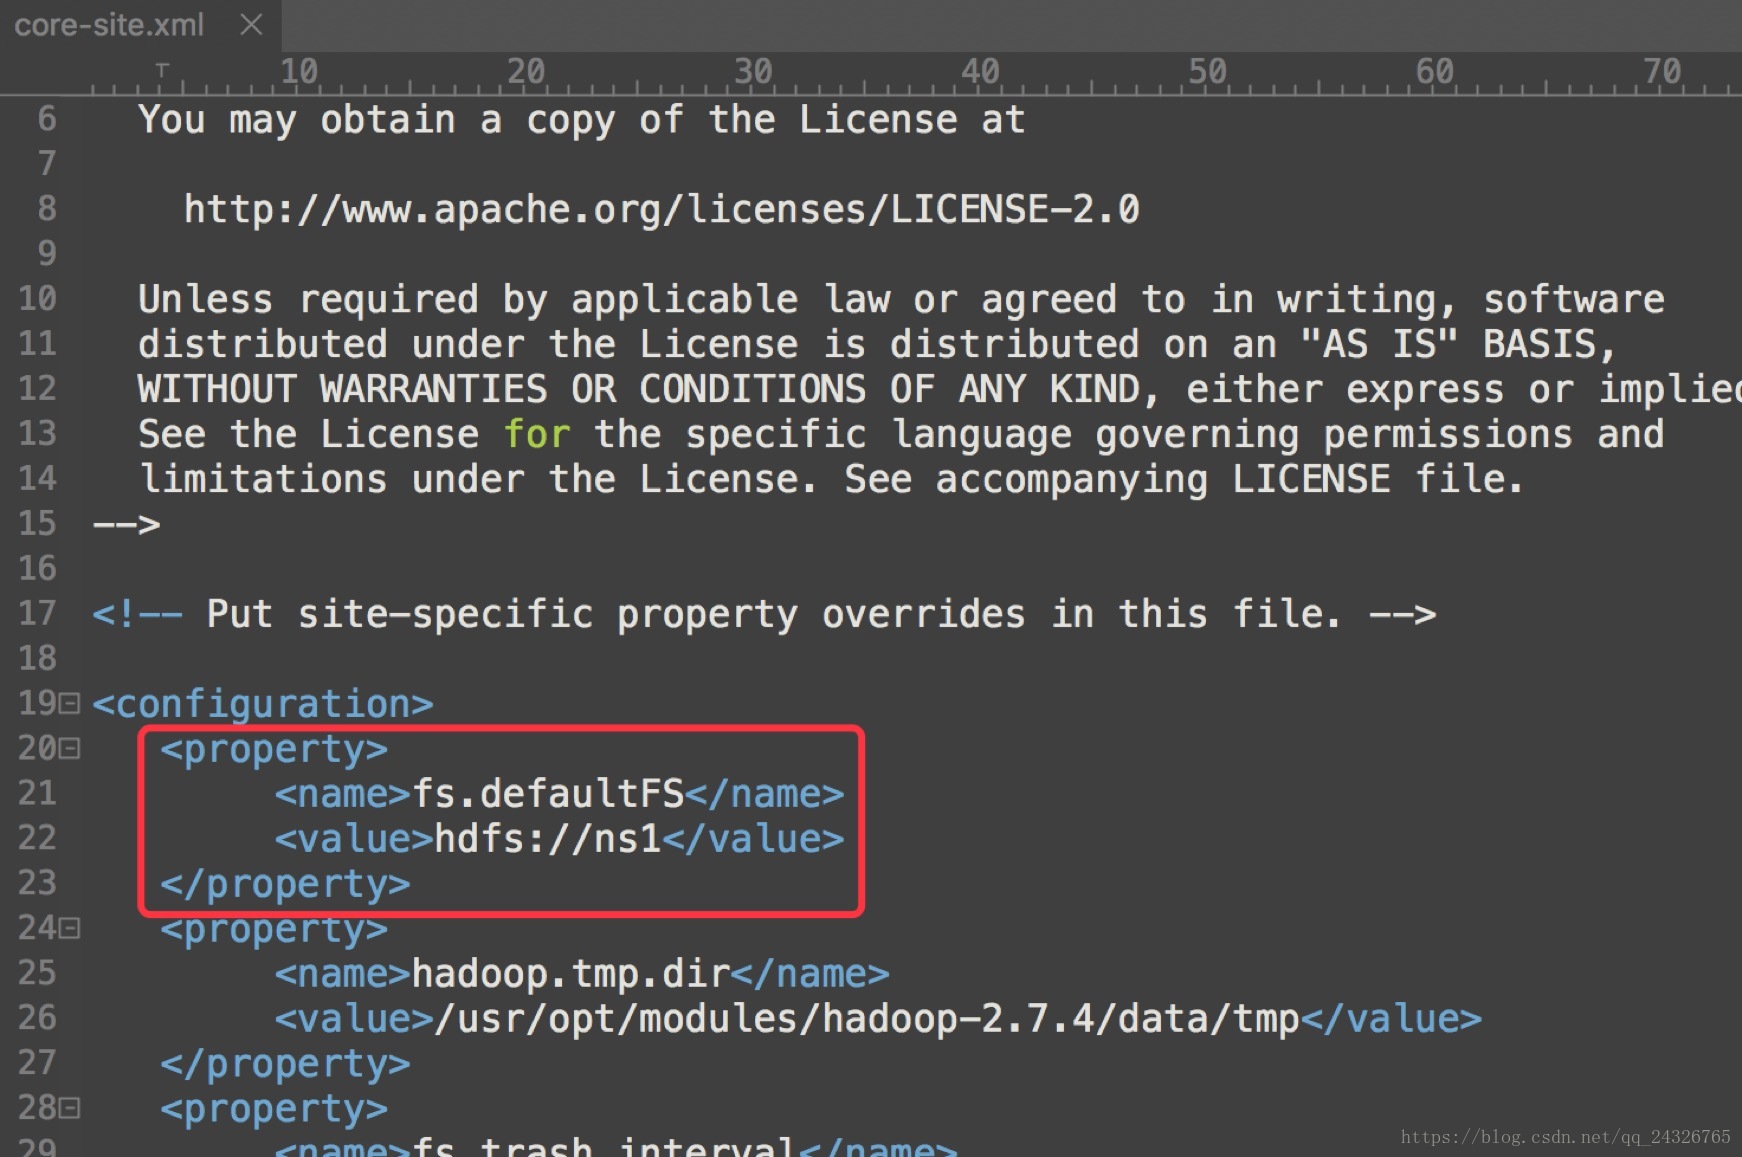
注意:假如我们的hdfs配置了HA,需要改变path;当需要访问ha的时候,把core-site.xml和hdfs-site.xml放到flume的conf文件夹下。
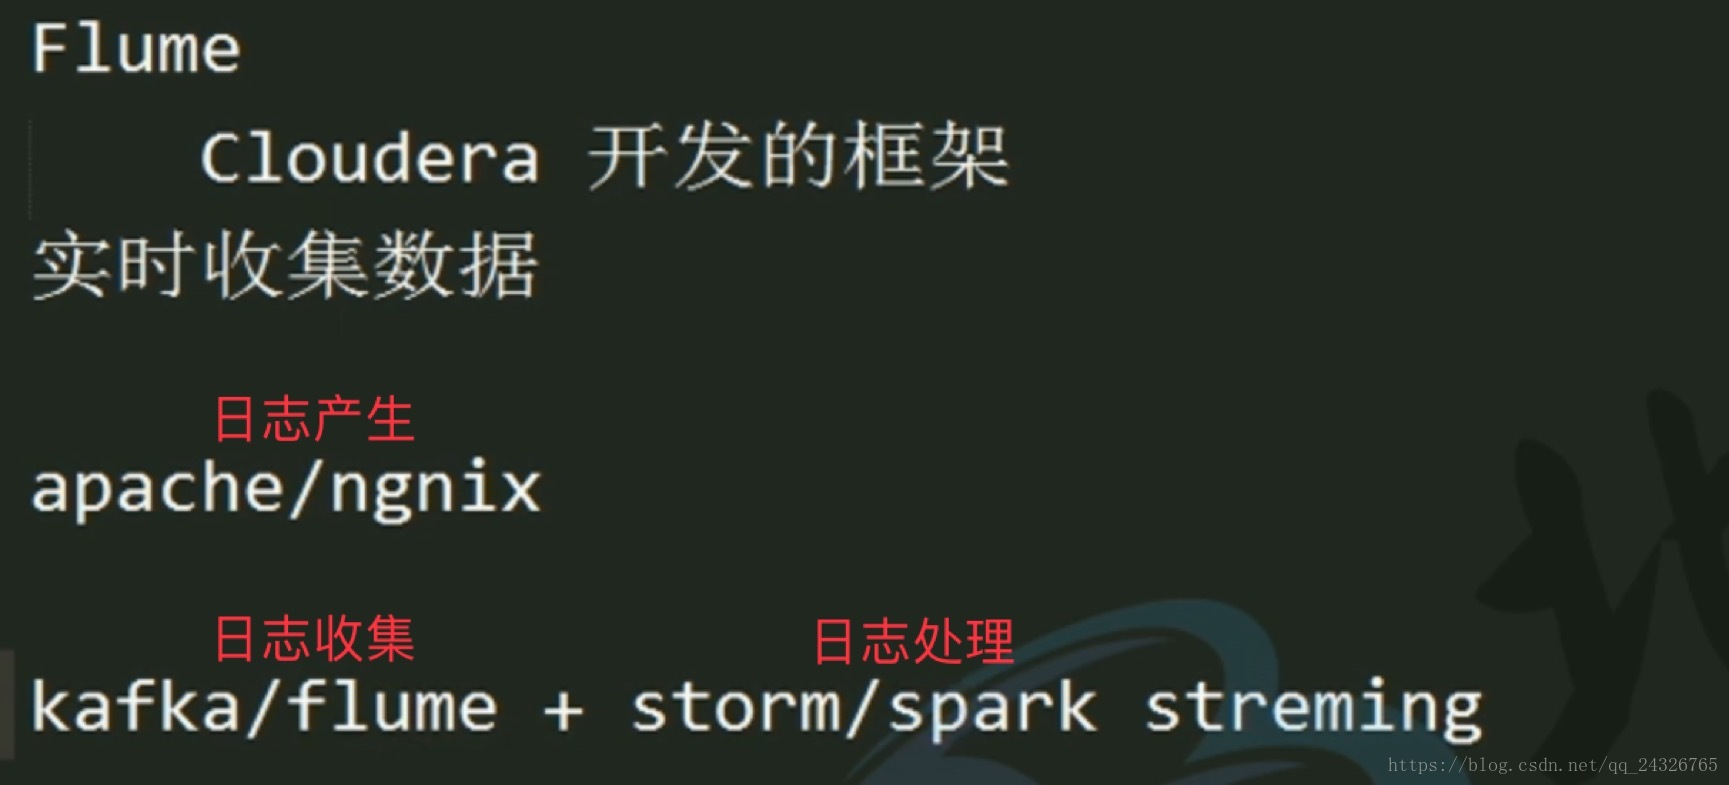
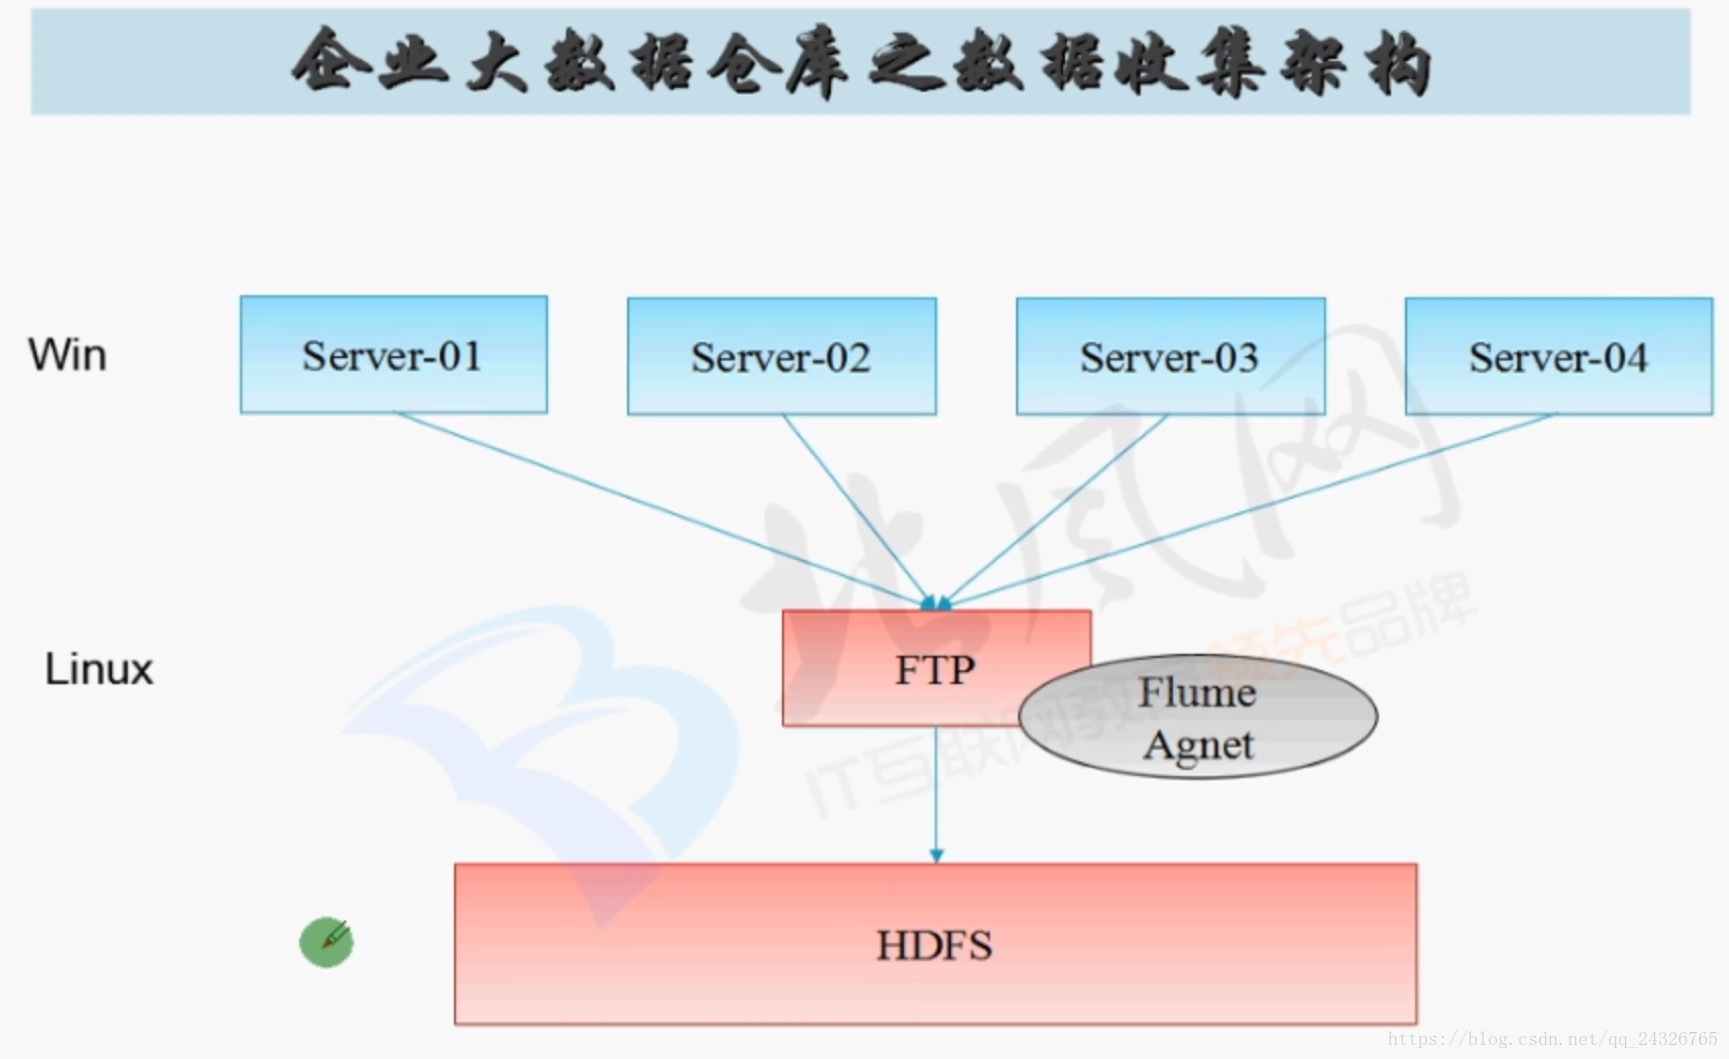
6. Flume在企业大数据仓库中数据收集架构
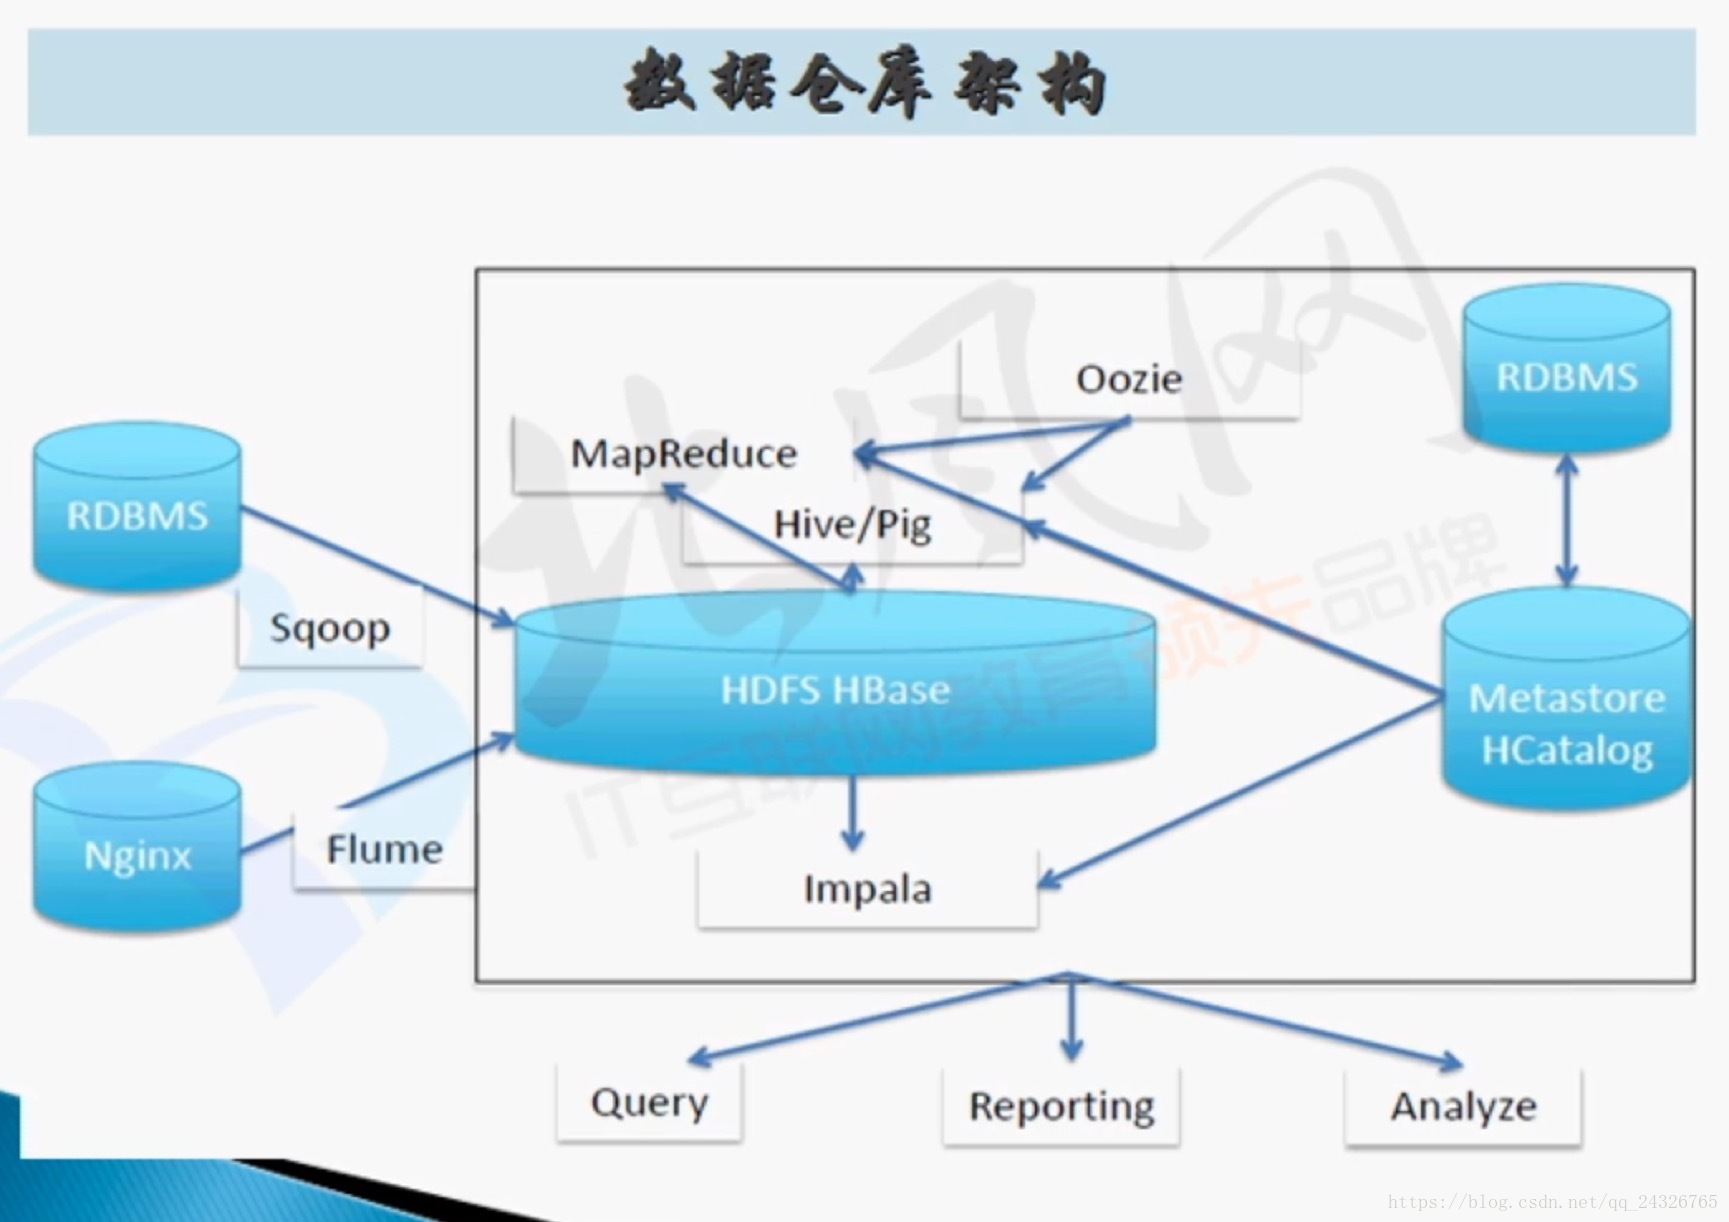
impala和hive类似,不同的是,hive的底层是mapreduce,impala把数据放到内存中。
flume和sqoop的过程:

flume只能在linux下运行,于是有两种情况:

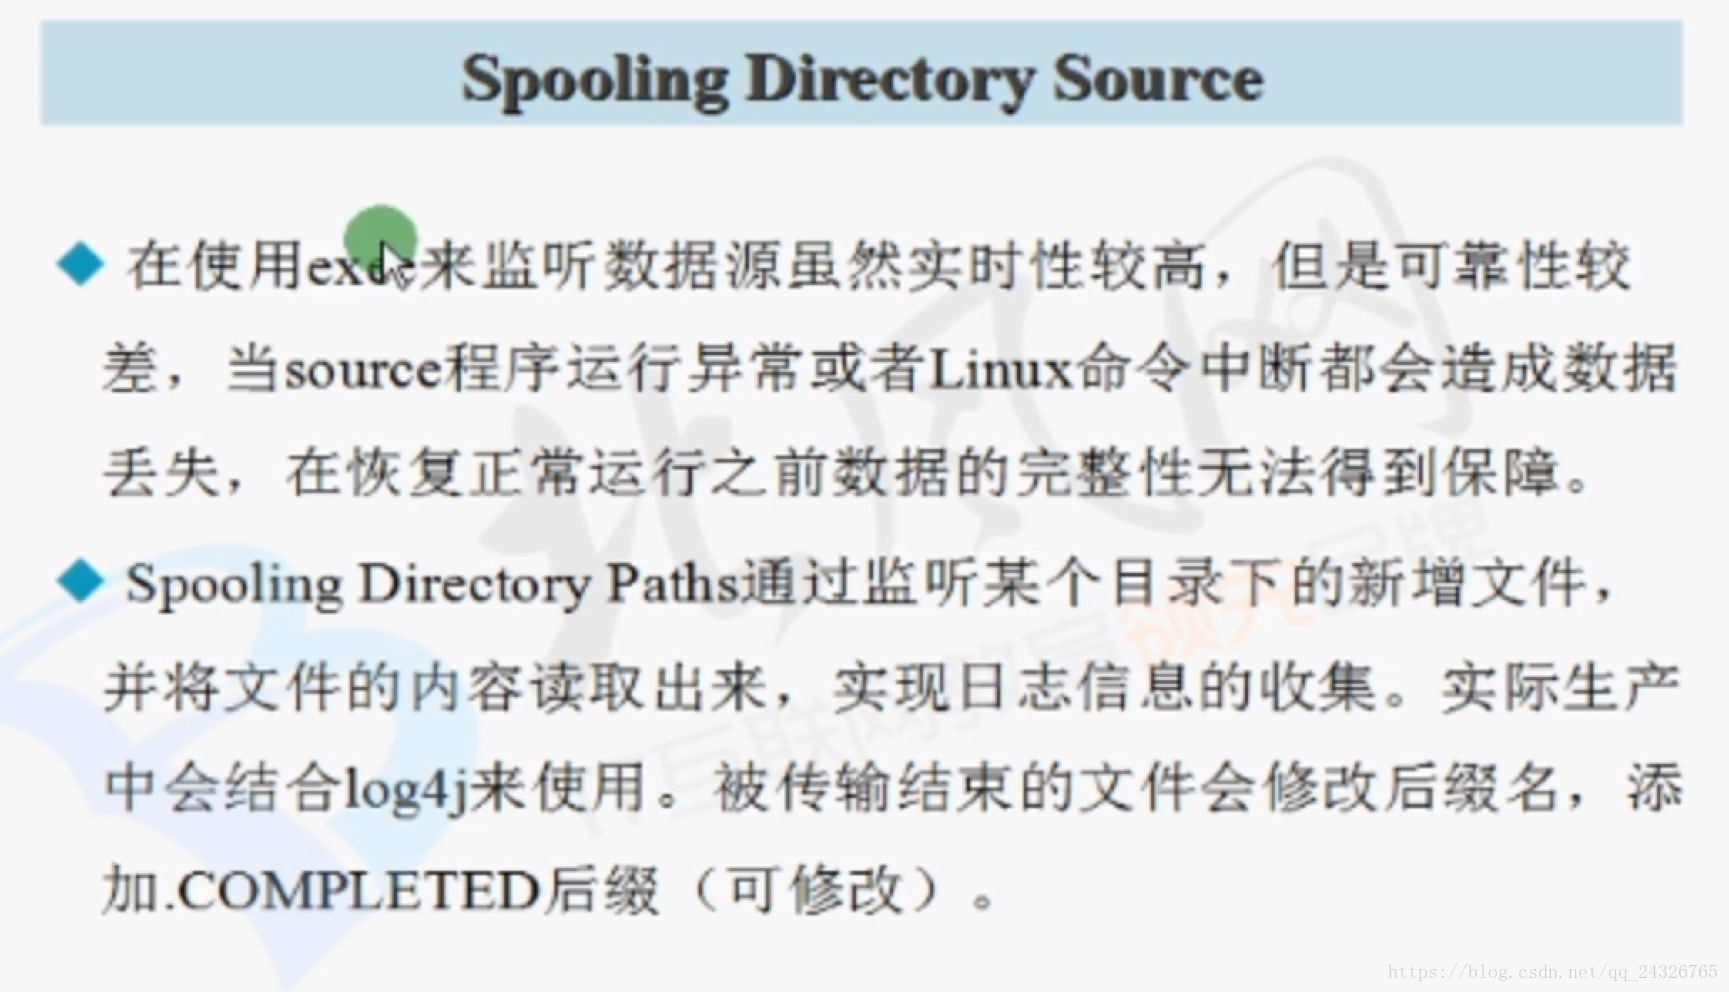
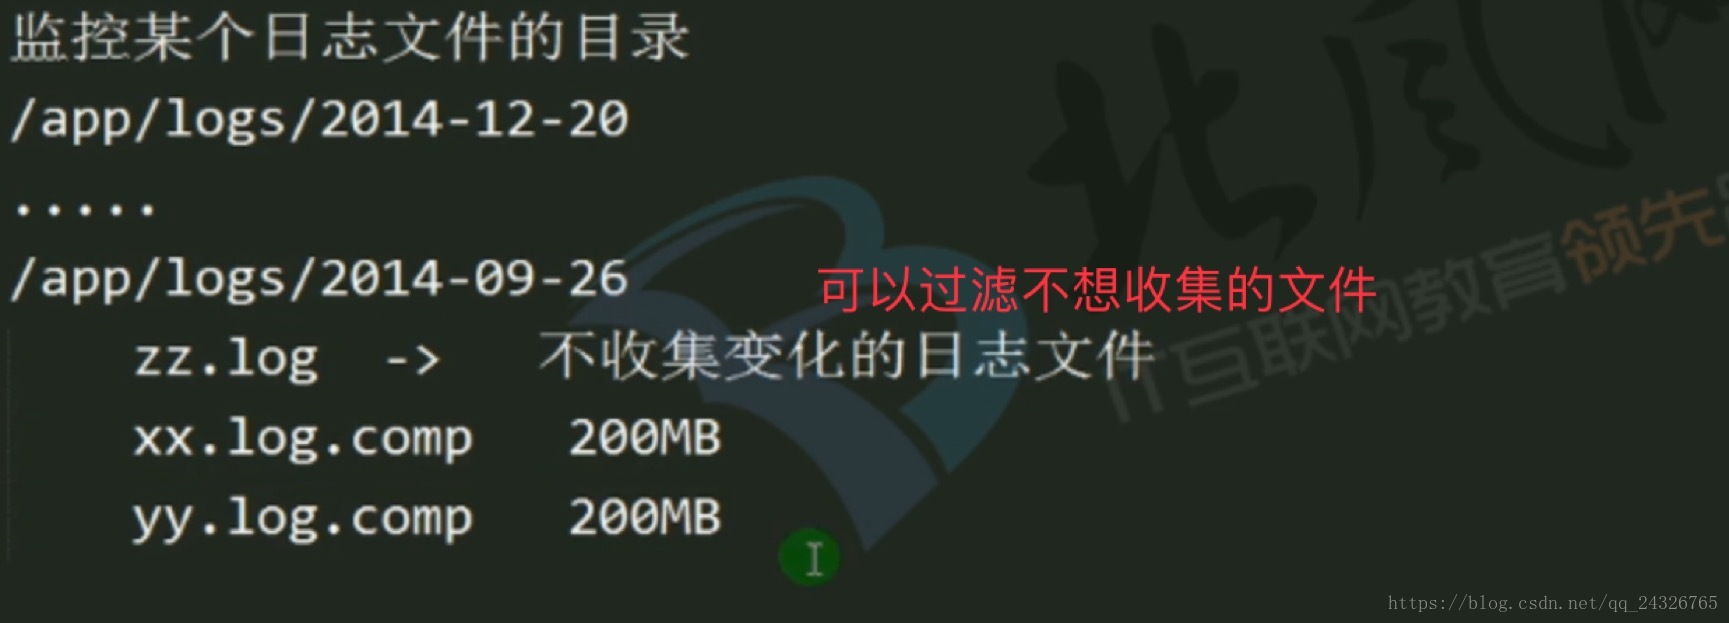
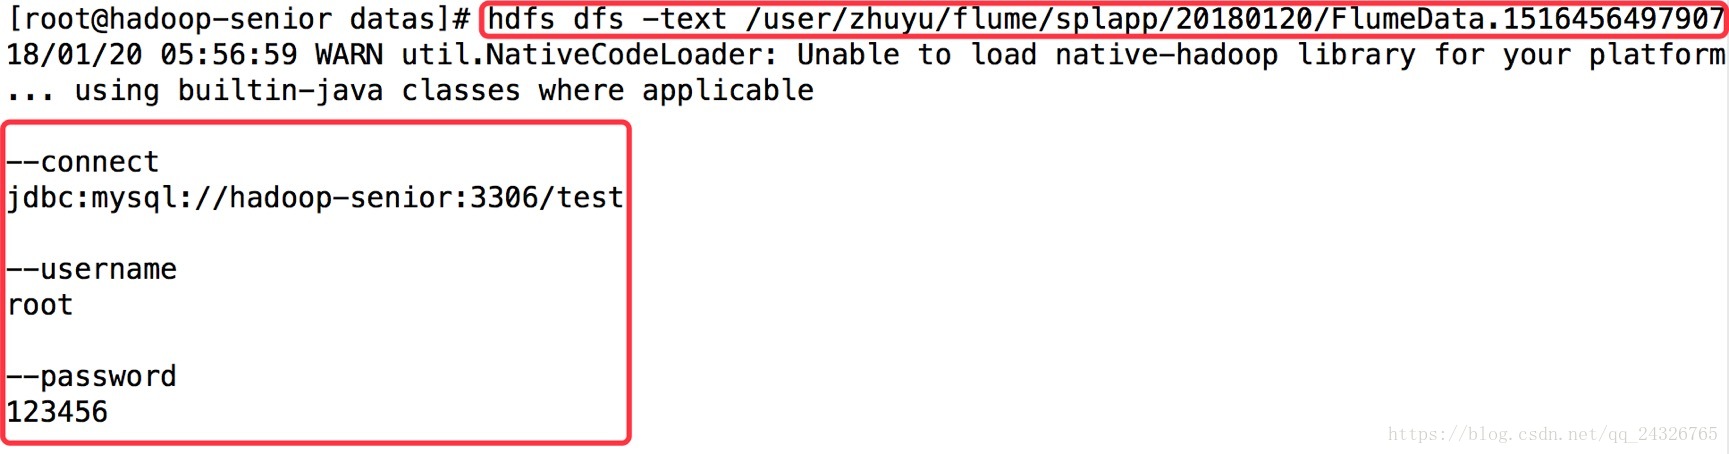
7. 实际案例讲解(监控日志目录日志数据,实时抽取之hdfs系统上)
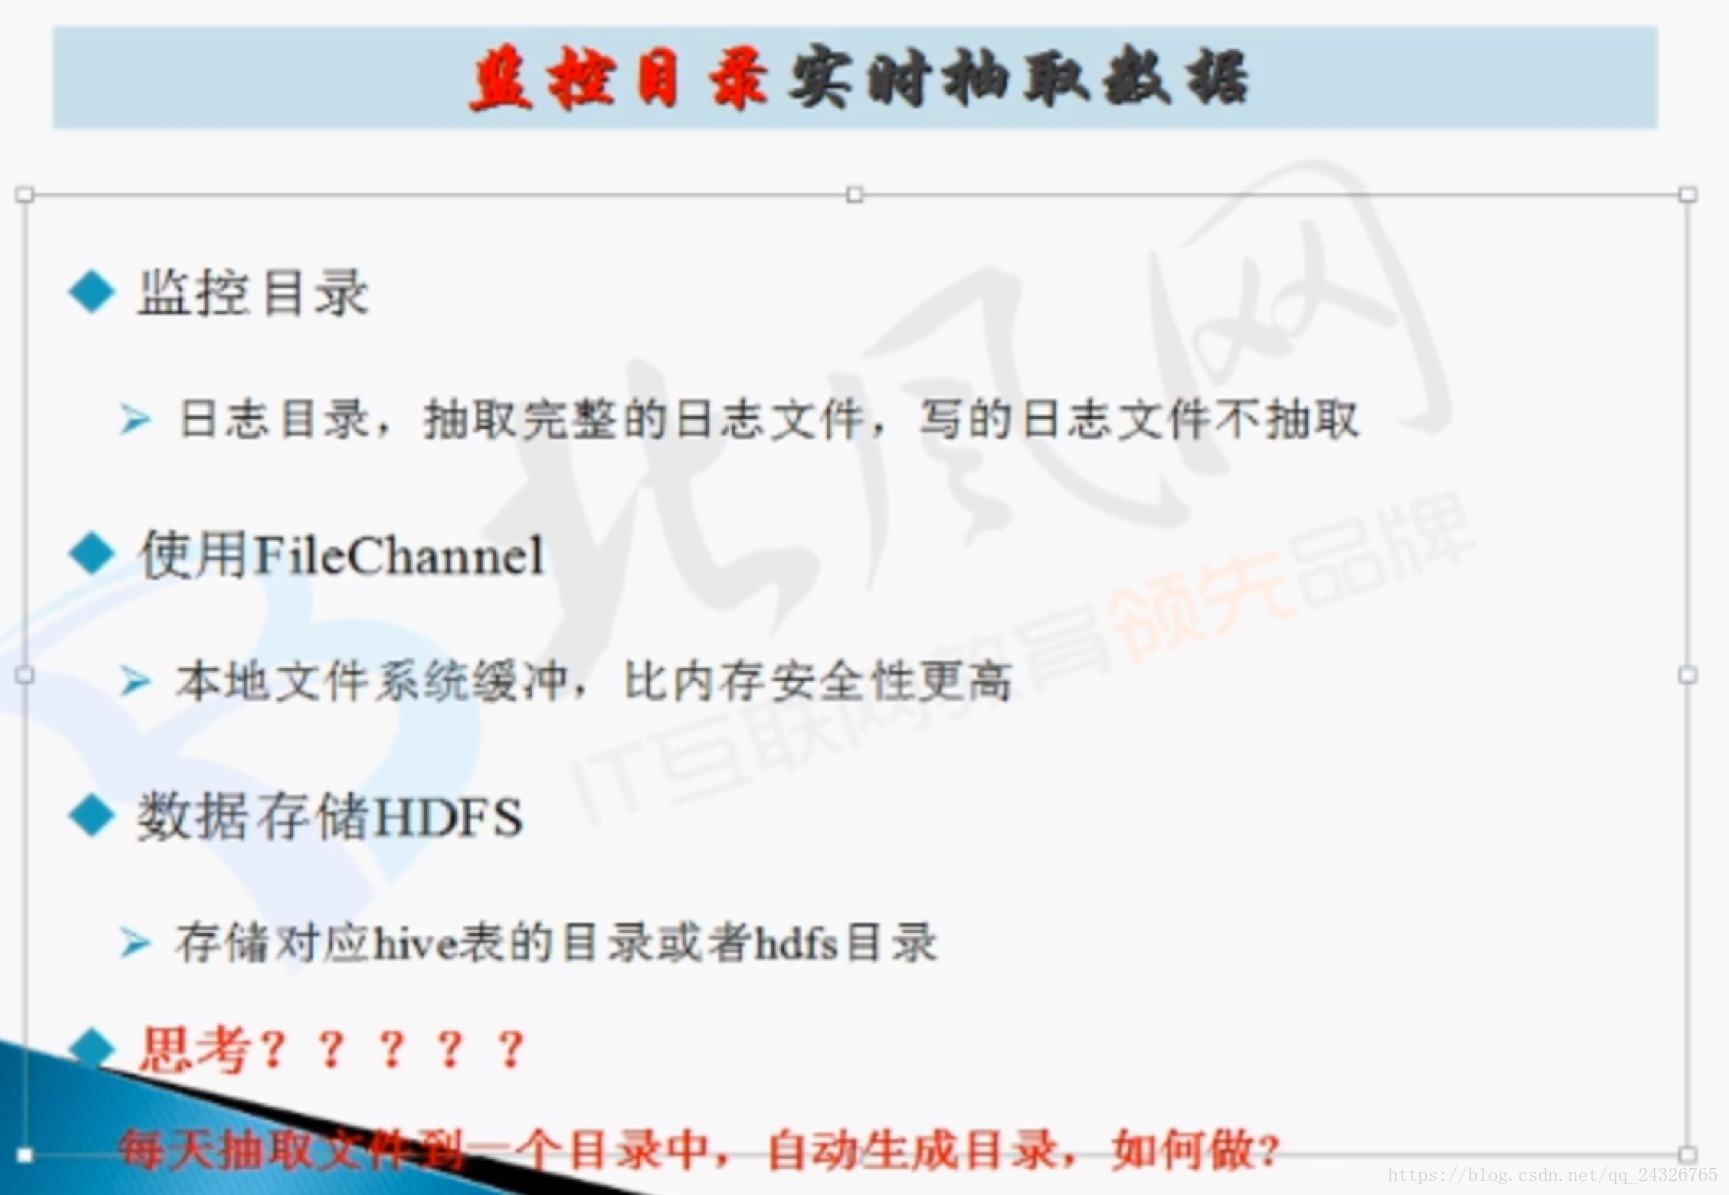
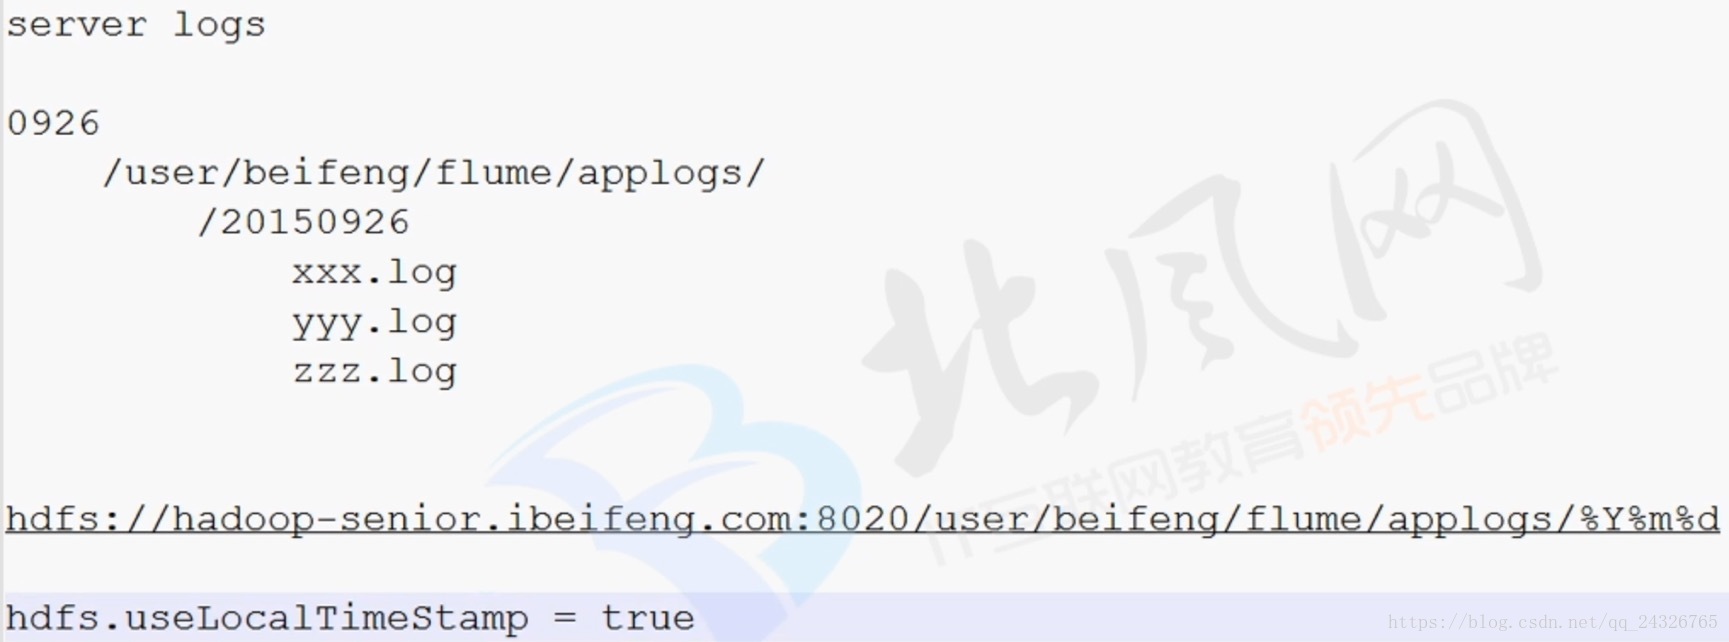
根据日期自动生成目录:
监控目录:
① 准备工作
[root@hadoop-seniorapache-flume-1.6.0-cdh5.13.0-bin]# mkdir spoollogs
[root@hadoop-senior apache-flume-1.6.0-cdh5.13.0-bin]#mkdir filechannel
[root@hadoop-seniorapache-flume-1.6.0-cdh5.13.0-bin]# mkdir filechannel/checkpointDir
[root@hadoop-seniorapache-flume-1.6.0-cdh5.13.0-bin]# mkdir filechannel/dataDirs
[root@hadoop-senior spoollogs]# cp/opt/cdh5.13.0/hive-1.1.0-cdh5.13.0/logs/hive.log .
[root@hadoop-senior spoollogs]# cphive.log hivef.data
[root@hadoop-senior spoollogs]# cp/opt/datas/user.txt .
[root@hadoop-senior spoollogs]# cp/opt/datas/sqoop-import-hdfs.txt .
② 编写conf
flume-app.conf

a3.sources=r3
a3.channels=c3
a3.sinks=k3
### define sources
a3.sources.r3.type=spooldir
a3.sources.r3.spoolDir=/opt/cdh5.13.0/apache-flume-1.6.0-cdh5.13.0-bin/spoollogs
a3.sources.r3.ignorePattern = ^(.)*\\.log$
a3.sources.r3.fileSuffix=.comp
### define channel
a3.channels.c3.type=file
a3.channels.c3.checkpointDir= /opt/cdh5.13.0/apache-flume-1.6.0-cdh5.13.0-bin/filechannel/checkpointDir
a3.channels.c3.dataDirs= /opt/cdh5.13.0/apache-flume-1.6.0-cdh5.13.0-bin/filechannel/dataDirs
#define sink
a3.sinks.k3.type=hdfs
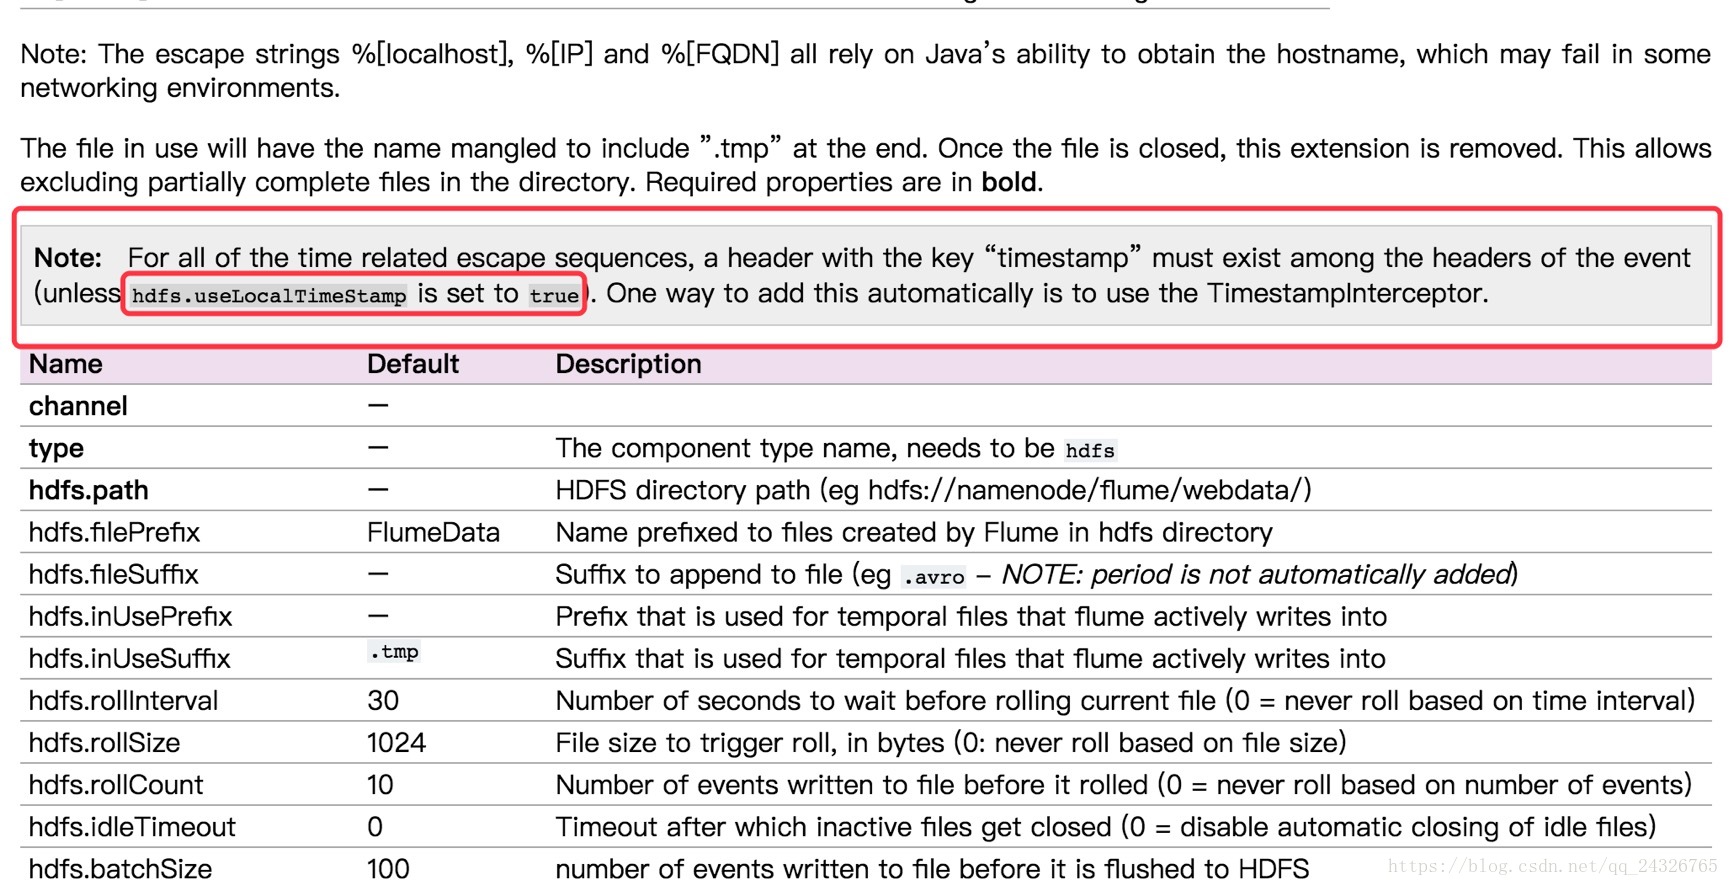
a3.sinks.k3.hdfs.path = hdfs://hadoop-senior:8020/user/zhuyu/flume/splapp/%Y%m%d
a3.sinks.k3.hdfs.useLocalTimeStamp=true
a3.sinks.k3.hdfs.fileType=DataStream
a3.sinks.k3.hdfs.writeFormat=Text
a3.sinks.k3.hdfs.batchSize=100
### bind the sources and sink to the channel
a3.sources.r3.channels=c3
a3.sinks.k3.channel=c3③ 开启flume客户端agent
bin/flume-ng agent \
-c conf \
-n a3 \
-f conf/flume-app.conf \
-D -Dflume.root.logger=DEBUG,console
④ 查看
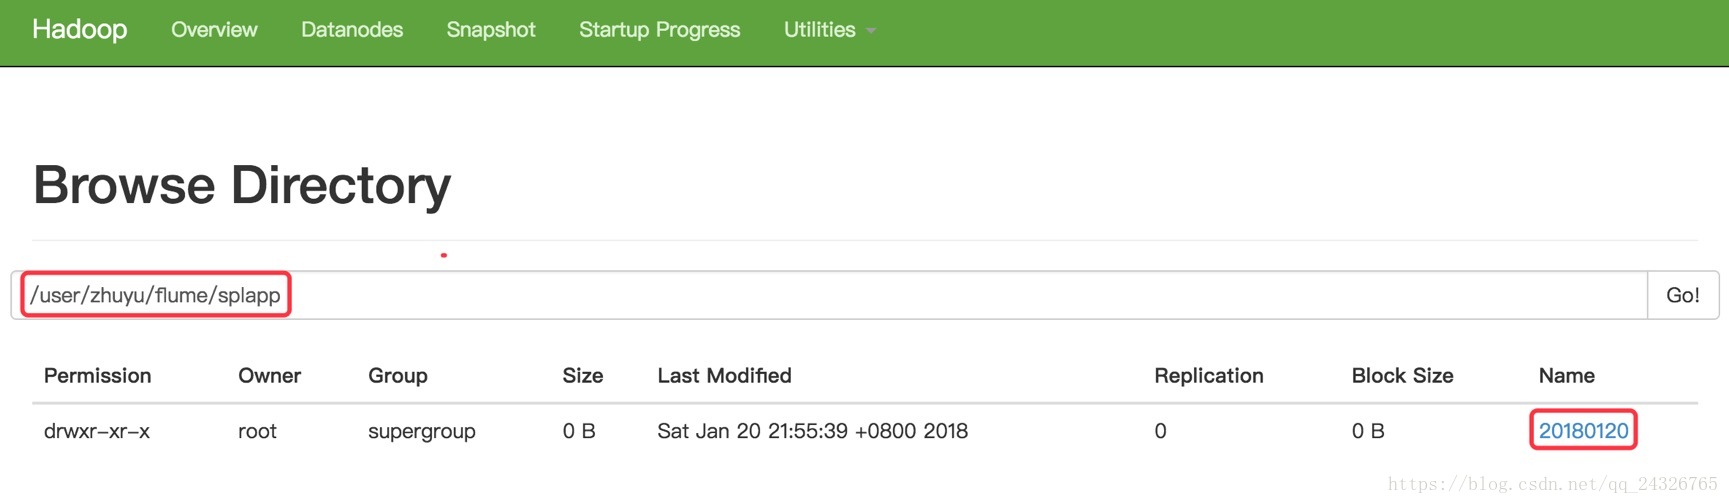
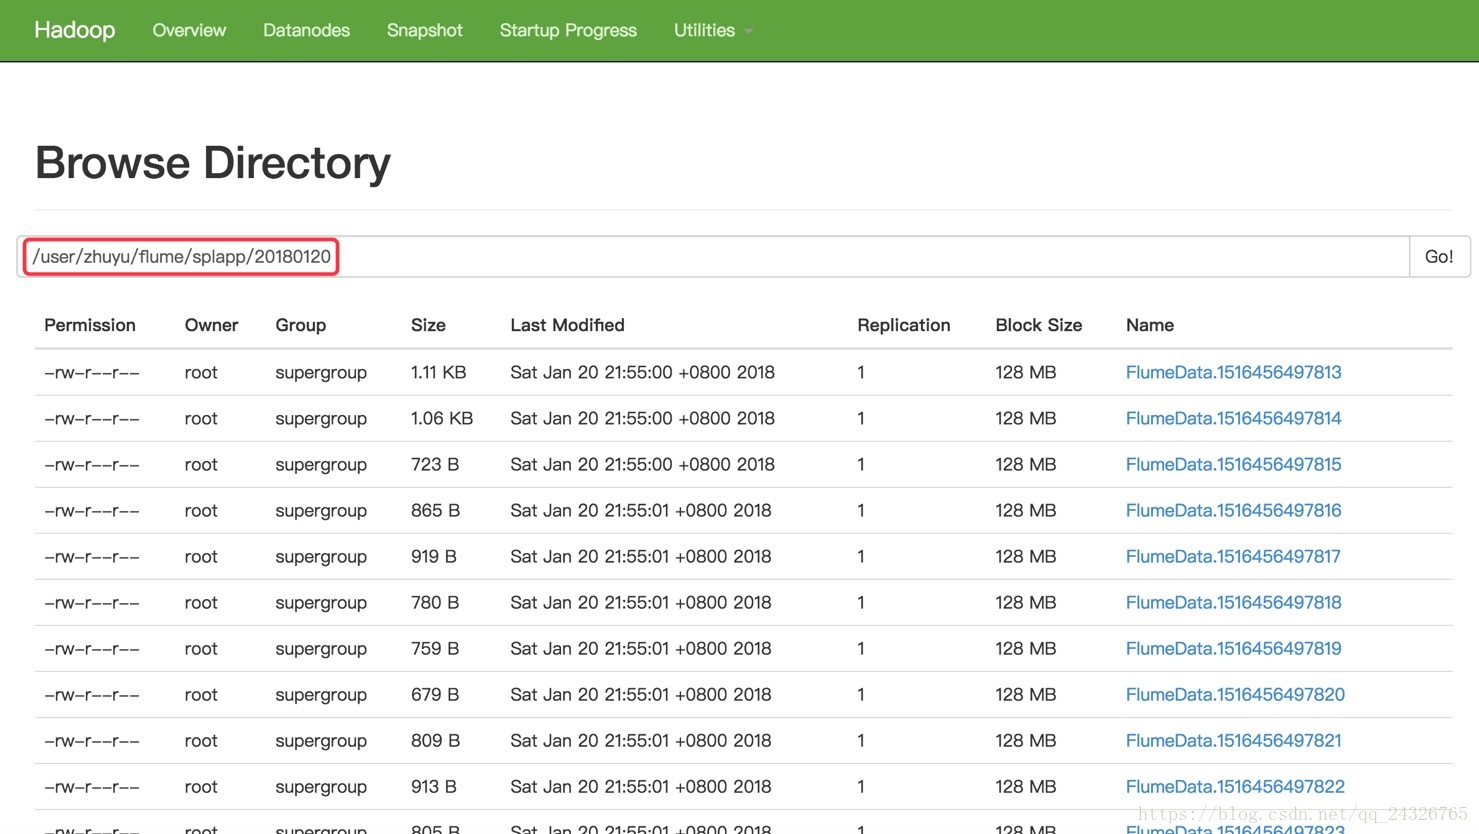
查看被收集目录:

查看channel检查点目录:

查看channel数据目录:


 449
449

 被折叠的 条评论
为什么被折叠?
被折叠的 条评论
为什么被折叠?
 到【灌水乐园】发言


