


 本文深入解析了热修复技术,对比了阿里AndFix、美团Robust、QZone超级补丁及Tinker热修复方案的特点,详细介绍了Tinker的工作原理,包括类替换、So替换和资源替换等。并通过手写代码实现了热修复过程,包括修复实现、模拟异常、模拟更新包下载、在Application中修复以及生成修复包等步骤。
版权声明:本文为博主原创文章,未经博主允许不得转载。
本文纯个人学习笔记,由于水平有限,难免有所出错,有发现的可以交流一下。
一、热修复
热补丁方案有很多,其中比较出名的有阿里的 AndFix、美团的 Robust 以及 QZone 的超级补丁方案。以及我们要分析的 Tinker 热修复。
| Tinker | QZone | AndFix | Robust | |
|---|---|---|---|---|
| 类替换 | yes | yes | no | no |
| So 替换 | yes | no | no | no |
| 资源替换 | yes | yes | no | no |
| 全平台支持 | yes | yes | yes | yes |
| 即时生效 | no | no | yes | yes |
| 性能消耗 | 较小 | 较大 | 较小 | 较小 |
Tinker 与QZone 是在java层进行替换,可以直接替换整个java 类,AndFix 和 Robust 是在 ndk 层进行替换,只能替换局部方法。
这四种热修复中,只有 Tinker 可以进行 so 的替换,其他不行,现在还有种 sophix 热修复也可以进行 so 的替换,但是 sophix 没有开源。
在安卓版本支持上来说,Tinker 是支持所有的。AndFix 在某些版本支持没有很好。
在性能损耗上,Tinker 这边虽然写着较小,但是个人感觉 Tinker 与 QZone 性能损耗应该都是比较大的。
二、Tinker 原理
在上一篇(十三)Dex 加解密与多 Dex 加载 中提到,ClassLoader 是通过加载自身私有属性 dexElements 的 dex 数组进行多 dex 的加载。
ClassLoader 在加载一个类的时候,会从头开始遍历 dexElements 数组,对各个 dex 进行查找,如果查找到要加载的类,则直接返回,不再继续查找。
例如:dexElements 有三个 dex,分别是 class.dex、class1.dex 和 class2.dex,如果 class1.dex 和 class2.dex 中都有一个 Test.class,那么按这个规则,在加载 Test 这个类的时候,会先找到 class1.dex 中的 Test.class,然后直接返回。
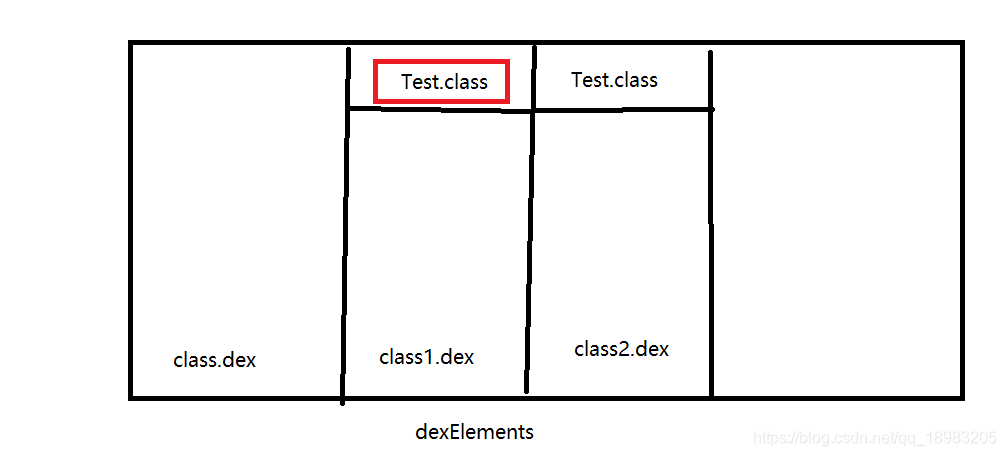
利用这一特性,Tinker 热修复把要修复的类文件打包成 dex,然后插入到 dexElements 数组中靠前的位置即可。
三、手写实现
1.修复实现
修复的核心内容与(十三)Dex 加解密与多 Dex 加载一样,这边直接贴代码,进行了小修改。
loadDex:
   /**
     * 加载 dex
     * @param dexFiles 需要加载的 dex 集合
     * @param optimizedDirectory dex 加载缓存目录
     */
    private static void loadDex(List<File> dexFiles, File optimizedDirectory){

        try {
            /**
             * 1.获得系统 classloader 中的 dexElements 数组
             */
            // 获得 classloader 中的 pathList(是一个 DexPathList)
            Field pathListField = ClassUtil.findField(App.getInstance().getClassLoader(), "pathList");
            Object pathList = pathListField.get(App.getInstance().getClassLoader());

            // 获得pathList类中的 dexElements
            Field dexElementsField = ClassUtil.findField(pathList, "dexElements");
            Object[] dexElements = (Object[]) dexElementsField.get(pathList);

            /**
             * 2.创建新的 element 数组 -- 解密后加载dex
             */
            // 需要适配安卓版本,5.0、6.0、7.0 都不一样
            // 具体要看各个版本的 dexElements 的创建方法是哪个,对这个方法进行反射
            ArrayList<IOException> suppressedExceptions = new ArrayList<IOException>();
            Method makeDexElements = null;
            // Element 数组
            Object[] addElements = null;
            if (Build.VERSION.SDK_INT >= Build.VERSION_CODES.LOLLIPOP && Build.VERSION.SDK_INT <
                    Build.VERSION_CODES.M) {
                makeDexElements = ClassUtil.findMethod(pathList, "makeDexElements", ArrayList.class,
                        File.class, ArrayList.class);
                addElements = (Object[]) makeDexElements.invoke(pathList, dexFiles,
                        optimizedDirectory, suppressedExceptions);
            } else if(Build.VERSION.SDK_INT < Build.VERSION_CODES.N){
                makeDexElements = ClassUtil.findMethod(pathList, "makePathElements", ArrayList.class,
                        File.class, ArrayList.class);
                addElements = (Object[]) makeDexElements.invoke(pathList, dexFiles,
                        optimizedDirectory, suppressedExceptions);
            }else if(Build.VERSION.SDK_INT >= Build.VERSION_CODES.N){
                makeDexElements = ClassUtil.findMethod(pathList, "makePathElements", ArrayList.class,
                        File.class, ArrayList.class, ClassLoader.class);
                addElements = (Object[]) makeDexElements.invoke(pathList, dexFiles,
                        optimizedDirectory, suppressedExceptions, App.getInstance().getClassLoader());
            }

            /**
             * 3.合并两个数组
             */
            //创建一个数组
            Object[] newElements = (Object[]) Array.newInstance(dexElements.getClass()
                    .getComponentType(), dexElements.length +
                    addElements.length);

	    //合并数组,更新包一定要放在前面,这样才会先被加载
            System.arraycopy(addElements, 0, newElements, 0, addElements.length);
            System.arraycopy(dexElements, 0, newElements, addElements.length, dexElements.length);

            /**
             * 4.替换classloader中的 element数组
             */
            dexElementsField.set(pathList, newElements);

        } catch (NoSuchFieldException e) {
            e.printStackTrace();
        } catch (IllegalAccessException e) {
            e.printStackTrace();
        } catch (NoSuchMethodException e) {
            e.printStackTrace();
        } catch (InvocationTargetException e) {
            e.printStackTrace();
        }
    }
2.模拟异常
新建一个项目,在 MainActivity 中调用 Test 类的方法,触发一个除 0 异常。
MainActivity:
public class MainActivity extends AppCompatActivity {

    private final static String TAG = "MainActivity";

    @Override
    protected void onCreate(Bundle savedInstanceState) {
        super.onCreate(savedInstanceState);
        setContentView(R.layout.activity_main);

    }

    public void jisuan(View view) {

        Test test = new Test();
        Toast.makeText(this, "计算结果为" + test.test(), Toast.LENGTH_LONG).show();
    }

    /**
     * 修复 bug
     * @param view
     */
    public void xiufu(View view) {

    }
}
activity_main.xml:
<?xml version="1.0" encoding="utf-8"?>
<LinearLayout xmlns:android="http://schemas.android.com/apk/res/android"
    xmlns:tools="http://schemas.android.com/tools"
    android:layout_width="match_parent"
    android:layout_height="match_parent"
    tools:context=".MainActivity">

    <Button
        android:layout_width="wrap_content"
        android:layout_height="wrap_content"
        android:text="计算"
        android:onClick="jisuan"/>
    <Button
        android:layout_width="wrap_content"
        android:layout_height="wrap_content"
        android:text="修复"
        android:onClick="xiufu"/>
</LinearLayout>
Test :
public class Test {

    public int test(){

        int a = 10;
        int b = 0;

        return a / b;
    }

}
3.模拟更新包下载
在 xiufu 这个方法中,从 sd 卡目录下拷贝更新包,模拟实际项目中从网络上下载更新包。修复包保存路径为 /data/data/包名/app_dexs/out.dex。
    public void xiufu(View view) {

        // 修复包保存为 /data/data/包名/app_dexs/out.dex
        File filesDir = this.getDir("dexs", Context.MODE_PRIVATE);
        String name = "out.dex";
        File dexFile =  new File(filesDir, name);
        Log.i(TAG, "dexFile: " + dexFile.getAbsolutePath());
        if (dexFile.exists()) {
            dexFile.delete();
        }

        InputStream is = null;
        FileOutputStream os = null;
        try {
            // 获取 sd 卡下的 out.dex
            is = new FileInputStream(new File(Environment.getExternalStorageDirectory(), name));
            os = new FileOutputStream(dexFile);
            int len;
            byte[] buffer = new byte[1024];
            while ((len = is.read(buffer)) != -1) {
                os.write(buffer, 0, len);
            }

        } catch (IOException e) {
            // TODO Auto-generated catch block
            e.printStackTrace();
        } finally {
            try {
                os.close();
                is.close();
            } catch (IOException e) {
                // TODO Auto-generated catch block
                e.printStackTrace();
            }
        }
        //调用修复
        FixManager.loadDex(this);
    }
loadDex:
    public static void loadDex(Context context){

        List<File> dexFiles = new ArrayList<>();
        File filesDir = context.getDir("dexs", Context.MODE_PRIVATE);

        // dex 缓存目录
        File dexCache = new File(filesDir, "cache");
        if (!dexCache.exists()) {
            dexCache.mkdirs();
        }

        File[] listFiles = filesDir.listFiles();
        for (File file : listFiles) {
            if(file.getName().endsWith(".dex")){
                Log.i("INFO", "dexName:"+file.getName());
                dexFiles.add(file);
            }
        }

        loadDex(dexFiles, dexCache);
    }
注:dex 的缓存目录不能跟 dex 的存储目录在同一个文件夹下。
4.在 Application 中修复
新建 App 继承 Application,在程序初始化的时候去加载所有已有的更新包。
App :
public class App extends Application {

    private static volatile App sigleton = null;

    public static App getInstance(){

        if (sigleton == null) {
            synchronized (App.class) {
                if (sigleton == null) {
                    sigleton = new App();
                }
            }
        }
        return sigleton;
    }
    @Override
    public void onCreate() {
        super.onCreate();
    }

    @Override
    protected void attachBaseContext(Context base) {
        super.attachBaseContext(base);

        sigleton = this;
        FixManager.loadDex(this);
    }
}
5.生成修复包
运行程序,点击 “计算” 按钮,发生除 0 异常,程序奔溃。
修改 Test 中的代码,进行修复这个除 0 异常。
Test:
public class Test {

    public int test(){

        int a = 10;
        int b = 1;

        return a / b;
    }
}
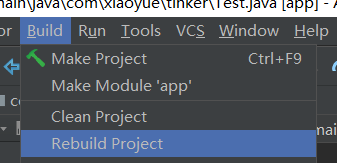
点击 Rebuild Project ,对项目重新进行编译。
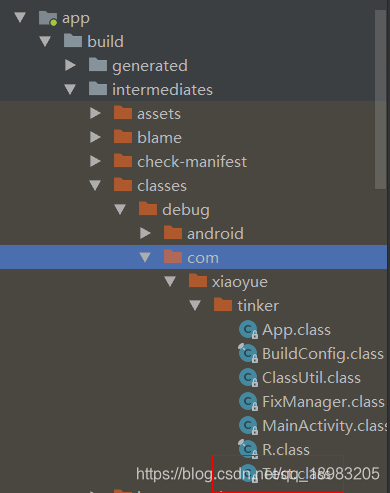
找到系统生成的 Test.class 文件。
按对应包名建立文件夹,把 Test.class 拷贝过来。
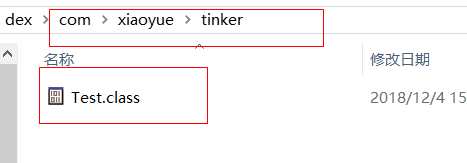
使用指令进行打包生成 dex 文件。
dx --dex --output C:\Users\ZX\Desktop\dex\out.dex C:\Users\ZX\Desktop\dex

6.修复
把生成的 out.dex 放到 sd 卡所在目录(模拟更新包下载),运行程序,点击“修复”,然后点击“计算”。
刚开始点击“计算”时候,运行出现除 0 异常,点击“修复”进行 dex 包的加载,并修复,然后就可以正常进行计算。


 被折叠的 条评论
为什么被折叠?
被折叠的 条评论
为什么被折叠?
 到【灌水乐园】发言


