


 本文介绍SpringSecurity的安全框架原理及其实现方式,包括认证、授权等功能,并演示如何将SpringSecurity集成到项目中,同时实现数据库用户授权。
本文纯个人读书笔记,书籍《一步一步学 Spring Boot 2》
如果喜欢,可直接购买书籍。如有侵权,请联系删除
一、Spring Security
在 Web 应用开发中,安全是非常重要的。如果在应用开发初期没有考虑安全问题,那么后期要修复安全漏洞,可能需要对整个架构进行调整,成本较大。所以,在项目的初期就要把安全问题给考虑起来。
Spring Security 安全框架除了包含基本的认证和授权功能外,还提供了加密解密、统一登录等一系列支持。
实现原理:
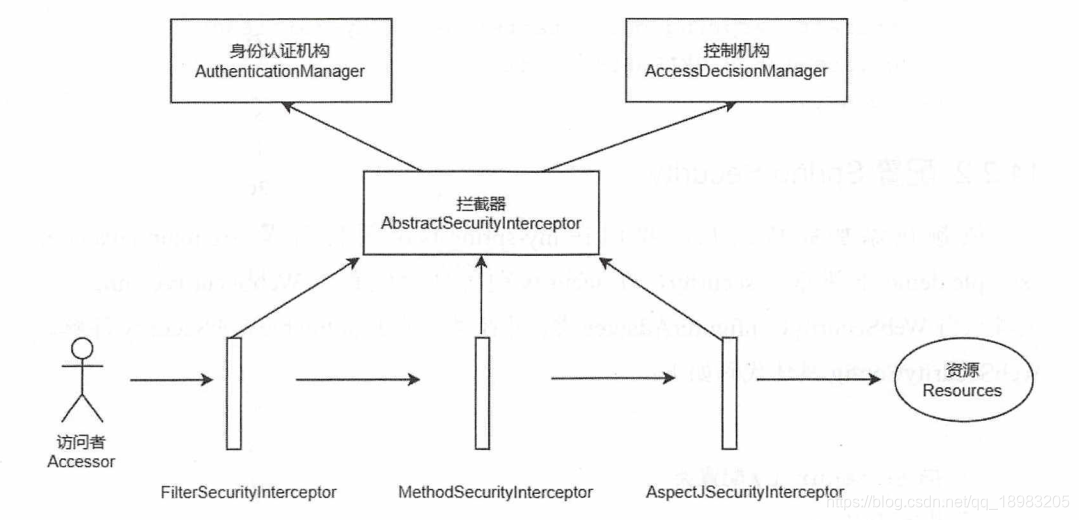
Accessor 是资源的访问者,在访问过程中,需要经过一系列拦截器 Interceptor 的拦截,比如FilterSecuritylnterceptor、 MethodSecuritylnterceptor、AspectJSecurityinterceptor 等。这些拦截器是统一的抽象类 AbstractSecurityInterceptor 的具体实现。
“控制机构” AccessDecisionManager 决定谁可以访问资源,而 “身份认证机构” AuthenticationManager 就是定义那个“谁”,解决的是访问者身份认证问题,只有确定注册类,才可以给予授权访问。 “控制机构” AccessDecisionManager 和 “身份认证机构” AuthenticationManager 负责制订规则, AbstractSecurityInterceptor 负责执行 。
二、集成 Spring Security
1.引入依赖
在 pom.xml 中添加依赖。
pom.xml:
        <dependency>
            <groupId>org.springframework.boot</groupId>
            <artifactId>spring-boot-starter-security</artifactId>
            <version>1.5.9.RELEASE</version>
        </dependency>
2.配置
新建 Spring Security 配置类 com.xiaoyue.demo.security.WebSecurityConfig。
WebSecurityConfig:
@Configuration
@EnableWebSecurity
public class WebSecurityConfig extends WebSecurityConfigurerAdapter {

    @Override
    protected void configure(HttpSecurity http) throws Exception {
        super.configure(http);

        //路由策略和访问权限的简单配置
        http.formLogin()                        //启用默认登录页面
                .failureUrl("/login?error")     //登录失败返回 URL:/login?error
                .defaultSuccessUrl("/user/list")//登录成功跳转 URL,这里跳转到用户首页
                .permitAll();                   //登录页面全部权限可访问
        super . configure(http);
    }

	//由于 Spring 版本更新,改写法与书籍有所出入
    @Override
    protected void configure(AuthenticationManagerBuilder auth) throws Exception {
        auth.inMemoryAuthentication().passwordEncoder(new BCryptPasswordEncoder())
                .withUser("zx")
                .password(new BCryptPasswordEncoder().encode("123456"))
                .roles("admin")
                .and()
                .withUser("zxy")
                .password(new BCryptPasswordEncoder().encode("123456"))
                .roles("user");
    }
}
@EnableWebSecurity: 开启 Security 安全框架。
3.测试
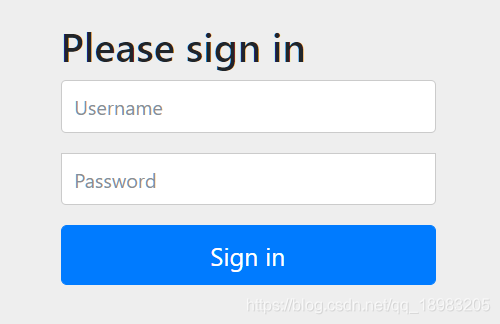
启动应用,访问 http://localhost:8080/demo/login,会被拦截跳转到默认登录界面。
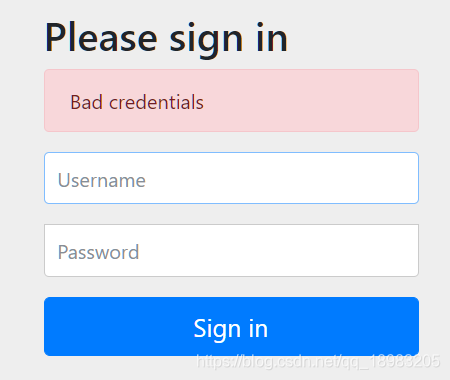
输入错误用户名密码后跳转到失败界面。
输入正确用户名密码,即可访问用户列表信息。
三、数据库用户授权
在上面我们是把用户名密码写死在代码中,实际项目中是需要与数据库中的用户表进行关联。
1.数据库建表
用户表:
-- ----------------------------
-- 用户表
-- Table structure for user
-- ----------------------------
DROP TABLE IF EXISTS USER;
CREATE TABLE USER (
  id VARCHAR(32) NOT NULL COMMENT '主键',
  NAME VARCHAR(10) DEFAULT NULL COMMENT '用户名',
  PASSWORD VARCHAR(32) DEFAULT NULL COMMENT '密码'
);

INSERT INTO USER (id, NAME, PASSWORD) VALUES ('1', 'aa', '$2a$10$O3ZBFBSM1xNvRTlM5Q1I7eu9GXGIavvl81r8hWf9Z83KVZ0pralmC');
INSERT INTO USER (id, NAME, PASSWORD) VALUES ('2', 'bb', '$2a$10$O3ZBFBSM1xNvRTlM5Q1I7eu9GXGIavvl81r8hWf9Z83KVZ0pralmC');

-- 角色表
DROP TABLE IF EXISTS role;
CREATE TABLE role(
	id VARCHAR(255) DEFAULT NULL,
	NAME VARCHAR(255) DEFAULT NULL
);

INSERT INTO role VALUES ('1', 'admin');
INSERT INTO role VALUES ('2', 'user');

-- 用户角色关联表
DROP TABLE IF EXISTS user_role;
CREATE TABLE user_role(
	user_id VARCHAR (255) DEFAULT NULL ,
	role_id VARCHAR(255) DEFAULT NULL
);

INSERT INTO user_role VALUES ('1', '1');
INSERT INTO user_role VALUES ('2', '2');
创建用户表,角色表,用户角色表,并指定 id 为 1 的用户角色为 admin,id 为 2 的用户角色为 user。
注: 用户的密码是 $2a 10 10 10O3ZBFBSM1xNvRTlM5Q1I7eu9GXGIavvl81r8hWf9Z83KVZ0pralmC,这个是 123456 使用 new BCryptPasswordEncoder().encode(“123456”) 获取的。
2.实体类
创建角色实体类 com.xiaoyue.demo.model.Role 和用户角色实体类 com.xiaoyue.demo.model.UserRole。
Role:
@Entity
@Table(name = "role")
public class Role implements Serializable {

    @Id
    private String id;
    private String name;
	......
}
UserRole:
@Entity
@Table(name = "user_role")
public class UserRole implements Serializable {

    @Id
    private String userId;
    private String roleId;
    ......
}
3.Repository
利用 JPA,创建对应的 Repository 接口 com.xiaoyue.demo.repository.RoleRepository 和 com.xiaoyue.demo.repository.UserRoleRepository。
RoleRepository:
public interface RoleRepository extends JpaRepository<Role, String> {

}
UserRoleRepository:
public interface UserRoleRepository extends JpaRepository<UserRole, String> {

	List<UserRole> findByUserId(@Param("userId") String userID) ;
}
4.Service 层
创建角色的 service 接口 com.xiaoyue.demo.service.RoleService 和实现类 com.xiaoyue.demo.service.impl.RoleServiceImpl。
RoleService :
public interface RoleService {

    Role find(String id) ;
}
RoleServiceImpl :
@Service
public class RoleServiceImpl implements RoleService {


    @Resource
    private RoleRepository roleRepository;

    @Override
    public Role find(String id) {
        return roleRepository.findById(id).get();
    }
}
创建用户角色的 service 接口 com.xiaoyue.demo.service.UserRoleService 和实现类 com.xiaoyue.demo.service.impl.UserRoleServiceImpl。
UserRoleService:
public interface UserRoleService {

    List<UserRole> findByUserId(String userId) ;
}
UserRoleServiceImpl :
@Service
public class UserRoleServiceImpl implements UserRoleService {

    @Resource
    private UserRoleRepository userRoleRepository;

    @Override
    public List<UserRole> findByUserId(String userId) {
        return userRoleRepository.findByUserId(userId);
    }
}
5.UserDetailsService
这边新建一个 com.xiaoyue.demo.security.CustomUserService, 实现 UserDetailsService 接口。
CustomUserService :
@Service
public class CustomUserService implements UserDetailsService {

    @Resource
    private UserService userService;

    @Resource
    private RoleService roleService;

    @Resource
    private UserRoleService userRoleService;

    @Override
    public UserDetails loadUserByUsername(String name) throws UsernameNotFoundException {

        User user = userService.findByName(name).get(0);

        if (user == null) {
            throw new BusinessException("用户不存在" );
        }

        //获取用户所有的关联角色
        List<UserRole> userRoles
                = userRoleService.findByUserId(user.getId());

        List<GrantedAuthority> authorityList = new ArrayList<GrantedAuthority>();

        if (userRoles != null && userRoles.size() > 0) {

            for (UserRole userRole : userRoles) {
                //获取用户关联角色名称
                String roleName = roleService.find(userRole.
                        getRoleId()).getName();
                authorityList.add(new SimpleGrantedAuthority
                        (roleName));
            }
        }

        return new org.springframework.security.core.userdetails.User(
                user.getName(), user.getPassword(), authorityList);
    }
}
5.注册
实现 UserDetailsService 的 UserDetails 需要在 WebSecurityConfig 中进行注册,修改 WebSecurityConfig 。
WebSecurityConfig :
@Configuration
@EnableWebSecurity
public class WebSecurityConfig extends WebSecurityConfigurerAdapter {

    @Resource
     private CustomUserService customUserService;

    @Override
    protected void configure(HttpSecurity http) throws Exception {
        super.configure(http);

        //路由策略和访问权限的简单配置
        http.formLogin()                        //启用默认登录页面
                .failureUrl("/login?error")     //登录失败返回 URL:/login?error
                .defaultSuccessUrl("/user/list")//登录成功跳转 URL,这里跳转到用户首页
                .permitAll();                   //登录页面全部权限可访问
        super . configure(http);
    }

    @Override
    protected void configure(AuthenticationManagerBuilder auth) throws Exception {

        auth.userDetailsService(customUserService).passwordEncoder(new BCryptPasswordEncoder());

    }
}
6.测试
启动项目,访问 http://localhost:8080/demo/login,输入用户名 aa,密码 123456,统一可以登录成功。


 被折叠的 条评论
为什么被折叠?
被折叠的 条评论
为什么被折叠?
 到【灌水乐园】发言


