//导入包设置
import numpy as np
import theano as th
import theano.tensor as T
from keras.utils import np_utils
import keras.models as models
from keras.layers import Input,merge
from keras.layers.core import Reshape,Dense,Dropout,Activation,Flatten
from keras.layers.advanced_activations import LeakyReLU
from keras.activations import*from keras.layers.wrappers import TimeDistributed
from keras.layers.noise import GaussianNoise
from keras.layers.convolutional import Conv2D, Convolution2D, MaxPooling2D, ZeroPadding2D, Deconv2D, UpSampling2D
from keras.layers.recurrent import LSTM
from keras.callbacks import ModelCheckpoint
from keras.regularizers import*from keras.layers.normalization import*from keras.optimizers import*from keras.datasets import mnist
import matplotlib.pyplot as plt
import cPickle, random, sys, keras
from keras.models import Model
from IPython import display
sys.path.append("../common")from keras.utils import np_utils
#K.set_image_dim_ordering('th')
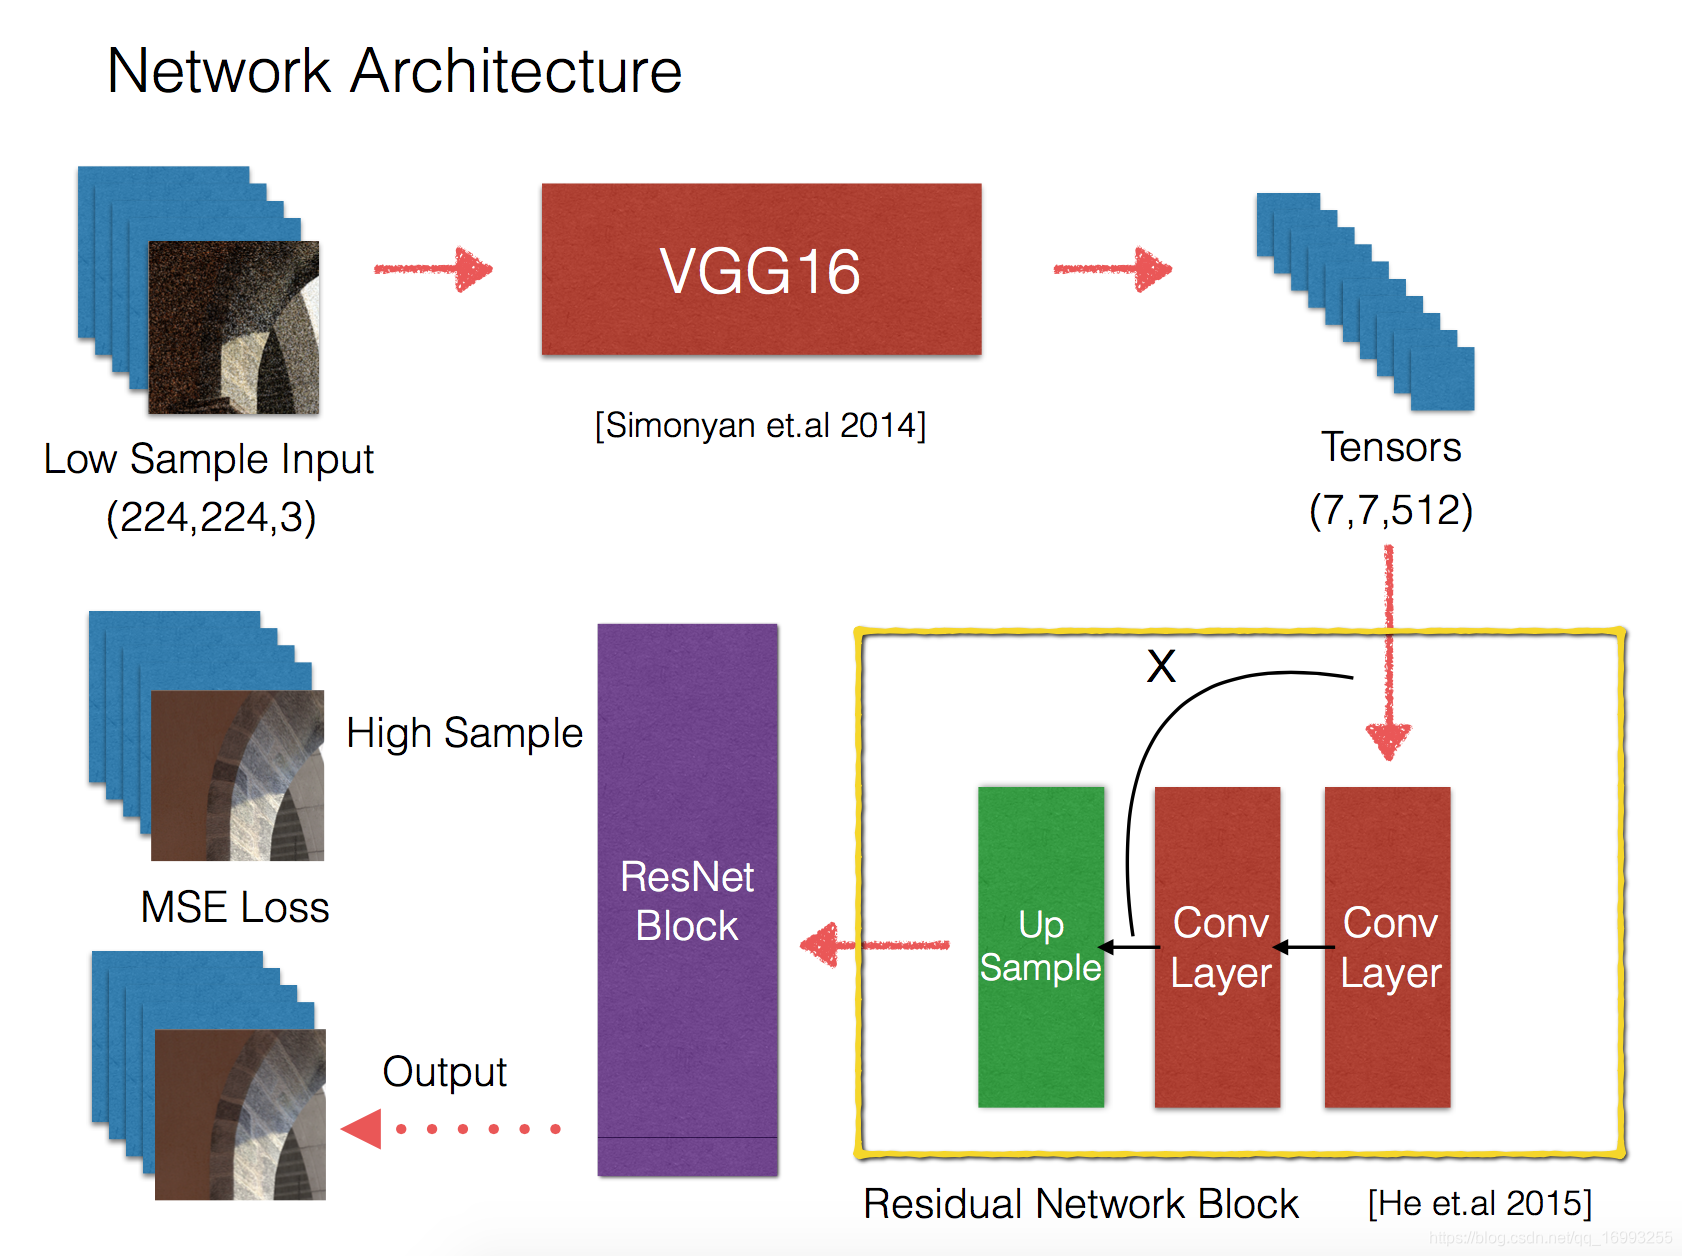
创建网络
加载训预练的VGG16网络
defcreate_network():#first we load the pre-trined vgg16 networkfrom keras.applications.vgg16 import VGG16
input_tensor = Input(shape=(224,224,3))
base_model = VGG19(input_tensor=input_tensor,weights='imagenet', include_top=False)for layer in base_model.layers:
layer.trainable =False
x = base_model.output
上采样块用残差连接
a = Conv2D(256,(3,3), activation='relu', padding='same')(x)
x = keras.layers.merge.Add()(a,x)
x = UpSampling2D(size=(2,2))(x)
a = x = Conv2D(128,(3,3), activation='relu', padding='same')(x)
x = keras.layers.merge.Add()(a,x)
x = UpSampling2D(size=(2,2))(x)
a = Conv2D(64,(3,3), activation='relu', padding='same')(x)
x = keras.layers.merge.Add()(a,x)
x = UpSampling2D(size=(2,2))(x)
a = Conv2D(32,(3,3), activation='relu', padding='same')(x)
x = keras.layers.merge.Add()(a,x)
x = UpSampling2D(size=(2,2))(x)
a = Conv2D(32,(3,3), activation='relu', padding='same')(x)
x = keras.layers.merge.Add()(a,x)
x = UpSampling2D(size=(2,2))(x)#### 以下的concatenate是什么意思?
x = keras.layers.concatenate([x, input_tensor])
x = Conv2D(64,(3,3), activation='relu', padding='same')(x)
x = Conv2D(32,(3,3), activation='relu', padding='same')(x)
out = Conv2D(3,(3,3), activation='sigmoid', padding='same')(x)
model = Model(inputs=base_model.input, outputs=out)#the final model use mse error with adadelta optimizer
model.compile(optimizer='adadelta', loss='mean_squared_error')return model
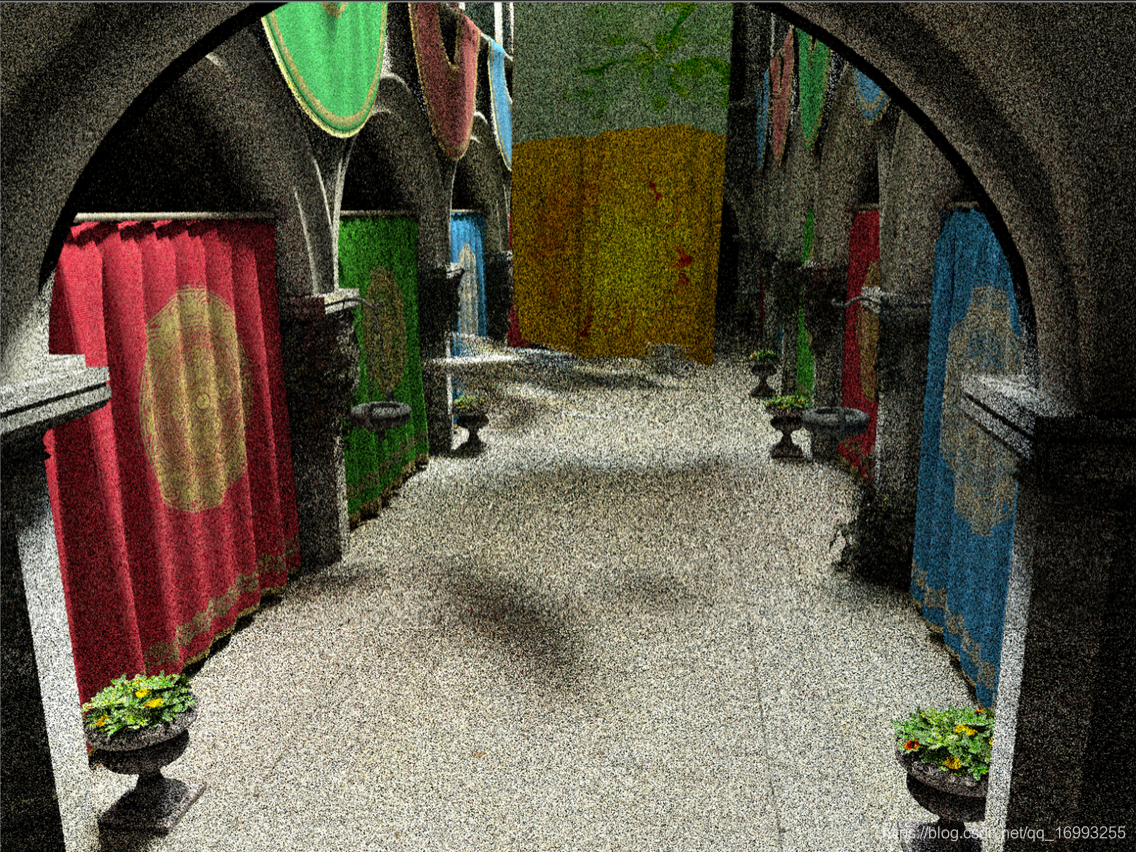
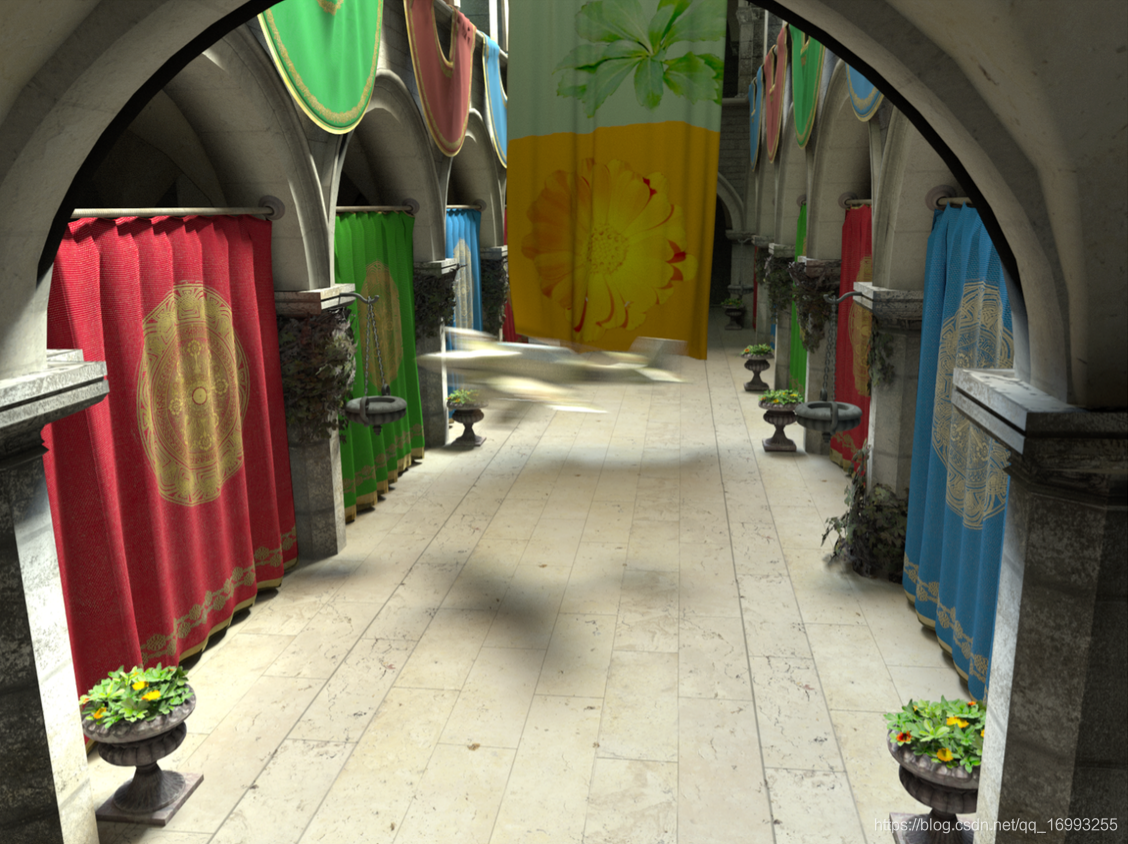
for i inrange(5):
plt.figure(i)
plt.grid(b=False)
plt.subplot(221)
plt.imshow(lowsampleimgs[i,:,:,:])
plt.subplot(222)
plt.imshow(highsampleimgs[i,:,:,:])
plt.show()


 蒙特卡洛渲染方法计算大量采样光线耗时久,影响其在工业中的应用。本文提出基于深度学习的框架,利用少量采样图像输入产生近似大量采样的图像效果。使用带有残差连接的卷积神经网络,以VGG16为基础模型,还引入one - shot learning扩展网络。


 5908
5908

 被折叠的 条评论
为什么被折叠?
被折叠的 条评论
为什么被折叠?
 到【灌水乐园】发言


