系统:windows10,python版本3.8虚拟环境
第一步:根据官方网址选python版本,cudnn、cuda版本
cuda 与 cudnn TensorFlow 对照表官网、Pytorch官网安装命令
https://download.pytorch.org/whl/torch/
加速源:
conda config --add channels http://mirrors.tuna.tsinghua.edu.cn/anaconda/pkgs/main/win-64
conda config --add channels http://mirrors.tuna.tsinghua.edu.cn/anaconda/pkgs/free/win-64
conda config --add channels http://mirrors.tuna.tsinghua.edu.cn/anaconda/cloud/pytorch/win-64
conda config --set show_channel_urls yes
第二步:安装 tensorflow-gpu、torch gpu
1、先安装tensorflow2.5.0 gpu
pip install tensorflow-gpu==2.5.0 -i https://pypi.mirrors.ustc.edu.cn/simple/
2、conda补充cudatoolkit、cudnn包,根据上述官网查看版本
conda install cudatoolkit=11.1.1 cudnn=8.1.0    ----- 使用该命令安装cuda cudnn,可供虚拟环境单独使用
3、安装pytorch1.8.0 gpu版,cudatoolkit已经装过了,故可以去除该包
官方命令:
# CUDA 11.1
conda install pytorch==1.8.0 torchvision==0.9.0 torchaudio==0.8.0 -c pytorch -c conda-forge
其他版本同理,如下:
# conda create -n py3.9_tf2.10_torch2.0.0 python=3.9
1、先安装tensorflow2.10 gpu
pip install tensorflow-gpu==2.10.1 -i https://pypi.mirrors.ustc.edu.cn/simple/
2、conda补充cudatoolkit、cudnn包,根据上述官网查看版本
conda install cudatoolkit=11.7 cudnn    ----- 使用该命令安装cuda cudnn,可供虚拟环境单独使用
3、安装pytorch2.0.0 gpu版,cudatoolkit已经装过了,故可以去除该包
命令:
# CUDA 11.7
conda install pytorch==2.0.0 torchvision==0.15.0 torchaudio==2.0.0 pytorch-cuda=11.7 -c pytorch -c nvidia
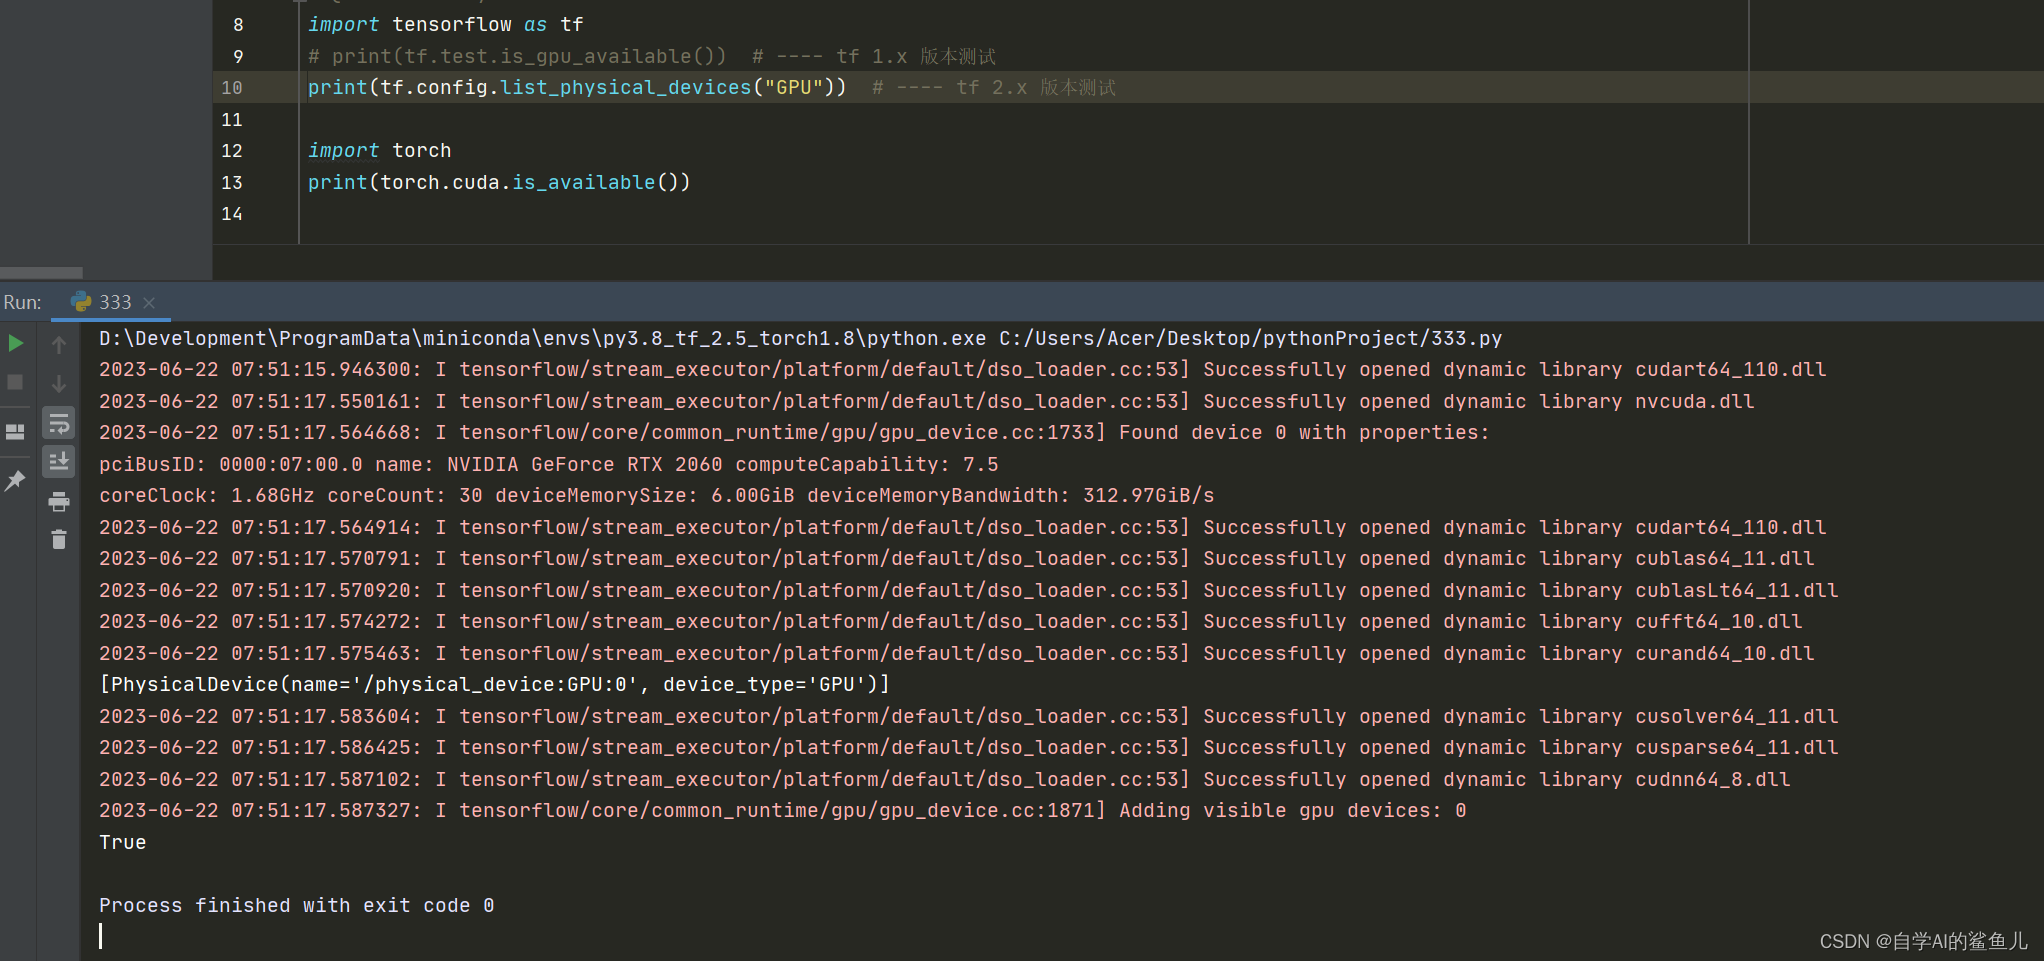
第三步:是否安装 gpu版本成功
import tensorflow as tf
# print(tf.test.is_gpu_available())  # ---- tf 1.x 版本测试
print(tf.config.list_physical_devices("GPU"))  # ---- tf 2.x 版本测试

import torch
print(torch.cuda.is_available())
遇到问题: AttributeError: module 'numpy' has no attribute 'object'
安装 numpy==1.19.2
pip install numpy==1.19.2 -i https://pypi.mirrors.ustc.edu.cn/simple/
#删除掉从不使用的packages
#Remove unused packages from writable package caches.
conda clean -p
#删除掉tar包
conda clean -t
#Remove index cache, lock files, unused cache packages,and tarballs.
conda clean -a
#删除虚拟环境
conda remove -n my_py_env --all
#创建虚拟环境
conda create -n env_name python=3.9
#conda 安装本地 tar
conda install --use-local <your-pkg-name>
#创建新环境并复制旧环境(用于测试)
conda create --name 新环境名 --clone 旧环境名
pip cache purge # 这个命令会清除所有缓存,包括已下载但未安装的软件包和已安装但未被使用的缓存。import torch
print('CUDA版本:',torch.version.cuda)
print('Pytorch版本:',torch.__version__)
print('显卡是否可用:','可用' if(torch.cuda.is_available()) else '不可用')
print('显卡数量:',torch.cuda.device_count())
print('是否支持BF16数字格式:','支持' if (torch.cuda.is_bf16_supported()) else '不支持')
print('当前显卡型号:',torch.cuda.get_device_name())
print('当前显卡的CUDA算力:',torch.cuda.get_device_capability())
print('当前显卡的总显存:',torch.cuda.get_device_properties(0).total_memory/1024/1024/1024,'GB')
print('是否支持TensorCore:','支持' if (torch.cuda.get_device_properties(0).major >= 7) else '不支持')
print('当前显卡的显存使用率:',torch.cuda.memory_allocated(0)/torch.cuda.get_device_properties(0).total_memory*100,'%')
--->
CUDA版本: 11.7
Pytorch版本: 1.13.1+cu117
显卡是否可用: 可用
显卡数量: 1
是否支持BF16数字格式: 不支持
当前显卡型号: NVIDIA GeForce GTX 960M
当前显卡的CUDA算力: (5, 0)
当前显卡的总显存: 3.9998779296875 GB
是否支持TensorCore: 不支持
当前显卡的显存使用率: 0.0 %


 本文详细介绍在Windows10系统下,如何使用Python3.8虚拟环境搭建GPU加速的深度学习环境,包括安装TensorFlow-GPU、PyTorch-GPU、CUDA及CuDNN等关键组件,以及验证GPU是否成功启用的方法。


 2943
2943

 被折叠的 条评论
为什么被折叠?


