 极光推送在Android应用中的集成与测试


 本文详细介绍了如何在Android应用中集成极光推送服务,包括创建应用、配置参数、添加依赖、配置XML文件及初始化过程,并分享了在不同华为手机版本上的测试经验。
原生与ionic项目整合中要求能在任何界面收到消息本来是用的socket做的,只能在当前应用接受,后来迁移到原生外壳中,加了服务、保活,在8.0版本的三星手机测试的一切正常,然后华为9.0发现并不支持,查了下资料发现,以下方案华为均不支持
1.双进程守护方案,华为6.0就失效
2.监听锁屏/亮屏/解锁广播,打开1像素Activity,华为6.0就失效,因广播被取消了
3.故意在后台播放无声的音乐,华为M10手机9.0失效
4.使用JobScheduler唤醒Service,7.0以上失效
华为有自己的推送服务,对华为手机支持当然是没问题的,对于非华为手机,要先下载一个apk支持华为服务,然后才能正常使用,这种方案体验很不好,放弃了,然后了解了下个推,不得不说个推官网写的不错,以前在h5开发中集成过,原生开发集成毫无问题,小半天就测试完毕了,很遗憾的是,应用切换到后台能正常收到消息,当将测试包关闭后在发送消息发现收不到了,这个方案也放弃了,然后又花了点时间了解了下极光推送,IOS的同事一直在用这个,功能测试也是很快的,小半天就完成,经过测试,应用关闭后能正常收到消息,但是如果将应用杀死是收不到消息,这个方案基本满足我们的需求,就用这个了,下面具体介绍下android stduio中集成极光推送的过程,不得不说,官网写的是真乱啊,eclipse版本和android stduio版本的乱七八糟,完全摸不着头脑,AndroidManifest.xml里面的配置看着还是有点乱。
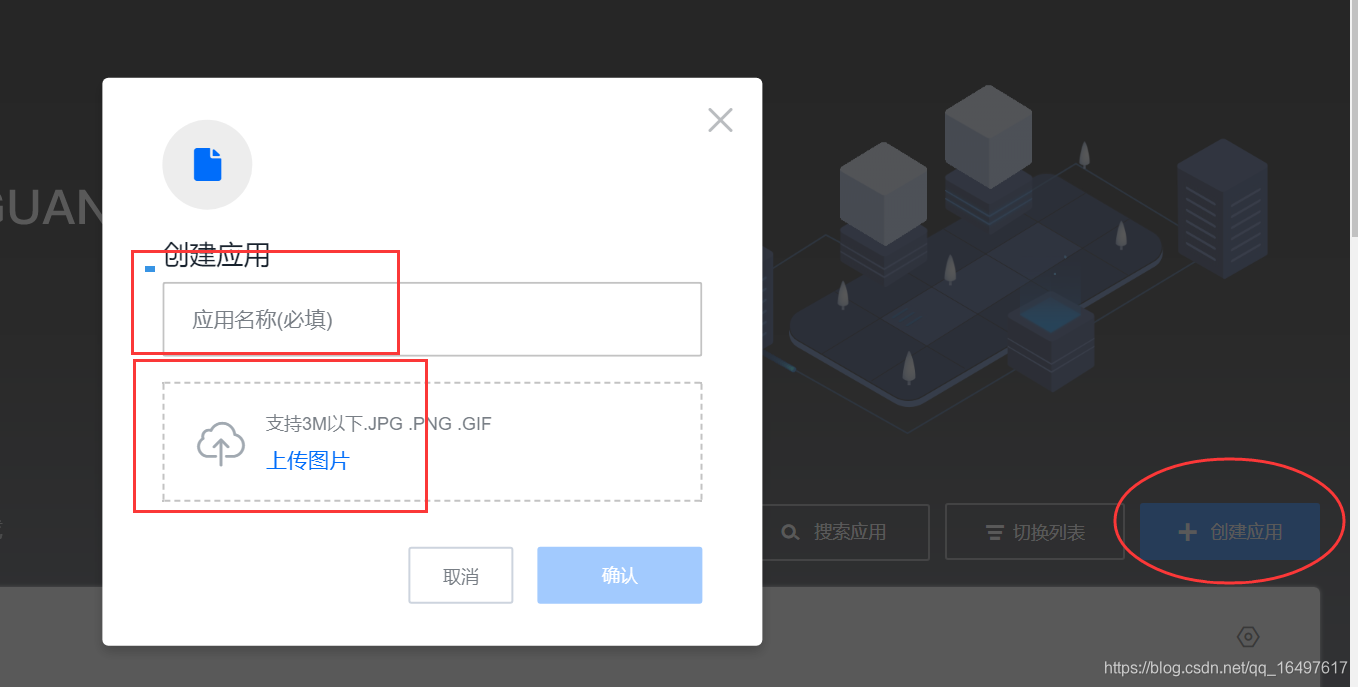
1.注册登录极光官网后,首先创建一个应用,名称和图片随便填即可,如下图:
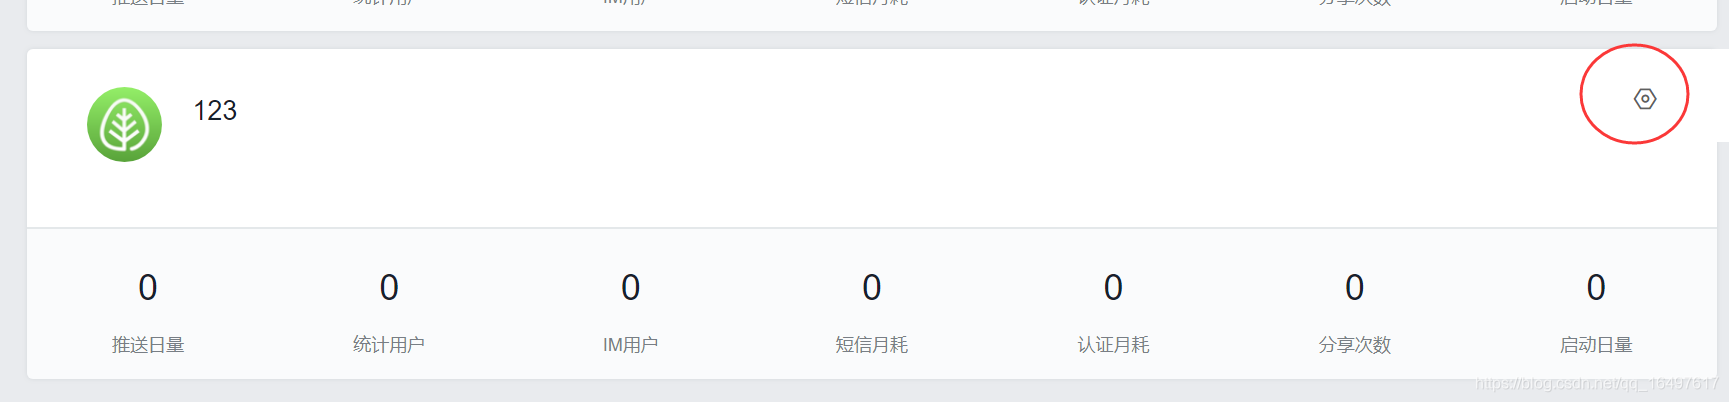
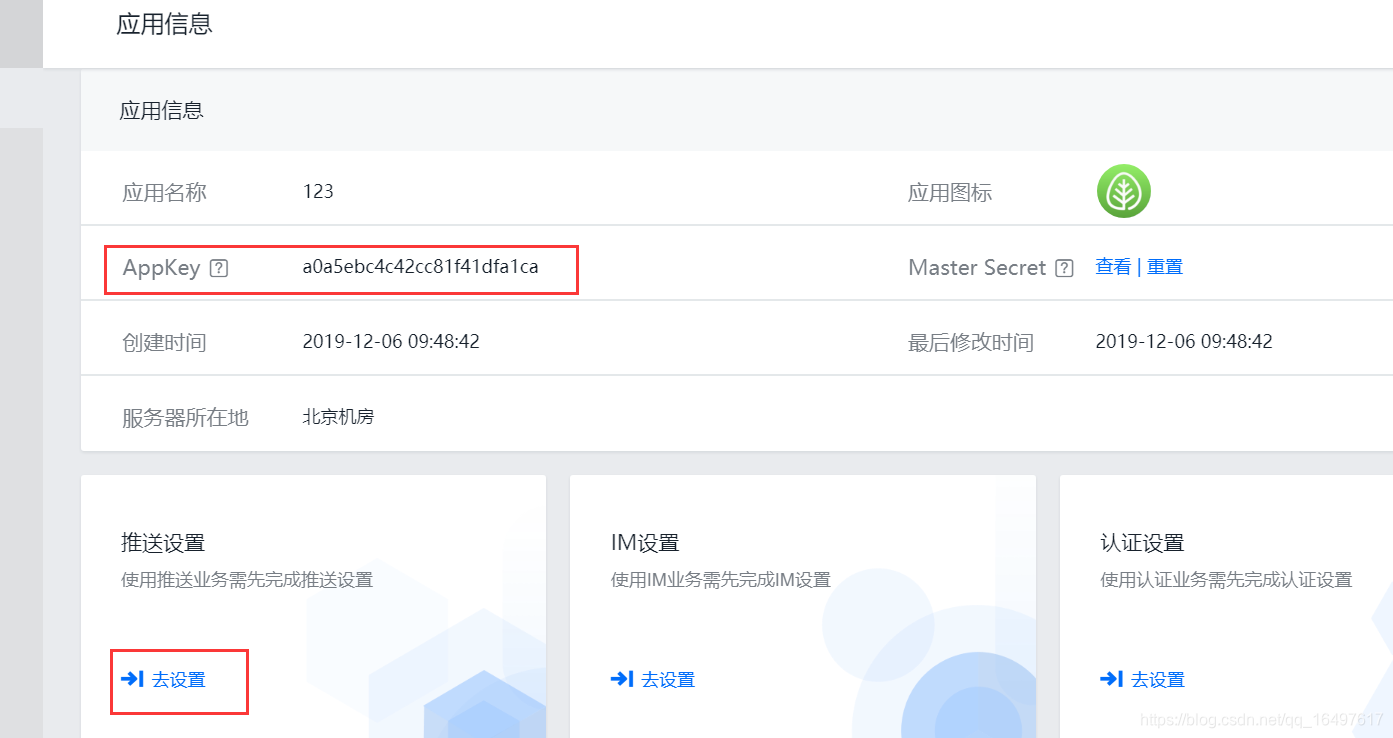
2.应用创建好之后点击配置,找到appkey保存下来,后面会用到
3.选择推送设置里面的去设置
4.应用包名填写项目的包名,一定要一致,填写完保存后可以下载安装包测试是否能正常收到消息了
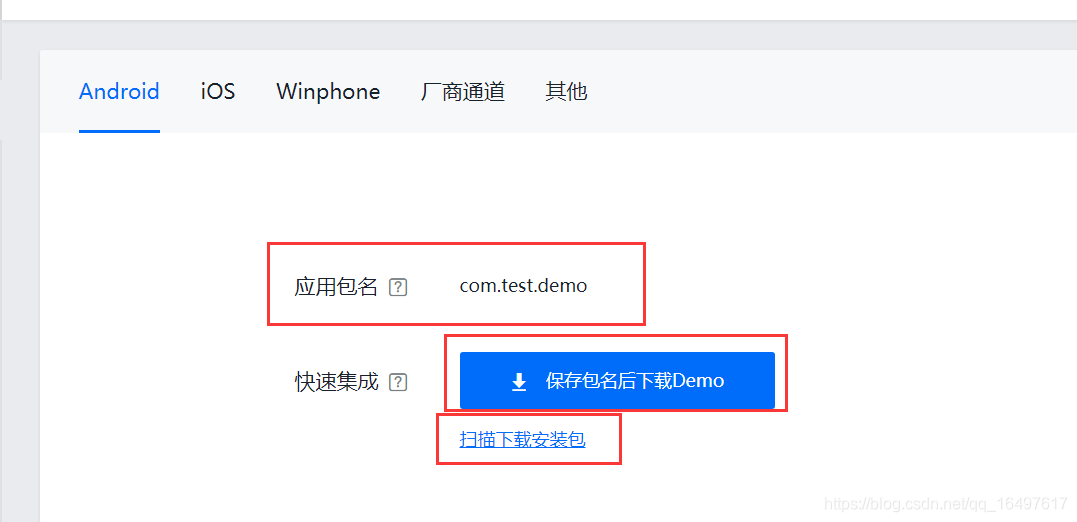
5.安装apk后,在这个页面可以发起一条消息测试手机端是否正常收到消息,预估人数为1即说明成功了99%,发送后手机端能正常收到即可在项目中集成代码了。

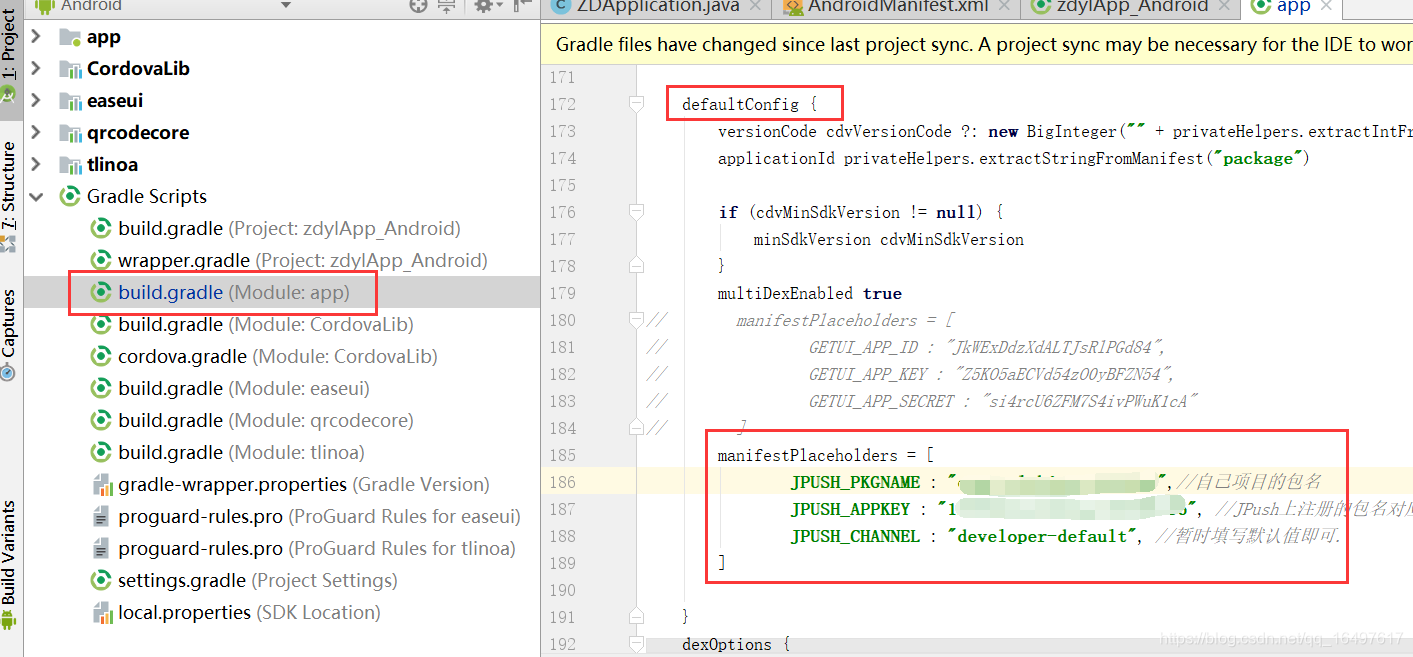
6.在module的build.gradle中的defaultConfig中加入如下代码:
manifestPlaceholders = [
        JPUSH_PKGNAME : "xxx",//自己项目的包名
        JPUSH_APPKEY : "xxx", //JPush上注册的包名对应的appkey.
        JPUSH_CHANNEL : "developer-default", //暂时填写默认值即可.
]
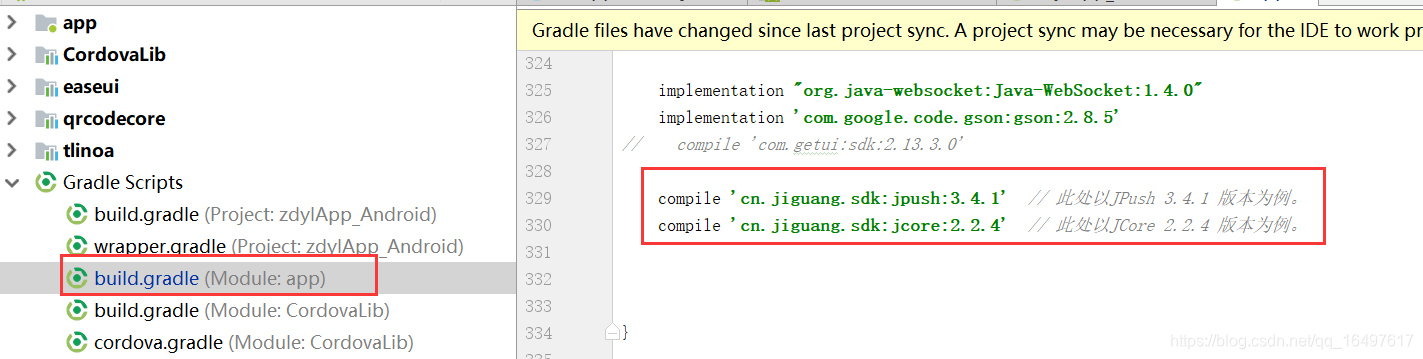
在当前文件中的dependencies中添加下面两个依赖,具体版本可参考官网
compile 'cn.jiguang.sdk:jpush:3.4.1'  // 此处以JPush 3.4.1 版本为例。
compile 'cn.jiguang.sdk:jcore:2.2.4'  // 此处以JCore 2.2.4 版本为例
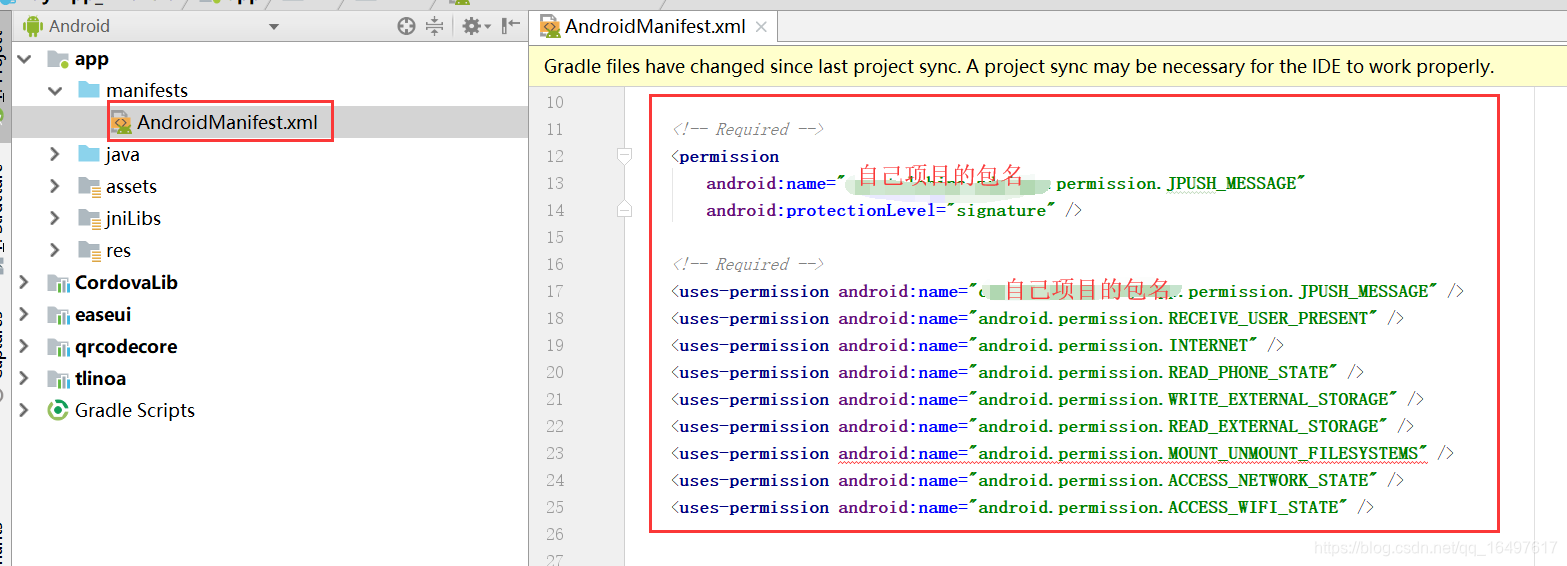
7.接下来开始配置xml,先引入必须的 Required 权限,配置这个也是参考极光官网的文档,其他没加 Required注释的去掉就行
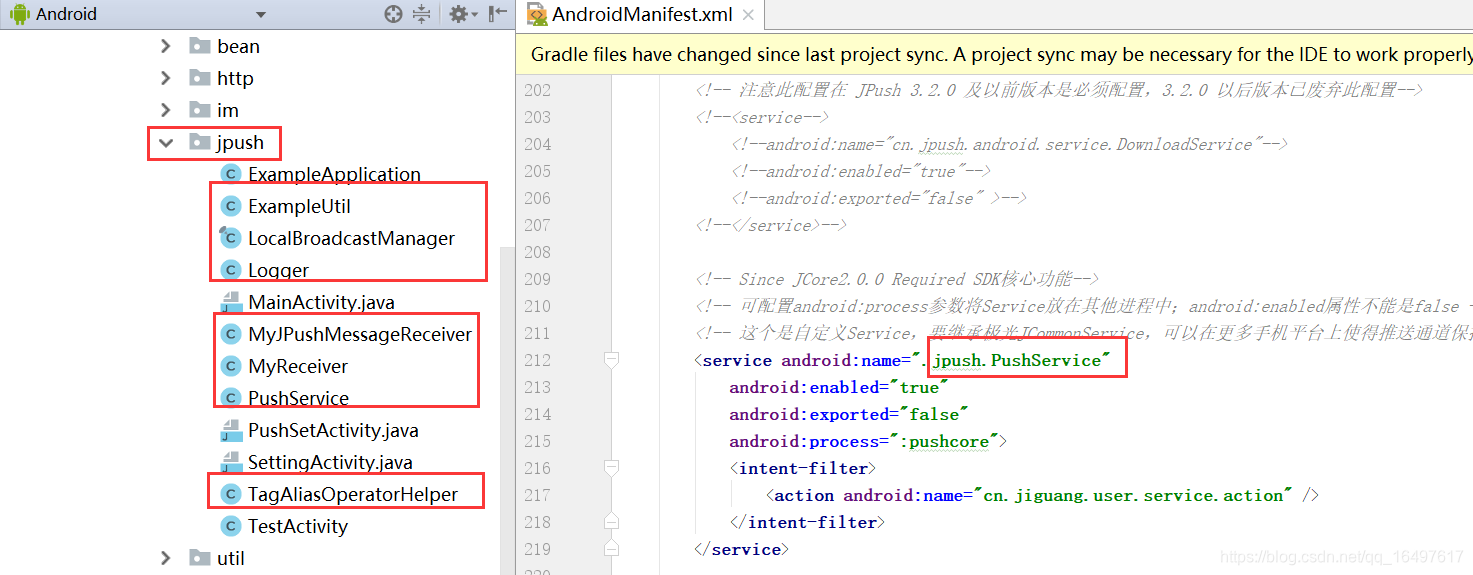
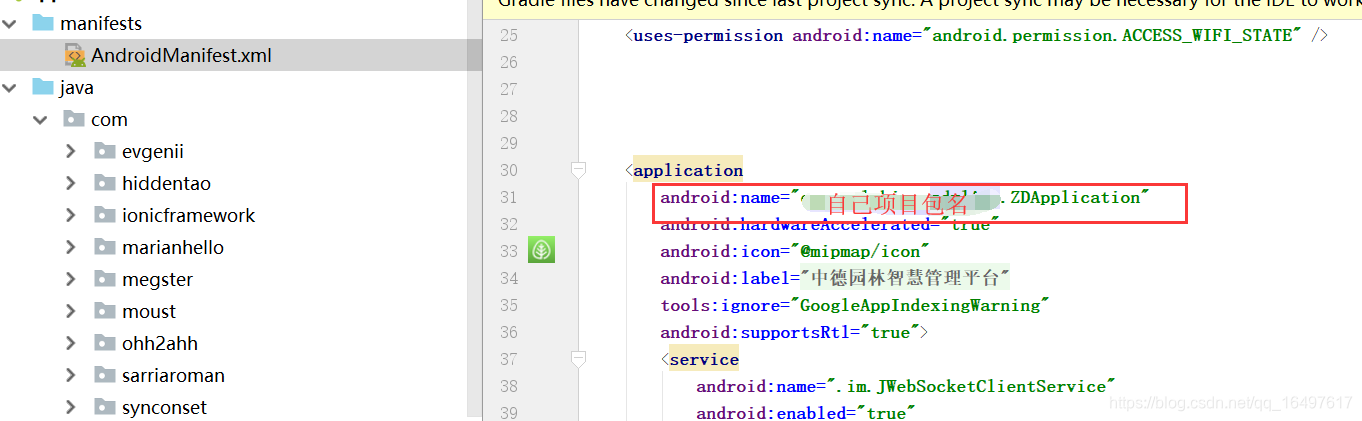
8.在application中加入下列代码配置,参考极光官网的配置,有些Required都注释了,发现加入并不能正常运行项目,其中用到的几个service是自定义的需要在自己项目的包中引入如下图所示:jpush里面的代码都是下载demo时候里面自带的,拷贝进去,将activity页面先注释即可,
 <!-- Required SDK 核心功能-->
    <!-- 可配置 android:process 参数将 PushService 放在其他进程中 -->
    <service
        android:name="cn.jpush.android.service.PushService"
        android:enabled="true"
        android:exported="false" >
        <intent-filter>
            <action android:name="cn.jpush.android.intent.REGISTER" />
            <action android:name="cn.jpush.android.intent.REPORT" />
            <action android:name="cn.jpush.android.intent.PushService" />
            <action android:name="cn.jpush.android.intent.PUSH_TIME" />
        </intent-filter>
    </service>


    <!-- since 3.0.9 Required SDK 核心功能--><!--必须注释-->
    <!--<provider-->
        <!--android:authorities="自己项目包名.DataProvider"-->
        <!--android:name="cn.jpush.android.service.DataProvider"-->
        <!--android:exported="true"-->
        <!--/>-->

    <!-- since 1.8.0 option 可选项。用于同一设备中不同应用的 JPush 服务相互拉起的功能。 -->
    <!-- 若不启用该功能可删除该组件,或把 enabled 设置成 false ;App 不会被其他 App 拉起,但会拉起其他的 App。 -->
    <service
        android:name="cn.jpush.android.service.DaemonService"
        android:enabled="true"
        android:exported="true">
        <intent-filter >
            <action android:name="cn.jpush.android.intent.DaemonService" />
            <category android:name="自己项目包名"/>
        </intent-filter>
    </service>

    <!-- since 3.1.0 Required SDK 核心功能-->
    <provider
        android:authorities="自己项目包名.DownloadProvider"
        android:name="cn.jpush.android.service.DownloadProvider"
        android:exported="true"
        />

    <!-- Required SDK 核心功能-->
    <receiver
        android:name="cn.jpush.android.service.PushReceiver"
        android:enabled="true" >
        <intent-filter android:priority="1000">
            <action android:name="cn.jpush.android.intent.NOTIFICATION_RECEIVED_PROXY" />
            <category android:name="自己项目包名"/>
        </intent-filter>
        <intent-filter>
            <action android:name="android.intent.action.USER_PRESENT" />
            <action android:name="android.net.conn.CONNECTIVITY_CHANGE" />
        </intent-filter>
        <!-- Optional -->
        <intent-filter>
            <action android:name="android.intent.action.PACKAGE_ADDED" />
            <action android:name="android.intent.action.PACKAGE_REMOVED" />
            <data android:scheme="package" />
        </intent-filter>
    </receiver>

    <!-- Required SDK 核心功能-->
    <!-- 若您的业务中有使用极光富媒体功能,或者极光早上好功能,需要把此 Activity 的 exported 设置成 true。 -->
    <!--<activity-->
        <!--android:name="cn.jpush.android.ui.PushActivity"-->
        <!--android:configChanges="orientation|keyboardHidden"-->
        <!--android:theme="@android:style/Theme.NoTitleBar"-->
        <!--android:exported="false" >-->
        <!--<intent-filter>-->
            <!--<action android:name="cn.jpush.android.ui.PushActivity" />-->
            <!--<category android:name="android.intent.category.DEFAULT" />-->
            <!--<category android:name="自己项目包名" />-->
        <!--</intent-filter>-->
    <!--</activity>-->
    <!-- SDK 核心功能-->
    <!-- 若您的业务中有使用极光富媒体功能,或者极光早上好功能,需要把此 Activity 的 exported 设置成 true。 -->
    <!--<activity-->
        <!--android:name="cn.jpush.android.ui.PopWinActivity"-->
        <!--android:configChanges="orientation|keyboardHidden"-->
        <!--android:exported="false"-->
        <!--android:theme="@style/MyDialogStyle">-->
        <!--<intent-filter>-->
            <!--<category android:name="android.intent.category.DEFAULT" />-->
            <!--<category android:name="自己项目包名" />-->
        <!--</intent-filter>-->
    <!--</activity>-->

    <!-- 注意此配置在 JPush 3.2.0 及以前版本是必须配置,3.2.0 以后版本已废弃此配置-->
    <!--<service-->
        <!--android:name="cn.jpush.android.service.DownloadService"-->
        <!--android:enabled="true"-->
        <!--android:exported="false" >-->
    <!--</service>-->

    <!-- Since JCore2.0.0 Required SDK核心功能-->
    <!-- 可配置android:process参数将Service放在其他进程中;android:enabled属性不能是false -->
    <!-- 这个是自定义Service,要继承极光JCommonService,可以在更多手机平台上使得推送通道保持的更稳定 -->
    <service android:name=".jpush.PushService"
        android:enabled="true"
        android:exported="false"
        android:process=":pushcore">
        <intent-filter>
            <action android:name="cn.jiguang.user.service.action" />
        </intent-filter>
    </service>

    <!-- Required SDK 核心功能-->
    <receiver android:name="cn.jpush.android.service.AlarmReceiver" />

    <!-- Required since 3.0.7 -->
    <!-- 新的 tag/alias 接口结果返回需要开发者配置一个自定的广播 -->
    <!-- 3.3.0开始所有事件将通过该类回调 -->
    <!-- 该广播需要继承 JPush 提供的 JPushMessageReceiver 类, 并如下新增一个 Intent-Filter -->
    <receiver
    android:name=".jpush.MyJPushMessageReceiver"
    android:enabled="true"
    android:exported="false" >
    <intent-filter>
        <action android:name="cn.jpush.android.intent.RECEIVE_MESSAGE" />
        <category android:name="自己项目包名" />
    </intent-filter>
</receiver>


    <!-- User defined. 用户自定义 Receiver 接收被拉起回调-->
    <!-- 自定义 Receiver 组件,继承cn.jpush.android.service.WakedResultReceiver类,复写onWake(int wakeType)或 onWake(Context context, int wakeType)方法以监听被拉起 -->
    <!--<receiver android:name="xx.xx.xx.MyWakedResultReceiver">-->
        <!--<intent-filter>-->
            <!--<action android:name="cn.jpush.android.intent.WakedReceiver" />-->
            <!--<category android:name="自己项目包名" />-->
        <!--</intent-filter>-->
    <!--</receiver>-->

    <!--Required SDK核心功能 since 3.3.0-->
    <activity
        android:name="cn.jpush.android.service.JNotifyActivity"
        android:exported="true"
        android:taskAffinity="jpush.custom"
        android:theme="@android:style/Theme.Translucent.NoTitleBar">
        <intent-filter>
            <action android:name="cn.jpush.android.intent.JNotifyActivity" />
            <category android:name="自己项目包名" />
        </intent-filter>
    </activity>

    <!-- Required. For publish channel feature -->
    <!-- JPUSH_CHANNEL 是为了方便开发者统计 APK 分发渠道。-->
    <!-- 例如: -->
    <!-- 发到 Google Play 的 APK 可以设置为 google-play; -->
    <!-- 发到其他市场的 APK 可以设置为 xxx-market。 -->
    <meta-data android:name="JPUSH_CHANNEL" android:value="developer-default"/>
    <!-- Required. AppKey copied from Portal -->
    <meta-data android:name="JPUSH_APPKEY" android:value="在极光官网创建应用的appkey"/>
9.在自己项目的Application中的onCreate初始化
public void onCreate() {
    super.onCreate();
    JPushInterface.setDebugMode(true);     // 设置开启日志,发布时请关闭日志
    JPushInterface.init(this);            // 初始化 JPush
}
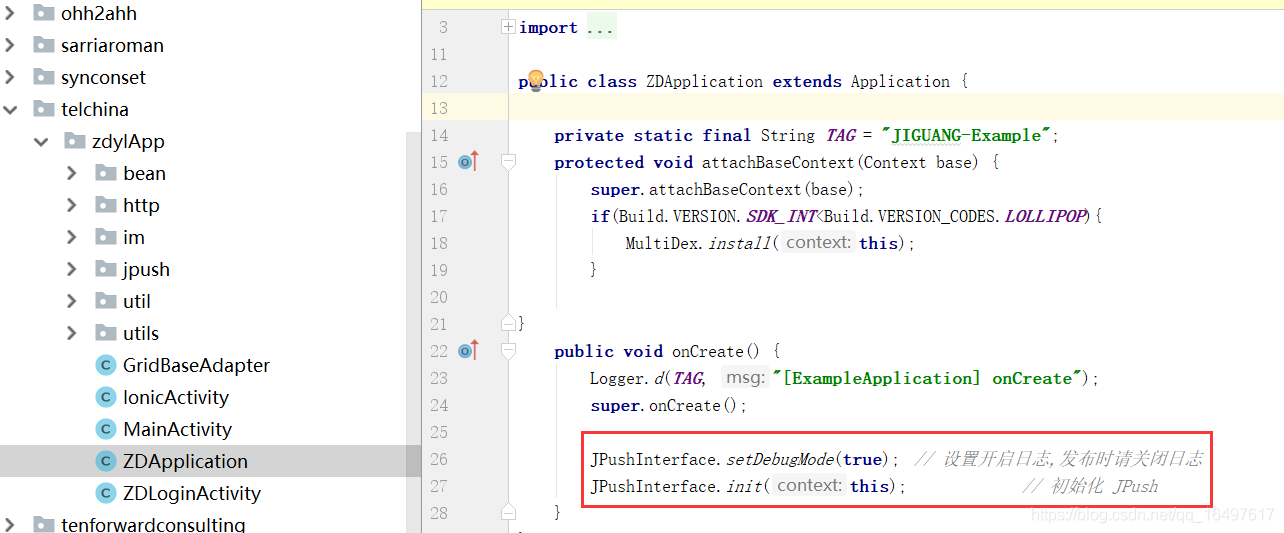
如果没有Application,自己写个ZDApplication继承Application,然后在xml中配上name属性
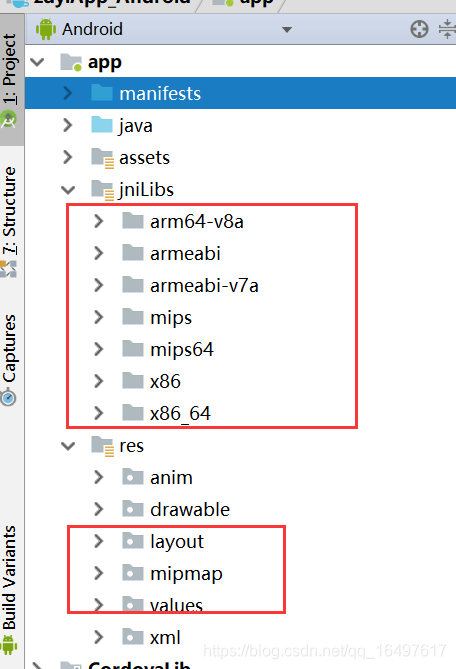
10.将下载demo的so文件及资源文件都拷贝到项目里即可,然后构建完项目即可测试是否正常收到消息了,收到消息的点击事件未做处理,自己根据实际需求处理即可。


 1919
1919

 被折叠的 条评论
为什么被折叠?
被折叠的 条评论
为什么被折叠?
 到【灌水乐园】发言


