


 本文详细介绍了Node.js的子进程模块child_process,包括spawn、spawnSync、exec、execSync、execFile、execFileSync和fork等API的使用,通过案例展示了如何创建子进程、执行命令、同步操作以及实现父子进程间通信。
一、子进程child_process模块的概要说明
child_process 模块提供了衍生子进程的功能。
它提供了四个创建异步进程的API,分别为 exec, execFile,fork,spawn,提供了三个创建同步进程的API,分别为execFileSync,execSync,spawnSync
二、子进程child_process模块的相关API介绍说明
该函数会异步地衍生子进程,且不会阻塞 Node.js 事件循环。
2.1 child_process.spawn(command[, args][, options]):
2.1.1 函数入参介绍如下:
2.1.2 案例介绍:
2.1.2.1 关键代码:
#! /usr/bin/env node

const cp = require("child_process");

const path = require('path');

const child = cp.spawn(path.resolve(__dirname, "test.cmd"), {
    cwd: path.resolve("D:/icli-program/test-process-lib")
});
child.stdout.on("data",function(chunk){
    console.log(chunk.toString());
});
child.stderr.on("data", function(chunk){
    console.log("stderr:", chunk.toString())
});
2.1.2.2 案例创建完整步骤:
step1:创建一个项目 test-process
mkdir test-processstep2:初始化项目 test-process
cd test-process
npm init
step3:添加入口文件bin/index.js

step4:在package.json中添加脚手架配置bin

step5:在入口文件bin/index.js中添加nodejs编译代码
#! /usr/bin/env nodestep6:引入子进程模块 child_process
#! /usr/bin/env node
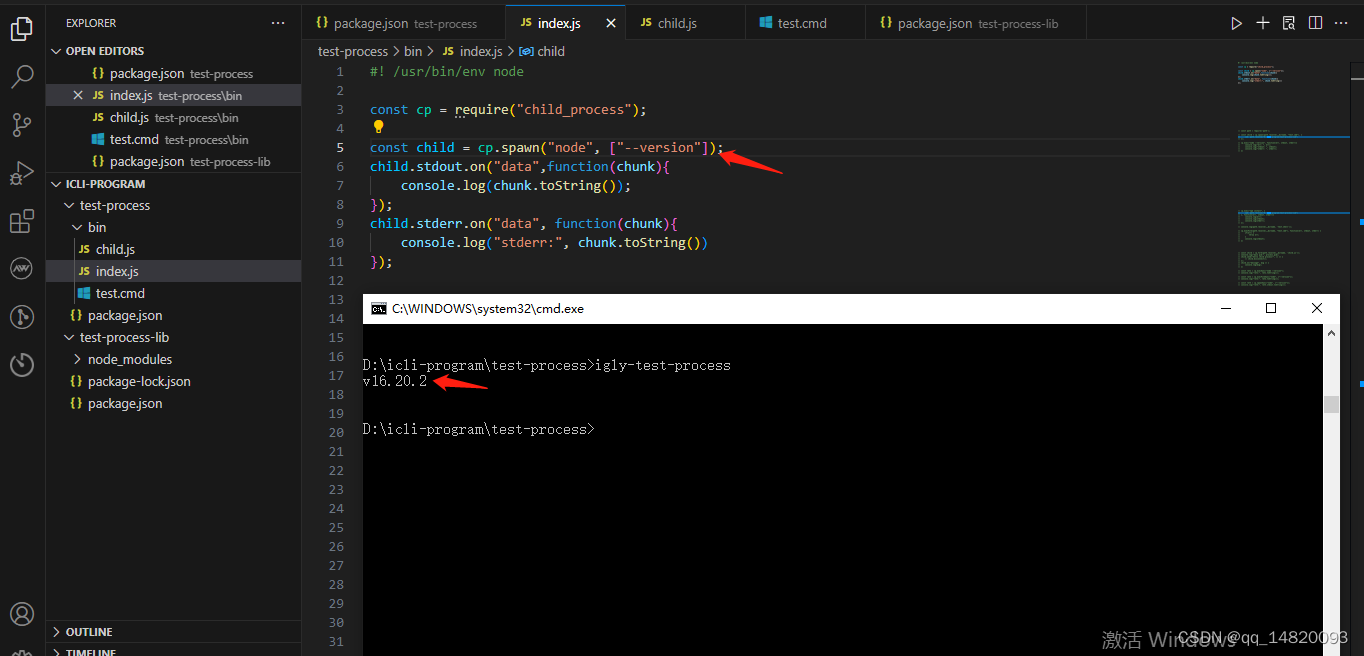
const cp = require("child_process");step7:案例1:直接用命令的模式在子进程的spawn函数中查看node的版本号
代码:
#! /usr/bin/env node

const cp = require("child_process");

const child = cp.spawn("node", ["--version"]);
child.stdout.on("data",function(chunk){
    console.log(chunk.toString());
});
child.stderr.on("data", function(chunk){
    console.log("stderr:", chunk.toString())
});
执行效果:
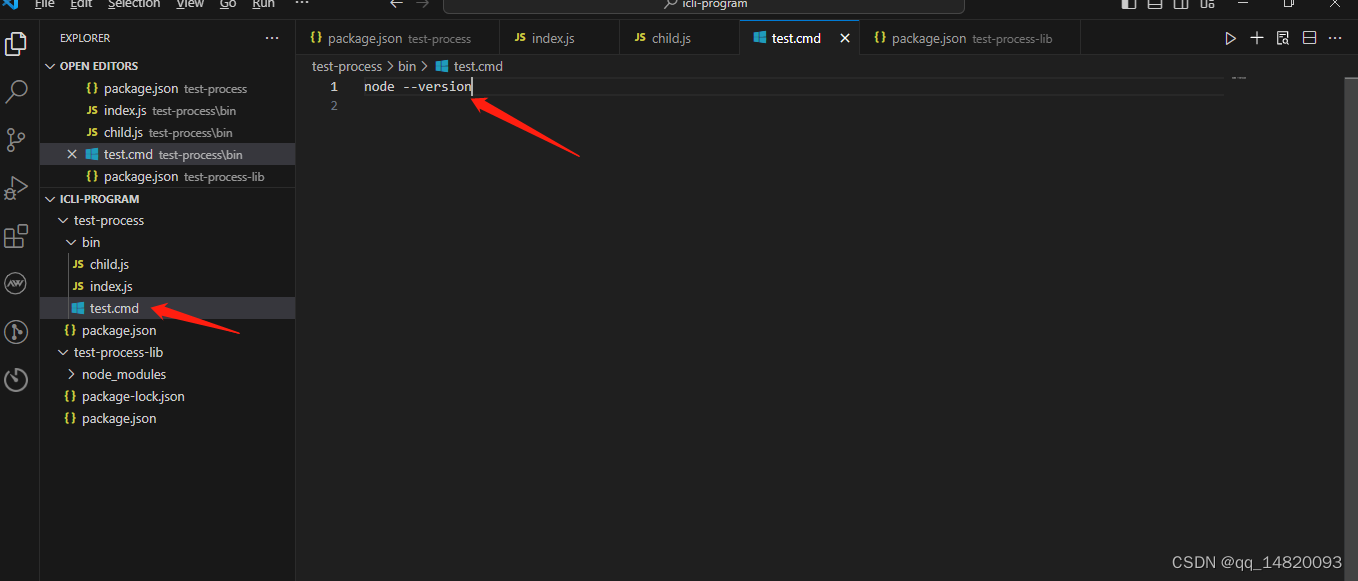
step8:案例2:通过读取一个.cmd文件(Linix 用 .shell 文件)中的命令在子进程的spawn函数中使用,执行.cmd 文件中的命令
1)在当前bin目录下创建一个 test.cmd 文件,并且在 test.cmd 文件中 添加 命令 node --version,如下:
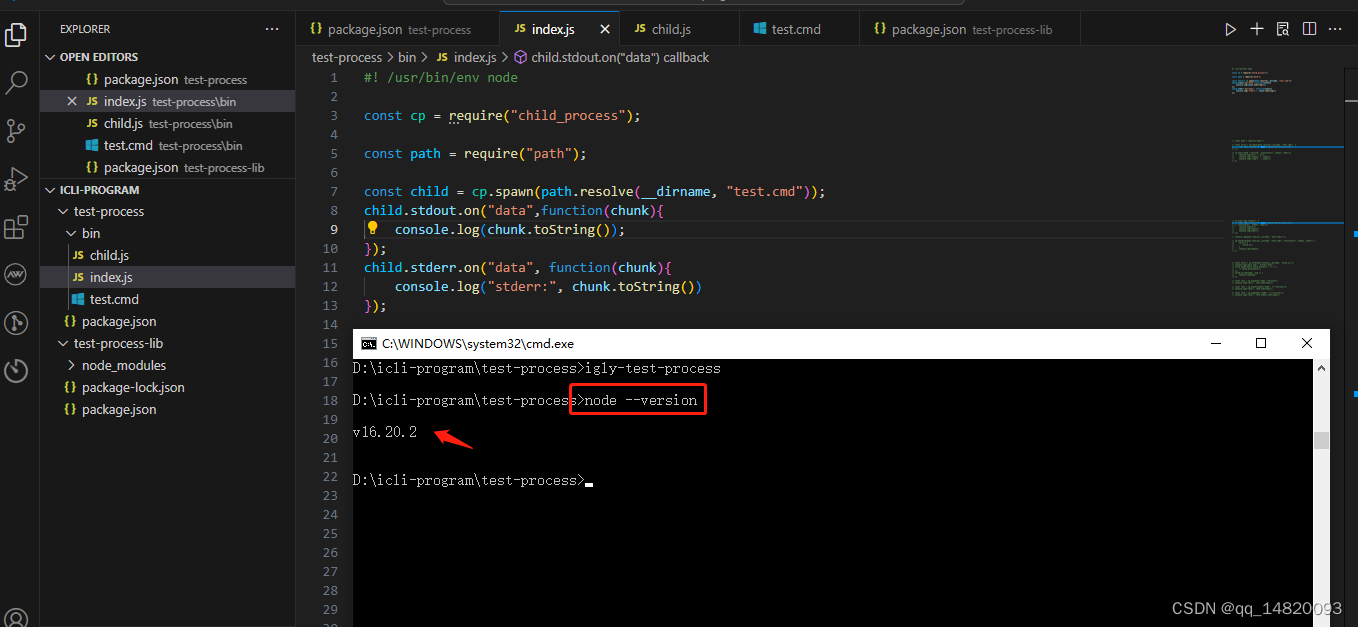
3)在bin/index.js入口文件中通过path 模块读取 test.cmd 文件,放到 spawn 函数的 第一个参数 command上
#! /usr/bin/env node

const cp = require("child_process");

const path = require("path");

const child = cp.spawn(path.resolve(__dirname, "test.cmd"));
child.stdout.on("data",function(chunk){
    console.log(chunk.toString());
});
child.stderr.on("data", function(chunk){
    console.log("stderr:", chunk.toString())
});
4)查看执行效果
step9:案例3:通过读取一个.cmd文件(Linix 用 .shell 文件)中的命令在子进程的spawn函数中使用,执行.cmd 文件中的命令,验证spawn 函数的 异步效果
1)基于step8的基础上,修改.cmd 文件,在.cmd 文件里面添加 npm install

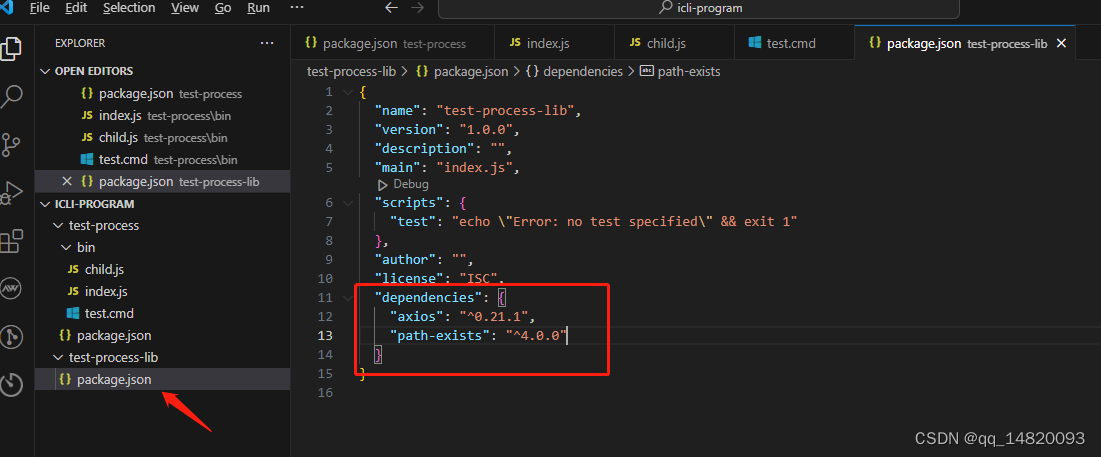
2)在当前项目的同级根目录创建一个新项目 test-process-lib 并初始化该项目;
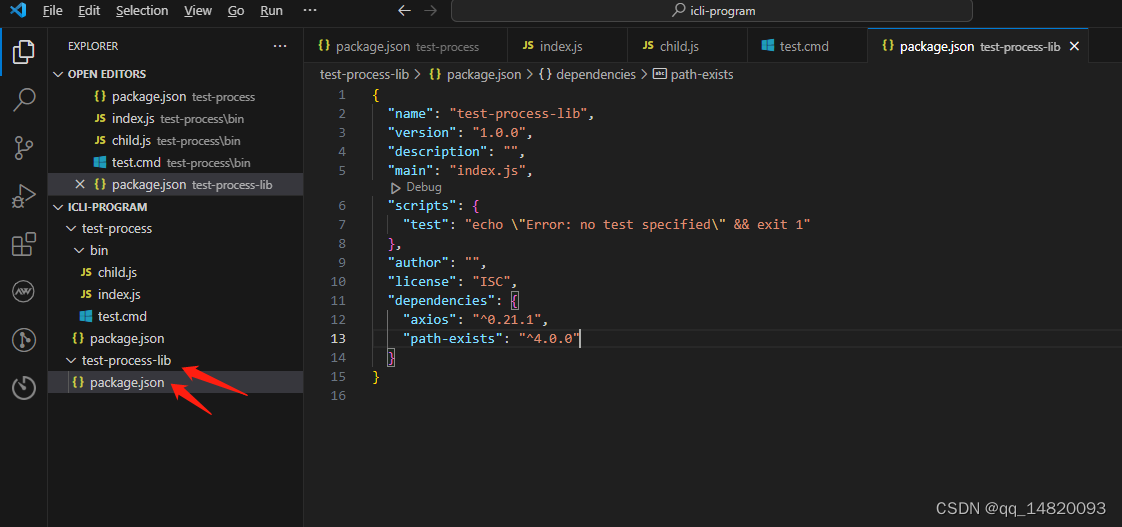
3)在test-process-lib 的package.json 文件下 添加 dependencies,并且添加两个可安装依赖,axios,path-exists,代码如下:
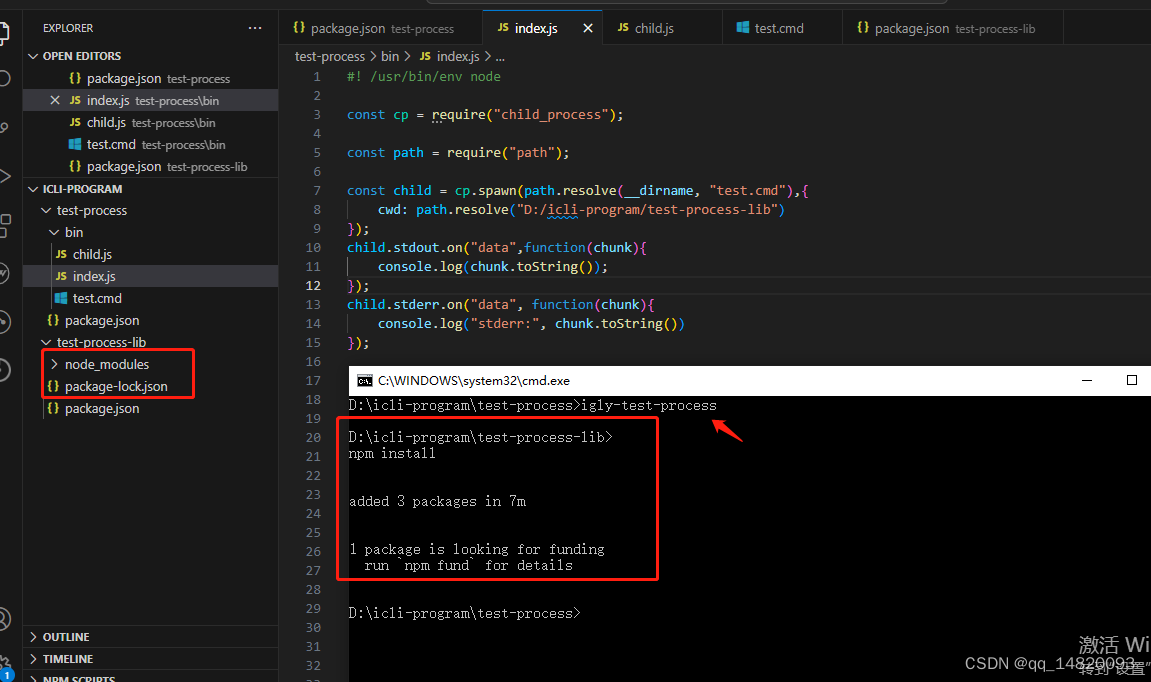
4)在当前项目的入口文件bin/index.js 里面的 子进程chilld_process的函数spawn里面添加options可选项配置,将cwd目录设置为新项目 test-process-lib 的路径,代码如下:
#! /usr/bin/env node

const cp = require("child_process");

const path = require("path");

const child = cp.spawn(path.resolve(__dirname, "test.cmd"),{
    cwd: path.resolve("D:/icli-program/test-process-lib")
});
child.stdout.on("data",function(chunk){
    console.log(chunk.toString());
});
child.stderr.on("data", function(chunk){
    console.log("stderr:", chunk.toString())
});
5)执行当前项目脚手架 igly-test-process
igly-test-process执行效果如下:
2.2. child_process.spawnSync(command[, args][, options]):
该函数则以同步的方式提供同样的功能,但会阻塞事件循环,直到衍生的子进程退出或被终止。
2.2.1 函数入参介绍如下:
command<string> 要运行的命令。args<Array> 字符串参数列表。options<Object>cwd<string> 子进程的当前工作目录。input<string> | <Buffer> | <Uint8Array> 要作为 stdin 传给衍生进程的值。- 提供该值会覆盖
stdio[0]
- 提供该值会覆盖
2.2.2 案例介绍:
2.2.2.1 关键代码:
#! /usr/bin/env node

const cp = require("child_process");

const child = cp.spawnSync("node", ["--version"]);
console.log("child:", child.stdout.toString());
2.2.2.2 执行效果

剩余几个可选函数,如 exec,execSync,execFile,execFileSync 等几个函数都是基于spawn和spawnSync实现的。
2.3 child_process.exec(command[, options][, callback]):
该函数会衍生一个 命令行(shell) 并在 控制台(shell) 上运行命令,当完成时会传入 stdout 和 stderr 到回调函数。
2.3.1 函数入参介绍如下:
command<string> 运行的命令,参数使用空格分隔。options<Object>cwd<string> 子进程的当前工作目录。env<Object> 环境变量键值对。- other options...
2.3.2 案例介绍:
2.3.2.1 关键代码:
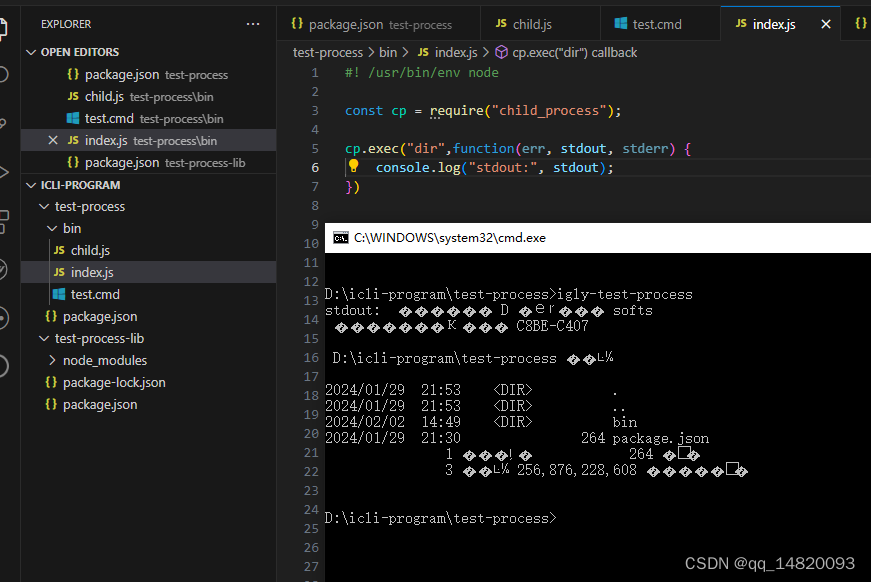
#! /usr/bin/env node

const cp = require("child_process");

cp.exec("dir",function(err, stdout, stderr) {
    console.log("stdout:", stdout);
})
2.3.2.2 执行效果:
2.4 child_process.execSync(command[, options]):
是child_process.exec() 的同步函数,会阻塞Node.js事件循环。
2.4.1 函数入参介绍如下:
command<string> 要运行的命令。options<Object>cwd<string> 子进程的当前工作目录。input<string> | <Buffer> | <Uint8Array>} 要作为 stdin 传给衍生进程的值。- other options...
2.4.2 案例介绍:
2.4.2.1 关键代码:
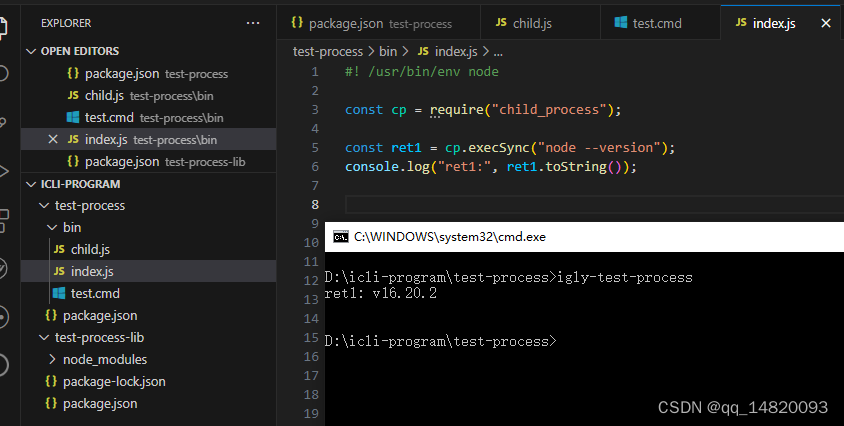
#! /usr/bin/env node

const cp = require("child_process");

const ret1 = cp.execSync("node --version");
console.log("ret1:", ret1.toString());
2.4.2.2 执行效果:
2.5 child_process.execFile(file[, args][, options][, callback]):
该函数类似 child_process.exec(),但直接衍生命令,且无需先衍生 shell。
2.5.1 函数入参介绍如下:
file<string> 要运行的可执行文件的名称或路径。args<string[]> 字符串参数列表。options<Object>cwd<string> 子进程的当前工作目录。env<Object> 环境变量键值对。- other options...
2.5.2 案例介绍:
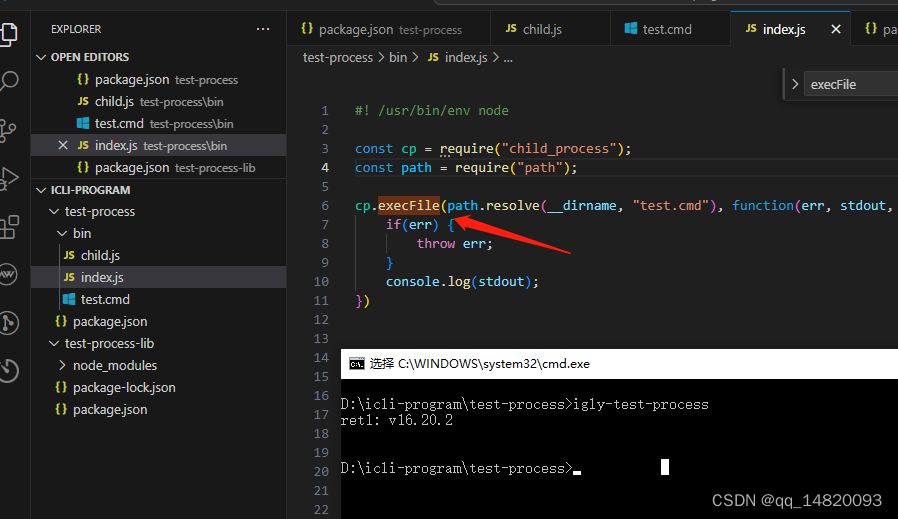
2.5.2.1 关键代码:
#! /usr/bin/env node

const cp = require("child_process");
const path = require("path");

cp.execFile(path.resolve(__dirname, "test.cmd"), function(err, stdout, stderr) {
    if(err) {
        throw err;
    }
    console.log(stdout);
})
2.5.2.2 执行效果:
2.6 child_process.execFileSync(file[, args][, options]):
该函数是 child_process.execFile() 函数的 同步函数,会阻塞 Node.js 事件循环。
2.6.1 函数入参介绍如下:
file<string> 要运行的可执行文件的名称或路径。args<string[]> 字符串参数列表。options<Object>cwd<string> 子进程的当前工作目录。- other options...
2.6.2 案例介绍
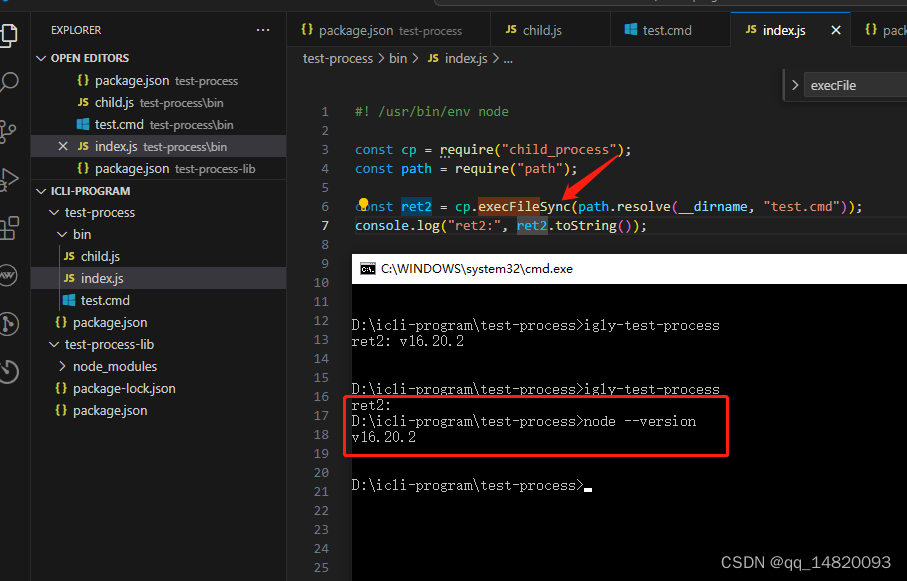
2.6.2.1 关键代码:
#! /usr/bin/env node

const cp = require("child_process");
const path = require("path");

const ret2 = cp.execFileSync(path.resolve(__dirname, "test.cmd"));
console.log("ret2:", ret2.toString());
2.6.2.2 执行效果:
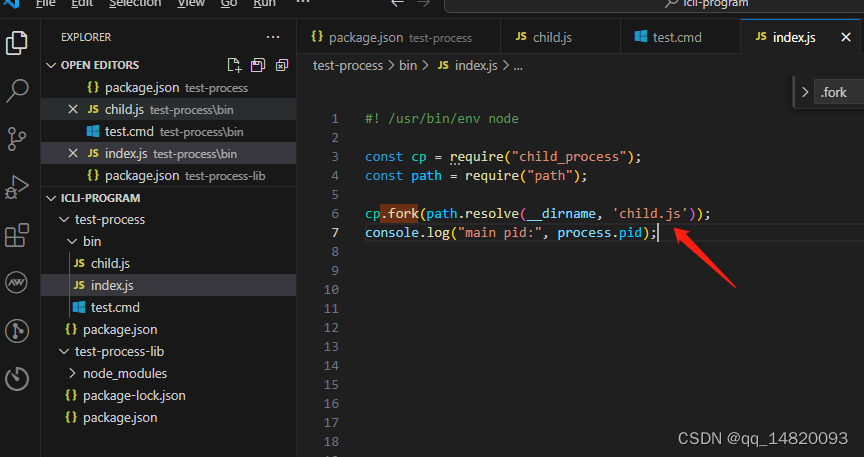
2.7 child_process.fork(moudlePath[, args][, options]):
该函数衍生一个新的 Node.js 进程,并通过建立 IPC 通讯通道来调用指定的模块,该通道允许父进程与子进程之间相互发送信息。
2.7.1 函数入参介绍如下:
2.7.2 案例介绍
2.7.2.1 关键代码
2.7.2.2 案例步骤
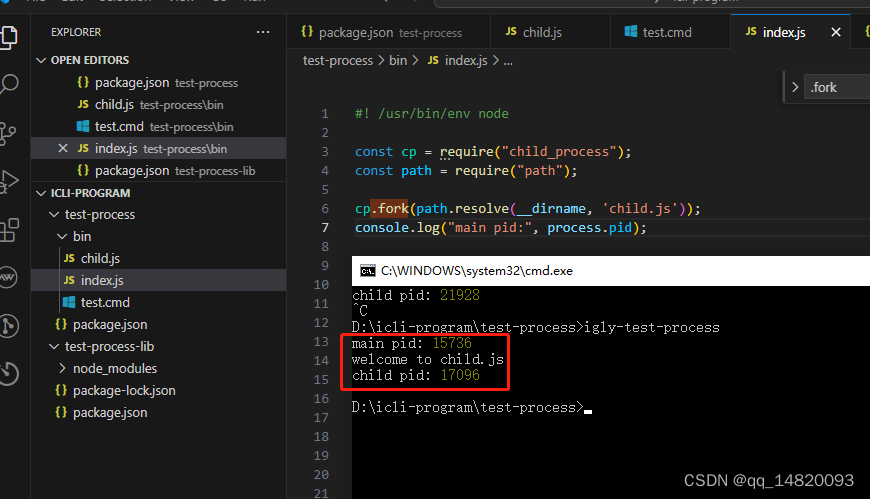
step1:在当前目录中创建一个文件 child.js,并且在child.js 中添加相关测试代码,如下:
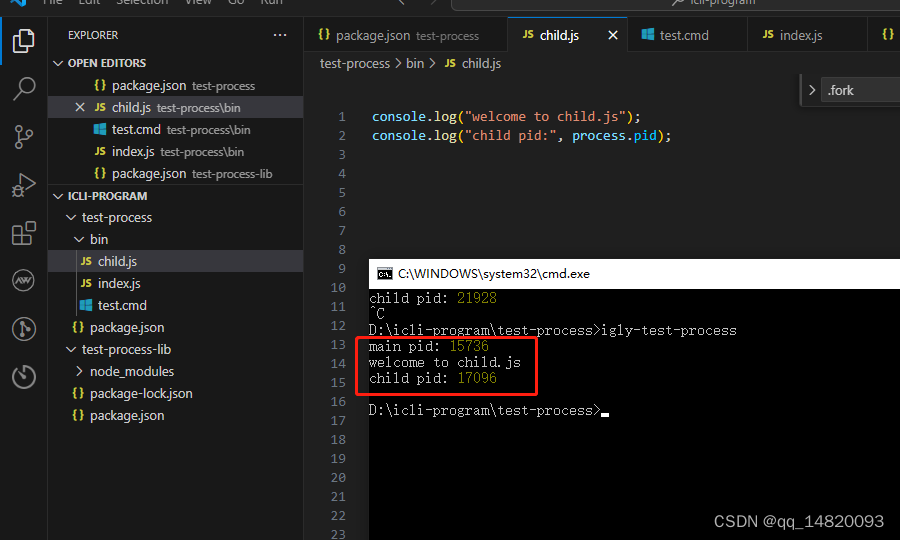
step2:在当前入口文件bin/index.js 文件中测试,代码如下:
step3:上述步骤后执行效果如下:
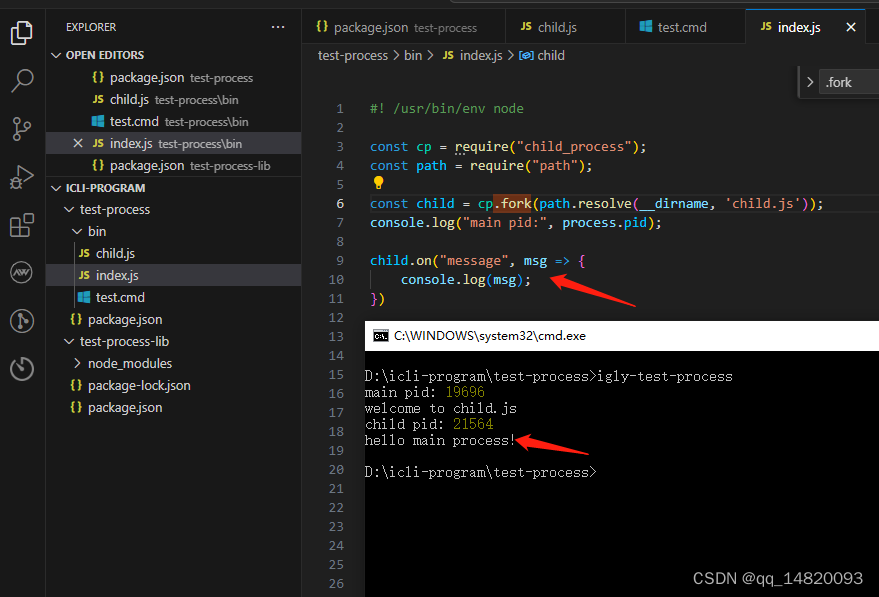
step4:案例2:添加父子进程的通讯,在child.js文件中向父级进程发送一个消息,代码如下:
console.log("welcome to child.js");
console.log("child pid:", process.pid);

process.send("hello main process!");
step5:基于step4,在父级进程中监听子集进程的消息,代码如下:
#! /usr/bin/env node

const cp = require("child_process");
const path = require("path");

const child = cp.fork(path.resolve(__dirname, 'child.js'));
console.log("main pid:", process.pid);

child.on("message", msg => {
    console.log(msg);
})
step6:基于上述step4和step5,执行效果如下:
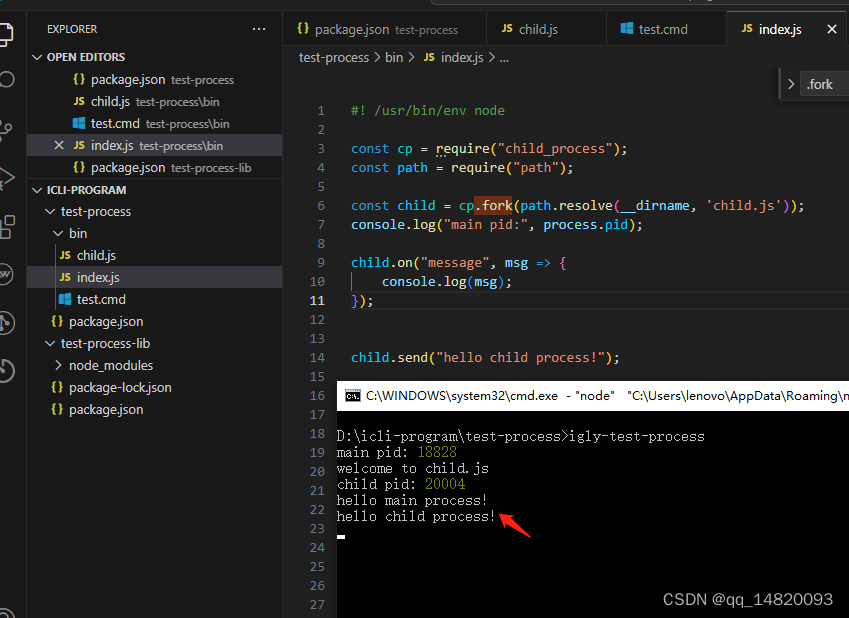
step7:案例3:在父级进程中文件bin/index.js向子级进程发送信息,代码如下:
#! /usr/bin/env node

const cp = require("child_process");
const path = require("path");

const child = cp.fork(path.resolve(__dirname, 'child.js'));
console.log("main pid:", process.pid);

child.on("message", msg => {
    console.log(msg);
});


child.send("hello child process!");
step8:基于step7的情况下,在子进程文件child.js中监听父级进程发送的信息,代码如下:
console.log("welcome to child.js");
console.log("child pid:", process.pid);

process.send("hello main process!");

process.on("message", msg => {
    console.log(msg);
});
step9:上述step7和step8之后,的执行效果如下:
三、总结:
上述就是针对node.js 的子进程模块child_process的使用方法以及相关常用的函数,包括每个函数的基本使用模式,本篇文章到此结束,感谢关注。


 1718
1718

 被折叠的 条评论
为什么被折叠?
被折叠的 条评论
为什么被折叠?
 到【灌水乐园】发言


